|
Let's start the lesson
Snakes
woman – Femmes serpents
-
Preparation
- Material Properties:
Set your Foreground color to color #050507=color 1 – Set your Background color to color #4985b9=color2

-
Properties Foreground- Prepare a Foreground/Background radial Gradient configured like this
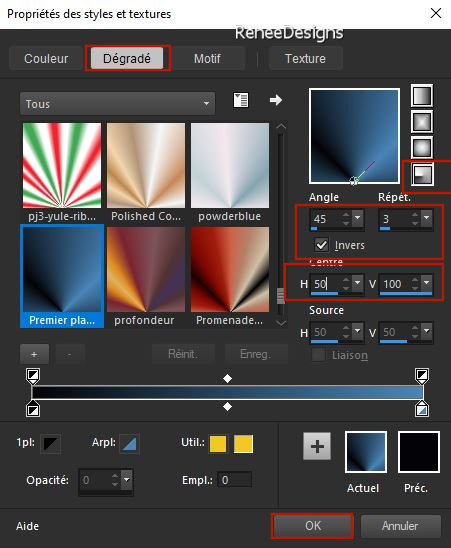
1.
File: Open a Transparent Image in this size : 1000 x 600 Pixels
2. Flood Fill Tool
 –
Fill the layer with the gradient –
Fill the layer with the gradient
3.
Adjust- Blur-Gaussian Blur-Radius 34%
4.
Effects- Plugins - Filters in Unlimited 2.0 - &<BKg
Designer sf10 II> - DIS Warp (vertical) : 198/ 137 /
135
5.
Effects- Plugins - Filters in Unlimited 2.0 -
[I.C.NET Software] - Buttons & Frames – Mirrored Frame :
30
6.
Effects- Plugins - Simple – Quick Tile
7.
Effects- Plugins - Filters in Unlimited 2.0 -
[I.C.NET Software] - Buttons & Frames – Mirrored Frame :
155
8.
Effects – Plugins – Simple – Quick Tile
9.
Effects- Plugins - Filters in Unlimited 2.0 -
[I.C.NET Software] - Buttons & Frames – Mirrored
Frame : 37
10.
Effects- Plugins - Filters in Unlimited 2.0 -
[I.C.NET Software]- Tile & Mirror - Quadrant Mirror using the default settings
11.
Effects- Plugins - Filters in Unlimited 2.0 -
Tramages – Pool Shadow using the default settings
12.
Effects – Edge Effects– Enhance
13.
Selections –load/save selection –load selection from disc and select my selection: ‘’Snakes-1’’
14.
Selections- Promote Selection to Layer
15.
Adjust- Blur-Gaussian Blur-Radius 34%

16.
Effects- Plugins – Medhi – Local Equalization
17.
Effects- Plugins – Sharpen - JazzMan’s –
Unsharp Mask use the settings below
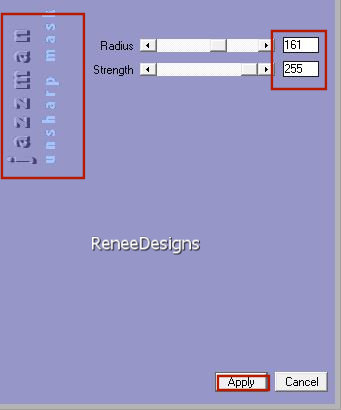
18.
Effects – 3D-Effects – Drop Shadow with these settings: 8/24/50/50 Color Black

19.
Effects- Image Effects- Seamless Tiling use the settings below

20.
Layers-Properties-Set the Blend Mode to " Hard Light "
21.
Effects – Plugins – FM Tile Tools – Blend Emboss
using the default settings
-Material Properties: Set your Foreground color to Gradient and select ‘’bkgr28’’-
Properties Foreground- Prepare a Foreground- sunburst Gradient configured like this

22.
Layers- New Raster Layer
23.
Flood Fill Tool
 –
Fill the layer with the gradient –
Fill the layer with the gradient
24.
Effects- Plugins - Filters in Unlimited 2.0 - Filter
Factory Gallery C- Tile Mix with these settings: 108/100
25.
Effects – Plugins– Richard Rosenmans- Lens
Corrector
- click
on Load and select my file- preset ‘’ Renee-Snakes-LensCorrectorpro-setting’’ (
Included in the material)
- click Ok and the filter will apply
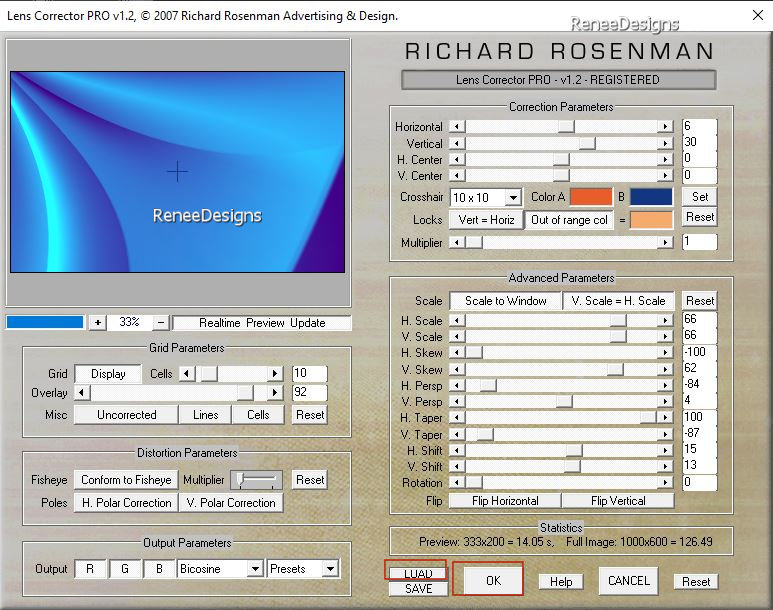
26.
Adjust – Softness – Soft Focus use the settings below
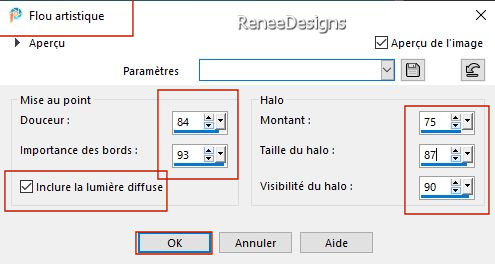
27.
Layers-Properties-Set the Blend Mode to " Overlay "
28.
Effects – Plugins – L & K’s – Elvida with these settings: 25
29.
Effects - Edge Effects- Enhance
-Material Properties:
Set your Foreground color to color #ffffff=color 3 – Set your Background color to color #123681=color 4
-
Properties Foreground- Prepare a Foreground/Background linear Gradient configured like this
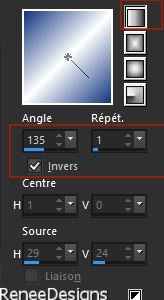
30.
Layers- New Raster Layer
31.
Selections –load/save selection –load selection from disc and select my selection: ‘’Snakes-2’’
32.
Flood Fill Tool – Fill the selection with the gradient
33.
Effects- Plugins - Alien Skin EyeCandy 5 –
Nature – Rust use the settings below
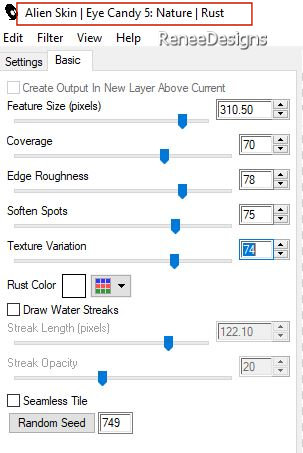
34.
Layers – Duplicate
35.
Effects- Plugins - Filters in Unlimited 2.0 -
Render – Plasma use the settings below
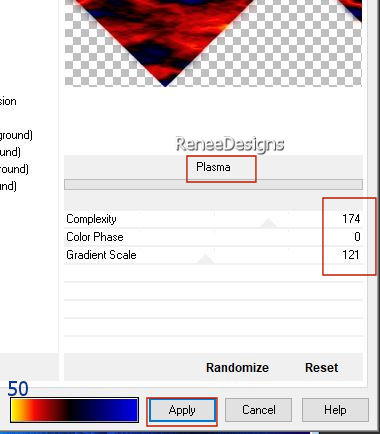
36.
Layers-Properties-Set the Blend Mode to " Overlay "
37.
Layers- Merge- Merge Down

38.
Effects- Image Effects- Seamless Tiling use the settings below
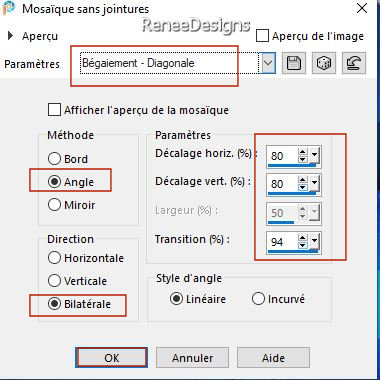
39.
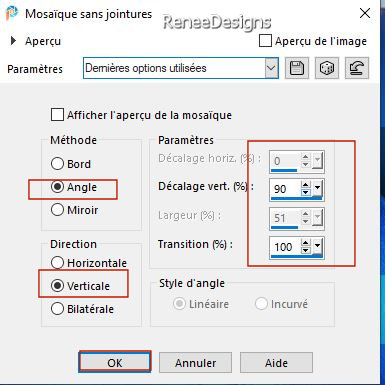
Repeat: Effects- Image Effects- Seamless Tiling use the settings below
40.
Adjust- Blur-Gaussian Blur-Radius 25%
41.
Effects – Plugins – L& K’s – Djin using the default settings:
100/18
42.
Layers – Duplicate
43.
Effects – Edge Effects – Find Vertical
44.
Layers-Properties-Set the Blend Mode to " Overlay " – Reduce the Opacity of this layer to 38%
45. Open the Tube ‘’Renee-SNAKES-Image 1’’ -Edit - Copy- Activate your work -Edit - Paste as a new layer
46.
Pick Tool: (K) on your keyboard -Enter these parameters on the toolbar
 - 31/
- 39
-Press ( M ) to close the Pick Tool
47.
Layers- Arrange - Move down twice
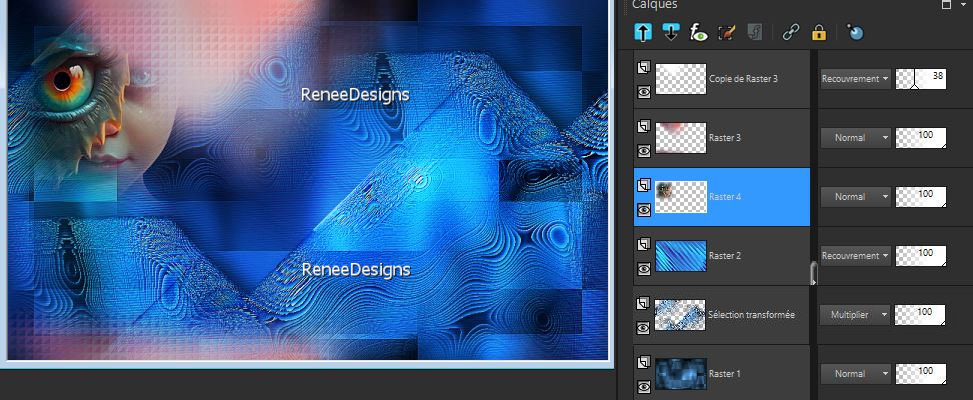
Your work and Layer Palette look like this now-You should have this result
(Attention: The second-last layer in the Layers palette (promoted selection )Renée has changed the blend mode to "Multiply", but you can choose the color yourself. )
- To replace the top of the layer-palette
48.
Open the Tube ‘’Renee-SNAKES-Image 2’’ -Edit - Copy- Activate your work -Edit - Paste as a new layer
-
Pick Tool: (K) on your keyboard -Enter these parameters on the toolbar
 0/
55 0/
55
49.
Layers-Properties-Set the Blend Mode to "Hard Light" – Reduce the Opacity of this layer to 57%
50.Open the Tube
‘’Renee-SNAKES-Image 3 and tube 4’’ -Edit - Copy- Activate your work -Edit - Paste as a new layer
-
Move the Tube in the right place ( see finished image)
51.
Layers-Properties -Lower the opacity of these 2 layers to 67%
52.
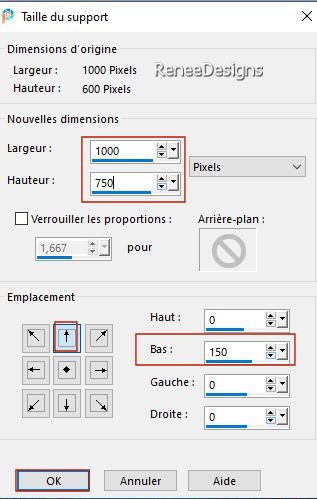
Image – Canvas Size use the settings below
- Activate the layer of Raster 1 in the Layers palette
53.
Activate the Magic Wand Tolerance and Feather at 0 /click in the empty part of the layer
54.
Layers- New Raster Layer
55.
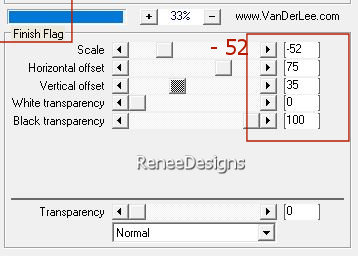
Effects – Plugins – Vanderlee Unplugged X-
Finish Flag use the settings below

56.
Activate the Magic Wand Tolerance and Feather at 0 /
select all the parts in white

-
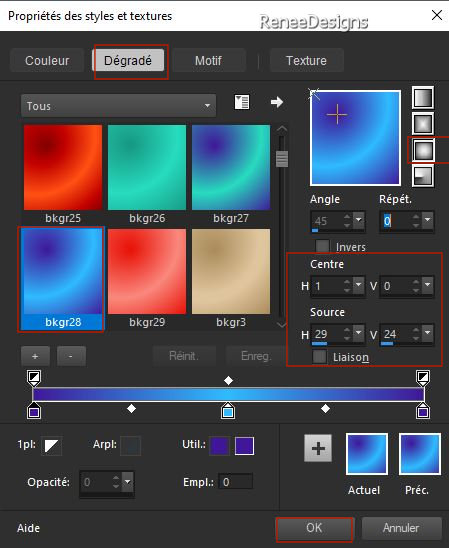
Material Properties: Set your Foreground color to Gradient and select again
‘’bkgr28’’–
Properties Foreground- Prepare a Foreground- sunburst Gradient configured like this
57.
Flood Fill Tool
 -
Fill the empty and selected parts of the gradient -
Fill the empty and selected parts of the gradient

58.
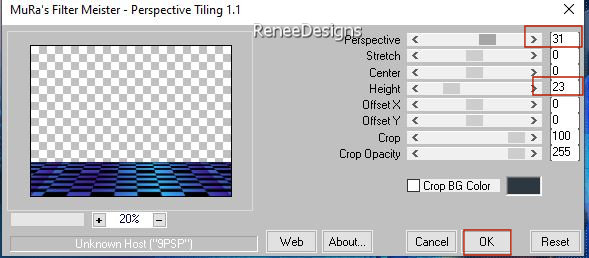
Effects – Plugins – Mura’s Meister – Perspective
Tiling use the settings below
59.
Selections –load/save selection –load selection from disc and select my selection: ‘’Snakes-3’’
60.
Adjust- Blur-Gaussian Blur-Radius 18%

61.
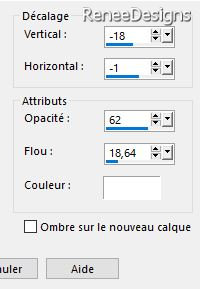
Effects – 3D-Effects – Drop Shadow with these settings: /Color #ffffff=3
62.
Layers- New Raster Layer
63.
Selections –load/save selection –load selection from disc and select my selection: ‘’Snakes-4’’
64. Properties Foreground-Set your Foreground color to color #ffffff=3
Flood Fill Tool
 –
Fill the selection with the Foreground color #ffffff=3 –
Fill the selection with the Foreground color #ffffff=3
65.
Effects – Plugins – L & K’s – Pia : 42

66.
Selections –load/save selection –load selection from disc and select my selection: ‘’Snakes-5’’

KEEP SELECTION
67.
Effects – 3D-Effects – Drop Shadow with these settings- Color #ffffff-3

68.
Effects- Plugins - Alien Skin EyeCandy 5 -
Impact – Glass –Tab- Settings- User Settings and select my file- Preset : ‘’Snakes-Glass’’
 -
To replace the top of the layer-palette -
To replace the top of the layer-palette
-Now for the embellishment of our work. Open one of Renée's tubes, or a tube of your own
Renée chose this tube
69.
Open the Tube ‘’Renee-TUBES- Snake-12’’ –
Resize 2 x 78%
-
Edit - Copy- Activate your work -Edit - Paste as a new layer
70.
Drop Shadow of your choice
71.
Open the Tube " titre "-Renée chose the font -Snake (Included in the material) Or choose a font of your own
-Edit - Copy- Activate your work -Edit - Paste as a new layer- Or write your own title
Place the text of your choice or take a look at the example of Renée
72.
Image - Add borders-Symmetric checked: 2 Pixels Color #050507= 1
Image - Add borders-Symmetric checked: 20 Pixels Color #ffffff=3
Image - Add borders-Symmetric checked: 1 Pixels- Color #050507= 1
Image - Add borders-Symmetric checked: 40 Pixels- Color #ffffff=3
73.
Paste the author's watermark on your work and your own watermark
74.
Layers- Merge- Merge All (flatten)
75.
Image - Resize to 85%- Resize all Layers checked.
Save as JPG
I hope you enjoyed this lesson
Renée
This lesson was written by Renée
26/02/2023
Edited and Update
in 2023
*
*
Any resemblance with an existing lesson is a coincidence * Do not forget to thank the people who work with us and for us
-I have appointed the tubeurs and translators
Thanks
|


 Translations


