|
Let's start the lesson.
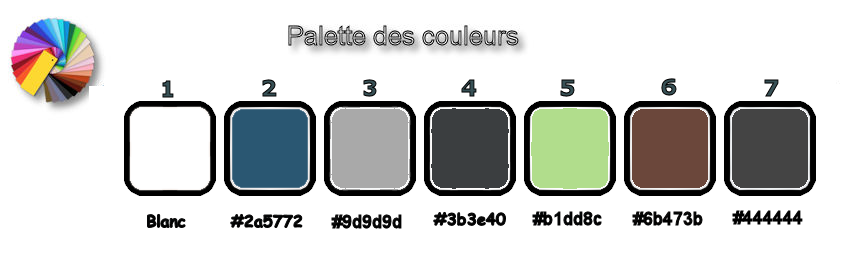
- Preparation - Color-palette:Set your foreground color to color #ffffff -Set your background color to color #2a5772
-
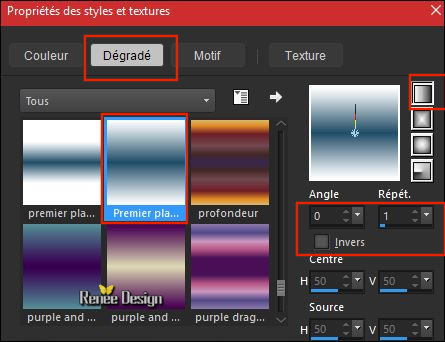
Prepare a foreground/background linear gradient configured like this
We will work with a large format.
It is easier to work with this tutorial.
I will adjust it later
1.
File: Open a new transparent image 1229 x 841 pixels
2.
Activate Flood Fill Tool  and fill the layer with the gradient and fill the layer with the gradient
3.
Adjust- Blur- Gaussian Blur: Radius 62
4.
Effects- Plugins-Unlimited – ColorRave -Color Cocktail 2.1
using the default settings
5.
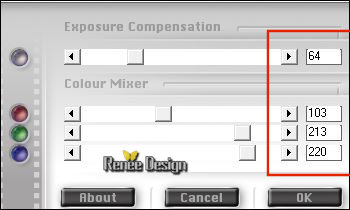
Effects –Plugins – Fotomatic – Sky grad use the settings below
- Color Palette: Set your foreground color to #9d9d9d -Set your background color to #ffffff
6. Layers- New Raster Layer
7.
Selections –load/save selection –load selection from disc and select my selection:
‘’Resonnance_sonore1.PspSelection’’
8. Activate Flood Fill Tool and fill the selection with the foreground color #9d9d9d
9. Effects –Plugins -
Unlimited – ColorRave - Color Cocktail 2.1
using the default settings
Selections- Deselect All
- In the Layer-Palette-Make Raster 1 active
10.
Selections –load/save selection –load selection from disc and select my selection:
‘’Resonnance_sonore2.PspSelection’’
11.
Selections- Promote Selection to Layer
12. Layers- Arrange- Bring to Top
13. Effects- 3 D Effects- Drop Shadow with these settings: 0/0/100/62 black
Selections- Deselect All
- Color Palette: Set your foreground color to #3b3e40 - Set your background color to #ffffff
14. Layers- New Raster Layer
15.
Selections –load/save selection –load selection from disc and select my selection:
‘’Resonnance_sonore3.PspSelection’’
16.
Selections- Modify- Expand with 5 pixels
17. Activate Flood Fill Tool Change the opacity of the color at 50% –and fill the selection with the background color #ffffff
Selections- Deselect All
18. Effects – Plugins -Unlimited - Andrew's Filters 54- Total
BreakOut...using the default settings
19.
Repeat it with the same selection!!!!!
Selections –load/save selection –load selection from disc and select my selection:
‘’Resonnance_sonore3.PspSelection’’
20. Adjust- Blur- Gaussian Blur: Radius 36
Selections- Deselect All
- Color Palette: Set your foreground color to #b1dd8c
21. Layers- New Raster Layer
22.
Selections –load/save selection –load selection from disc and select my selection:
‘’Resonnance_sonore4.PspSelection’’
23. Activate Flood Fill Tool –Opacity 50 %–and fill the selection with the foreground color #b1dd8c
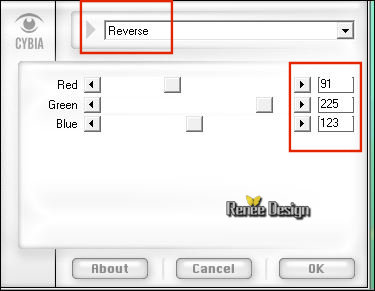
24. Effects
– Plugins – Cybia – Colour Works use the settings below
Selections- Deselect All
- Layer Palette - Close the Bottom Layer =Raster 1 by clicking in the little eye
- Layer Palette - Click on the top layer
25.Layers- Merge -Merge Visible
- Stay on the Merged Layer
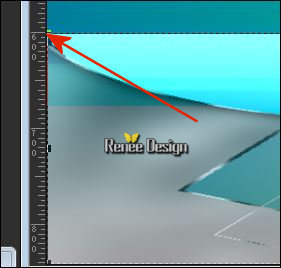
26. Activate the Pick Tool/Deformation tool (K) Mode Scale -Pull the Top Node down to 600 pixels high as shown in the example below
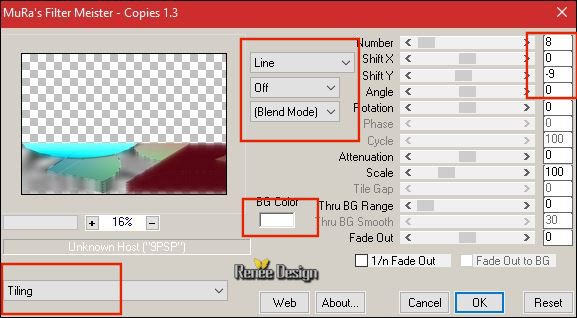
27. Effects
– Plugins – Mura’s Meister – Copies use the settings below
28.
Layers-Properties-Set the Blend Mode to" Multiply "
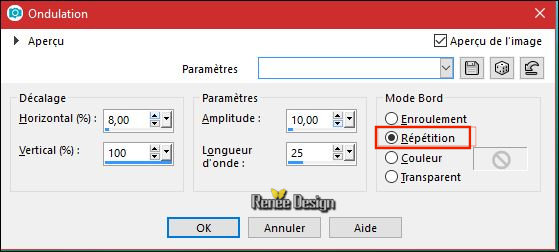
29. Effects
– Distortion Effects –Ripple with these settings
- Color Palette: Set your foreground color to
#6b473b
30. Layers- New Raster Layer
31.
Selections –load/save selection –load selection from disc and select my selection:
‘’Resonnance_sonore5.PspSelection’’
32. Activate Flood Fill Tool Opacity 50% and fill the selection with the foreground color #6b473b
Selections- Deselect All
33. Layers- Duplicate
- Layers- Merge- Merge Down
34.
Selections –load/save selection –load selection from disc and select my selection:
‘’Resonnance_sonore6.PspSelection’’
DELETE

Selections- Deselect All
35. Effects-Image Effects- Offset with these settings H = - 285 and V =
0
36. Layers- New Raster Layer
37.
Selections –load/save selection –load selection from disc and select my selection:
‘’Resonnance_sonore7.PspSelection’’
38. Activate Flood Fill Tool / Opacity 100% -and fill the selection with the background color #ffffff
Selections- Deselect All
39.
Layers-Properties-Set the Blend Mode to" Screen "-Set the Opacity of this layer to 81%
-Open the tube’’ Resonnance_Audition_Tubes
DECOS.pspimage’’
Do not close we need it later for the rest of the work
40. Activate the layer ‘’ouvrier ‘of the tube
- Edit - Copy- Activate your work -Edit - Paste as a new layer
41. Effects-Image Effects- Offset with these settings H = - 267 and V = 2
42. Layers- New Raster Layer
43.
Selections –load/save selection –load selection from disc and select my selection:
‘’Resonnance_sonore8.PspSelection’’
44. Activate Flood Fill Tool -and fill the selection with the background color #ffffff (2 clics)
45. Layers- New Raster Layer
46. Selections –load/save selection –load selection from disc and select my selection: ‘’Resonnance_sonore
9.PspSelection’’
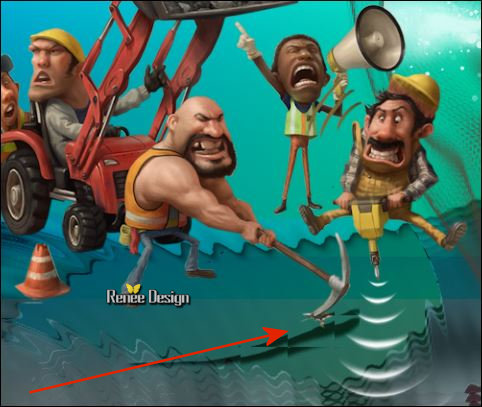
47. Activate your Brush Tool and choose the brush "Round " use the settings below

- Set the foreground color to #444444- With the Brush draw against the line ( that small dark part as shown on the example below )

Selections- Deselect All
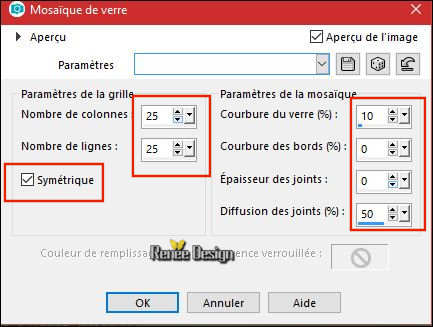
48. Effects
– Texture Effects – Mosaic Glas use the settings below
The difference depends on where the brush is placed
49.
Layers-Properties-Set the Blend Mode to" Difference "
50. Back on tube DECOS
- Activate the layer ‘’Cailloux’’ and the layer ‘’oiseaux ‘’of the tube
- Edit - Copy- Activate your work -Edit - Paste as a new layer
- Activate Move Tool (M) move it the right place ( see finished image )
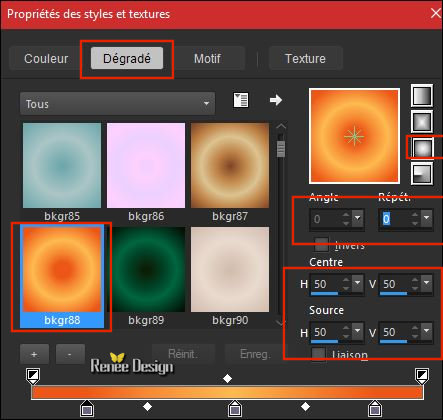
- Material palette:Set your foreground color to gradient and select ‘’ bkgr88 ‘’ / Prepare a foreground- sunburst gradient configured like this.
51.Layers- New Raster Layer
52.
Selections –load/save selection –load selection from disc and select my selection: ‘’Resonnance_sonore
10.PspSelection’’
53. Activate Flood Fill Tool and fill the selection with the gradient
Selections- Deselect All
54. Adjust- Blur- Gaussian Blur: Radius: 65
55.
Layers-Properties-Set the Blend Mode to" Hard Light "
- Back on the tube "DECOS"
56. Activate the layer ‘’Forme’’of the tube
- Edit - Copy- Activate your work -Edit - Paste as a new layer
57. Effects- Image Effects- Offset with these settings: H = 355 and V = 287
58.
Layers-Properties-Set the Blend Mode to " Luminance "
59. Layers- Duplicate
60. Image - Mirror - Mirror vertical ( Image - Flip in older versions of PSP)
61.
Layers-Properties-Set the Blend Mode to" Hard Light " -Set the Opacity of this layer to
75%
62. Effects- 3 D Effects- Drop Shadow with these settings: 0/0/85/39 black
- Activate the layer underneath =(Raster 10)
63.
Effects –Plugins- Unlimited - Filter Factory Gallery C – Spiral
4 with these settings 39/134
64.
Set the Opacity of this layer to 75%
- Back on the tube ‘’DECOS’’
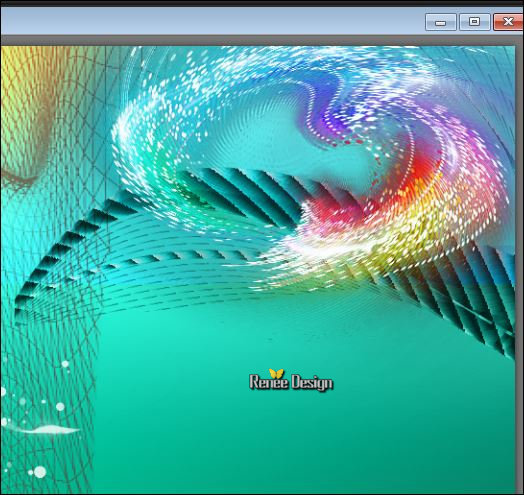
65. Activate the layer ‘’Tourbillon’’of the tube
- Edit - Copy- Activate your work -Edit - Paste as a new layer
66. Effects- Distortion Effects -Twirl-Degrees = - 235
- Move tool / place your tube on the top right side of your image
67. Layers- Arrange- Move Down and Repeat 1x
68.
Layers-Properties-Set the Blend Mode to" Color "
- Your work and Layer Palette look like this now-You should have this result
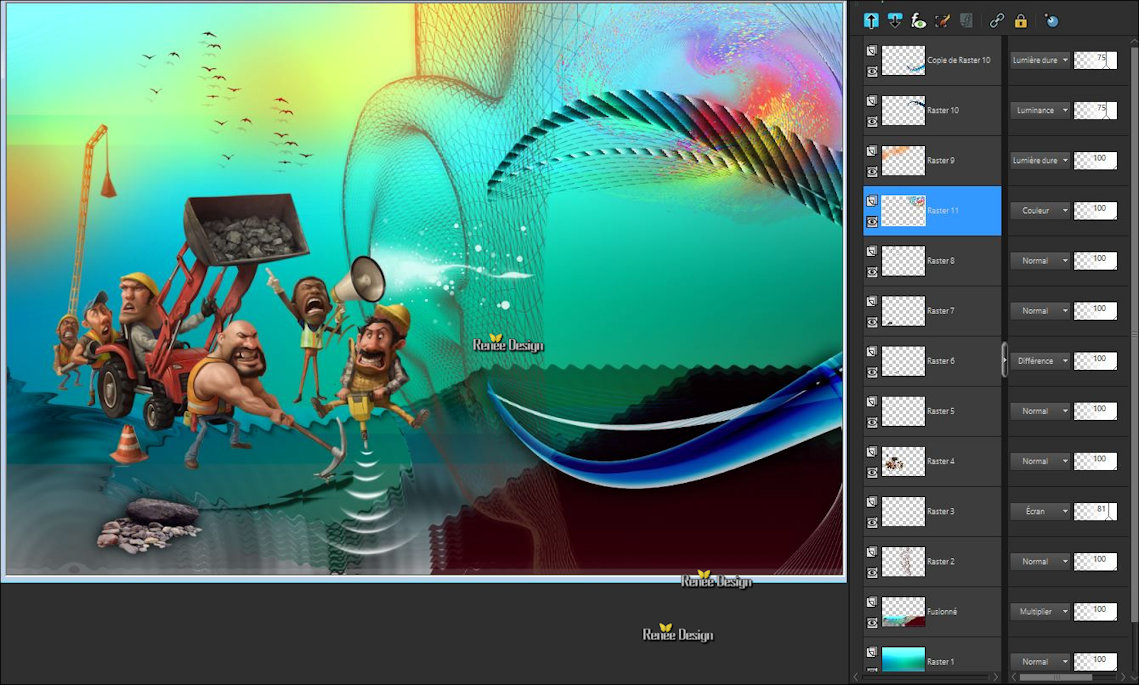
- To replace the top of the layers palette
69.Layers- New Raster Layer
70. Activate your Brush Tool – Choose 2 brushes according to your wishes with the music notes
-Stamp 1x with black and 1 x with white on the top right side ( see finished image )
-
Change the size to your own taste
-I opted for 2 brushes configured like this


71. Effects – 3D Effects- Drop Shadow with these settings: 1/1/85/1 black
72. Back on the tube ’’DECOS’’
- Activate the layer "musicien’ of the tube
73. Image
Resize to 85 %
- Edit - Copy- Activate your work -Edit - Paste as a new layer
- Move tool / place your tube on the right side of your image as shown in the example below

74. Back on the tube '' Decos ‘’
- Activate the layer
‘’chefs_chantier ‘’of the tube
75. Edit - Copy- Activate your work -Edit - Paste as a new layer – Activate Move Tool (M) move it the right place ( see finished image )
- Back on the tube "DECOS"
76. Activate the layer ‘’mur " of the tube
- Edit - Copy- Activate your work -Edit - Paste as a new layer
– Move tool / place your tube on the bottom right side of your image
77.Layers- New Raster Layer
78.
Selections –load/save selection –load selection from disc and select my selection: ‘’Resonnance_sonore
11.PspSelection’’
79. Activate Flood Fill Tool and fill the selection with the background color #ffffff ( 2 clicks)
Selections- Deselect All
80. Effects-Edge Effects- Enhance
- Back on the tube "DECOS"
81. Activate the layer
‘’spot’’of the tube
- Edit - Copy- Activate your work -Edit - Paste as a new layer
- Activate Move Tool (M) move it the right place ( see finished image )
82. Open the tube ‘’Titre ‘’
- Edit - Copy- Activate your work -Edit - Paste as a new layer
- Move Tool / place your tube to the top of your image
83. Layers- Merge -Merge Visible
84. Image
Resize to 1009 Pixels width
79. Image - Add borders-Symmetric checked 1 pixel black
80. Image - Add borders-Symmetric checked de 10 pixels #ffffff
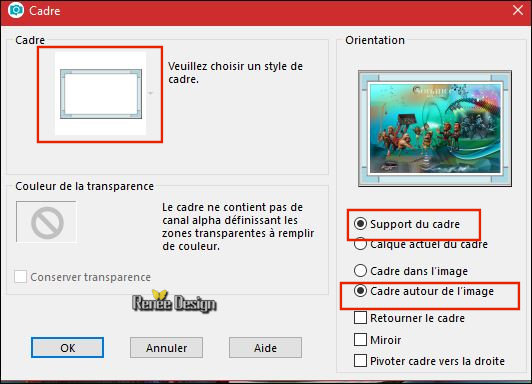
85. Image –
Picture Frame and select ‘’cadre Resonnance’’ use the settings below
86.
Layers- Merge Merge All ( Flatten)
Save as JPG
I hope you enjoyed this lesson
Renée
This lesson was written by Renée 08/10/2017
Edited and Update
2017
*
Any resemblance with an existing lesson is a coincidence
*
Do not forget to thank the people who work with us and for us I have appointed the tubeurs and translators
Thanks Renée
*
| 

 Translations


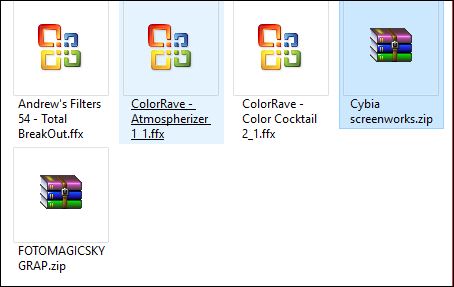


 If a plugin supplied appears with this icon it must necessarily be imported into Unlimited *