|
Let's start the lesson. Open the Color-Palette
-
Material Properties: Foreground color to this color: #35725e-Background color to this color
#103a2b
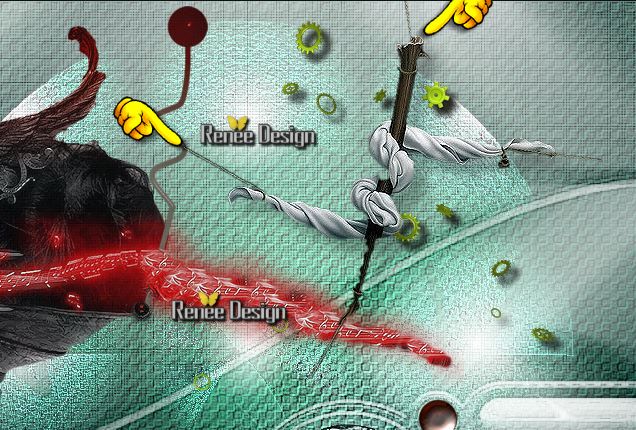
1. Open the Background Image:
''steampunk_fond_25''- Promote background Layer = Raster 1
1
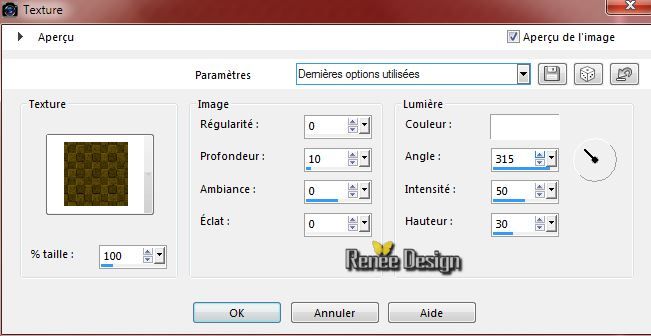
2.Effects- Texture Effects-Texture and select : ''yello056''
3. Layers- Duplicate
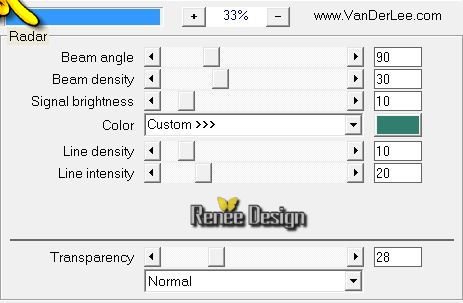
4. Effects- Plugins - Vanderlee Unplugged X-Radar- Color #317d6e
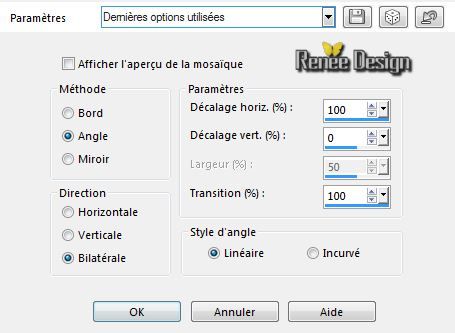
5. Effects- Geometric Effects-Perspective-vertical- Distorsion
50 Transparent
6. Effects- Plugins - Unlimited 2.0 -
Italian Editors Effect -Picture in Picture 186/220
7. Effects- Plugins - Transparency- Eliminate White
- Activate the bottom of the layer-palette
Raster 1
8.
Selections - load/save selection - load selection from disk and choose my selection: ''ST_25_1'
9.
Selections- Promote selection to layer
10.
Layers- Arrange-Bring to Top
11.
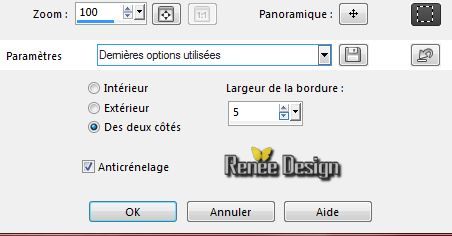
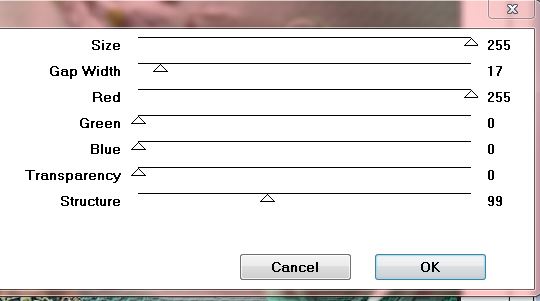
Selections-Modify-Select-Selection Borders with these settings
-
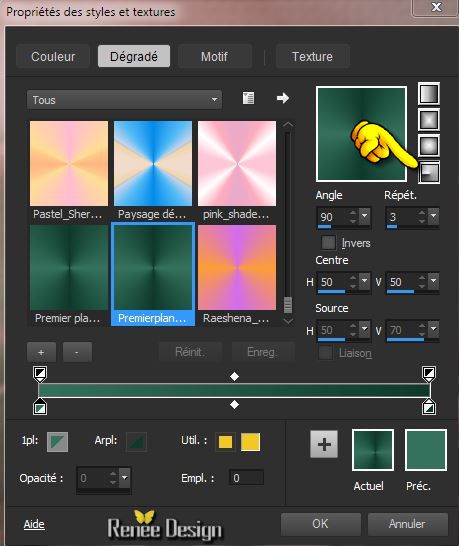
Activate Flood fill tool and fill the selection with the backgroundcolor #103a2b
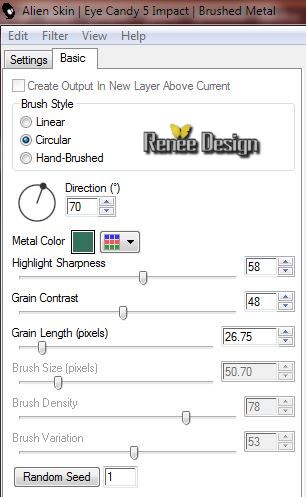
12. Effects- Plugins - Eyecandy 5 Impact - Brushed metal
- Selections- Deselect All
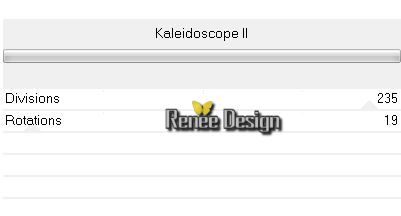
13. Effects- Plugins - Unlimited 2.0
-Factory Gallery A- Kaleidoscope II
14.
Layers- Merge- Merge Down
15. Effects-Plugins - Unlimited 2.0
- Factory gallery B - Circulator 2

16.
Selections - load/save selection - load selection from disk and choose my selection: "ST_ 25_2''
17.
Selection - Invert-Delete

Selections- Deselect All
18.
Effects-Plugins - Unlimited 2.0- Factory Gallery A - Marble
Madness One / 26/0/0/0
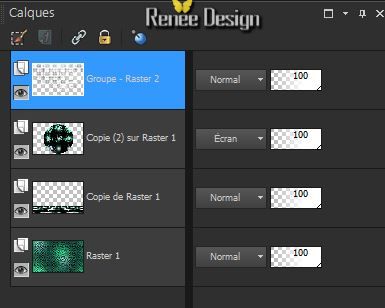
19.
Layers- Duplicate
20.
Layer Palette -Double click on this layer and set the Blendmode to Screen
21.
Effects- Edge Effects- Enhance More
-Activate the layer underneath (Copy of Raster 1)
22.
Effects- Plugins -Mura's Meister -Perspective
Tilling - click Reset and OK
23.
Activate your Pick Tool (K) Mode Scale put down to 525 pixels
- Activate the top of the layer Palette
24.
Layers- New raster layer
- Activate Flood fill tool and fill the layer with color white
25.
Layers- New Mask Layer from Image and choose Mask:''
masque_steampunk_25.jpg''

-
Delete the mask layer
-
Layers- Merge-Merge Group
26.
Effects- Edge Effects- Enhance More
-Your work look like this now:
-
Stay on top of the layer palette
-
Color palette with the starting colors
27.
Put your foreground/background radial gradient with settings below
28.
Layers- New raster layer
29.
Selections - load/save selection - load selection from disk and choose my selection:" ST_25_3''
30.
Activate Flood fill tool and fill the selection with the gradient
-
Selections- Deselect All
31
.Effects-Plugins - Unlimited 2.0 - Simple - Quarter Corner -use the default setting
32. Effects-Plugins - Unlimited 2.0
- Simple - Pizza Slice Mirror
33. Selection Tool ( S ) Custom selection use settings below
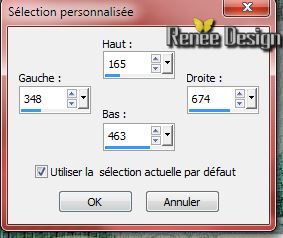
-
Press the Delete button on your key board
-
Selections- Deselect All
34.Effects- Image Effects -Seamless Tiling with these settings
35.
Effects-Distotion Effects-Wind 82 ° to the left
36.
Effects-Distotion Effects-Wind 100° to the right
37.
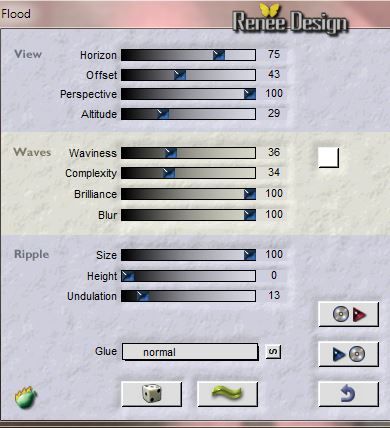
Effects- Plugins - Flaming Pear -Flood use settings below
38.
Activate the tube ''Renee_tube-steampunk_25.pspimage''
-Image Mirror
-
Edit/copy-Edit paste as a new layer on your working area
39.
Effects- Image Effects- Offset with these settings
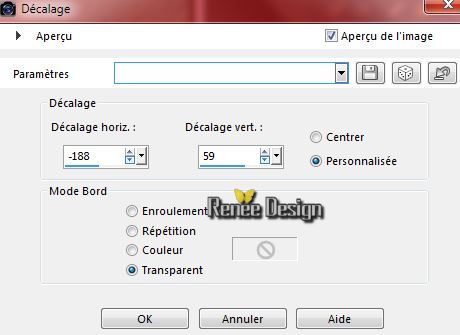
-
Reduce the opacity of this layer to: 91%
40. Activate the tube
''a-dozi's-metal-round-14.pspimage''
-
Edit/copy-Edit paste as a new layer on your working area and move -
(see the finished image)
41.
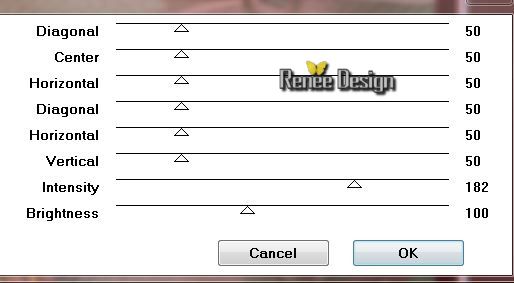
Effects-Plugins - Unlimited 2.0 - Colors -Photocopy-Photocopy
148
42.
Layer Palette -Double click on this layer and set the Blendmode to Hard Light -Opacity to 100%
43.
Activate the tube "image2_steampunk_25"
-
Edit/copy-Edit paste as a new layer on your working area and move
44. Effects- Plugins - EyeCandy 5 Impact -Bevel- tab Settings/User settings choose my preset: -
"steampunk_25_bevel''
45.
Effects- Plugins - Graphic Plus - Cross Shadow
46.
Activate the tube ''image_1_steampunk25''
-
Edit/copy-Edit paste as a new layer on your working area and move
47.
Effects- Plugins - Graphic Plus - Cross Shadow
(same settings )
48.
Activate the tube "image3_steampunk_25.pspimage"
-
Edit/copy-Edit paste as a new layer on your working area
-Do not move it is in the right place
49.
Activate the tube ''Renee_tube_draps''- Edit/copy-Edit paste as a new layer on your working area and move (see the printsreen )
50.
Layers- Arrange-Move 2x Down
51. Effects- Plugins - EyeCandy 5 Impact -Black-light- tab Settings/User settings choose my preset-
''ST_25_Blacklight"
52.
Layers- Merge- Merge- Visible
53.
Image - Add borders-Symmetric checked: 1 pixel black
54.
Image - Add borders-Symmetric checked: 50 pixels white
55.
Image - Add borders-Symmetric checked: 1 pixel black
56.
Image - Add borders-Symmetric checked: 25 pixels white
57. With the magic wand select the white border of 25 pixels
58.
Effects- Plugins - VM Instant Art - Steel Mesh
59.
Selections Invert
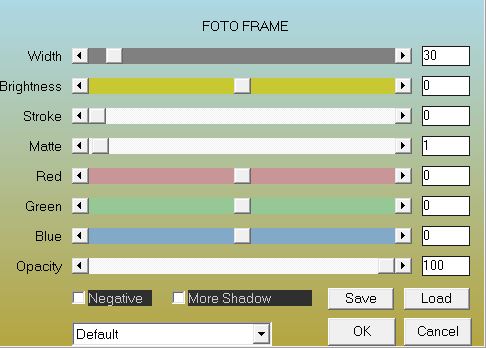
60.
Effects- Plugins -AAA Frame Foto Frame
Selections- Deselect All
61.
Open the tube "text" Edit/copy-Edit paste as a new layer on your working area and move/ Ore write your own text ( Font included into the zipfile) ''Janworx-Gears
''
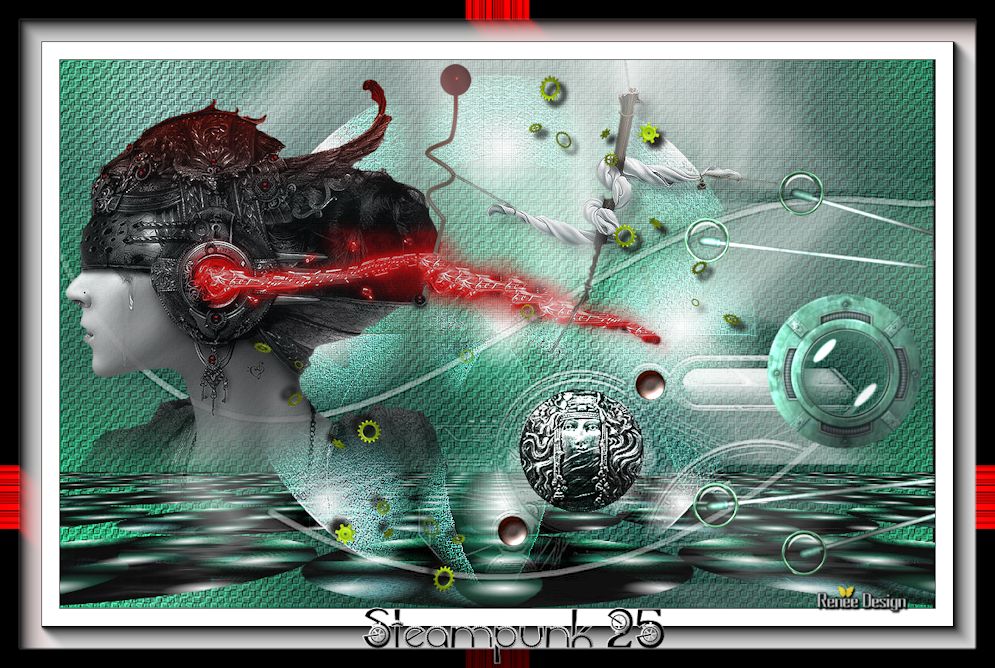
62.
Image Resize 995 pixels Width
Save as JPG
I hope you enjoyed this lesson
Renée
This lesson was written by Renée 01/11/2014
Placing
11/2014
*
Any resemblance with an existing lesson is merely a coincidence *
* Don't forget to thank the people who work for us and with us. I named the tubeurs - Testers and the translators.
Thanks Renée.
*
|
 Translations


 All rights reserved