|
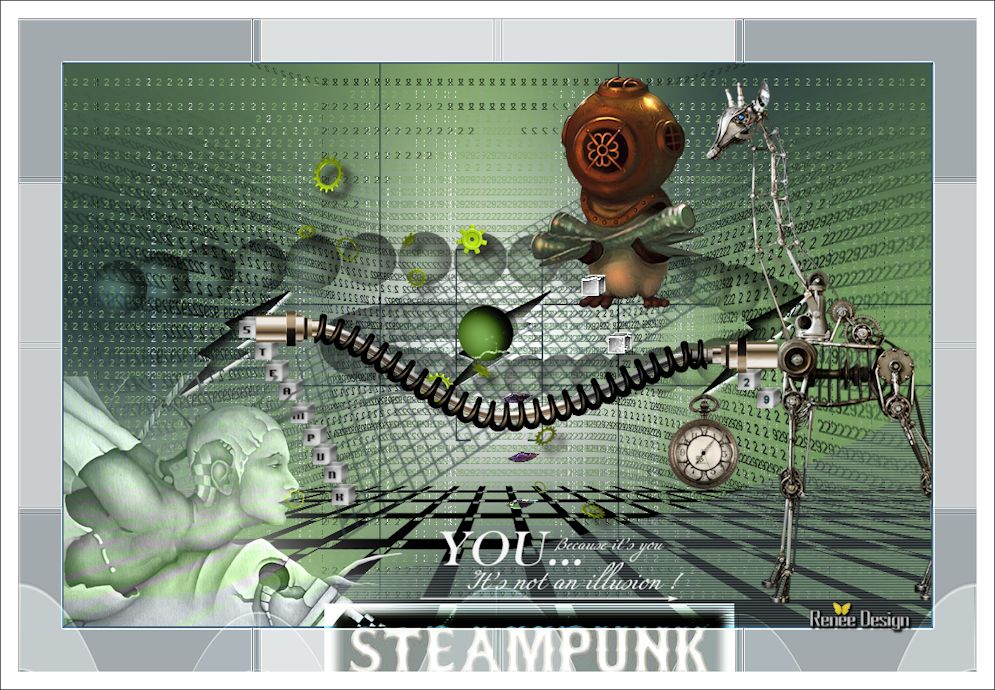
Let's start the lesson.Open the Color Palette
-
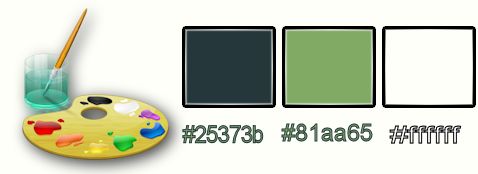
Material Properties: Set your foreground color to: #25373b
-Set your background color to #81aa65
1.
Open a transparent image of 995 x 645 pixels
2.
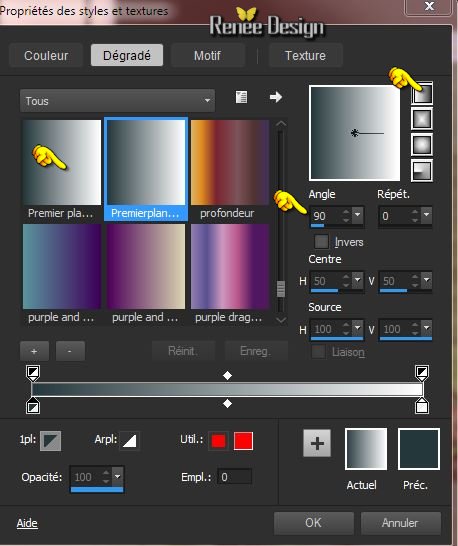
Set your foreground to gradient 'Foreground-background' -Radial with settings below

3.Flood Fill Tool: fill the layer with the gradient
4.
Adjust-Blur-Gaussian Blur: Radius: 55%
5.
Activate the image ‘’ STPK_29-image1’’
-
Edit/copy -Edit paste as a new layer on your working area -do not move it is in the right place
6.
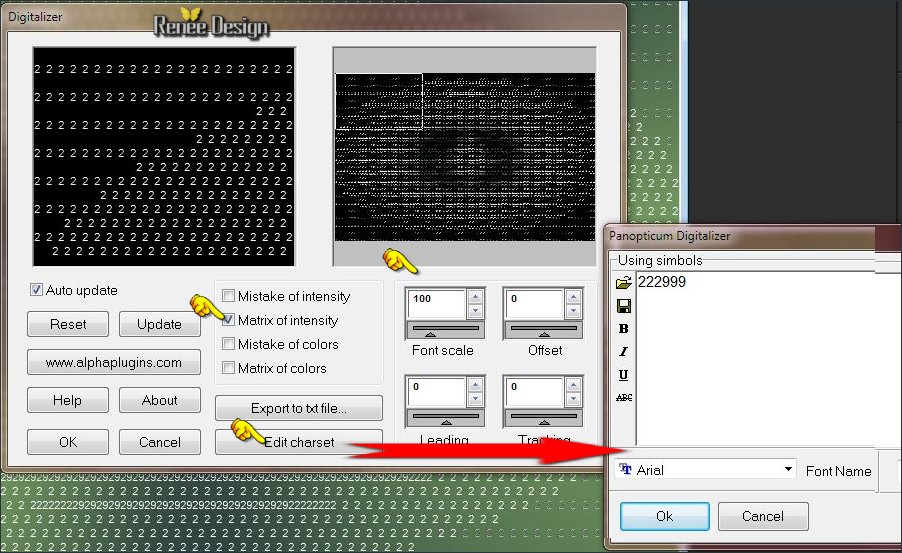
Effects-Plugins – Panopticum – Digitalizer
- Click
RESET
- Click " Edit Charset" to change numbers or letters to your taste OK (I choose 222999 ) as shown below
and settings as shown in the example below and OK
7.
Layers-Duplicate
8.
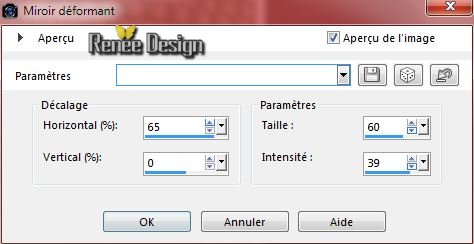
Effects-Distortion Effects-Warp with these settings
9.
Layer Palette -Double click on this layer and set the Blendmode to Multiply
10.
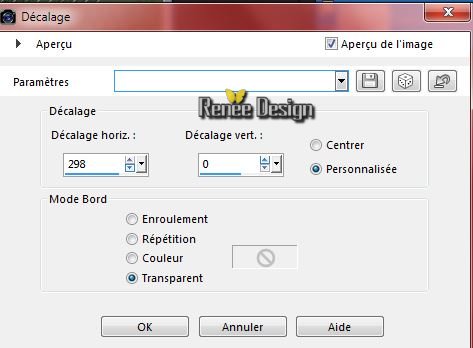
Effects-Image Effects-Offset with settings below
11.Layers- Duplicate
12.
Image Mirror
13.
Layers-Merge-Merge-Down
-
Activate the bottom layer of the layer palette= Raster 1
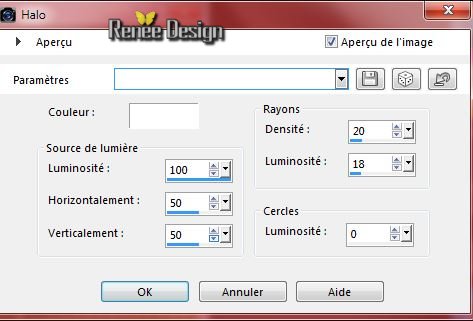
14. Effects-Illumination Effects-Sunburst with settings below
-
In the layer palette-make raster 2 active
15.
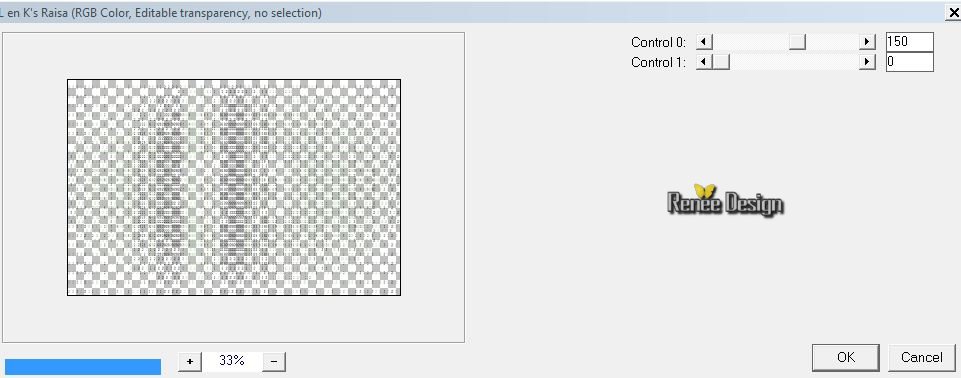
Effects-Plugins – L and K’s –
Raisa with these settings
16.
Layers-New raster layer
17.
Selections - load/save selection - load selection from disk and choose my selection: ‘’
steampunk_29_1’’
-
Material palette: Set your foreground color to #25373b– Flood Fill Tool: Fill the Selection with the foreground color
Selections- Deselect All
18.
Preset Shapes Tool -(P) select the shape you have loaded with these settings: Checked: Retain Style-Anti Alias and Create as Vector
(Extract into:C:\Users\yourname\Documents\Corel PaintShop Pro\17.0\Preset Shapes)
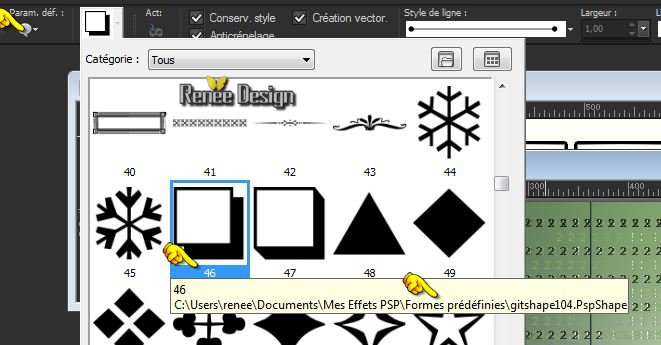
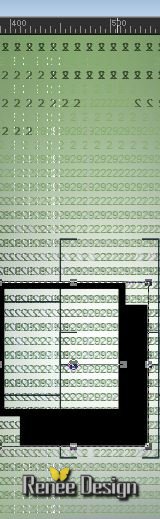
Trace the shape like this
-
Convert to Raster Layer (Raster
5)
19.
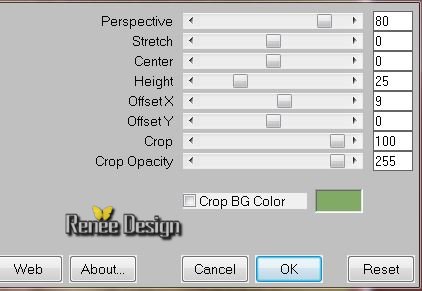
Effects-Plugins - Muras Meister –Perspective
tilling with these settings
20.
Activate the tube ‘’STPK_29-image2.pspimage’’
-
Edit/copy- Edit/ paste as new layer (do not move it is in the right place)
-
Layer Palette -Double click on this layer and set the Blendmode to Hard Light
Layer palette look like this now

-
Activate the top of the layer palette
21.
Layers- New raster layer
22.
Selections - load/save selection - load selection from disk and choose my selection: «
steampunk_29_2 »
23.
Pot of Paint: Change the opacity of the color at 50%
-Flood Fill Tool: Fill the Selection with the foreground color
Selections- Deselect All
24.Effects-Texture Effects-Blinds with these settings

25.
Layers-New raster layer
26.
Selections - load/save selection - load selection from disk and choose my selection: ‘’
steampunk_29_3’’
27.
Pot of Paint:opacity of the color at 50%
–Flood Fill Tool: Fill the Selection with the foreground color
Selections- Deselect All
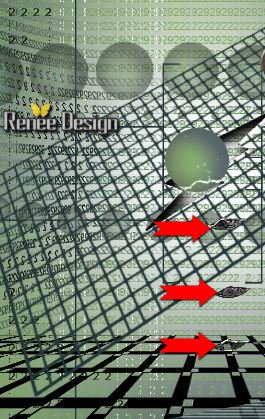
28.Layers- New raster layer
29.
Selections - load/save selection - load selection from disk and choose my selection: ‘’steampunk_29_4’’
30.
Pot of Paint: Change the opacity of the color at 100%
Flood Fill Tool: fill the Selection with the background color
31.
Selections-Invert
32.Effects-3D Effects-Drop Shadow with these settings: 0/0/100/35 color black
33.
Layers-Duplicate
34.
Selections-Invert
35.
Effects-3D Effects-Cutout with these settings
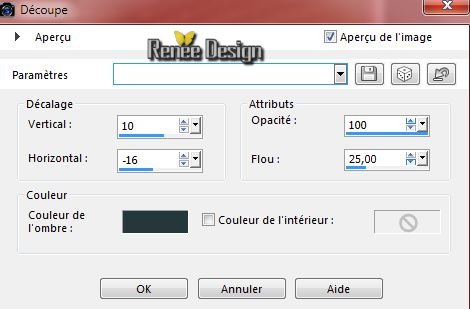
Selections- Deselect All
36.
Layers-Merge-Merge Down
37.
Layers-Duplicate
38.
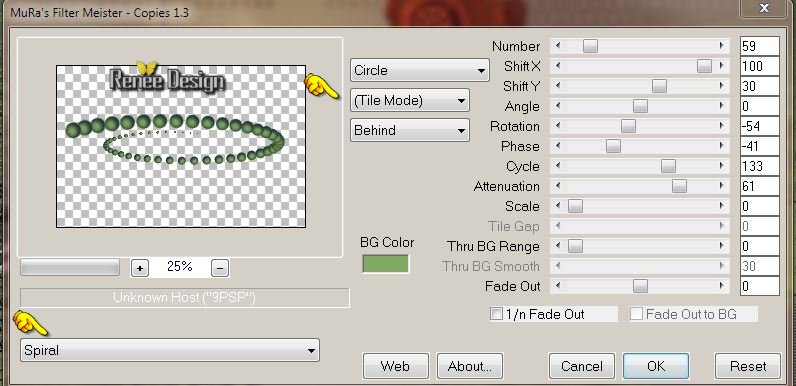
Effects-Plugins - Mura’s Meister –
copies with these settings
39.
Layers-Arrange-Move above Raster 4
40.
Layer Palette -Double click on this layer and set the Blendmode to Luminance and set the layer opacity of this layer to 51%
-
Activate the top of the layer palette=(Raster 9 the green ball)
41.
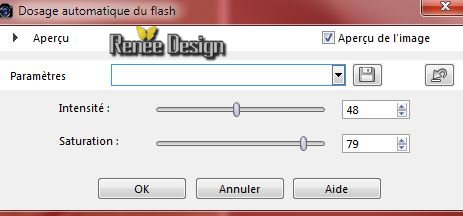
Adjust-Fill Flash with these settings
42.
Effects-Plugins –Unlimited 2.0 – Photo Aging Kit – CrackedPaper
128/128
43.Activate the Freehand Selection-Point to Point select the part of the broken tube from the bottom (the part of CrackedPaper )
- Edit/copy- Edit/ paste as new layer on your working area
-
Layers- Duplicate twice –place them one by one on your work and merge the three layers and to one single layer
-(The effect is included with the material : tube ‘’3Craquelures’’ Paste it as a new layer on your working area)
44. Layer Palette -Double click on this layer and set the Blendmode to Difference
45.Effects-Edge Effects-Enhance
46.
Activate the tube ‘’
SteampunkPenguinProfessor~einen~Sassydeb’’
-
Activate the Freehand Selection-select the right part
-
Edit/copy- Edit/ paste as new layer on your working area and move
47.
Activate the tube ‘’ deco_tube_steampunk_29’’
-You have a blank cube (if you want to write)
-
Activate the 3 others tuben ( layer
29/and cubes_brises and steampunk)
-
Edit/copy- Edit/ paste as new layer on your working area
-
Move Tool (M) move it into the right place
48.
Activate the tube ‘’
Renee_tube_fading_away_by_acirmo’’
- Image
Miroir
- Image
Resize 60 %
- Edit/copy- Edit/ paste as new layer on your working area
- Move Tool (M) move it to the bottom left corner
49. Layer Palette -Double click on this layer and set the Blendmode to Luminance-Legacy
50. Layers-Duplicate
- Activate the layer underneath(original)
51. Adjust-Blur-Gaussian Blur: Radius: 55%
- Activate the top of the layer palette
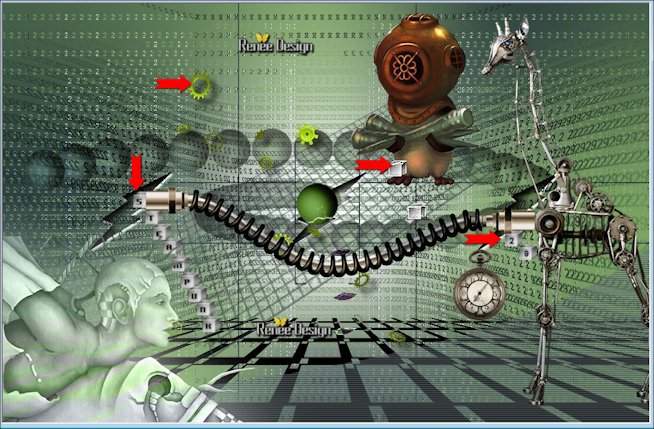
52. Activate the tube ‘’ deco_2_tube_steampunk_29.pspimage’’
We will place the elements of the tube
53.Activate the tube ‘’ tube de FrançoiseVerdon’’
-Image Mirror –
Edit/copy- Edit/ paste as new layer on your working area (remove the signature)
54. Activate the tube ‘’ renee_tuyau’’
- Image
Free rotate 90° right
- Edit/copy- Edit/ paste as new layer on your working area and move
55. Activate the tube ‘’montre ‘’
- Edit/copy- Edit/ paste as new layer on your working area and move
56. Activate the tube ‘’ deco_rondelles’’
- Edit/copy- Edit/ paste as new layer on your working area and move
as shown in the example below
You may minimize your tube for a moment, but do not close, we will need it again soon
57. Activate the tube ‘’texte_steamunk29’’
- Edit/copy- Edit/ paste as new layer on your working area and move
58. Layers- Merge-Merge Visible
59. Image - Add borders-Symmetric checked: 2 pixels foreground color #25373b
-Material Properties: Set your foreground color to #25373b- Set your background color to #ffffff
60.
Set your foreground to gradient 'Foreground-background' - Linear with settings below
61. Image - Add borders-Symmetric checked: 50 pixels color white
62. With the magic wand -select the border of 50 pixels
63. Layers-New raster layer
-Flood Fill Tool : fill the selection with the gradient
64. Effects-Plugins L and k’s –Jouri 129/129/129
Selections- Deselect All
65. Effects-Plugins – Simple 4 Way Average
66. Effects-Edge Effects-Enhance More
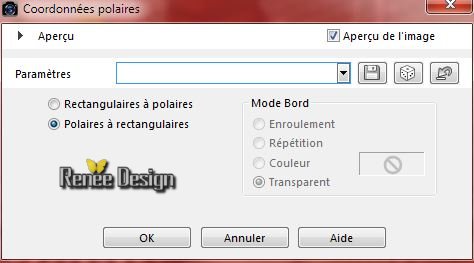
67. Layers-Duplicate
68.Effects- Distortions Effects-Polar Coordinates-Polar to Rectangular
69. Layer Palette -Double click on this layer and set the Blendmode to Overlay
70. Image - Add borders-Symmetric checked: 20 pixels color white
-
Now activate the tube from step 56 ''deco_rondelles "
71.
Activate the tube ‘’ steampunk_titre’’
- Edit - Copy -Edit - Paste as new layer on your working area and move
72. Layer Palette -Double click on this layer and set the Blendmode to Overlay
73. Layers-Duplicate
74. Layers-Merge-Merge All
75. Image - Add borders-Symmetric checked: 1 pixel foreground color
73. Image
Resize 995 pixels Width
Save as JPG
I hope you enjoyed this lesson
Renée
This lesson was written by Renée 30/03/2015
edited and update
on 2015
*
Any resemblance with an existing lesson is merely a coincidence *
* Don't forget to thank the people who work for us and with us. I named the tubeurs - Testers and the translators.
Thanks Renée.
*
| 
 Translations


 When you see this logo the filter is imported in Unlimited

 All rights reserved