|
.
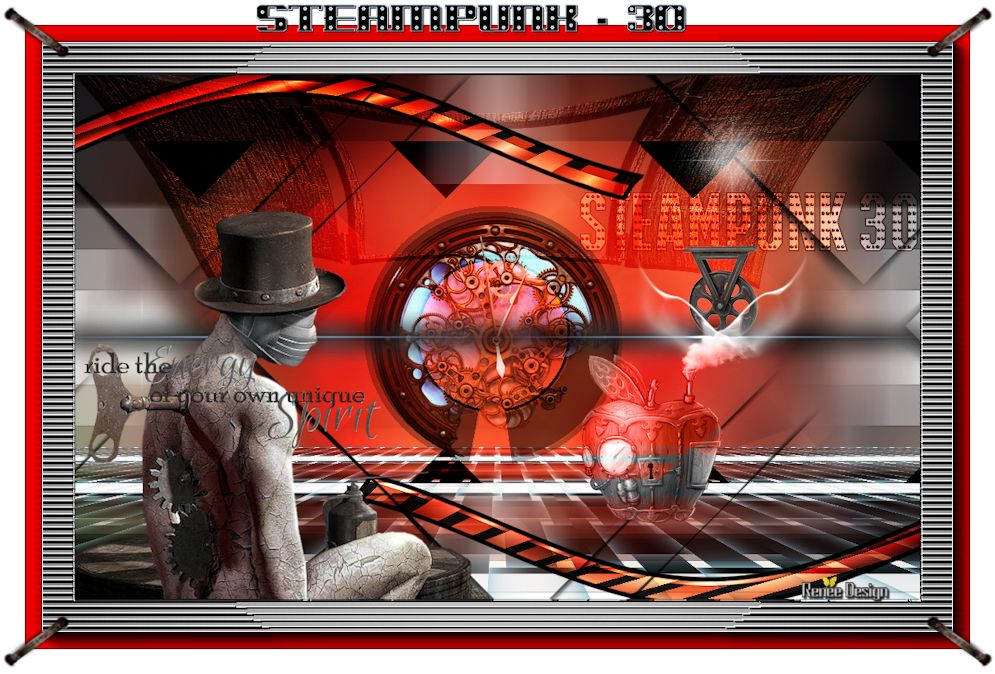
Let's start the lesson.
Material Properties -
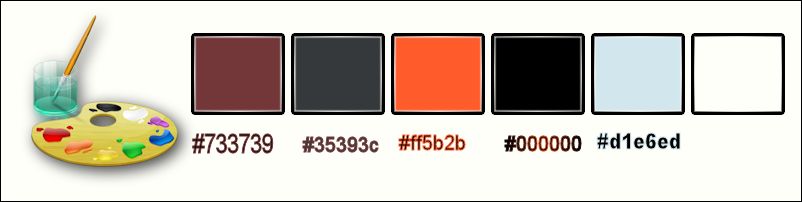
Set your foreground color to #ff5b2b
Set your background color to #35393c
-
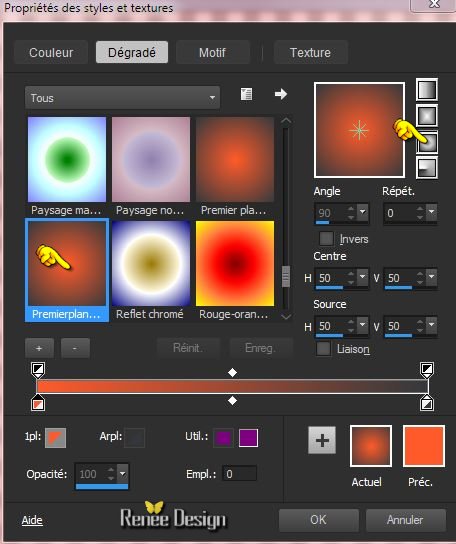
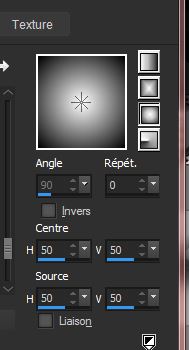
Set your foreground to gradient 'Foreground-background' - Sunburst with these settings
1.
Open a transparent image of 1025 x 635 pixels
2. Activate Flood Fill Tool and fill the layer with the gradient
3. Layers- New raster layer
4.
Selections-Select All
5. Activate the tube ‘’
Renee_tube_FemmeSteampunk_chien.pspimage’’
- Edit/Copy
- Edit-Paste into selection
Selections-Deselect All
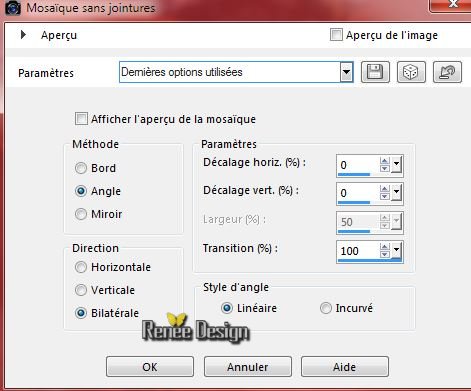
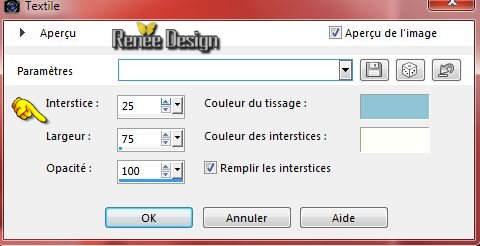
6. Effects-Image Effects-Seamless Tiling with these settings
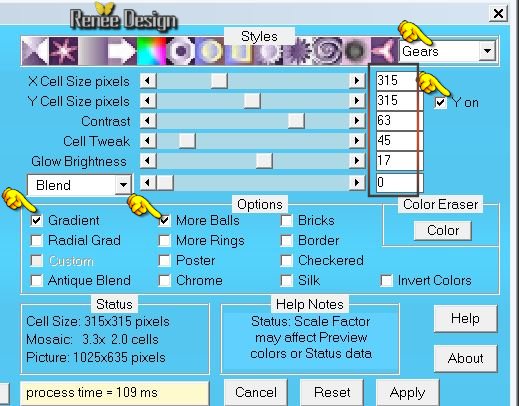
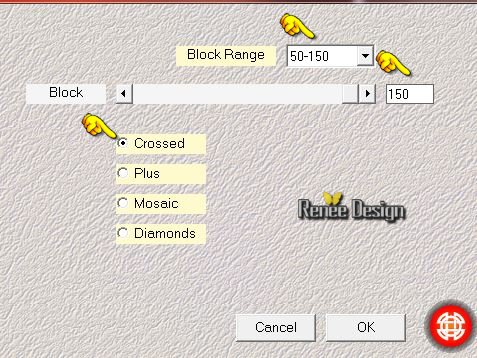
7. Effects –
Plugins – Lootis Filters –Mosaic Toolkit
Plus with these settings
8. Adjust-Blur-Gaussian Blur: Radius: 28
9. Layer Palette - Double click on this Layer and set the Blend Mode to "Overlay"
10.
Activate image ‘’
Renee_steampunk_30-image1’’
- Edit/copy- Edit/ paste as new layer on your working image -do not move it is the right place
11. Layer Palette - Double click on this Layer and set the Blend Mode to "Overlay"
12.
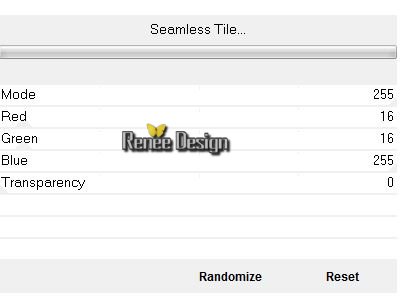
Effects –Plugins- Unlimited - VM Toolbox-Seamless
Tile..with these settings .
13.
Effects –Plugins – Medhi – Sorting Tiles with these settings
- Properties Background; Set your background color to black
14. Layers- New raster layer
15. Activate Flood Fill Tool and fill the layer with the background color black
16. Layers- New Mask layer from Image and select Mask’’
masque_steampunk30’’
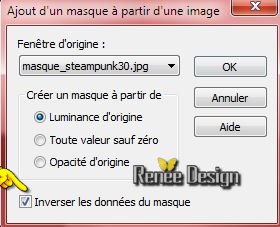
- Delete layer
- Layers-Merge- Merge Group
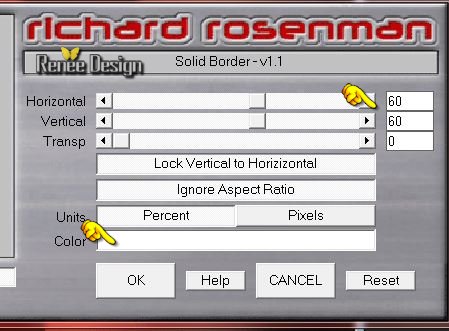
17. Effects
–Plugins– Richard Rosenman -Solid Border
v1.1 with these settings
- Properties Foreground: Set your foreground color to
#ff5b2b
18. Layers- New raster layer
19.
Selections –load/save selection –load selection from disc and choose:‘’
Steampunk_30_1’’
20.Activate Flood fill tool and fill the selection with the foreground color
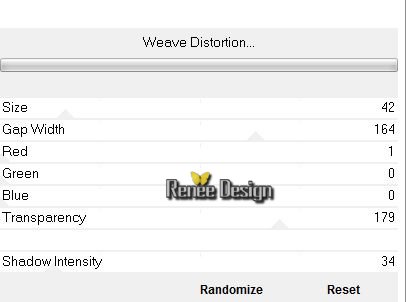
21.
Effects –Plugins - Unlimited - VM Natural- Weave
Distorsion with these settings
22.
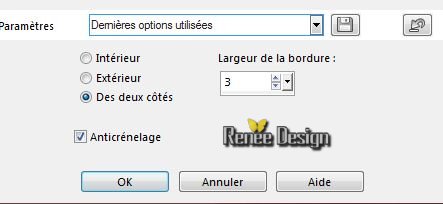
Selections-Modify-Select-Selection Borders with these settings
23. Activate Flood fill tool and fill the selection with the background color
Selections-Deselect All
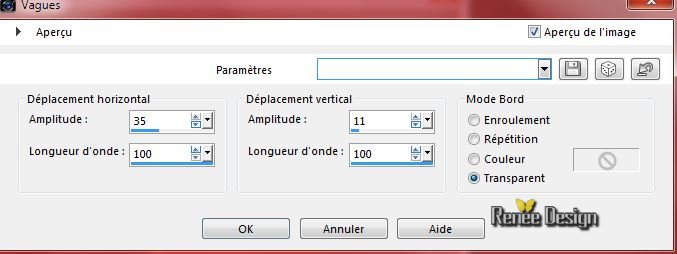
24. Effects-Distortion Effects-Wave with these settings
25. Layer Palette - Double click on this Layer and set the Blend Mode to "Hard Light "
-Layer-Palette:activate the layer underneath - Group-Raster 4
26.
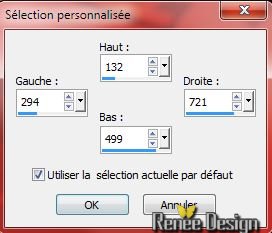
Selection Tool ( S ) Custom selection use settings below
27.
Selections-Promote selection to layer
28. Effects-Textur Effects-Weave with these settings-Color:#90c5d5 and white
Selections-Deselect All
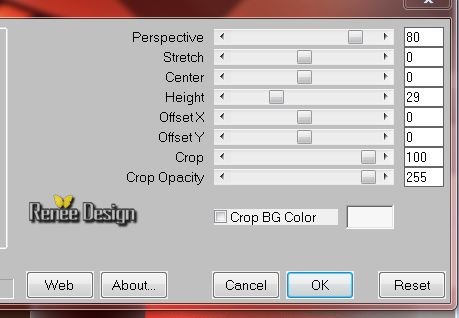
29.
Effects - Plugins – Mura’s Meister –Perspective
Tilling with these settings
30. Layers-Arrange-Move 2x Down / under Raster
3
Layer palette look like this now
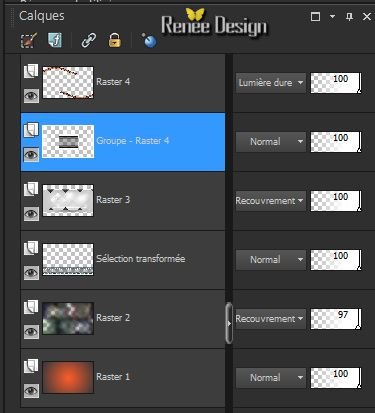
- Layer palette: Make Group –Raster 4 active
31.
Selection Tool ( S ) Custom selection with the same selection effects as point 26
32. Effects
–Plugins -Unlimited - VM Distortion- Circulator with these settings
Or take
Filter
Factory Gallery B, Circulator,

Selections-Deselect All
33. Activate the tube ‘’ Renee_tube_demi_clock.pspimage’’
-Edit/copy- Edit/ paste as new layer on your working image
(do not move it is the right place)
34. Layer Palette - Double click on this Layer and set the Blend Mode to "Hard Light "
- Activate the top of the layer palette
35. Layers- New raster layer
36. Selections –load/save selection –load selection from disc and choose: ‘’
Steampunk_30_2’’
37. Activate Flood Fill Tool and fill the selection with black (click 1 x in the selection )
Selections-Deselect All
38. Layers- New raster layer
39.Selections –load/save selection –load selection from disc and choose: ‘’
Steampunk_30_3’’
- Properties Foreground: Set your foreground color to white
40. Pot of Paint: Change the opacity of the color at 50% -Activate Flood Fill Tool and fill the selection with the foreground color white
Selections-Deselect All
41. Layer Palette - Double click on this Layer and set the Blend Mode to "Screen"
42.
Activate the tube ‘’
Window-GI_SteamPunkSampler.pspimage’’
-Edit/copy- Edit/ paste as new layer on your working image
-do not move it is in the right place
43. Layer Palette - Double click on this Layer and set the Blend Mode to "Soft Light "
44. Effects-Edge Effects-Enhance
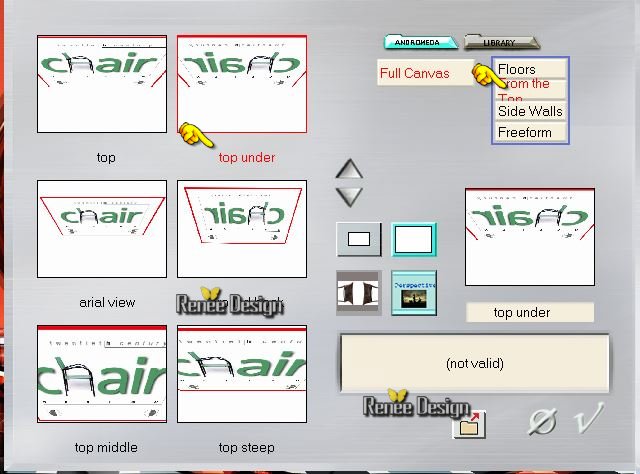
45.
Effects – Plugins – Andromeda – Perspective – From the
top – top under
46.Effects-Image Effects-Offset with these settings H =0 and V = 83
47. Effects-3D Effects-Drop Shadow with these settings: 1/1/100/0 black
48. Activate the tube ‘’ steampunk_30_texte’’
-Edit/copy- Edit/ paste as new layer on your working image
49. Activate your Pick Tool (K) move to the left side as shown in the example below
50. Activate the tube ‘’ Renee_steampunk_30-image2.png’’
-Edit/copy- Edit/ paste as new layer on your working image
-do not move it is in the right place
51. Layers-Arrange-Move Down (under Raster 8)
- Activate the top of the layer palette
- Material Properties: Set your foreground color to #d1e6ed
-Set your background color to black
52. Activate your Text Tool: Font « «IRON MAN OF WAR 001B NCV’’- Size 72 pixels –Type the text:“STEAMPUNK 30’’
- With your move tool place it to the right side-(see finished image)
53. Image –Negative
Image
54. Layer Palette - Double click on this Layer and set the Blend Mode to Overlay
55. Activate the tube ‘’ steampunk_30_roulette’’
-Edit/copy- Edit/ paste as new layer on your working image
- Place as shown in the example below

56. Layers- New raster layer
57.
Selections –load/save selection –load selection from disc and choose:‘’
Steampunk_30_4’’
58. Properties Foreground: Set your foreground color to
#d1e6ed
- Activate Flood fill tool and fill the selection with the foreground color
- Layer Palette: Make Raster 8 active
59. Activate the tube ‘’ Renee_tube-homme_mecanique .pspimage’’
- Image
Resize a 70 %
- Image
Mirror
- Activate your Move Tool: move to the bottom left side
- Activate the top of the layer palette
60. Activate the tube ‘’ Renee_tube-pomme_steampunk.pspimage’’
- Image
Resize a 50 %
- Edit/copy- Edit/ paste as new layer on your working image
- Activate your Move Tool: move as shown in the example below
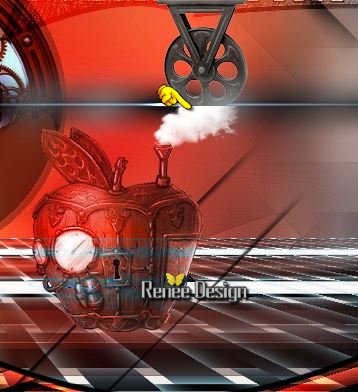
61. Layer Palette - Double click on this Layer and set the Blend Mode to "Luminance Legacy "
62. Activate the tube ‘’ Renee_steampunk_30-image-Fumee’’
- Edit/copy- Edit/ paste as new layer on your working image
With the move tool, move itin the right place
(see finished image)
63. Image - Add borders-Symmetric checked:1 pixel black
64. Image - Add borders-Symmetric checked:50 pixels white
- Material Properties - Set your foreground color to white -Set your background color to black
65. Set your foreground to gradient 'Foreground-background' - Sunburst with these settings
66. With the magic wand -select the border of 50 pixels
67. Activate Flood Fill Tool and fill the selection with the gradient
68. Effects -Plugins –
Unlimited – VM Experimental- TeeWee... a
0/0
69. User-Defined Filter - Emboss 3 using the default settings
Selections-Deselect All
70. Image - Add borders-Symmetric checked:10 pixels white
71. Effects
–Plugins – AAA Frame – Foto Frame with these settings
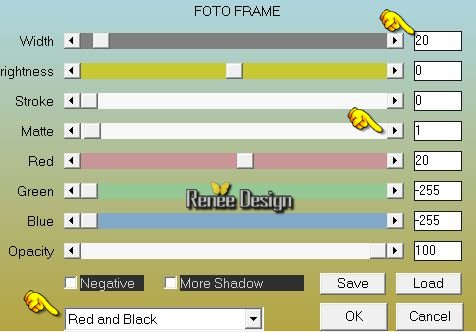
72. Image - Add borders-Symmetric checked:30 pixels white
73. Activate the tube ‘’ atttaches _steampunk-30’’
-Edit/copy- Edit/ paste as new layer on your working image
- With your move tool move to the top
74. Layers-Duplicate
- Image
Flip
75. Layers- Merge- Merge- Down
76.Activate the Text Tool: Font ‘’IronCladBolted’’- Size 48 pixels – Type the text- ‘’Steampunk 30 ‘’ (Foreground color #d1e6ed -Background color black )
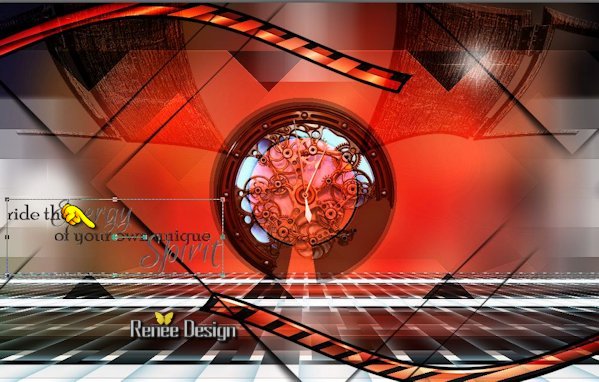
77. Layers-Merge-Merge-All
78. Image
Resize a 995 pixels width
Save as JPG
I hope you enjoyed this tutorial .
Renée
This lesson was written by Renée 24/05/2015
edited and update
2015
Any resemblance with an existing lesson is merely a coincidence *
* Don't forget to thank the people who work for us and with us. I named the tubeurs - Testers and the translators.
Thanks Renée.
| 
 Translations


 When you see this logo the filter is imported in Unlimited

 All rights reserved