|
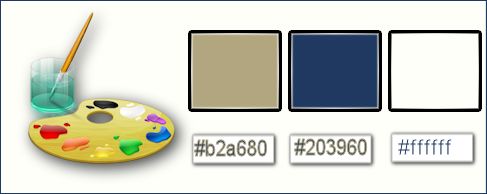
Let's start the lesson.Open the Color Palette
-
Material Properties: Set your foreground color to #b2a680
-Set your background color to #203960
1.
Open a transparent image 1005 x 665 pixels
2.
Activate Flood Fill Tool and fill the foreground color #b2a680
3.
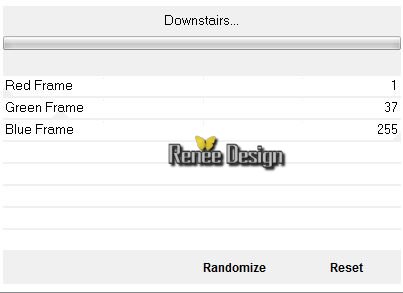
Effects-Plugins – Unlimited 2.0 - VM
Natural-Downstairs..with these settings as shown below.
4.
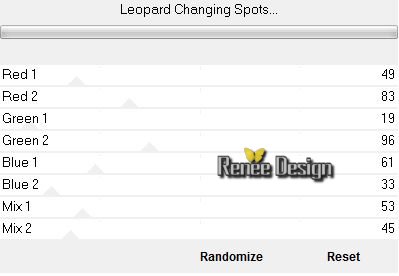
Effects- Plugins – Unlimited 2.0- Andrew's Filters 16-Leopard
Changing Spots...using the default settings -
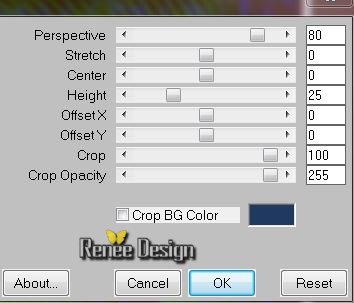
5. Effects-Plugins- Mura’s Meister – Perspective
tilling with these settings as shown below
6. Color Palette: Prepare a foreground/background linear gradient with settings below
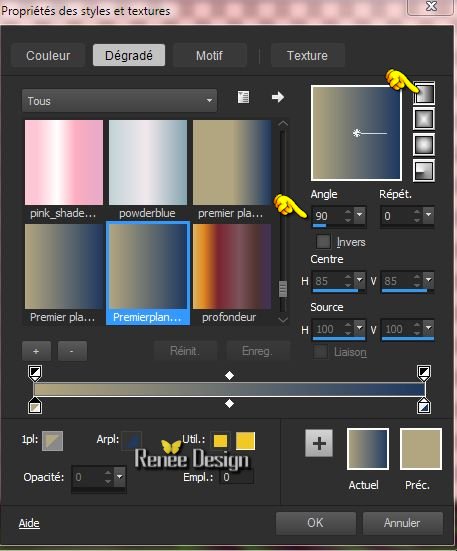
7. Layers- New raster layer
- Activate Flood Fill Tool and fill the layer with the gradient
8. Layers-Arrange-Sent to Bottom
9.
Effects-Plugins –Unlimited 2.0 - &<Bkg Designer sf10 I>-ALFs
Border Mirror Bevel with these settings 88
-52
10. Effects- Edge Effects- Enhance More
- Activate the top of the layer-Palette
11. Layers- New raster layer
12.
Selections - load/save selection - load selection from disk and choose my selection:« story_for_girls_1 »
13. Flood Fill Tool: Fill the selection with the gradient
14.
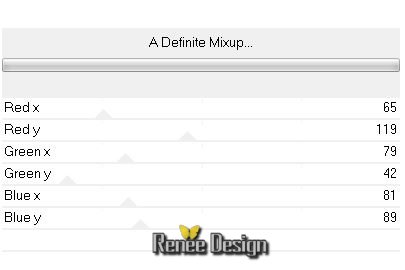
Effects-Plugins - Unlimited 2.0 - Andrew's Filters 36- A
Definite Mixup with these settings as shown below ..
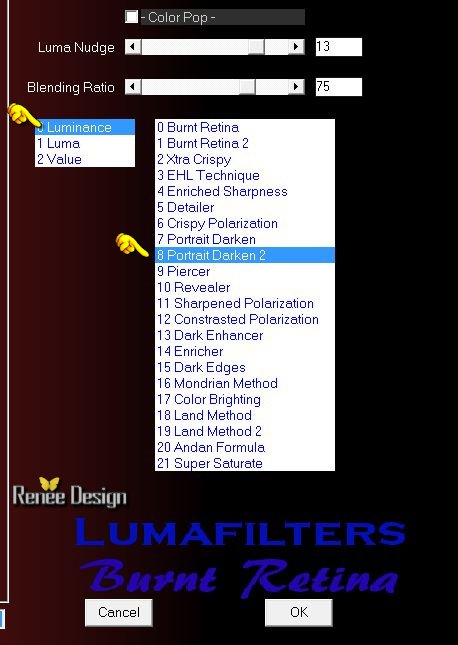
15. Effects-Plugins – Luma Filters – Burn retina with these settings as shown below
Selections-Deselect All
- You are there in your work
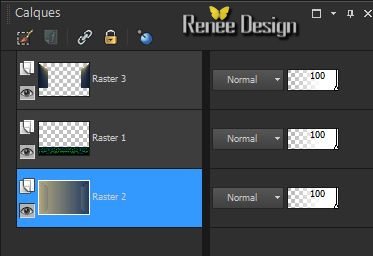
16.
Activate the bottom of the Layers palette =Raster 2
17.
Activate the tube ‘’ story_for_girl_image_1’’-
Edit/copy-Edit/paste as a new Layer (do not move, it is the right place)
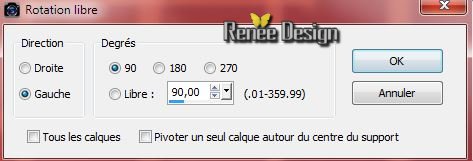
18. Image -Free
Rotate with these settings
19. Effects-Plugins – EyeCandy 5 Impact – Extrude –-Tab-Settings-User Settings and choose my Preset ‘’
story_girl_extrude’’
20. Layer Palette: Set the Blend mode to Luminance
21.
Layers- Duplicate
22. Effects-Plugins- –Simple -Blintz
You are there in your work
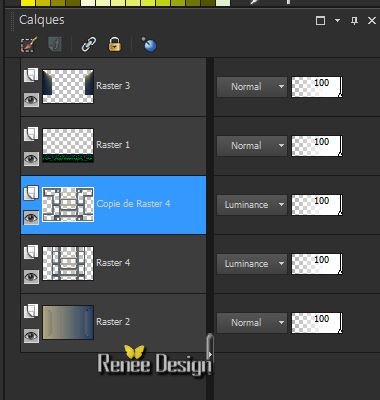
22. Layers- Merge- Merge layers Down
- Layer palette – Make raster 1 active
23.
Effects-Plugins - EyeCandy 5 impact – Glass--Tab-Settings-User Settings and choose my Preset
‘’renee_Story_girl_glass’’
-
Activate the top of the layer palette
24. Layers- New raster layer
25.
Selections - load/save selection - load selection from disk and choose my selection: ‘’
story_for_girls_2’’
- Flood Fill Tool : fill the selection with the background color
26.
Effects-Plugins – Eyecandy 5 Texture –Marble –Tab-Settings-User Settings and choose my Preset
“story_girl_texturemarble”
Selections-Deselect All
27.
Effects-Plugins- - EyeCandy 5 Impact – Extrude –Tab-Settings-User Settings and choose my Preset
‘’ story_girl_extrude_2’’
28. Layers- New raster layer
29.
Selections - load/save selection - load selection from disk and choose my selection: ‘’
story_for_girls_3’’
- Color Palette: Set the foreground color to #b2a680 - Flood Fill Tool : fill the selection with the foreground color
30.
Effects-Plugins – Eyecandy 5 Texture- Wood- -Tab-Settings-User Settings and choose my Preset
« story_girl_texturewoods”
Selections-Deselect All
31.Effects-Plugins - EyeCandy 5 - Extrude -Tab-Settings-User Settings and choose my Preset
« story_girl_extrude_3’’
32. Layers- New raster layer
33.
Activate your Selection Tool - Custom selection with these settings as shown below :
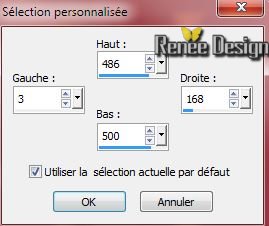
34.Flood Fill Tool : fill the selection with the selection with the foreground color
Selections-Deselect All
35. Effects-Texture Effects-Polished Stone with these settings as below
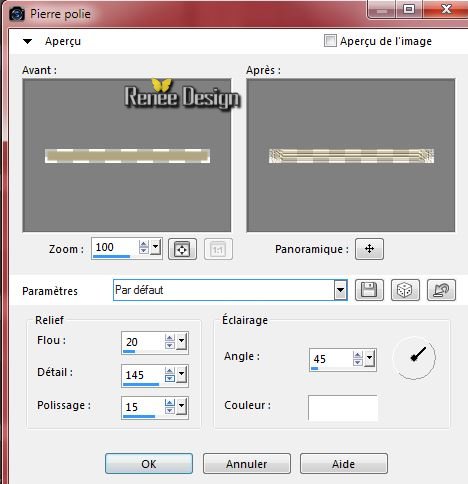
36. Effects- Edge Effects-Enhance More
37. Layers-Merge- Merge Layers Down and repeat (You have 1 wardrobe layer)
38. Activate the tube ‘’story_girl_poignée »
- Activate layers 1 ore layer 2 and choose your image (I chose
bouton_1)
- Edit/copy-Edit/paste as a new Layer on your working area
- With your move tool:move to the left
39. Layers- Duplicate
-
Move this layer slightly down places see finished drawing
40. Layers- Merge- Merge layers Down
41. Layers- New raster layer
42.
Selections - load/save selection - load selection from disk and choose my selection:’’
story_for_girls_4’’
43. Activate the tube « story_girl_image_coin »
- Edit/copy- Edit/ paste into selection
44.
Selections - Modify - Contract 10 pixels
45.
Selections - Invert
Press the Delete button on your key board
46.
Selections - Invert
47. Layers- New raster layer
48. Effects-3D Effects- Buttonize with these settings as shown
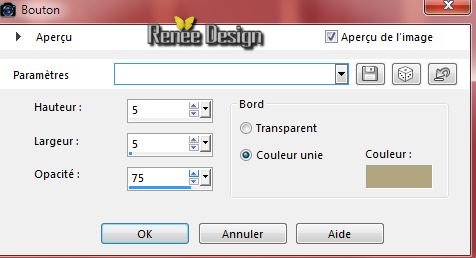
Selections-Deselect All
49. Layers- Merge- Merge layers Down
50. Effects-3D Effects- Drop Shadow with these settings as shown below
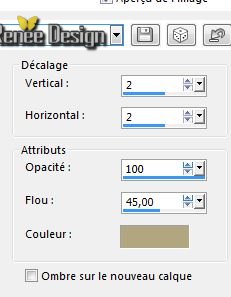
51. Effects-Plugins – Luma Filters –Burn retina with these settings
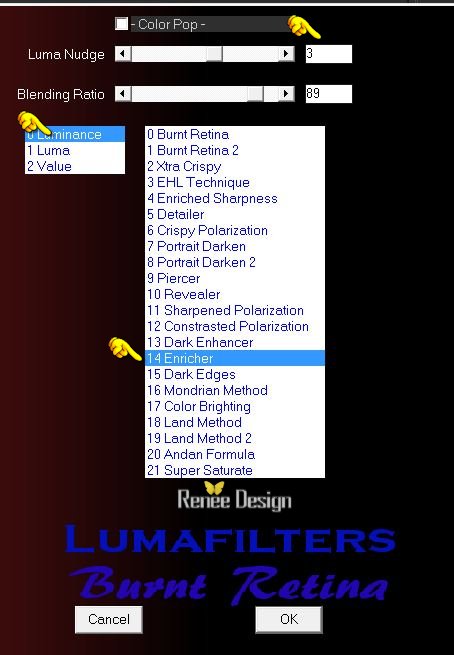
52.
Activate the tube ‘’story_girl_spots’’
- activate spot-1/Edit/copy -Edit/paste as a new Layer and place
- activate spot-2/Edit/copy -Edit/paste as a new Layer and place
-Layers- Duplicate and place
53. Activate the tube ‘’story_girl_reflet_lumières’’
- activate raster 1 and 2 of this tube /Edit/paste as a new Layer and place as shown in the example below

54. Layers - Merge - Merge layers visibly
55. Layers- New raster layer
56.
Selections - load/save selection - load selection from disk and choose my selection: ‘’
story_for_girls_5’’
- Change the foreground color into white
57. Pot of Paint: settings of your paint pot to 60% Activate Flood Fill Tool and fill the selection with the foreground color white
Selections-Deselect All
58. Effects - Image effects - Seamless tiling with these settings
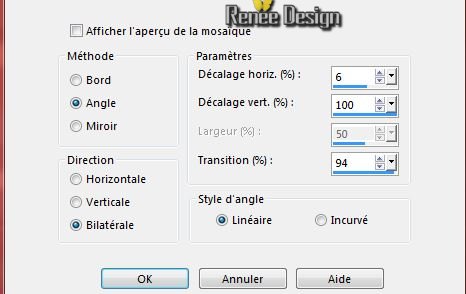
We will decorate our work
59.
Activate the tube ‘’
story_for_girl_imagepourdeco’’
Select the elements , place them one by one on your work
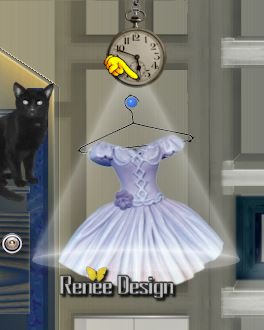
60. Activate and paste as a new layer on your working area and move :
- Porte
transparente’
-
chat_noir
-
horloge
-
cintre
-
robe
-but you can create others if you wish (see what is best for you ! )
(Ore take mine ''pourdeco'')
-
Everything is in the right place?
61. Close bottom layer but keep top layer active
62.
Layers - Merge - Merge layers visibly
Open the bottom layer
-
-Activate the top of the layer palette
63. Activate the tube ‘’cadre_spot_story_girl''
- Edit/copy -Edit/paste as a new Layer and place
64. Layers- New raster layer
65.
Selections - load/save selection - load selection from disk and choose my selection:
‘’story_for_girls_6’
66. Reset the settings of your paint pot to 100% Activate Flood Fill Tool and fill the selection with the foreground color white (2 to 3 clicks into selection )
Selections-Deselect All
67. Activate Eraser Tool: We will remove the remains of the white parts from the clock as shown in the example below
68. Activate the tube ‘’ JHanna_203_c.nicoletta’’
- Image
Resize with 70 %
- Edit/copy -Edit/paste as a new Layer -Move tool / place your tube on the left side of your image
69.
Effects-Plugins- –EyeCandy 5 –Impact –Perspective
shadow –Tab-Settings-User Settings and choose my Preset ‘’
story_girl_perspective_shadow’’
70. Image - Add borders-Symmetric checked:1 pixel Background color
71. Image - Add borders-Symmetric checked:65 pixels White
72. Image - Add borders-Symmetric checked:1 pixel Background color
73. Image - Add borders-Symmetric checked:10 pixel White
74. Image - Add borders-Symmetric checked:1 pixel Background color
75. Activate the Magic Wand and select the white border of 65 pixels
/Fill with color
#203960
76.
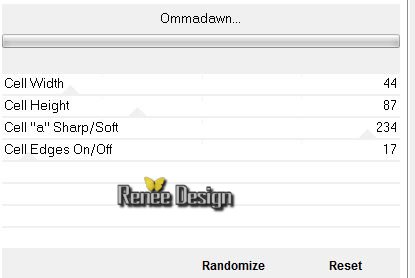
Effectst-Plugins-Unlimited 2.0 – Filter Factory Gallery
V-Ommadawn with these settings as shown below
77.
Selections- Promote selection to layer
78. Layer Palette: Set the Blend mode to Screen
79. Effects-3D Effects- Drop Shadow with these settings as shown below
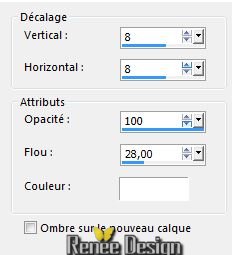
80. Repeat Drop Shadow -negative H-8 and V -8
Selections-Deselect All
81. Open the text / Edit/copy-Edit paste as a new layer on your working area .Ore write your own text
82. Image
Resize with 995 pixels Width
Save as JPG
I hope you enjoyed this lesson
Renée
This lesson was written by Renée 20/03/2015
Placing
2015
Any resemblance with an existing lesson is merely a coincidence *
* Don't forget to thank the people who work for us and with us. I named the tubeurs - Testers and the translators.
Thanks Renée.
*
|