|
Let's start the lesson.
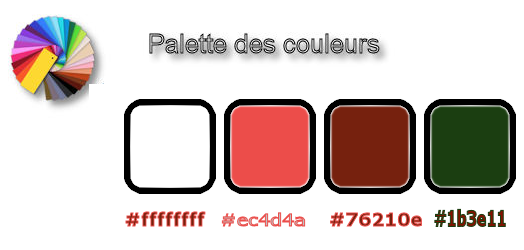
Used Colors
- Preparation - Color Palette: Set your foreground color to #ffffff -Set your background color to #76210e
1.
Open the Image ’’Fond_sur_les_toits’’- Window - Duplicate (or shift+D) - Close the original and proceed on the copy -Promote Background Layer = Raster 1
2.
Open the tube ‘’
Sur_les_toits_Image_ville ‘’
-
Edit - Copy- Activate your work -Edit - Paste as a new layer.
3.
Effects- Image Effects- Offset with these settings: H = - 36 and V =
141
4.
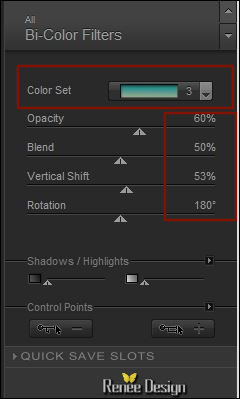
Effects –Plugins -Nick color effex Pro .3/Bi-Color
Effex / Color set / Cool warm 3
5.
Layers-Properties-Set the Blend Mode to " Hard Light "
6.
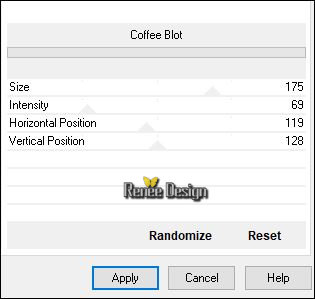
Effects -Plugins- Unlimited – Photo Agin Kit – Coffee
Blot
7. Layers- New Raster Layer
8. Activate the Flood Fill Tool  Change the opacity of the color to 60% / Fill the layer with the foreground color Change the opacity of the color to 60% / Fill the layer with the foreground color
9. Layers- New Maske Layer From Image and select Mask:
''Renee_masque_Sur_toits""
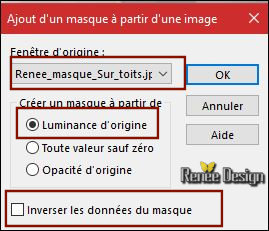
- Layers- Merge- Merge Group
10.
Selections –load/save selection –load selection from disc and select my selection: ‘’ Sur_toits_1’’
DELETE
Selections- DESELECT All
11. Open the
tube ‘’ Sur_les_toits_Image_nuages.png’’
- Edit - Copy- Activate your work -Edit - Paste as a new layer
- Move Tool / place your tube to the top of your image
12. Layers- Duplicate
13. Effects
- Distortion Effects – Pixelate use the settings below
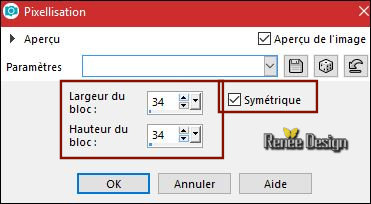
14. Effects-
Distortion Effects – Wave with these settings
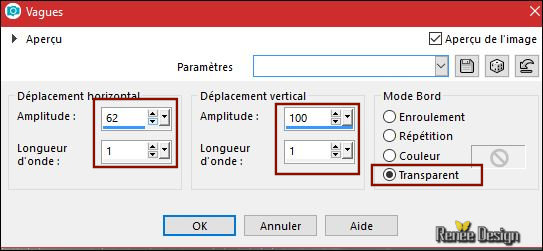
15. Effects- Edge Effects- Enhance
16. Layers- Arrange- Move Down
17.
Layers-Properties-Set the Blend Mode to" Dodge "-Set the Opacity of this layer to 51%
-In the Layer-Palette-Make Raster 3
active (cloud layer )
18.
Activate Selection Tool -Custom Selection (S) -Rectangle with these settings
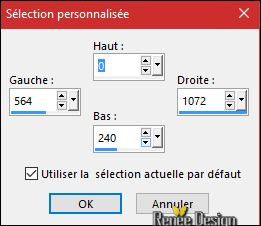
19. Effects- Illumination Effects-Lights- / color #f35829/ select my file -Preset
‘’Parametres_Eclairage –sur_toits’'( Color according to your choice )
(Copy the preset in the preset folder of psp)
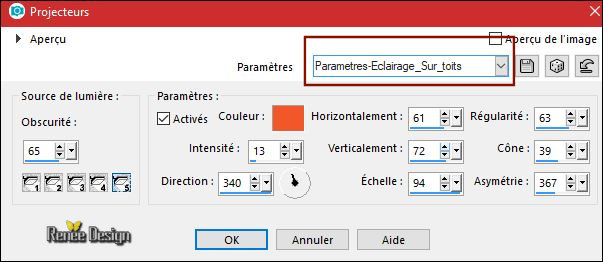
Selections- Deselect
20.
Set the Opacity of this layer to 83%
21. Effects-Edge Effects- Enhance
- Layers- Merge- Merge Visible
- Color Palette: Set your foreground color to #ec4d4a -Set your background color to
#76210e
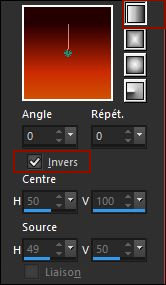
- Prepare a foreground/background radial gradient configured like this
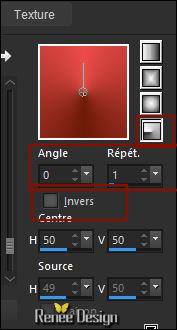
22. Layers- New Raster Layer
23. Activate the Flood Fill Tool  Change the opacity of the color to 100% – Fill the Layer with the gradient Change the opacity of the color to 100% – Fill the Layer with the gradient
24.
Adjust- Blur- Gaussian Blur: Radius : 65
25. Effects
– Plugins – L & K’s - Zitah ( patched into the zipfile)
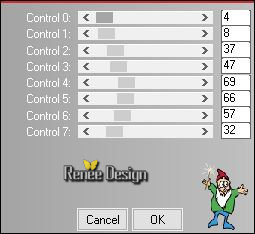
26. Effects
– Plugins – Redfield – Ripples magic use the settings below ( Galaxy)
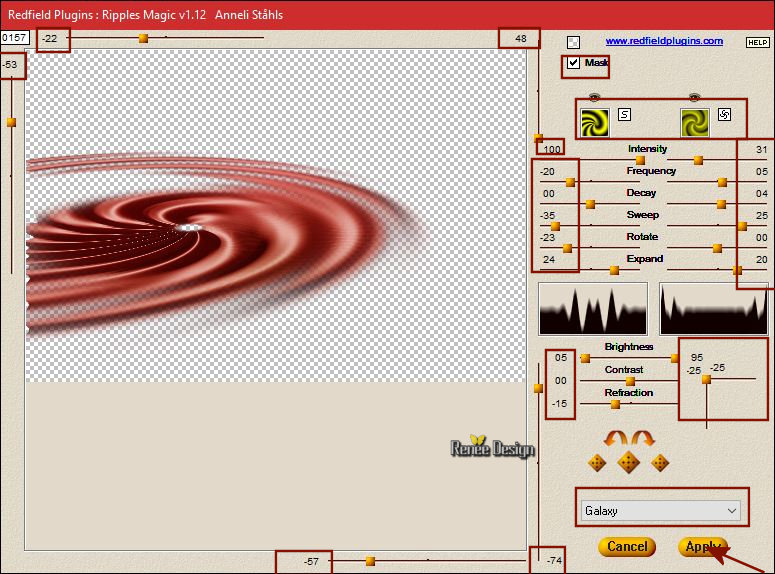
27.
Layers-Properties-Set the Blend Mode to " Lighten"
28.
Effects –Plugins-Unlimited – It@lian Editors Effect– Effetto Fantasma
41/41
29. Layers- New Raster Layer
30.
Selections –load/save selection –load selection from disc and select my selection: ‘’ Sur_toits_2’’
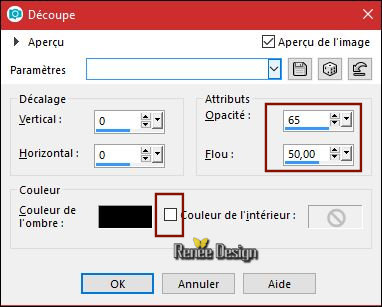
31. Effects – 3D Effects –Cutout use the settings below
Selections- Deselect All
32. Effects- Image Effects- Offset with these settings: H = -36 and V = 111
33.
Set the Opacity of this layer to 83%
34. Open the tube ‘’ Sur_les_toits_Image_cadran.png’’
- Edit - Copy- Activate your work -Edit - Paste as a new layer
- Move tool / place your tube on the left side of your image
35.
Layers-Properties-Set the Blend Mode to" Multiply "-Set the Opacity of this layer to
63%
36.Open the tube’’ Renee_tube_Sur_les_toits.pspimage’’
- Edit - Copy- Activate your work -Edit - Paste as a new layer (do not move it is in the right place )
Activate your Pick Tool (K) stretch on the left side that it fits (see finished image)
37. Layers- New Raster Layer
38.
Selections –load/save selection –load selection from disc and select my selection: ‘’ Sur_toits_3’’
39. Color Palette: Set your foreground color to #ffffff-Activate the Flood Fill Tool  and fill the selection with the foreground color #ffffff ( click 2 or 3 times ) and fill the selection with the foreground color #ffffff ( click 2 or 3 times )
Selections- Deselect All
40.
Layers-Properties-Set the Blend Mode to" Screen"
-In the Layer-Palette-Make Raster 1 active
41. Open the tube ‘’ Sur_les_toits_Image_chateau.png’’
- Edit - Copy- Activate your work -Edit - Paste as a new layer
42. Effects- Image Effects- Offset with these settings: H = - 399 and V = - 13
43.
Layers-Properties-Set the Blend Mode to" Hard Light "-Set the Opacity of this layer to 75%
- Activate the top of the layer palette
44. Open the tube ‘’ Sur_les_toits_Image_etoiles.png’’
- Edit - Copy- Activate your work -Edit - Paste as a new layer
45. Effects- Image Effects- Offset with these settings: H = 0 and V = 269
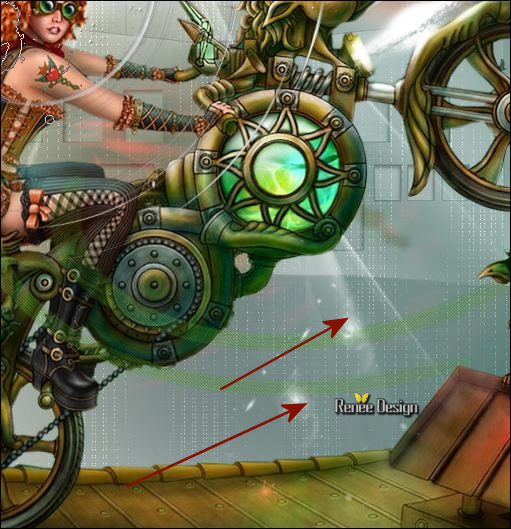
- Your work and Layer Palette look like this now-You should have this result
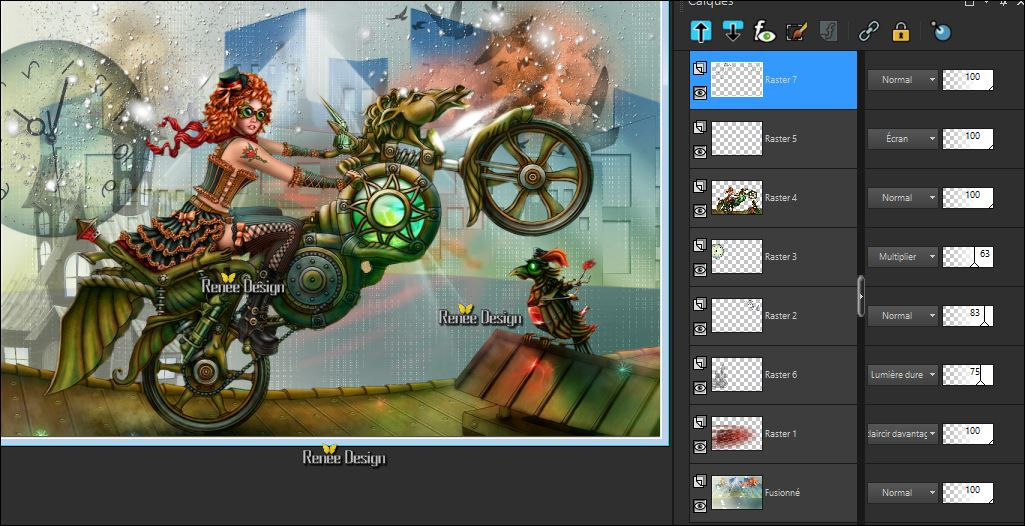
46. Layers- Duplicate
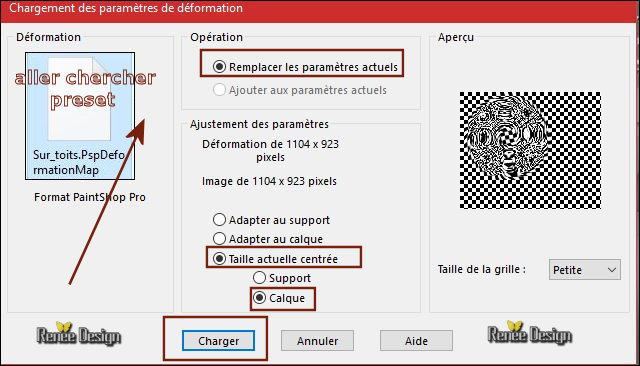
47. Activate Warp Brush Tool 
- Copy the Deformations files‘’Sur_toits.PspDeformationMap’’ in the Deformation Folder of PSP in the Deformation Folder of PSP
- Activate Warp Brush /Open Deformation Map >>>as shown in the example below 
- and the window opens /you load it now by clicking on the Folder /choose my file in the list and Load
- (If you do not have this effect? The effect is included with the material (effets
_pinceau_deformant.png)

48. Open the tube ‘’ Sur_les_toits_Image_demi_terre.png’’
-Edit - Copy- Activate your work -Edit - Paste as a new layer
- Move Tool / place your tube to the top of your image -Attention !!move it in the right place
(see finished image)
49. Effects
–Plugins- Unlimited – VideoRave-YUV Intensify /with the default settings
50. Open the tube ‘’ Sur_les_toits_Image_rouge.png’’
- Edit - Copy- Activate your work -Edit - Paste as a new layer
- Move Tool/place your tube to the right side behind the bird
- Color-Palette:Foreground material into gradient and select ‘’
@nn_010914_GR_Autumn_tdstudio’’
-
Prepare a linear gradient configured like this

51.
Layers-New Raster Layer
52.
Selections –load/save selection –load selection from disc and select my selection: ‘’ Sur_toits_4’’
53. Activate Flood Fill Tool  and fill the selection with the gradient and fill the selection with the gradient
Selections- Deselect All
54. Effects
– Plugins – EyeCandy 5 Impact – Glass-in the settings tab, choose my preset click on the Preset
‘’Sur¨toits_Glass’’
55. Layers- New Raster Layer
56.
Selections –load/save selection –load selection from disc and select my selection: ‘’ Sur_toits_5’’
- Color Palette: Set your foreground color to
#1b3e11
57. Activate the Flood Fill Tool  fill the selection with the foreground color fill the selection with the foreground color
58. Adjust- Blur- Gaussian Blur: Radius: 48
Selections- Deselect All
59. Effects- Distortion Effects -Twirl 300
60. Effects
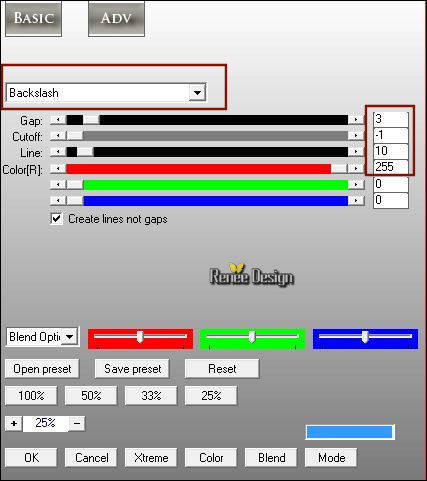
–Plugins – AP[Lines] Silverling use the settings below

61. Effects- Edge Effects- Enhance More
62. Layers- New Raster Layer
63. Activate your Brush Tool and choose the brush"’’Renee_brushes_Sur_toits’’ use the settings below
Put your Brush in your Brush Folder of PSP
Do you have a problem with the brush?
- Open the Brush ‘’
Renee_brushes_Sur_toits.png’’ in your psp
- File- Export-Custom Brush and give it a name

64. Set the foreground color to #ffffff-
Place the brush with foregroundcolor #ffffff
Apply 2 times as shown in the example below

65. Effects- Edge Effects- Enhance More
66.
Layers-Properties-Set the Blend Mode to " Overlay "
67. Image - Add borders-Symmetric checked 1 Pixel #1b3e11 (green)
68. Image - Add borders-Symmetric checked 20 Pixels #ffffff
69. Image - Add borders-Symmetric checked 1 Pixel # 76210e (red)
70. Image - Add borders-Symmetric checked 55 Pixels #ffffff
71.
Selections- Select All/Selections -Modify-Contract with 20 pixels
72. Effects – 3D Effects- Drop Shadow with these settings: 0/0/80/45 black
73.
Selections – Invert
74. Effects
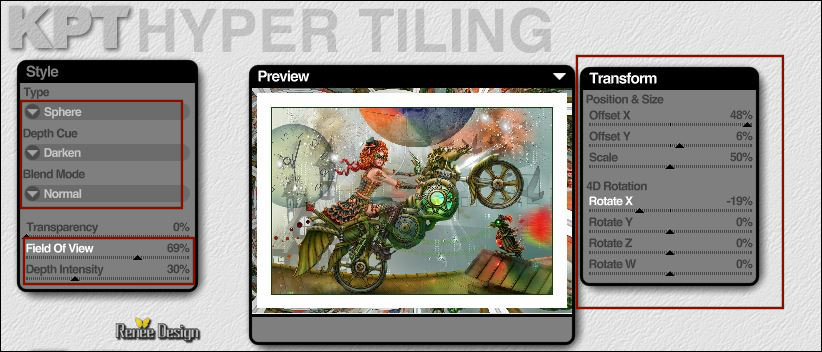
–Plugins – KPT Effect - KPT Hyper Tiling use the settings below

75. Adjust- Blur- Gaussian Blur: Radius: 28
76. Effects – 3D Effects- Drop Shadow with the same settings
Selections- Deselect All
77. Open the tube with the "text" -Edit - Copy- Activate your work -Edit - paste as a new layer and move
78. Image
Resize to 1005 Pixels width.
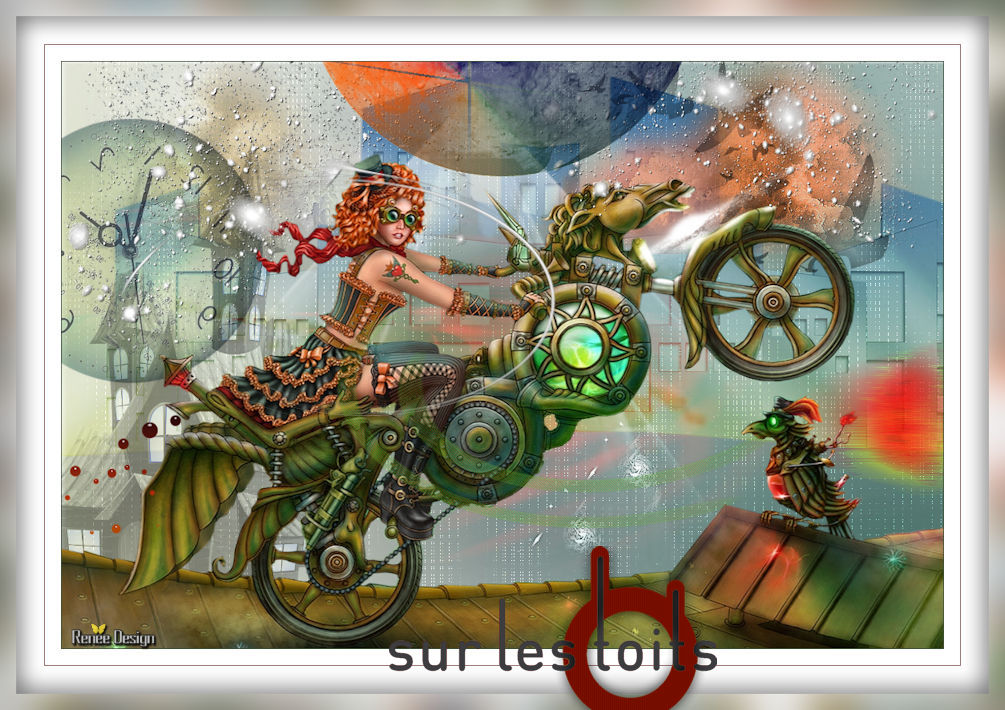
Save as JPG
I hope you enjoyed this lesson
Renée
This lesson was written by Renée 29/09/2017
Edited and Update
2017
*
Any resemblance with an existing lesson is a coincidence
* Do not forget to thank the people who work with us and for us I have appointed the tubeurs and translators
Thanks
*
| 
 Translations




 If a plugin supplied appears with this icon it must necessarily be imported into Unlimited *


 in the Deformation Folder of PSP
