|
Let's start the lesson.
Surprenante Basse cour
-
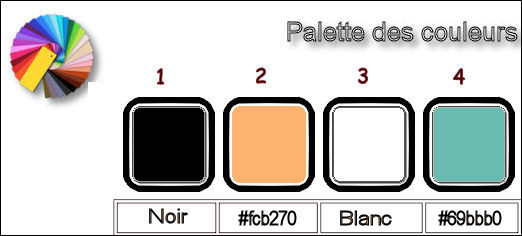
Preparation/ Material Properties: Set your foreground color to #ffffff=Number 3 - Set your background color to #000000 = Number 1

1.
Open the Image ‘’Fond_Surprenante_Basse cour’’ – Window - Duplicate (or shift+D) - Close the original and proceed on the copy -Promote Background Layer =Raster 1
2.
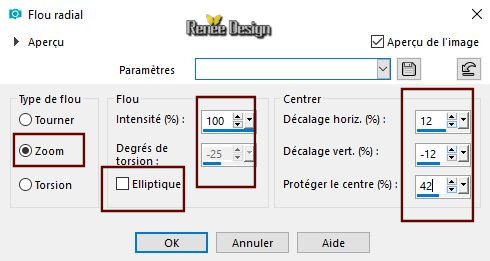
Adjust- Blur- Radial Blur use the settings below
3.
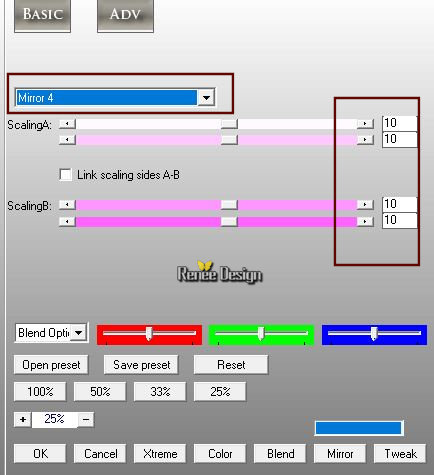
Effects –Plugins – AP [Utility] Utility
Reflections with these settings
4.
Layers- New Raster Layer
5.
Activate Flood Fill Tool
 - Flood Fill the selection with #ffffff - Flood Fill the selection with #ffffff
6.
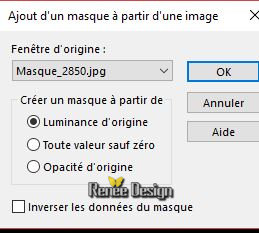
Layers- New Mask Layer- From Image and select Mask
‘’Masque_2850’’
-
Layers- Merge- Merge- Group
7.
Effects –3D- Effects – Drop Shadow with these settings : 0/5/100/1 color black
8.
Effects –Plugins – Mura’s Meister – Perspective
Tilling use the settings below
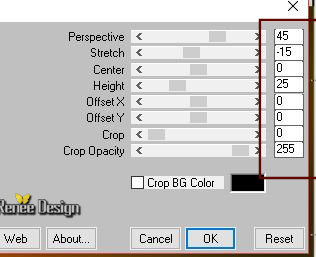
9.
Effects – Plugins – Nick software Color Efex Pro
3 - BI- Color Filters– Color set = Moss 3
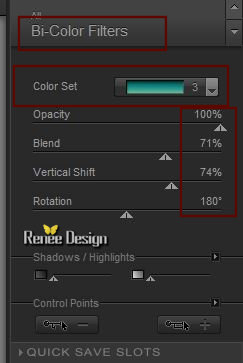
10.
Selections –load/save selection –load selection from disc and select my selection: ‘’basse_cour’’
11.
Effects-Texture Effects-Weave use the settings below - Colors
#372d0c
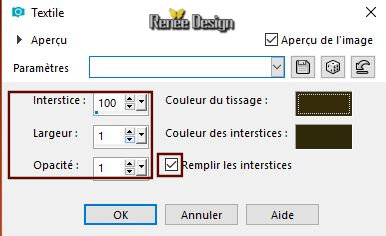
Selections- Deselect All
12.
Eraser Tool - Erase carefully the small horizontal lines as shown in the screen below

-
Color Palette: Set your foreground color to #000000=Number 1 - Set your background color to #fcb270 = Number 2
–
Prepare a sunburst gradient configured like this.
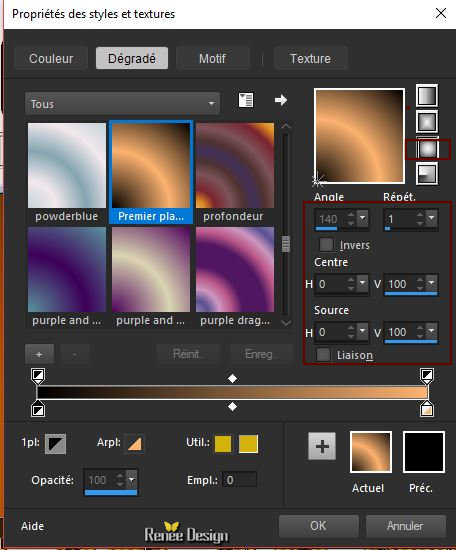
- Activate the bottom of the Layer Palette =Raster 1
13.
Layers- New Raster Layer
14.
Activate Flood Fill Tool
 –
Flood Fill the Layer with the gradient –
Flood Fill the Layer with the gradient
15.
Effects - Plugins -Unlimited 2.0 - &<Bkg Kaleidoscope>- Cake Mix with these settings 169/169
16.
Effects -Plugins -Unlimited 2.0 - It@lian Editors Effect -
Effetto Fantasma 10 /5
17.
Effects – Distortion Effects- Twirl- Degrees 85
-
Repeat- Twirl with the same settings
18.
Layers- New Raster Layer
19.
Activate Flood Fill Tool
 –
Flood Fill the Layer with the gradient –
Flood Fill the Layer with the gradient
20.
Effects- Plugins -Unlimited 2.0 - Filter Factory Gallery H –
Jumble : 255/32
21.
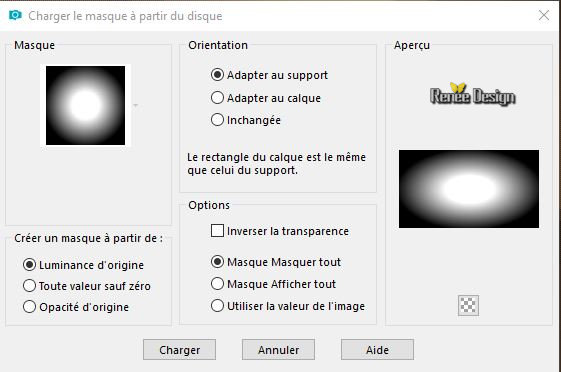
Layers- Load/Save mask-Load Mask from Disk and select Mask ‘’
0masque_2020’’
-
Layers- Merge- Merge- Group
22.
Layers-Properties-Set the Blend Mode to " Hard Light "
22.
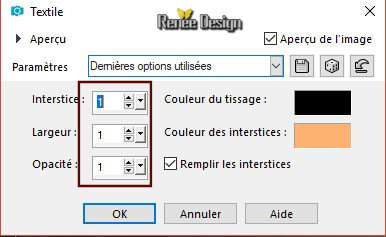
Effects-Texture Effects-Weave use the settings below (FG-BG color )
23.
Effects- Image Effects- Seamless Tiling using the default settings
Color Palette-
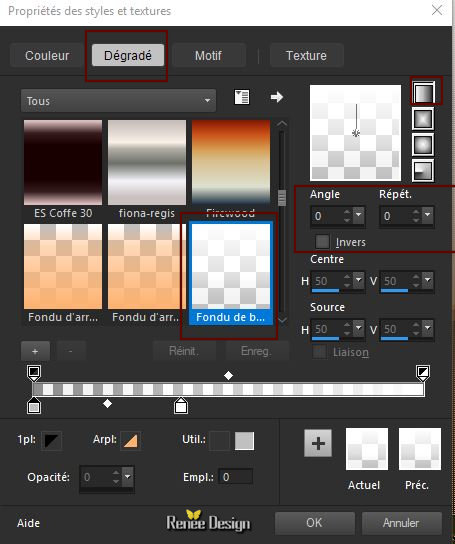
Change Foreground Material into gradient and select ''Fading White ''( Corel_06_028)- Prepare a Linear gradient configured like this.
24.
Layers- New Raster Layer
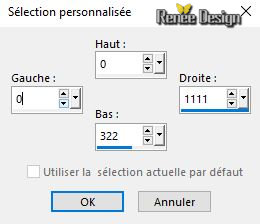
25. Activate Selection Tool -Custom Selection (S) -Rectangle with these settings
26.
Activate Flood Fill Tool
 -Flood Fill the selection with the gradient -Flood Fill the selection with the gradient
Selections- Deselect All
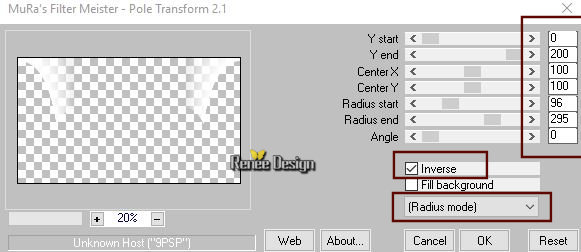
27.
Effects –Plugins – Mura’s Meister - Pole
Transform use the settings below
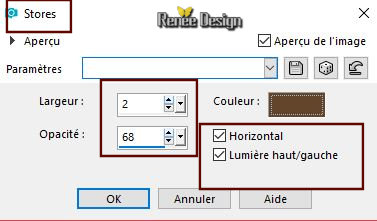
28.
Effects- Texture-Effects- Blinds with these settings- Color #62462b
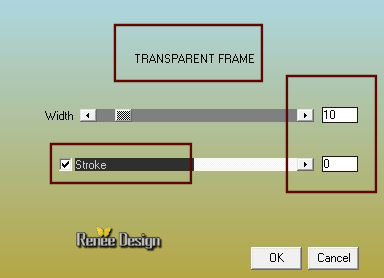
29.
Effects –Plugins – AAA Frames – Transparent
Frame
30.
Effects –Plugins -Unlimited 2.0 - Filter Factory Gallery A -
Zoom Out with these settings : 128/128/255/150
-
Repeat this Filter with the same settings
31.
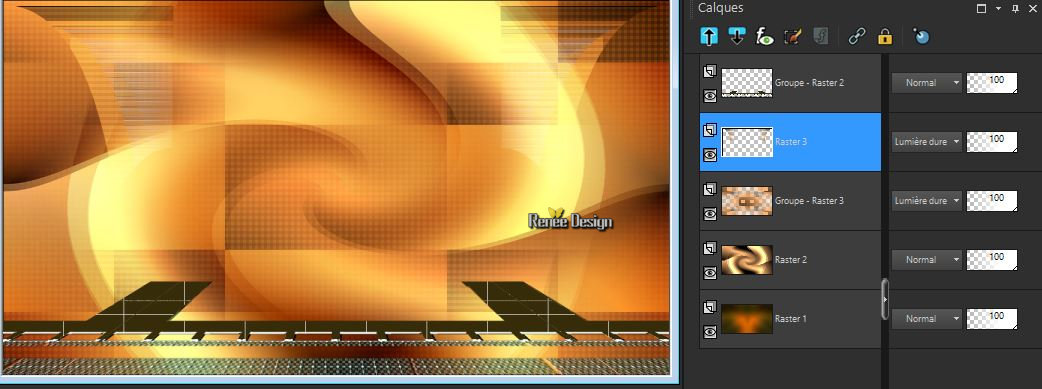
Layers-Properties-Set the Blend Mode to " Hard Light "
-Your work look like this now-You should have this result
32.
Layers- New Raster Layer
33.
Activate Flood Fill Tool - Flood Fill the Layer with the gradient
34.
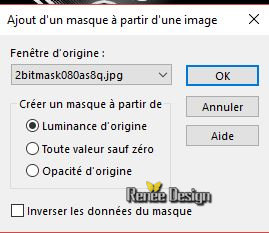
Layers- New Mask Layer from Image and select Mask
‘’
2bitmask080as8q.jpg’’
-
Layers- Merge- Merge Group
35.
Layers-Properties-Set the Blend Mode to " Soft Light "
36.
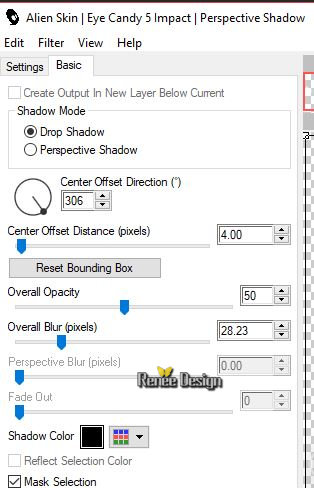
Effects –Plugins-– Eye Candy 5 Impact –
Perspective Shadow use the settings below
-
Stay on this Layer-Group of Raster 4
37.
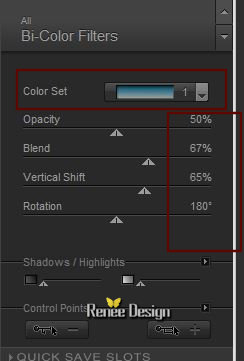
Effects – Plugins – Nick Color Efex pro .3-
Bi_Color Filters – Cool warm 1
(Adapt according to your colors if you do not use the same colors as me )
- In the Layer Palette-Make -Group of - Raster 3 active
38.
Activate the tube ‘’
Basse_cour_Image 2.png’’
-
Edit - Copy- Activate your work -Edit - Paste as a new layer
-
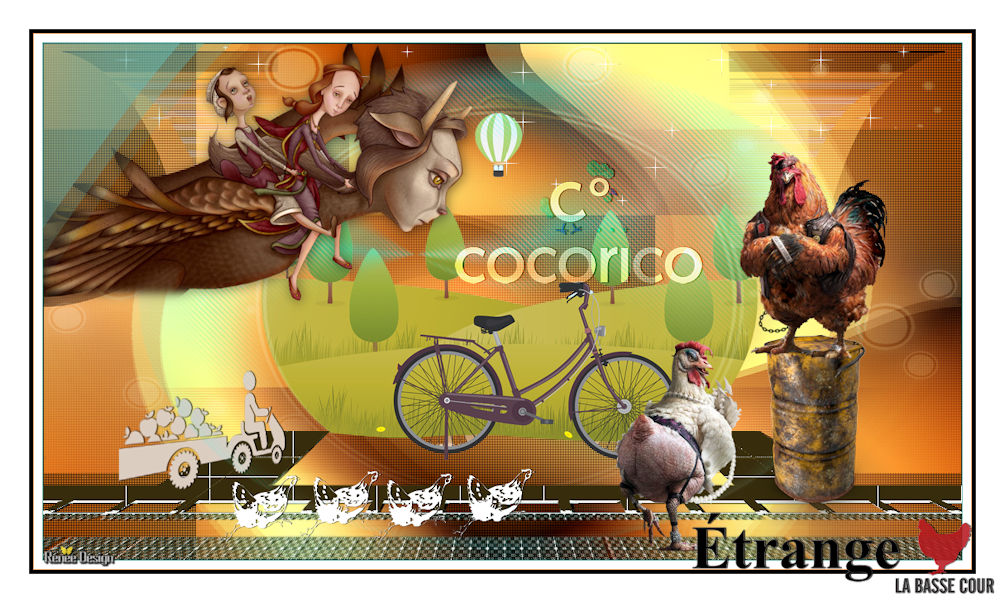
Activate your Move Tool (M) move it in the right place (see finished image )
- To replace the top of the layer-palette
39.
Activate the tube ‘’
Basse_cour_Image 1.png’’
-
Edit - Copy- Activate your work -Edit - Paste as a new layer
-
Activate your Move Tool (M) place the tube at the bottom left side
40.
Layers- New Raster Layer
-
Color Palette:Set your Foreground Color to:#ffffff
41.Activate
Flood Fill Tool – Opacity 75% – Flood Fill the Layer with #ffffff
42.
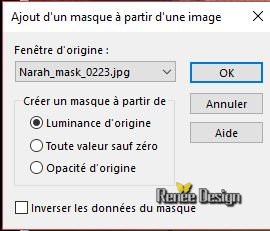
Layers- New Mask Layer from Image and select Mask
Narah_mask_0223.jpg’’
-
Layers- Merge- Merge Group
43.
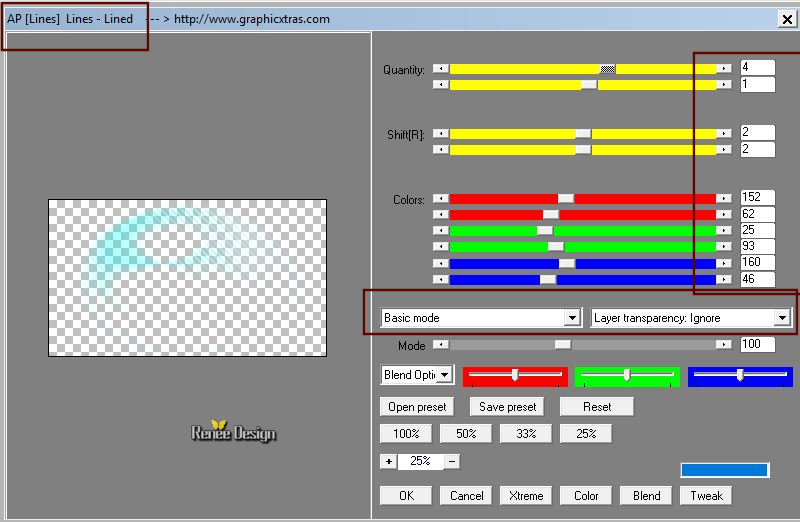
Effects – Plugins – AP [lines] - Lined with these settings
-
Layers-Properties-Set the Blend Mode to " Normal "- Lower the Opacity of the layer to 57%
44.
Layers- New Raster Layer
45.
Activate Flood Fill Tool
 –
Opacity 100% – Flood Fill the Layer with #000000 –
Opacity 100% – Flood Fill the Layer with #000000
46.
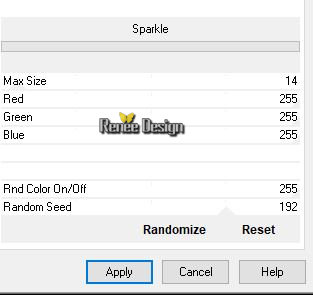
Effects –Plugins - Unlimited – VM Natural – Sparkle use the settings below
47.
Effects –Plugins– Transparency – Eliminate
Black
48.
Selections –load/save selection –load selection from disc and select my selection: ‘’basse_cour_1’’
49.
Selections- Invert
DELETE

Selections- Deselect All
50.
Effects- Edge Effects- Enhance
51.Activate the tube ‘’
Renee_TUBES_YUsta.pspimage’’
-
Image - Resize to 60%
-
Edit - Copy- Activate your work -Edit - Paste as a new layer
-
Activate your Move Tool (M) place the tube at the top left side
52.
Activate the tube ‘’
Renee_TUBES_Tonneau.pspimage’’
-
Edit - Copy- Activate your work -Edit - Paste as a new layer
52a.
Effects- Image Effects- Offset with these settings: H = 379 and V =
-156
53.
Effects -Plugins – Eyecandy 5 Impact –
Perspective Shadow use the settings below
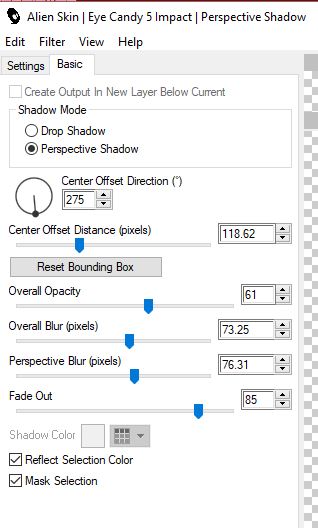
54.
Activate the tube ‘’
Renee_TUBES_Poule.pspimage’’
-
Image Resize to 45%
-
Edit - Copy- Activate your work -Edit - Paste as a new layer
Place the tube on the barrel
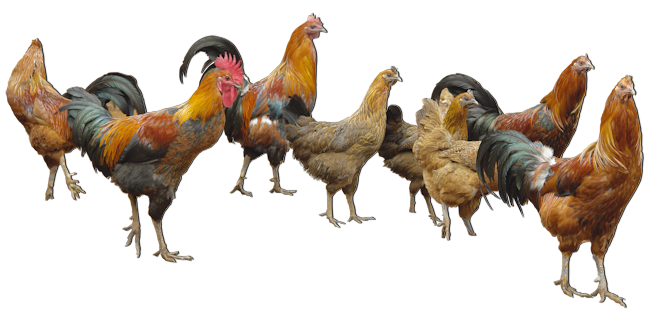
55.
Activate the tube ‘’
Renee_TUBES_Poule_Chic.pspimage’’
-
Image Resize to 45%
-
Edit - Copy- Activate your work -Edit - Paste as a new layer
-
Activate your Move Tool (M) move it in the right place (see finished image )
56.
Layers- New Raster Layer
57.
Selections –load/save selection –load selection from disc and select my selection: ‘’basse_cour_3’’
58.
Activate Flood Fill Tool
 –
Flood Fill the selection with #ffffff –
Flood Fill the selection with #ffffff
Selections- Deselect All
59.
Effects – 3D-Effects- Drop Shadow with these settings: 0/1/100/1 color black
-
Color Palette: Set your FG-Color to #69bbb0=Number 4
60.
Layers- New Raster Layer
61.
Selections –load/save selection –load selection from disc and select my selection: ‘’basse_cour_4’’
62.
Activate Flood Fill Tool
 -Flood Fill the selection with the FG-Color
( 2 clicks) -Flood Fill the selection with the FG-Color
( 2 clicks)
Selections- Deselect All
63.
Activate the tube ‘’
Basse_cour_Image 3.png’ Edit - Copy- Activate your work -Edit - Paste as a new layer and move
64.
Layers-Properties-Set the Blend Mode to " Overlay "
65.
Image - Add borders-Symmetric checked 1 Pixel Color # 69bbb0 = Number 4
66.
Image - Add borders-Symmetric checked 10 Pixels Color #ffffff =Number 3
67.
Image - Add borders-Symmetric checked 1 Pixel Color #fcb270=Number 2
68.
Image - Add borders-Symmetric checked 5 Pixels Color #000000= Number 1
69.
Image - Add borders-Symmetric checked 35 Pixels Color #ffffff =Number 3
70. Activate the "titre"-Edit - Copy- Activate your work -Edit - Paste as a new layer and move /Ore write your own text
71.
Layers- Merge- Merge All (flatten)
72.
Image Resize to 1005 pixels Width
Save as JPG
I hope you enjoyed this lesson
Renée
This lesson was written by Renée 25 June 2018
Edited and Update
2018
*
Any resemblance with an existing lesson is a coincidence
*
Do not forget to thank the people who work with us and for us I have appointed the tubeurs and translators
Thanks
*
|
 Translations


