|
Let's start the lesson
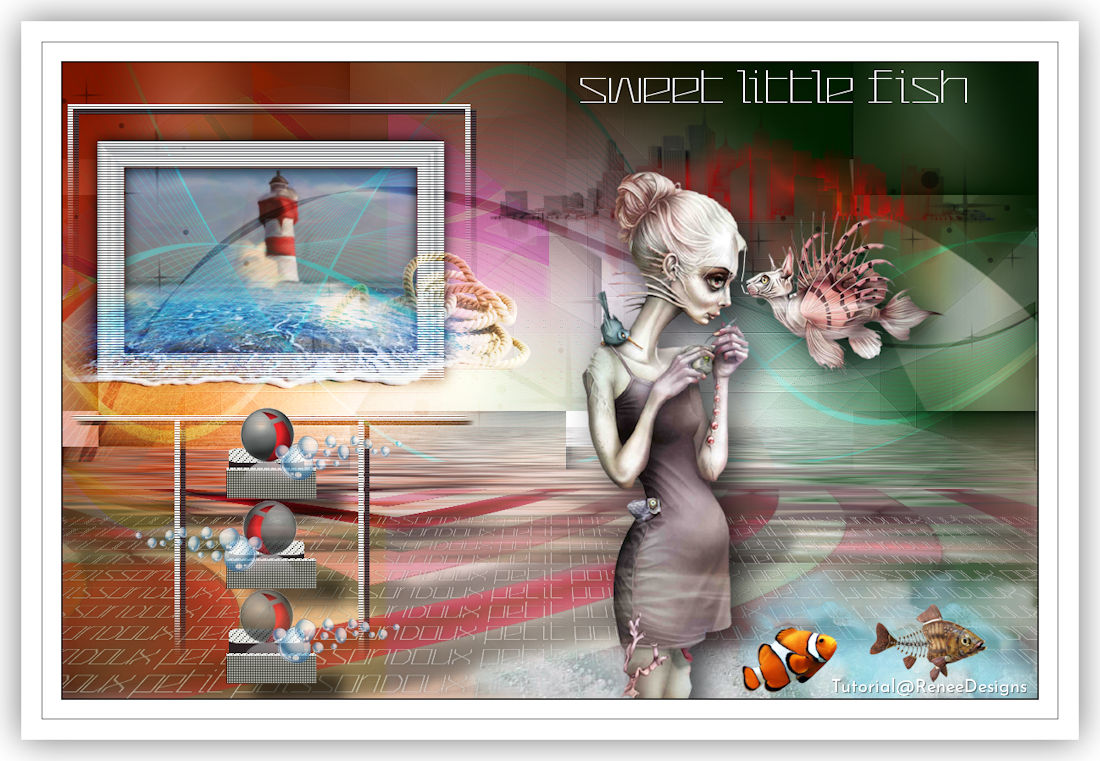
Sweet little fish -
Doux petit poisson
1.
Open the Background image – ‘’Fond-Sweet-little-fish’’
– Promote Background Layer =Raster 1
2. Layers- New Raster Layer
- Preparation
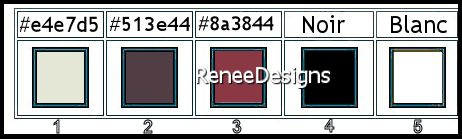
-Material Properties: Set your foreground color to color #e4e7d5 = 1- Set your background color to color #513e44 =
2
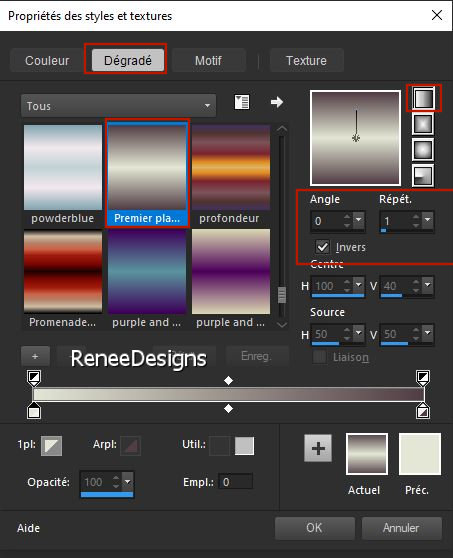
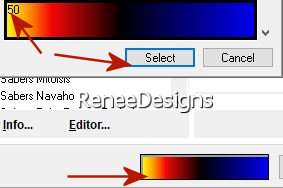
- Color Palette: Set your Foregroundcolor to Foreground/Background Gradient-Style Linear configured like this
3. Activate Flood Fill Tool
 -
Fill the layer with the gradient -
Fill the layer with the gradient
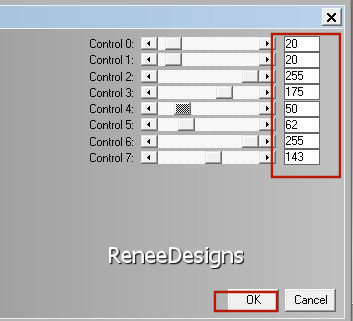
4. Effects –Plugins-
Unlimited 2.0 – Toadies – Weaver with these settings: 147/147/222
5. Effects – Edge Effects – Enhance
6. Effects – Plugins – L &K’s – Adonis use the settings below
7. Effects –Plugins-
Unlimited 2.0- Simple – Blintz
- Repeat: Effects –Plugins-
Unlimited 2.0- Simple – Blintz
8. Effects – Plugins – Toadies – What are you with these settings :225/0
9. Effects –Plugins-
Unlimited 2.0 – Simple - 4 Way Average
10. Layers-Properties-Set the Blend Mode to " Luminance Legacy "
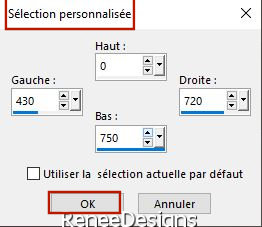
11. Activate Selection Tool -Custom Selection (S) -Rectangle with these settings
12. Selections- Promote selection to layer
13. Effects – 3D-Effects - Drop Shadow with these settings: 0/0/40/20 Color Black
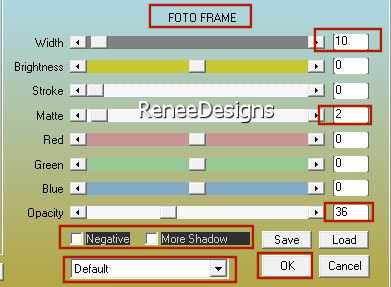
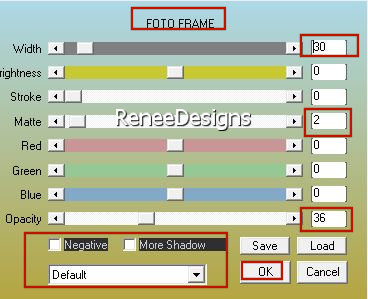
14. Effects- Plugins –AAA Frame – Foto Frame use the settings below
15. Effects -Plugins– Carolaine & Sensibilty- CS-Reflection use the settings below


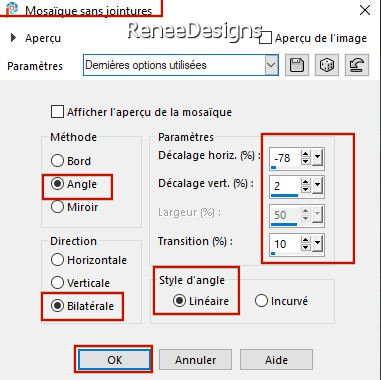
16. Effects – Image Effects - Seamless Tiling use the settings below

17.
Effects -Plugins- Unlimited 2.0- Two Moon - FadeSpookSpot...with these settings:
255/147/158
18. Repeat:
Effects -Plugins- Unlimited 2.0- Two Moon - FadeSpookSpot...with these settings: 255/71/113
19. Layers-Properties-Set the Blend Mode to "Multiply "
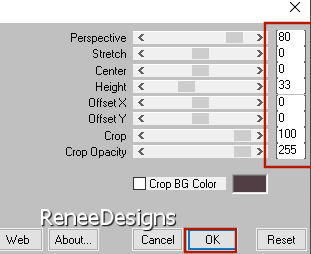
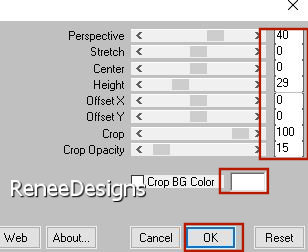
20. Effects –Plugins - Mura’s Meister – Perspective Tiling use the settings below
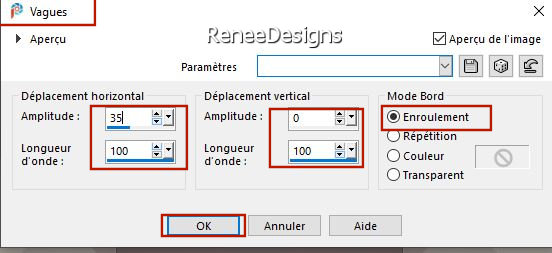
21. Effects- Distortion Effects – Wave use the settings below
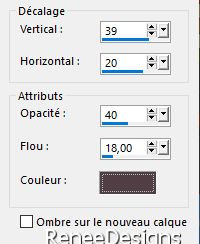
22. Effects- 3D Effects- Drop Shadow use the settings below -Color #513e44 =2
- In the layers palette- activate Raster 2
23. Effects-Plugins-Unlimited 2.0- Filter Factory Gallery
A -
Marble Madness One with these settings:126/0/0/0
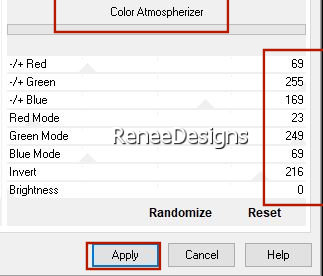
24. Effects-Plugins-Unlimited 2.0-
&<Sandflower Specials°v° > - Color Atmospherizer use the settings below
25. Effects -Plugins- Unlimited 2.0 - RCS Filter Pak
1.0 -
RCS TripleExposure : 255
26. Effects – Edge Effects-Enhance
27. Layers-Properties-Set the Blend Mode to " Normal "
- In the layers palette- activate Raster 1
28. Layers Arrange-Bring to Top
29. Effects – Plugins- AAA Frame – Foto frame use the settings below
30. Effects –Plugins- Unlimited 2.0 - ICNET-Filters
-
Buttons & Frames- Rectangular Button using the default settings
31. Effects -Plugins-
Unlimited 2.0– Simple – Blintz
- Repeat: Effects -Plugins-
Unlimited 2.0– Simple – Blintz
32. Layers- Duplicate /Reduce the Opacity of this layer to 60
33.Image - Mirror - Mirror Horizontal (Image - Mirror in older versions of PSP)
34. Layers- Merge- Merge Down
35. Effects -Plugins- Unlimited 2.0 -Simple-
Zoom Out and Flip
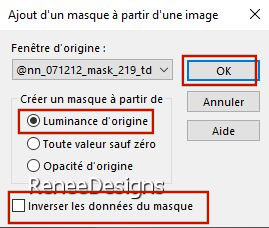
36. Layers- New Mask Layer-From Image and select Mask @nn_071212_mask_219_td
- Layers- Merge-Merge Group
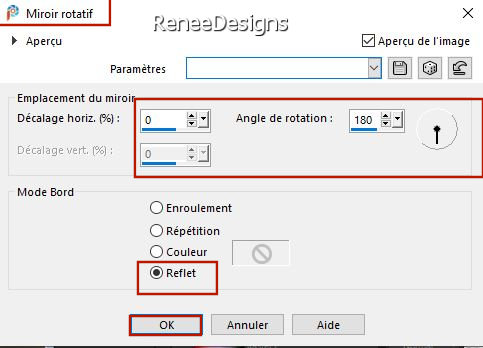
37. Effects – Reflection Effects – Rotating Mirror use the settings below
38. Adjust-Sharpness-Sharpen
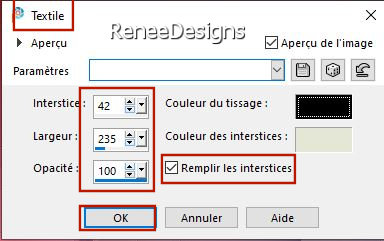
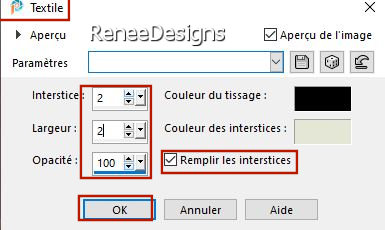
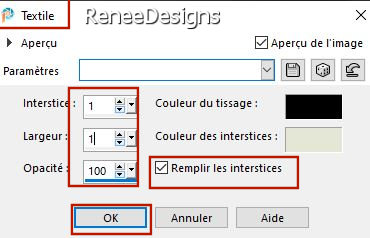
39. Effects – Texture Effects –Weave use the settings below- Colors Black and #e4e7d5= 1
40.
Selections –load/save selection –load selection from disc and select my selection: ‘’
Sweet little fish 1’’
41. Adjust-Blur-Gaussian Blur-Radius 50
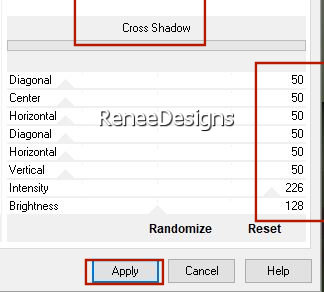
42. Effects -Plugins-
Unlimited 2.0 - Graphics Plus- Cross Shadow use the settings below
- In the layers palette- activate Raster 2
- Do not add a new layer
43.
Selections –load/save selection –load selection from disc and select my selection: ‘’
Sweet little fish 2’’
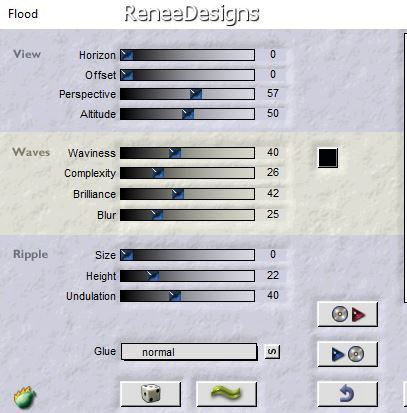
44. Effects –Plugins - Flaming Pear – Flood use the settings below/ Color # 513e44= 2
45. Layers- New Raster Layer
46.
Selections –load/save selection –load selection from disc and select my selection: ‘’
Sweet little fish 3’’
47. Effects-
3D-Effects – Cutout use the settings below - Color White

48. Effects-3D-Effects-Drop Shadow with these settings: 1/0/55/45 Color Black
49. Effects –Plugins-
Unlimited 2.0 - Sapphire Filters 02-
SapphirePlugin_0199...using the default settings
50. Effects – Edge Effects-Enhance
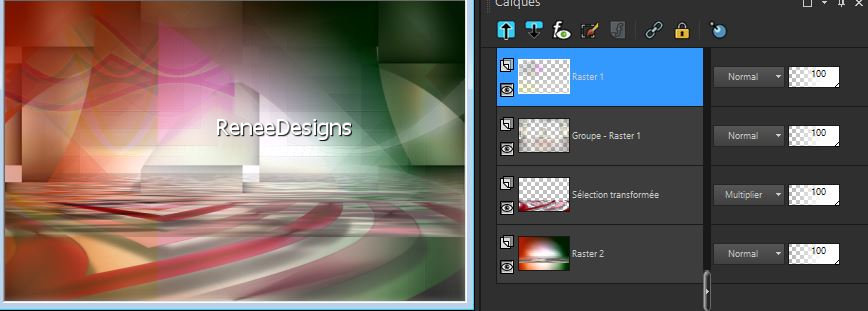
51. Layers- Arrange-Bring to Top
- Your work and layer palette look like this now-You should have this result
52. Layers- New Raster Layer
53.
Selections –load/save selection –load selection from disc and select my selection: ‘’
Sweet little fish 4’’
54. Color Palette-Set the Foreground color to color #ffffff=5
Flood Fill Tool
–
Fill the selection with #ffffff=5
55. Effects – Image Effects - Seamless Tiling use the settings below
56. Layers- Duplicate
57. Image –
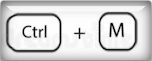
Flip - Flip Horizontal ( if you don't have this function you can do it with the keyboard CTRL+ M)
58. Layers- Merge- Merge Down
59. Effects-3D-Effects-Drop Shadow with these settings: 6/7/100/1 Color #513e44=2
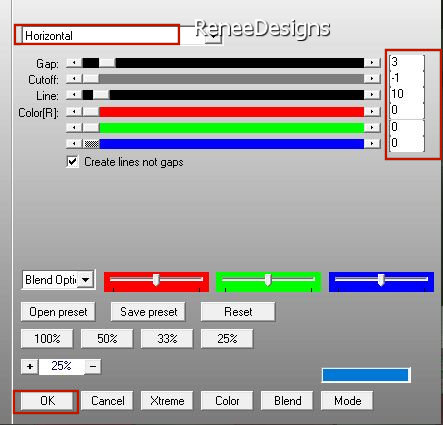
60. Effects – Plugins - AP[Lines] Lines – Silverlining use the settings below
61. Open the Tube Renee-TUBES-Sweet
little fish-Image-Cadre’’ -Edit - Copy- Activate your work -Edit - Paste as a new layer
62. Pick Tool: (K) on your keyboard -Enter these parameters on the toolbar
 41/
92 41/
92
-Press ( M ) to close the Pick Tool
63. Effects-3D-Effects-Drop Shadow with these settings: 0/0/100/25 / Color Black
64. Layers- New Raster Layer
65.
Selections –load/save selection –load selection from disc and select my selection: ‘’
Sweet little fish 5’’
66.
Open the Tube ‘’Renee-TUBES-Sweet little fish-Image-Phare’’ -Edit - Copy- Activate your work -Edit - Paste into selection
67. Layers- Arrange- Move Down
68. Layers-Properties-Reduce the Opacity of this layer to 73%
-To replace the top of the layer-palette
69.
Open the Tube ‘’Renee-TUBES-Sweet
little fish-Image-mer’’ -Edit - Copy- Activate your work -Edit - Paste as a new layer
70. Pick Tool: (K) on your keyboard -Enter these parameters on the toolbar
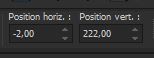 -2
/ 222 -2
/ 222
Press ( M ) to close the Pick Tool
71. Layers-Properties-Change the Blend Mode to " Hard Light "
72. Layers- New Raster Layer
73.
Selections –load/save selection –load selection from disc and select my selection: ‘’
Sweet little fish 6’’
74. Activate Flood Fill Tool
–
Fill the selection with the Fore ground color #ffffff=5
75. Effects – Texture Effects –Weave use the settings below- Colors Black and #e4e7d5= 1
76.
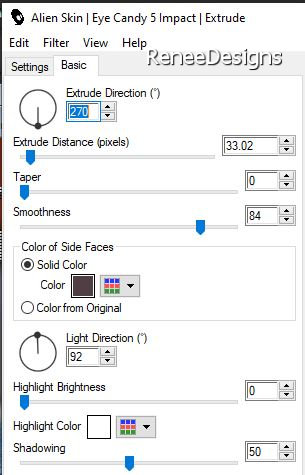
Effects - Plugins - Alien Skin EyeCandy 5 -
Impact - Extrude -Tab-Settings-User Settings and select my file–Preset : ‘’Sweet
little fish – Extrude’’
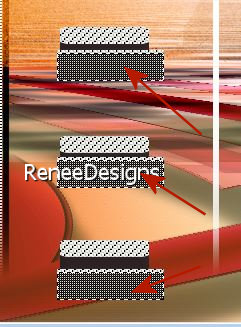
77. Activate the Magic Wand with these settings- Select these 3 rectangles

78. Effects – Texture Effects –Weave use the settings below- Colors Black and #e4e7d5= 1
79. Effects-3D-Effects-Drop Shadow with these settings: 21/32/60/25 Color Black
80. Activate the Tube
‘’ Renee-TUBES-Sweet little fish-Image-Boule-Bulles’’
-There are 2 items on this tube
- Place on the layer = ''Boule'' of the Tube
- Edit - Copy- Activate your work -Edit - Paste as a new layer
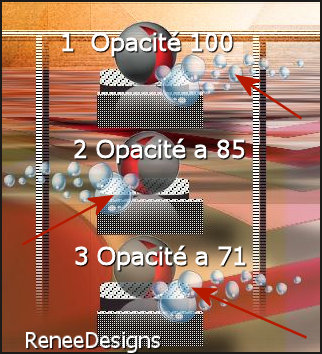
- Duplicate twice and move as shown in the example below (the middle tube is mirrored).– Adjust the opacities of the balls as follows
81. Reactivate the Tube ''Renee-TUBES-Sweet little fish-Image-Boule-Bulles.''
= Place on the layer =Bulle of the Tube
- Edit - Copy- Activate your work -Edit - Paste as a new layer – and move
- Duplicate and see capture above for placement (the middle tube is mirrored)(Red arrow)
- To replace the top of the layer-palette
82. Layers- New Raster Layer
How to Create and Export a Brush-Open your brush image in your psp-File- Export -Custom Brush (Give it a name)

83. Activate the Brush Tool- and choose the brush‘’ Pinceau-Ville-Renee’’ Size 659

-Color Palette-Set the Foreground color to color Black-Apply the brush 3 a 4 times with the black foreground color as shown in the example below

84. Effects –Plugins-
Unlimited 2.0- Render – Plasma – in the menu -choose number 50
 Apply by default Apply by default
85. In the layer palette- activate the second layer from the bottom (promoted selection)
86.Material properties : close the foreground color – Set the background layer to white
87. Activate Text Tool - Font ‘’ CommunityService Thin’’ – Size 36

88.
Write the title ‘’
Doux petit poisson’’
-Convert to Raster Layer
89. Objects –Align
- Center in Canvas
90. Objects – Align
– Bottom
91. Effects-3D-Effects-Drop Shadow with these settings: 1/1/30/8 Color Black
92. Effects – Plugins – Mura’s Meister – Perspective Tiling use the settings below
93. Reduce the Opacity of this layer to 63%
94. Activate Text Tool again with the same font - Size 48 Write ‘’Sweet little fish ‘’
- Convert to Raster Layer
95. Layers- Arrange-Bring to Top
- Place at the top right (see finished image)
96. Effects- 3D-Effects - Drop Shadow with the same settings: 1/1/100/1 Color Black
97.
Open the Tube ’’ Renee-TUBES-Sweet little fish-Image-Designs’’- Edit - Copy- Activate your work -Edit - Paste as a new layer
98. Objects – Align
– Top
99. Layers-Properties-Set the Blend Mode to "Overlay"– Reduce the Opacity of this layer between 44 and 51 %
100.
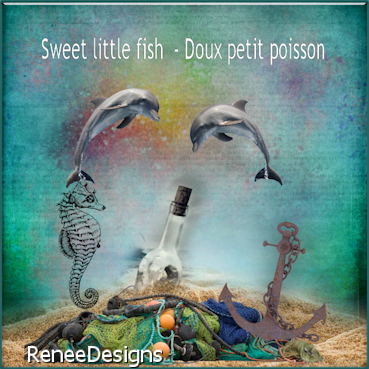
Open the Tube‘’ Sweet-little-fish-pour
tuto’’ - Edit - Copy- Activate your work -Edit - Paste as a new layer
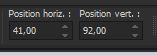
101. Pick Tool: (K) on your keyboard -Enter these parameters on the toolbar
 457
/99 457
/99
Press ( M ) to close the Pick Tool
102. Layers- Merge Merge Visible
103. Edit -Copy !!
104. Activate the Tube "
Cadre "– Edit- Paste -Into Selection (Image is still in your PSP memory)

105. Image - Resize to 1100 pixels width
- Paste the author's watermark on your work and your own watermark
106. Layers- Merge- Merge All (flatten)
Save as JPG
That's it - Thank you / I hope you enjoyed this lesson
Renée
This lesson was written by Renée
03/11/21
Edited and Update
2021
*
Any resemblance with an existing lesson is a coincidence
* Do not forget to thank the people who work with us and for us -I have appointed the tubeurs and translators
Thanks
*
|
 Translations