|
Let's start the lesson.
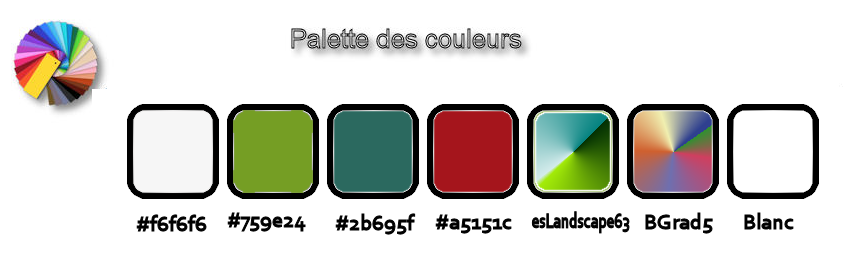
- Used Colors
- Preparation - Color Palette: Set your Foreground color to #f6f6f6 -Set your Background color to plan #759e24
1. File: Open a new transparent image 1005 x 585 Pixels
2. Set your Foregroundcolor to foreground-background sunburst gradient configured like this

3. Activate Flood Fill Tool  and fill the layer with the gradient and fill the layer with the gradient
4. Effects –
Plugins – Simple – Half Warp
5. Effects –
Plugins – AAA Frame Foto Frame use the setings below

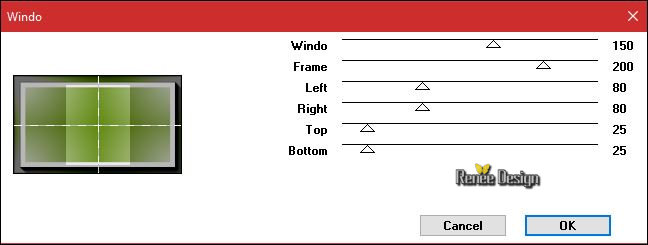
6.
Effects – Plugins – Mock – Windo use the settings below
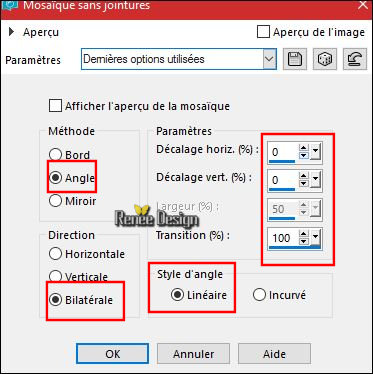
7. Layers- Duplicate
8. Effects- Image Effects- Seamless Tiling with these settings
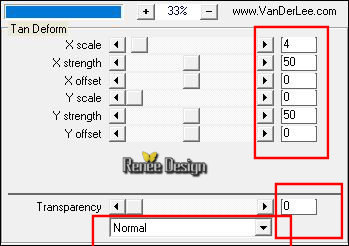
9.
Effects – Plugins – Vanderlee – Unplugged X -Tan
Deform
10.
Selections –load/save selection –load selection from disc and select my selection:‘’
Vacances_caravane_1’’
DELETE

Keep Selection
11. Layers- New Raster Layer
12. Activate Flood Fill Tool – and fill the selection with the gradient
Selections- Deselect All
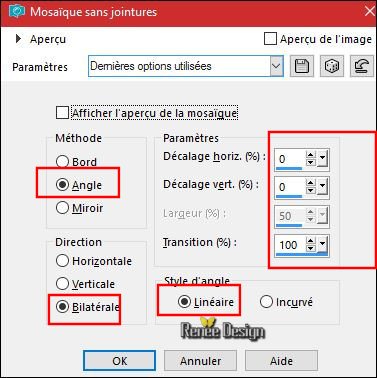
13. Effects- Image Effects- Seamless Tiling with these settings
14.
Layers-Properties-Set the Blend Mode to " Screen"
- Activate the layer underneath (Copy of Raster 1)
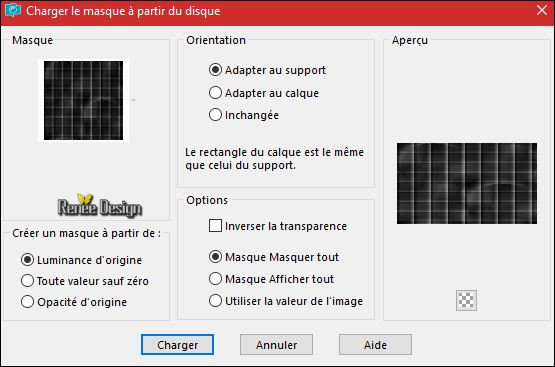
15. Layers- Load/Save Mask-Load Mask from Disk and select‘’@nn_201013_TXT_148_tdstudio’’
- Layers- Merge- Merge Group
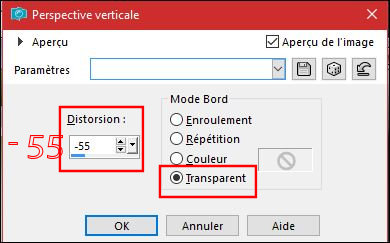
16. Effects
– Geometric Effects – Perspective Vertical
17. Effects
– Use defined Filter - Emboss 3 using the default settings
18.
Selections –load/save selection –load selection from disc and select my selection:‘’
Vacances_caravane_1’’
DELETE 2 times
Selections- Deselect All
19.
Layers-Properties-Set the Blend Mode to " Multiply"
- To replace the top of the Layer- Palette
Color-Palette- Set your Background color to #2b695f
-
Color Palette: Set your Foreground color to gradient and select: ‘’ ES Landscape 63’’-Prepare a radial gradient configured like this.

20. Layers- New Raster Layer
21. Activate Flood Fill Tool – Change the opacity of the color at 50%- and fill the layer with the gradient
22.
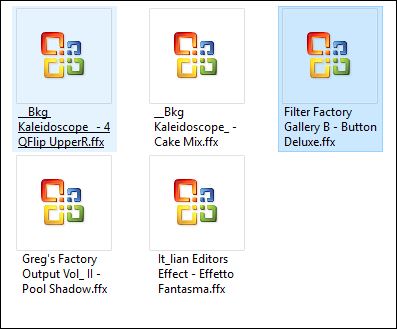
Effects –Plugins-Unlimited - &<Bkg Kaleidoscope> - 4 QFlip
UpperR
23.
Effets –Plugins- Unlimited - &<Bkg Kaleidoscope> - Cake
Mix 169/169
24.
Effects –Plugins- Unlimited - It@lian Editors Effect - Effetto
Fantasma 4/41
-
Layers-Properties-Set the Blend Mode to " Soft Light "
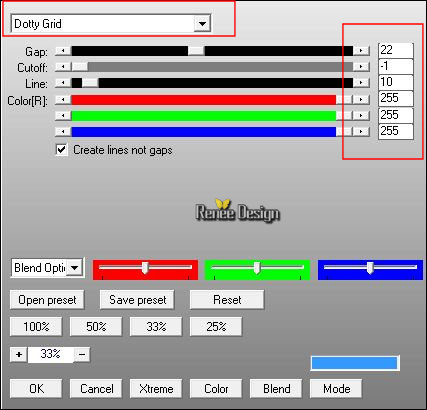
25.
Effects –Plugins– AP[Lines]
Silverling use the settings below
26. Open your tube ‘’ Renee_tube_oiseau_vacance’’
- Edit - Copy- Activate your work -Edit - Paste as a new layer
- Activate Move Tool (M) move it the right place at the top of your image
- Activate the bottom of the Layer- Palette = Raster 1
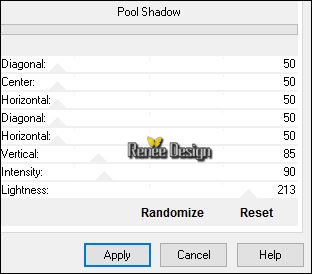
27. Effects –Plugins- Unlimited - Greg's Factory Output Vol.
II -Pool
Shadow
- To replace the top of the Layer- Palette
28. Open your tube ‘’Renee_tube_vacances.pspimage’’
- Image
Resize to 55 %
- Edit - Copy- Activate your work -Edit - Paste as a new layer
- Move Tool (M) move the tube on the bottom left side
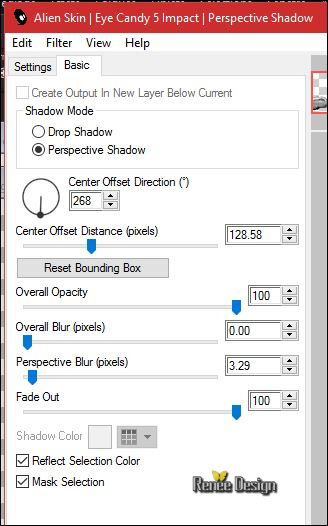
29. Effects
–Plugins– Eye Candy Impact – Perspective
shadow use the settings below
30. Layers- New Raster Layer
31.
Activate Selection Tool -Custom Selection (S) -Rectangle with these settings

32. Activate Flood Fill Tool – Change the opacity of the color at 50%
- an fill the selection with the gradient
Selections- Deselect All
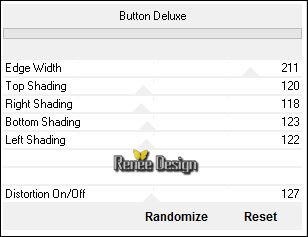
33.
Effects –Plugins- Unlimited - Filter Factory Gallery B - Button
Deluxe...using the default settings
34. Open your tube ‘’ SvB Vakantie.pspimage’’
- Image
Resize to 40%
- Edit - Copy- Activate your work -Edit - Paste as a new layer
35. Effects- Image Effects- Offset with these settings: H = 326 and V = - 39
(don’t forget to erase the watermark)
36. Layers- New Raster Layer
37. Activate your Brush Tool and select my file: ‘’Voyage_Tampon’’

-Foreground color to color #ffffff -Stamp your brush at the top left side by using your foreground color #ffffff (see example)
38. Effects – 3D Effects – Drop Shadow with these settings 1/1/100/1 black
39. Open your tube ‘’Vacances_sable’’
- Edit - Copy- Activate your work -Edit - Paste as a new layer / With the move tool, move it in the bottom right corner
40. Open your tube ‘’ Renee_tube_valise _vacances .pspimage’’
(Choose the decoration you'd like to use. Layers are closed to reduce file size. Click on each layer to open )
- Activate the layer ‘’tuto_valise_vacances’’ of the tube
- Edit - Copy- Activate your work -Edit - Paste as a new layer -With the move tool, move it in the bottom right corner
- Activate the bottom of the layer palette = Raster 1
41. Open your ‘’ Renee_Vacances_coucher_soleil’’
- Edit - Copy- Activate your work -Edit - Paste as a new layer
-Do not move, it is in the right place
- To replace the top of the Layer- Palette
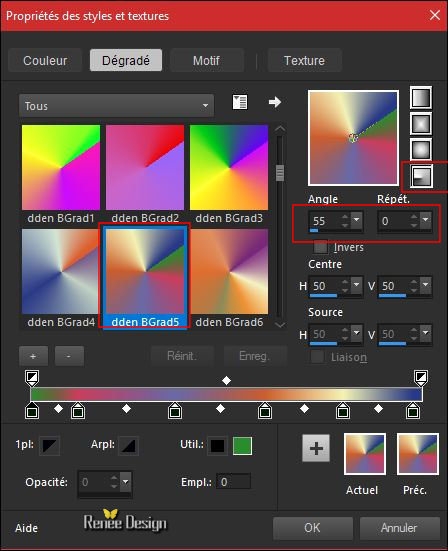
- Color Palette: Set your Foreground color to gradient and select: ‘’ dden
BGrad5.jgd’’- Prepare a radial gradient configured like this.
42. Layers- New Raster Layer
43.
Selections –load/save selection –load selection from disc and select my selection:‘’
Vacances_caravane_2’’
44. Activate Flood Fill Tool – Change the opacity of the color at 100%
- and fill the selection with the gradient
Selections- Deselect All
45. Adjust- Blur- Gaussian Blur: Radius 15
-
Set the Opacity of this layer to 69%
46. Image - Add borders-Symmetric checked: 1 pixel en #759e24
47. Image - Add borders-Symmetric checked: 55 Pixels #ffffff
48. Open the tube ‘’Vacances déco ’’ Edit - Copy- Activate your work -Edit - Paste as a new layer and move
49. Image - Add borders-Symmetric checked: 1 pixel #a5151c
50. Image - Add borders-Symmetric checked: 3 pixels #ffffff
51. Image - Add borders-Symmetric checked: 1 pixel #a5151c
52. Image - Add borders-Symmetric checked: 60 pixels #ffffff
53. Image
ajouter des bordures de 1 pixel #a5151c
54. Image
ajouter des bordures de 3 pixels #ffffff
55.
Activate Magic Wand and click in the white border of 60 pixels
56. Activate Flood Fill Tool and fill the selection with the gradient
57.
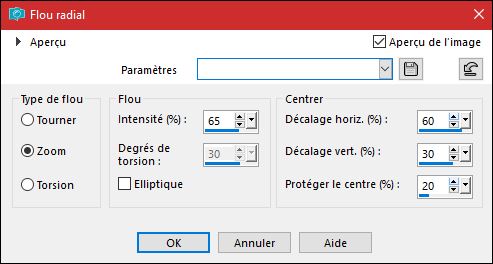
Adjust- Blur- Radial Blur use the settings below
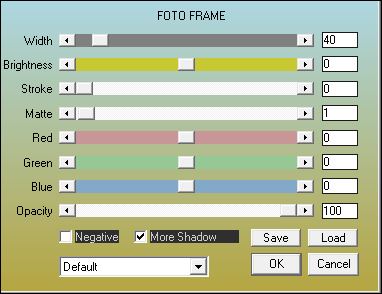
58. Effects
–Plugins - AAA Frame - Foto Frame
Selections- Deselect All
59. Image
Resize to 999 Pixels width.
Save as JPG

I hope you enjoyed this lesson
Renée
This lesson was written by Renée 20/06/2017
Edited and Update
2017
*
*
Any resemblance with an existing lesson is a coincidence
* Do not forget to thank the people who work with us and for us I have appointed the tubeurs and translators
Thanks
Renée
| 


 Translations


 If a plugin supplied appears with this icon it must necessarily be imported into Unlimited *

 All rights reserved