|
Let's start the lesson.
Winter stork -cigogne d'hiver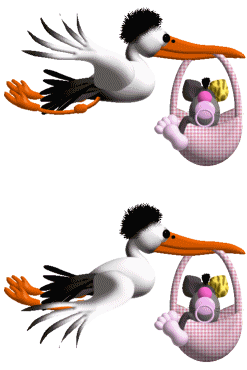
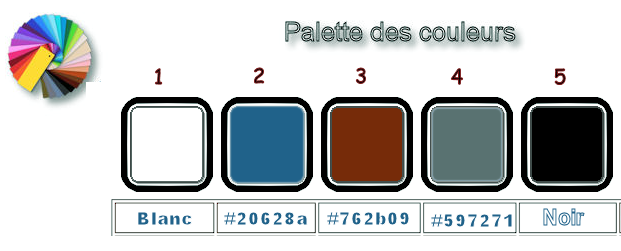
- Preparation-
Material Properties: Set your foreground color to color # 20628a = No 2 -Set your background color to color #597271= No 4
1. Open the Backgroundimage : Fond ‘’Winter_stork’’- Window - Duplicate (or shift+D) - Close the original and proceed on the copy -Promote Background Layer =Raster 1
2. Effects –Plugins – Medhi- Vibration 1.1 use the settings below

3. Layers- Duplicate
4. Effects –Plugins – Mock – LaserSight
5. Activate your Magic Wand, set as below

- Select the two upper squares
–
DELETE

- Selections- Deselect All
6. Activate your Magic Wand- Select the bottom left square
7. Layers- New Raster Layer
8. Activate the Flood Fill Tool  -Flood Fill the selection with the foregroud color = (No 2)
9. Effets – Modules externes – Graphic plus – Cross
shadow using the default settings
Selections- Deselect All
- In the layer-palette: activate the bottom Layer =Raster 1
10. Activate your Magic Wand- Select the bottom right square
11. Layers- New Raster Layer
12. Set you foreground color to color #ffffff. Activate the Flood Fill Tool
 –
Flood Fill the selection with the foregroud #ffffff –
Flood Fill the selection with the foregroud #ffffff
13. Effects – Plugins– Graphic plus – Cross
shadow use the settings below

Selections- Deselect All
- The Result

- Close the Bottom Layer in the layer palette =Raster 1 /Activate an open layer in the Layer -Palette/Layers-Merge-Merge Visible
- Open the Bottom Layer= Raster 1
- Activate the Merged Layer
- Properties background: Set your background color to color #ffffff
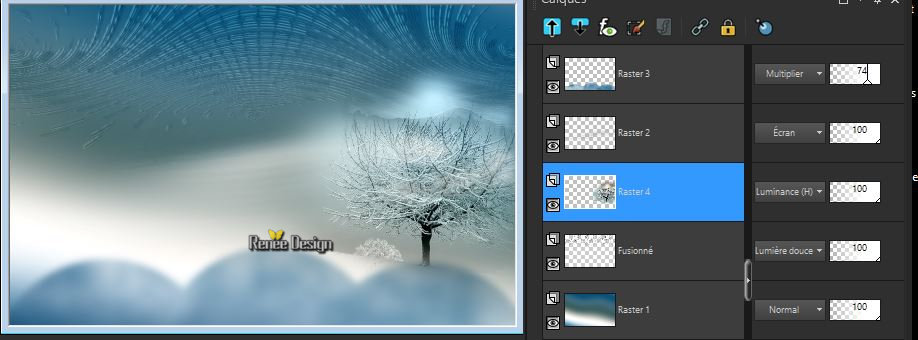
14. Effects – Plugins - Flaming Pear – Flexify 2
(
If you are having difficulty finding the correct one, on your keyboard, Place the mouse on the first preset of the menu
Type the first letter of the preset G here on your keyboard
type G as long as you have the preset name
(Gilbert Globe)

15. Effects – Distortion Effects-Wave use the settings below

16. Layers-Properties-Set the Blend Mode to " Soft Light "
17. Effects –Plugins- Unlimited 2.0 - RCS Filter Pak 1.0 - RCS
Sequins
18. Effects – Plugins- Flaming Pear – Flexify 2 use the settings below

19. Activate the Pick Tool (K) Mode Scale - Pull the Top Node down to 350 Pixels high as shown in the example below

20. Image - Mirror - Mirror vertical ( Image - Flip in older versions of PSP)
21.Effects- User Defined Filter – Deep Emboss using the default settings (attention put the preset in the preset folder of psp )
22. Open the tube ‘’
Renee_TUBES-winter-paysage-d-hiver-GRAND’’
- Edit - Copy- Activate your work -Edit - Paste as a new layer
23. Adjust-Blur- Radial Blur use the settings below

24. Effects- Image Effects-Seamless Tiling with these settings

25. Effects – Distortion Effects - Twirl -Degrees 86
26. Effects – Geometric Effects – Perspective
Horizontal with these settings

27. Effects – Plugins-Vanderlee Unplugged X – Defocus

28. Layers-Properties-Set the Blend Mode to " Screen "
29. Layers- New Raster Layer
30. Selections –load/save selection –load selection from disc and select my selection: ‘’ Winter
stork_1’’
31. Properties Foreground # #20628a .Activate the Flood Fill Tool
 -Flood Fill the selection with the foreground color #20628a =(No 2)
32. Adjust- Blur- Gaussian Blur: Radius 45
33. Effects – Plugins – Render- 2D HyperClouds use the settings below

Selections- Deselect All
34. Adjust- Blur- Gaussian Blur: Radius 8
35. Layers-Properties-Set the Blend Mode to "Multiply" – Lower the Opacity of the layer to 74%
36. OPen the tube ‘’
Renee_TUBES-winter-paysage-d-hiver.pspimage’’
- Edit - Copy- Activate your work -Edit - Paste as a new layer
37. Effects – Image Effects- Offset with these settings: H = 287 and V =
1
38. Layers-Properties-Set the Blend Mode to "Luminance Legacy"
39. Layers- Arrange- Move two times Down
- Your work and Layer Palette look like this now-You should have this result
- To replace the top of the layer-palette
40. Open the tube ‘’
Renee_TUBES-winter-paysage-d-hiver.pspimage -2’’
- Edit - Copy- Activate your work -Edit - Paste as a new layer
41. Effects – Image Effects- Offset with these settings: H = 90 and V =
- 149
42. Effects – 3 D Effects -Drop Shadow with these settings: 3/3/35/18 Color black
43. Layers- Duplicate
44. Layers-Properties-Set the Blend Mode to " Screen "– Lower the Opacity of the layer to 77%
45. Open the tube ‘’
Renee_TUBES-cygogne-hiver-nuage.pspimage’’
- Edit - Copy- Activate your work -Edit - Paste as a new layer
46. Objects - Align- Top (
if you do not have this function place against the top edge of the image )
47. Layers-Properties-Set the Blend Mode to " Screen "– Lower the Opacity of the layer to 73%
48. Open the tube ‘’
Renee_TUBES-winter-paysage-d-hiver.pspimage -3’’
- Edit - Copy- Activate your work -Edit - Paste as a new layer
49. Effects – Image Effects- Offset with these settings: H = -22 and V =
95
50. Layers- Arrange – Move Above Raster 1
- To replace the top of the layer-palette
-
Properties foreground: Foreground material into gradient and select :
Corel_06_001 ( Black-White) – Put your foreground on the sunburst gradient with the settings below

51. Layers- New Raster Layer
52. Selections –load/save selection –load selection from disc and select my selection: ‘’ Winter
stork_2’’
53. Activate the Flood Fill Tool
 –
Flood Fill the selection with the gradient –
Flood Fill the selection with the gradient
54. Effects –Plugins- Unlimited 2.0 - VM Extravaganza – Plastic
Surgery with these settings: 222/93/219
Selections-Deselect All
55. Effects –Plugins- Unlimited - &<BKg Designer sf10 II> -
Emboss With Color using the default settings
56. Layers-Properties-Set the Blend Mode to "Screen"
57. Adjust / Brightness and Contrast-Curves use the settings below

58. Layers- New Raster Layer
59. Selections –load/save selection –load selection from disc and select my selection: ‘’ Winter
stork_3’’
60. Activate the Flood Fill Tool  - Flood Fill the selection with the background color #ffffff
61. Effects –Plugins – Eyecandy 5 impact Glass
–Tab-Settings-User settings-select my file -Preset ‘’winter-stork’’
Selections-Deselect All
62. Image - Resize to 50% (do not move it is in the right place)
63. Effects – Plugins - Muras Meister – Copies
(click first  put your settings
-Do you have problems with this- PNG image is into the zipfile and paste as a new layer on your working area and move
–then remove the layer)

64. Open the tube ‘’
Renee_TUBES-winter-trace-de-pas-neige’’
- Edit - Copy- Activate your work -Edit - Paste as a new layer
65. Effects- Image Effects- Offset with these settingsH= - 15 and V = -
174
66. Open the tube ‘’ Renee_TUBES-winter-oiseaux’’
- Edit - Copy- Activate your work -Edit - Paste as a new layer and move into the right place
67. Open the tube ‘’
Renee_TUBES-winter-loup.pspimage’’-Edit - Copy- Activate your work -Edit - Paste as a new layer
- With your move tool:move to the bottom right corner
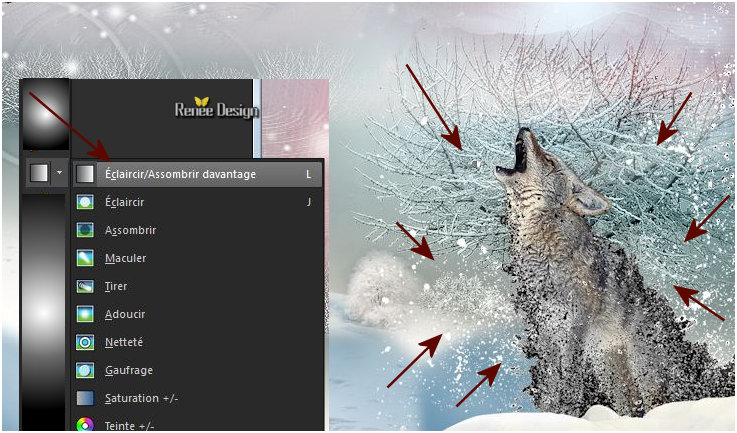
68.Activate the Tool Lighten/Darken brush (push L on your keyboard)
Click and drag the left mouse pointer over the area you want to lighten. (Sweep carefully where you want to make it a little light=> see screen below )
69. Open the tube ‘’
Renee_TUBES-winter-fille-hiver’’
- Edit - Copy- Activate your work -Edit - Paste as a new layer and move
70. Open the tube ‘’
Renee_TUBES_winter_stork’’ Activate the Layer " pour tuto
winter "of the tube
- Edit - Copy- Activate your work -Edit - Paste as a new layer
-Activate your Move Tool (M) place it in the right place as shown in the example below
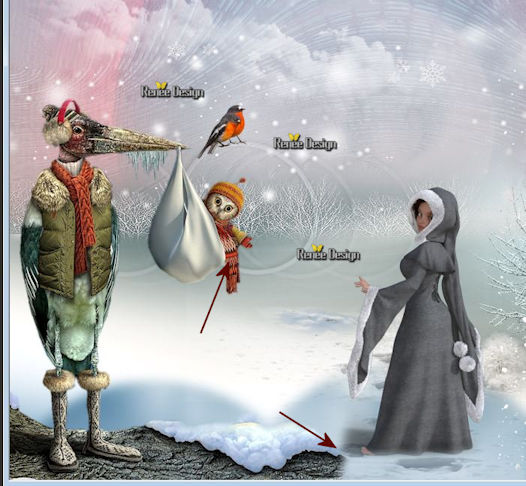
71. Effects – 3D Effects – Drop Shadow with these settings: -2/-1/36/15 color black
- In the Layer-Palette: make Raster 1 aktive
72. Open the tube ‘’
Renee_TUBES-winter-demi-lune.pspimage’’
- Edit - Copy- Activate your work -Edit - Paste as a new layer (do not move it is in the right place )
73. Image Resize to 68 % Resize all layers not checked
74. Layers-Properties-Set the Blend Mode to " Soft Light"
75. Open the tube ‘’
Renee_TUBES-winter-flocons de -neige.pspimage’’
- Edit - Copy- Activate your work -Edit - Paste as a new layer and move
76. Image - Add borders-Symmetric checked 1 Pixel Color #597271 = No 4
77. Image - Add borders-Symmetric checked 15 Pixels Color #ffffff
78. Image - Add borders-Symmetric checked 1
Pixel Color black
79. Image - Add borders-Symmetric checked 40 Pixels Color #ffffff
80. Image - Add borders-Symmetric checked 1
Pixel Color # 762b09 = No 3
81. Open the tube ‘’ titre cygogne winter " Edit - Copy- Activate your work -Edit - Paste as a new layer. Or write your own text.
82. Layers- Merge-Merge All
83. Image - Resize to 1005 Pixels width
Save as JPG
I hope you enjoyed this lesson
Renée
This lesson was written by Renée 2018
Edited and Update
2018
*
Any resemblance with an existing lesson is a coincidence
*
Do not forget to thank the people who work with us and for us I have appointed the tubeurs and translators
Thanks
*
|
 Translations


