|
New
Translations here
Androïdes
Let's start the lesson. 1. File - new - open a new transparent image 935 x 600 pixels Color-palette:Set your foreground color to #c1977e - Set your background color to #647d60 2. Selections- Select All 3. Open the tube « fond lunaire ''Edit/ Copy-Edit - Paste into selection 4. Selections- Deselect All 5. Layers- Duplicate 6. Effects- Image Effects- Seamless Tiling use settings below
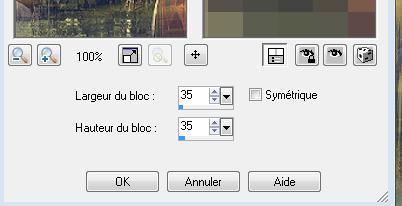
7. Effects- Distortion Effects -Pixelate use settings below
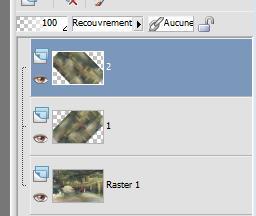
8. Effects-User Defined Filter - Emboss 3 Default (rename this layer 1) 9. Layers- Duplicate (rename this layer 2 ) 10. Activate layer 1 /image Free rotate 45° left 11. Activate layer 2 /Image Free rotate 45° right - Activate layer 2 in the Layer-Palette-Double click on this Layer and set the Blend Mode to "Over lay" * Your work and Layer Palette look like this now
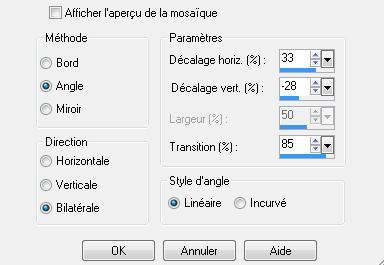
12. To replace the top of the layers palette Layers- Merge- Merge Down 13. In the Layer-Palette: activate the Merged Layer Effects- Distortion Effects-Warp use settings below
14. Effects- Filter-Eyecandy 5 - Impact / Black light -tab Settings/User settings choose my preset " renee-robotique" 15. Open the tube » futurisme « / -Edit/ Copy-Edit - Paste as new layer on your working image /With your Move Tool: move it to the bottom right corner. 16. Open the tube « 03-ben -goossens « / -Edit/ Copy-Edit - Paste as new layer on your working image/Image Mirror /and move 17. Open the tube « crealios-androides-104 »/ Image Resize 65 % / -Edit/ Copy-Edit - Paste as new layer on your working image and move 18. Layers- Merge- Merge Visible 19. Layers- Duplicate 20. Effects- Plugins-Andromeda perspective/Side walls/it wrongside 21. Effects- Image Effects- Offset with these settings: H=-25 and V= 0 22. Effects- Plugins - Eyecandy5 Impact - Blacklight -tab Settings/User settings choose my preset '' renee hors du temps'' 23. Layers- Duplicate/Image Mirror -Activate the bottom layer 24. Effects- Plugins-Graphic plus /Old photo( Repeat this filter ) 25. Effects- Plugins - Tramage/we make Headlights use settings below
-To replace the top of the layers palette 26. Ouvrir tube « eclat « / -Edit/ Copy-Edit - Paste as new layer on your working image /bien placer -To replace the bottom of the layers palette 27. Layers- New Raster Layer 28. Selections –load/save selection –load selection from disc and choose my selection: "@renee-horsdutemps " 29. Open the tube « escalier piano « / Edit/ Copy-Edit - Paste into selection 30. Selections-Deselect All -Do not merge the layers!!
31. To replace the top of the layers palette=raster 1 32. Layers- New Raster Layer Activate Flood Fill Tool and fill the layer with this color #cdbf28 Pot of Paint: Change the opacity of the color at 65%
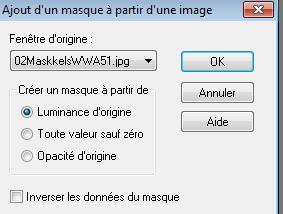
33. Ouvrir masque « 02MasllesWWWA51 Calque nouveau calque de masque a partir d'une image'' 02MasllesWWWA51'
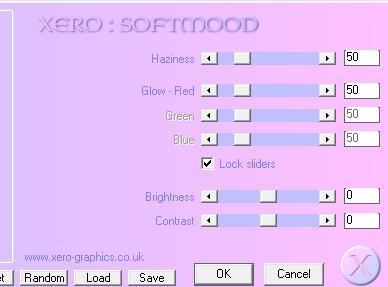
- Layers- Merge- Merge Group *Pot of Paint: Change the opacity of the color at 100% -on the layer mask 34. Effects- Plugins - Xero /Softmood use settings below
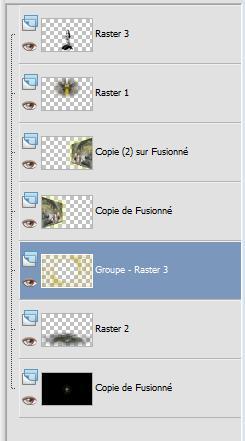
- Stay on the top of the layers palette 35. Open the tube « crealios androides 83 » / Image Rezise 58% 36. Edit/ Copy-Edit - Paste as new layer on your working image /Layers- Arrange- Move Down and move - Double click on this Layer and set the Blend Mode to "Hard Light "-Set the layer opacity of this layer to 91% 37. Effects- 3 D Effects- Drop Shadow with these settings : 5/5/100/12 color white -Layers- Arrange- Move Down as shown in the example below
38. Layers- Merge- Merge Visible 39. Image - Add borders-Symmetric checked: 50 pixels color #bbac1d 40. Activate the magic wand and select the border of 50 pixels 41. Selections- Promote selection to Layer /Keep Selections !! 42. Color-palette:Set your foreground color to #bbac1d - Set your background color to black #000000 43. Effects- Plugins- Unlimited &< BKG Kaleidiscope /kaleidoscope divisions use settings below
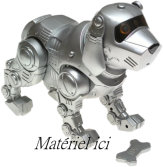
MY TESTER NOTED THAT IN THE BLACK 13 PSP DOES NOT marked BUT WAS REPLACED WITH WHITE If this is the case select the parts in white / black add a fill layer and merge down 44. Effects- Edge Effects Enhance More 45. Selections- Deselect All 46. Image - Add borders-Symmetric checked: 5 pixels color #bbac1d 47. Open the tube "chien robot" /Image Resize 2x 58% / -Edit/ Copy-Edit - Paste as new layer on your working image 48. Effects- 3 D Effects- Drop Shadow using the default settings 49. Open the tube "texte "-Edit/ Copy-Edit - Paste as new layer on your working image Save as JPG
I am part of the Tutorial Writers Inc. My tutorials are registered regularly ReneeGraphisme_All rights reserved
*
|
 Translations