|
New
Traducteur ici
I ripped the heart out
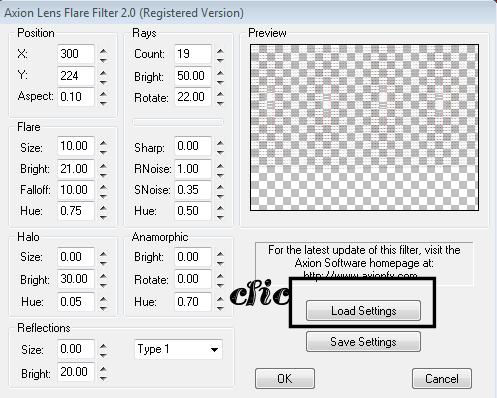
1. Open the backgroundimage ''fond" Window - Duplicate (or shift+D) - Close the original and proceed on the copy -Promote Background Layer =Raster 1 2. Layers- New raster layer 3. Effects- Plugins - Axion /Lens Flare 2.0 with these settings
4. Effects-Plugins - Axion /Glow with these settings
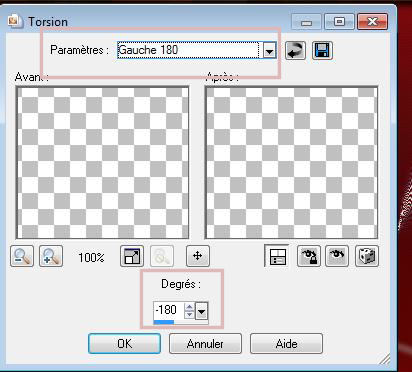
5. Layers- Duplicate /Effects- Geometric Effects- Circle-Repeat 6. Layers- Arrange- Move Down - Stay on this layer 7. Open the tube' 'Beauty _ arrache-coeur_Cibibijoux'' Edit/copy -Edit/paste as a new Layer on your working area and place 8. Open the tube ''renee-arrache-coeur-image1'' Edit/copy -Edit/paste as a new Layer on your working area and place 9. Layers- Arrange Move Down under raster 2 /Set the layer opacity of this layer to 75% 10. Layers- New raster layer 11. Selections - Load/save selections - Load selection from disk and select my file: -renee-arrache-coeur'' 12. Put you Forgroundcolor on #deb9b9 -Activate Flood Fill Tool and fill the selection with the foregroundcolor #deb9b9 13. Effects- Plugins -EyeCandy 5 Impact /Glass - tab Settings/User settings choose my preset: ''renee-arrache-coeur'' 14. Selections- Invert 15. Edit/copy -Edit/paste as a new Layer on your working area 16. Selections- Deselect All 17. Effects- Distortion Effects -Twirl-Attention! Settings- Left 180 and Degrees -180
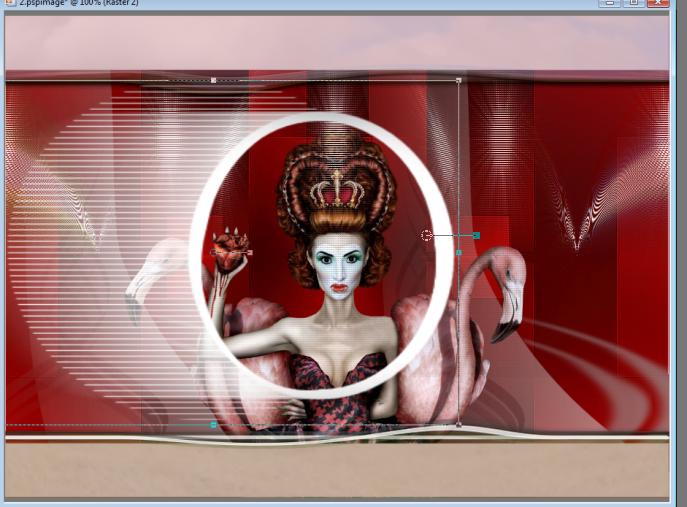
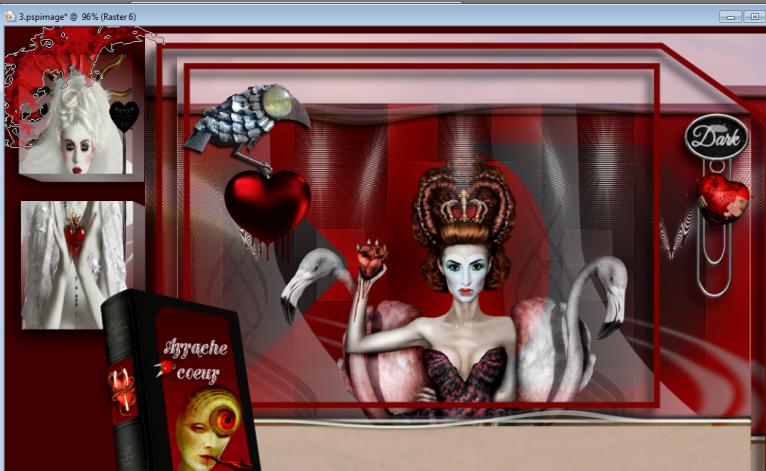
18. Layers- Merge- Merge Visible 19. Layers- Duplicate 20. Open the tube ''renee-arrache-coeur-image-cercle '' Edit/copy -Edit/paste as a New layer on your working area- Move Tool: Put the tube in it's place as shown in the example below
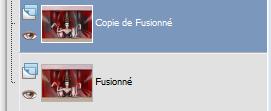
21. Effects- Plugins - Simple /pizza slice mirror - Layer Palette -Double click on this layer and set the Blendmode to "Color Legacy" 22. Selections - Load/save selections - Load selection from disk and select my file: /''renee-arrache coeur1''/ Delete 23. Selections- Deselect All 24. Layers- Merge- Merge Down - -Your work look like this now
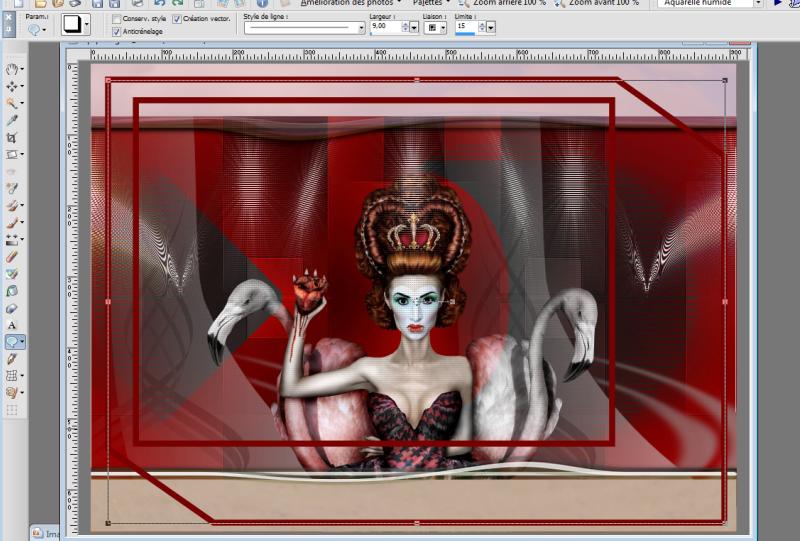
25. Activate Preset Shape Tool - select the shape ''Box '' you have loaded with these settings
26. Color palette -change the foregroundcolor to #760504 // Close the backgroundcolor - Trace the shape as shown in the example below
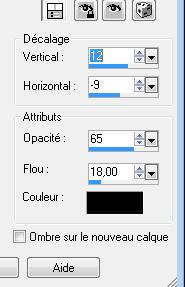
27. Objects-Align-Center in Canvas 28. Convert to Raster Layer 29. Effects - 3D Effects - Drop shadow with these settings
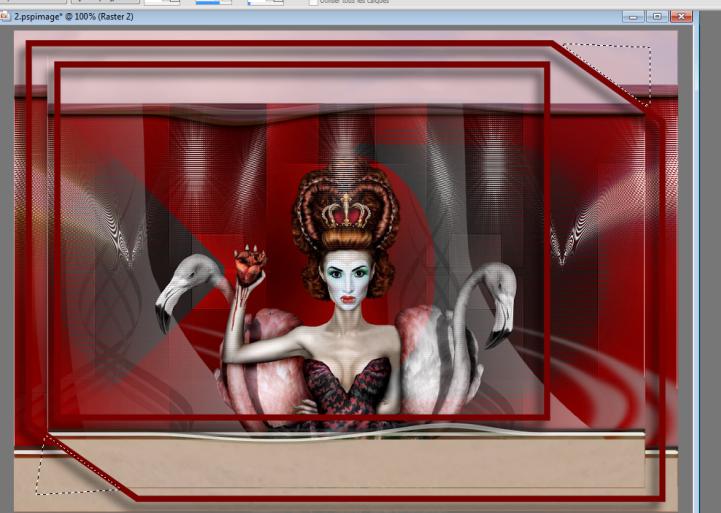
30. Activate the layer underneath=Copy of Merged /Image- Resize with 90% (Resize all the layers not checked) 31. Activate Freehand selection-Lasso- Select the 2 small triangles and Delete
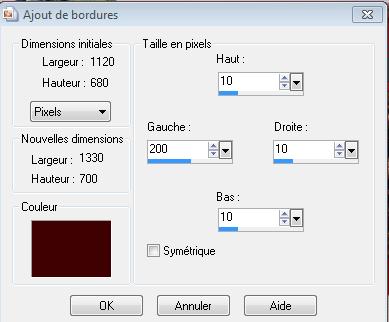
- Activate raster 1 ( Boxlayer) 32. Layers- Merge- Merge Down 33. Effects - 3D Effects - Drop shadow with the same settings 34. Open the tube ''renee-arrache-coeur-oiseau metal'' Image Resize with 50% Edit/copy -Edit/paste as a new Layer on your working area and move 35. Open the tube ''heart2 » » Image Resize with 2x 75% Edit/copy -Edit/paste as a new layer on your working area and move 36. Open the tube ''renee-arrache-coeur-dark''/Edit/copy -Edit/paste as a new layer on your working area and move 37. Layers- Merge- Merge All 38. Image - Add Borders-with these settings- No Symmetric -Color #3f0302
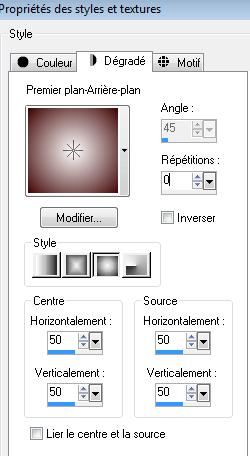
39. Layers- New raster layer 40. Selections - Load/save selections - Load selection from disk and select my file: ''renee-arrache-coeur2'' 41. Material Properties: Foregroundcolor to #ffffff Backgroundcolor to #3f0302 - Prepare a Sunburst Gradient as configured
- Activate Flood Fill Tool and fill the selection with the gradient 42. Effects-Plugins -EyeCandy5 /Impact/Extrude- tab Settings/User settings choose my preset: ''renee-extrude-arrache-coeur'' 43. Effects-Plugins - EyeCandy5/Impact ''perspective shadow -tab Settings/User settings choose my preset: ''renee-perspective-sahdow-arrache -coeur'' 44. Selections- Deselect All 45. Layers- New raster layer 46. Selections - Load/save selections - Load selection from disk and select my file: ''renee-arrache-coeur3'' 47. Open the tube ''femme coeur de bambou ''Edit/copy- Edit Paste into selection 48. Selections- Deselect All 49. Open the tube ''epingle-coeur'' Edit/copy -Edit/paste as a new Layer on your working area and place 50. Open the tube ''renee-arrache-coeur-livre'' *Now we decorating the lesson / with the tubes that I used in the folder or take mine already prepared* 51. Take mine tube: Erase the watermark /Layers- Merge- Merge Visible/Rename this layer:''mon livre'' /Image Resize with 45% Edit - Paste as new layer on your working area and move to the left side 52. Open the Brush image ''sang'' in your PSP- File- Export Custom Brush-Give it a name ''sang'' - Activate your Brush Tool and choose the brush "Sang" with these settings
53. Properties Foreground: Foregroundcolor to #eb1117 //Layers- New raster layer /Place the brush with the foregroundcolor #eb1117 to the top left corner as in example
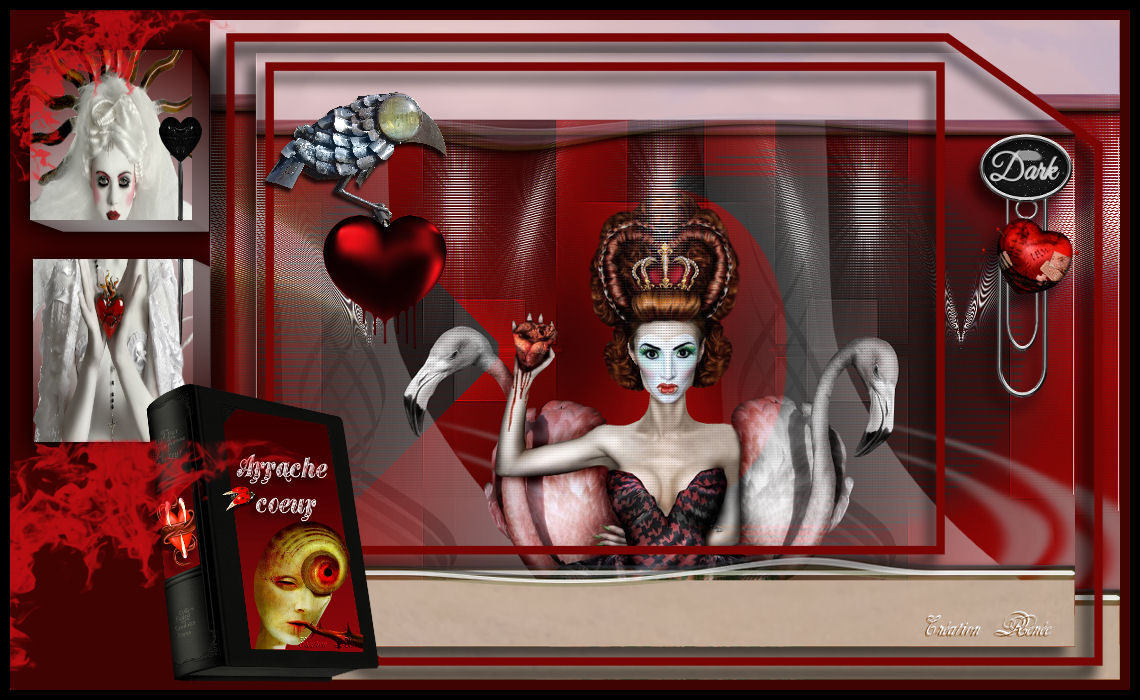
- Again/Activate BrushTool "Sang" Size 400 Layers-New raster layer -Place the brush with the foregroundcolor #eb1117 to the bottom left corner 54. Image - Add borders-Symmetric checked:10 pixels black Save as JPG I hope you enjoyed this lesson Renée This lesson was written by Renée Placing 2011*
Any resemblance with an existing lesson is merely a coincidence * * Don't forget to thank the people who work for us and with us. I named the tubeurs - Testers and the translators. Thanks Renée. *
I am part of Tutorial Writers Inc. My tutorials are regularly recorded ReneeGraphisme_All rights reserved
*
|
 Translations


 Let's start the lesson.