|
New
Translations here
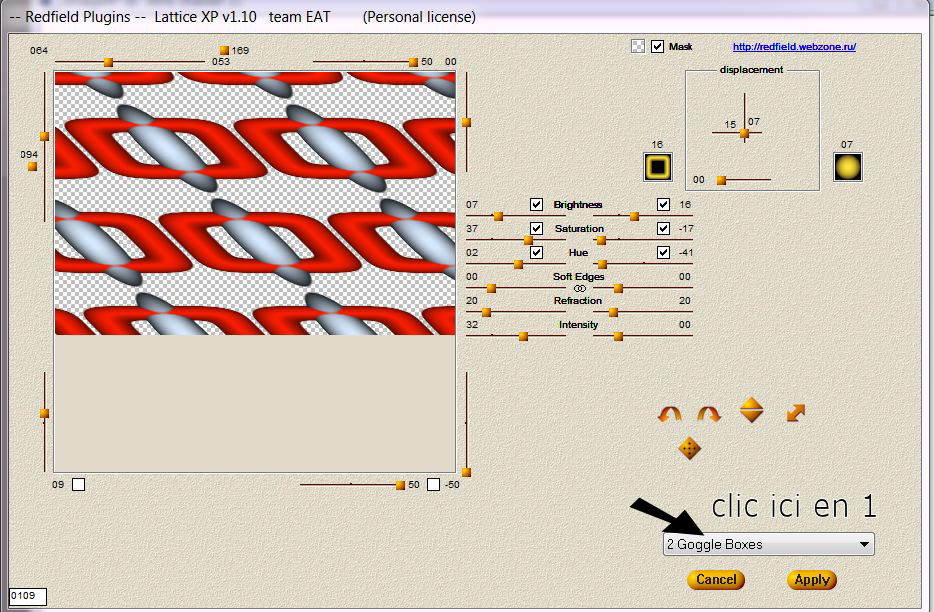
Let's start the lesson. 1. File - New - Transparent - New Image: 950 x 625 pixels 2. Activate Flood Fill Tool and fill the layer with color white 3. Effects- Plugins -Redfield->Lattice XP-(Filter is included into the zipfile) - Do you have problems with this filter -Redfield-pspimage'' is into the zipfile and paste as a new layer on your working area
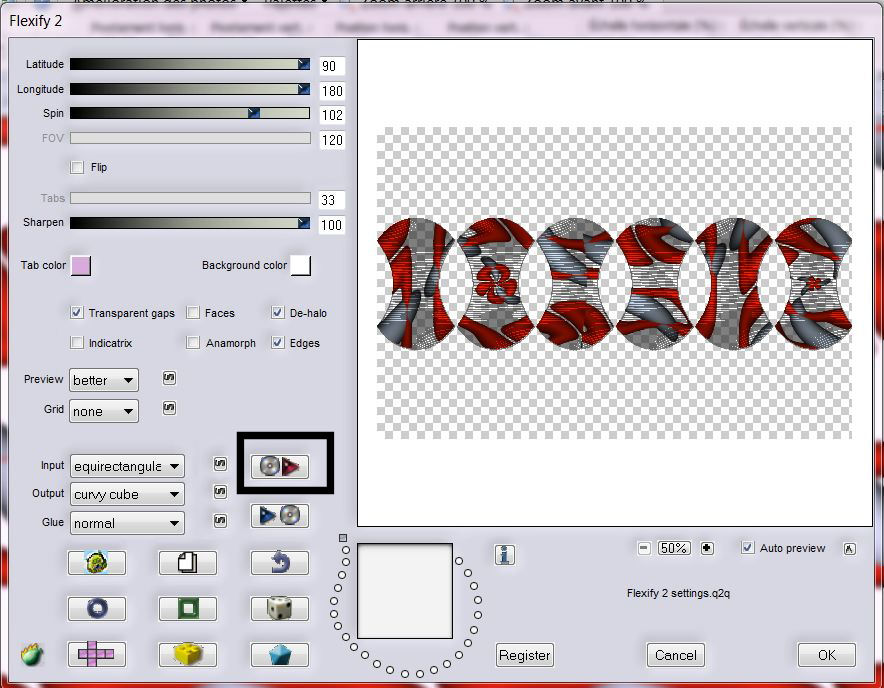
4. Effects- Plugins -Flaming Pear Flexify 2--- preset is into the zipfile >>>Click on the Red Arrow and load Preset >>>Flexify 2 settings.q2q Or if this is not working for you with these settings: -pspimage'' is into the zipfile and paste as a new layer on your working area
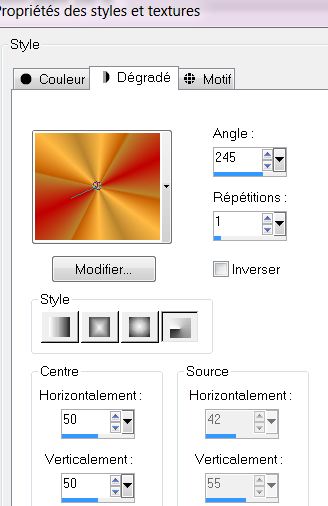
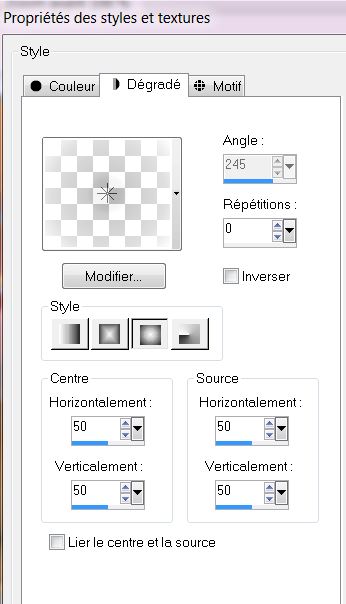
5. Layers - New Raster Layer 6. Layers- Arrange- Move Down 7. Material of the foreground - select my file in the list: ''chrisfallleaves'' – Prepare a radial gradient configured like this --Activate Flood Fill Tool and fill the layer with the gradient
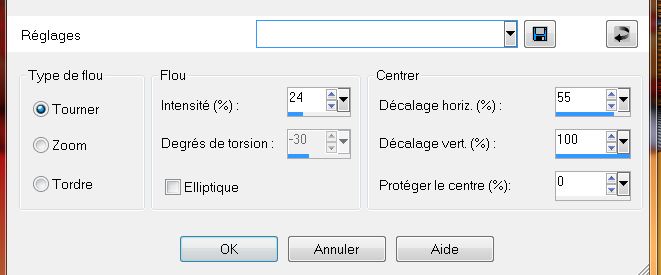
8. Adjust- Blur-Radial Blur with these settings
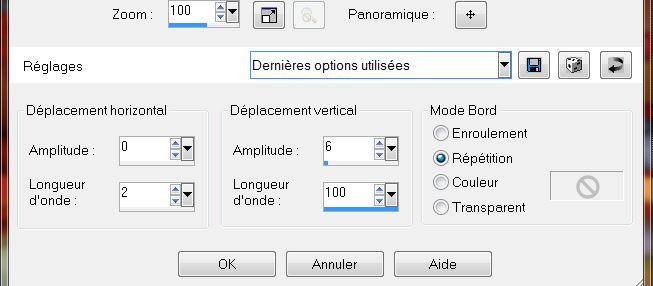
9. Activate the top of the layer-Palette 10. Effects-Plugins - EyeCandy 5 -Perspective shadow - tab Settings/User settings choose my preset: » Alya -perspec1 » 11. Layers - New Raster Layer 12. Selections - load/save selection - load selection from disk and select my file: ''renee-atya-selec1'' 13. Color Palette- FG- Color to #8d9aa8 14. Activate Flood Fill Tool and fill the selection with the the foreground color 15. Selections- Deselect All 16. Effects- Plugins -EyeCandy 5 perspective – tab Settings/User settings choose my preset:''renee-atya -perspective'' 17. Layers - New Raster Layer 18. Selections - load/save selection - load selection from disk and select my file: ''renee-atya-selec1'' 19. Open image ''feuille eau'' Edit- Copy-Edit Paste into selection 20. Selections- Deselect All 21. Double click on this layer and set the Blendmode to Hard Light 22. Effects- Distortion Effects- Wave with these settings
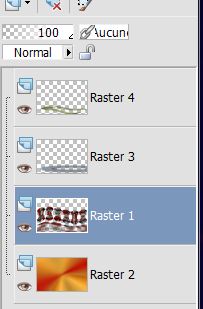
- Your work and Layer Palette look like this now-You should have this result
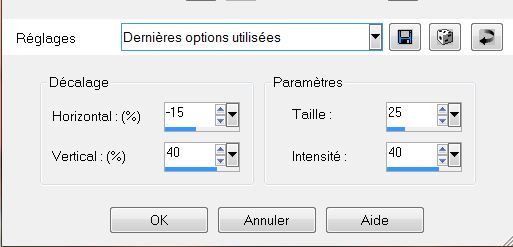
23. In the Layer Palette activate raster 1 --Effects- Distortion Effects- Wave with the same settings 24. Activate the top of the layer-Palette 25. Layers - New Raster Layer 26. Selections - load/save selection - load selection from disk and select my file: ''renee-atya-selec2'' 27. Activate Flood Fill Tool and fill the selection with radial gradient 28. Selections- Deselect All 29. Effects- Plugins -Eyecandy 5 -Gradient glow- tab Settings/User settings choose my preset: ''renee-atya -gradient glow'' 30. Layers- Duplicate 31.Effects- Distortion Effects- Warp with these settings
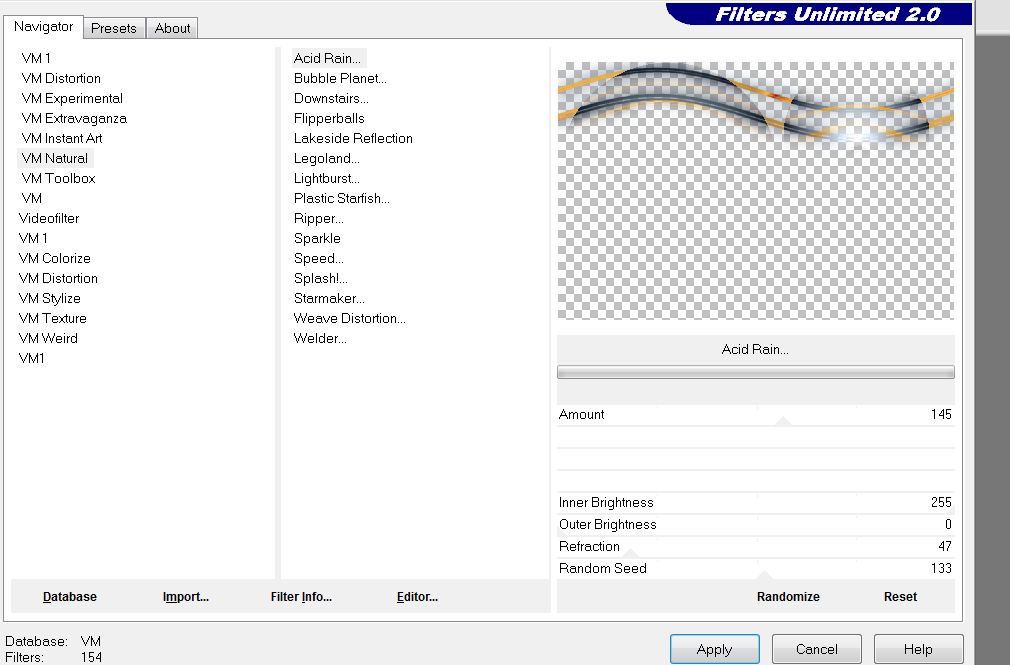
32. Layers- Merge- Merge Down 33. Effects- Plugins -VM Natural -Acid Rain
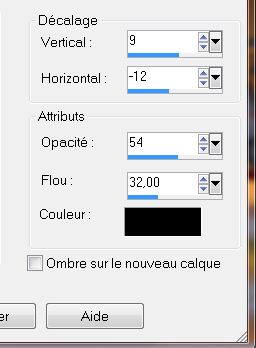
34. Effects - 3D Effects - Drop shadow with these settings
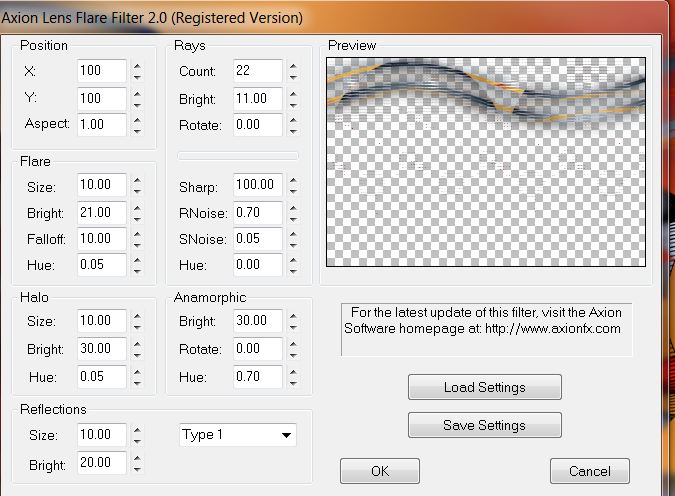
35. Effects- Plugins - Axion - Lens Flare Filter 2.0
- Activate the Eraser tool and erase everything is too much away (if necessary) 36. Layers- New Raster Layer 37. Selections - load/save selection- load selection from disk and select my file ''renee-atya-selec3'' 38. Change foreground material into a white fading foreground sunburst gradient with these settings---Foregroundcolor to color white -Activate Flood Fill Tool and fill the selection with the gradient
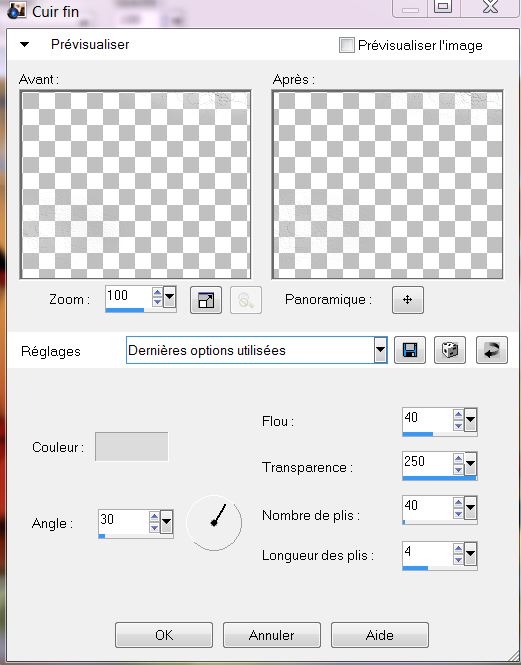
39. Effects-Texture Effects- Fine Leather with these settings- Color #DCDCDC
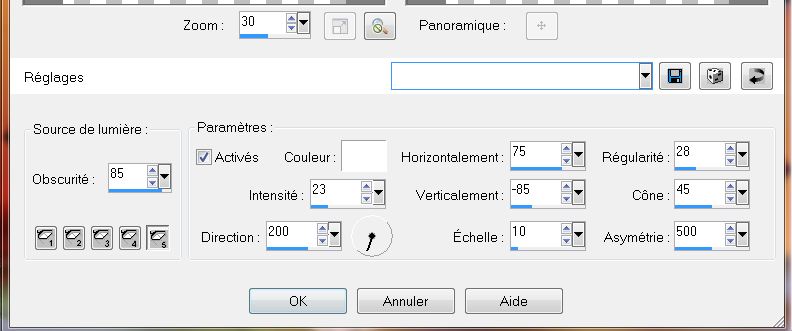
40. Effects- Edge Effects- Enhance More *If necessary lower the opacity to 65%. 41. Selections- Deselect All 42. Open the tube '' monde de cameron'' Edit - Copy -Edit - Paste as new layer on your working area --With the move tool, move it in the upper right corner-- Double click on this layer and set the Blendmode to Exclusion 43. Effects- Illumination Effects- Lights with these settings
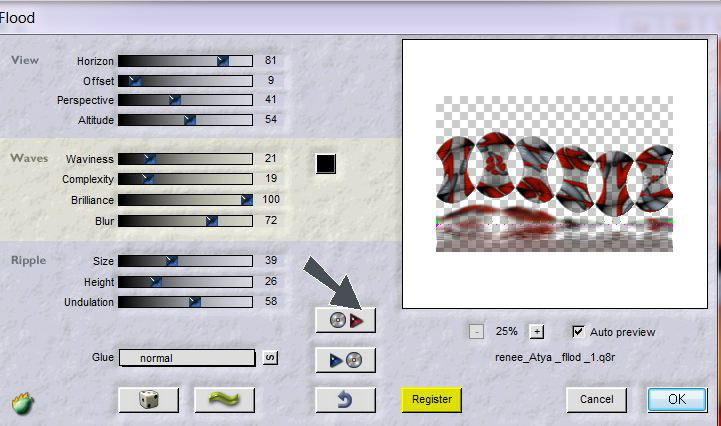
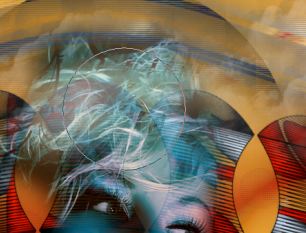
44. Open the tube ''renee- atya-nuage- Edit - Copy -Edit - Paste as new layer on your working area and move Double click on this layer and set the Blendmode to Screen--Set the layer opacity of this layer to 85% 45. Open the tube ''face woman11'' Edit - Copy -Edit - Paste as new layer on your working area and move to the left side /Set the layer opacity of this layer to 72% 46. In the Layer Palette: Activate raster 1 47. Effects- Plugins -Flaming Pear Flood -Click on the Red Arrow and load Preset ''renee_atya_fllod_1'' and OK
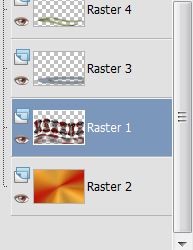
- Your work and Layer Palette look like this now-You should have this result
48. Stay on this layer -Activate your Lighten /Darken Brush with these settings -FG-Color =white
- Draw a line from bottom to top *carefully to get this effect=just a little brightening as shown in the example below
49. Activate the top layer with the lady- do the same with this "hat" -as shown in the example
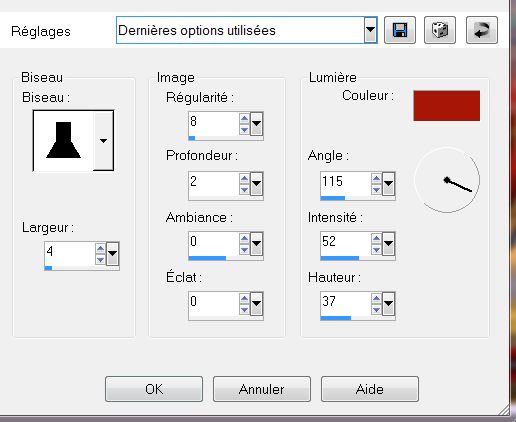
50. Layers - New Raster Layer 51.Selections - load/save selection - load selection from disk and select my file: ''renee-alya-selec4'' -- Activate Flood Fill Tool and fill the selection with color :#34393f 52. Selections- Modify-Contract 8 pixels- Activate Flood Fill Tool and fill the selection with this color #a71708 53. Selections- Modify-Contract 8 pixels - Delete 54. Selections -Invert -Selections - Float -Selections – Defloat. 55. Effects- 3D Effects- Inner Bevel with these settings- Color #a71708
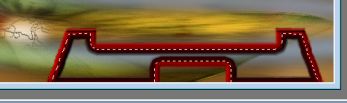
56. Selections- Deselect All 57.
With the the Magic Wand select in the inner parts of these rectangles as shown in the example below
58. Layers- New Raster Layer: Color palette - Change the foreground to gradient and selec the gradient from point 7 -Fill the selection with the radial gradient
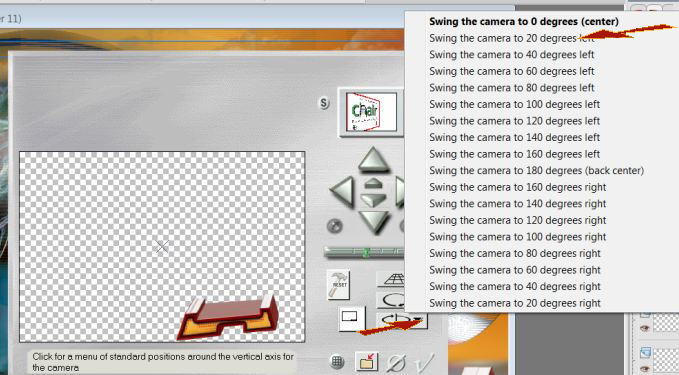
59. Effects- Plugins- L and K's – Djin setting: 43 and 21 60. Selections- Deselect All 61. Layers- Arrange- Move Down 62. Activate the layer above- Layers- Merge- Merge Down 63. Effects- Plugins -Eyecandy 5 - Extrude - tab Settings/User settings choose my preset: ''renee-atya extrude'' 64. Effects- Plugins-Andromeda -Perspective -Preset- swing the camera to 20 degrés
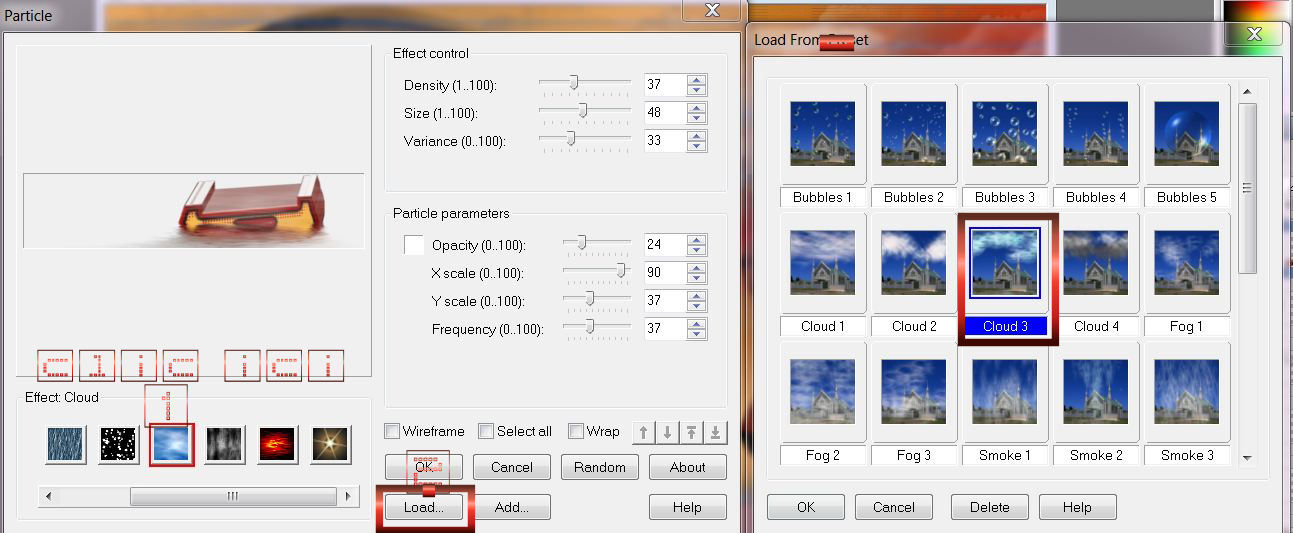
65. Effects- Image Effects- Offset with these settings: H =100 and V = 0 Transparent 66. Effects-Plugins - Flaming pear flood -with the same settings -Horizon to 91 67. Effects- Plugins - Ulead effect -Particle **Attention for this filter ** *1 -First click on the icon = effects nuage 2* - Click on load >>the second window will open 3 * Then choose cloud3 -control the settings in the first window and click OK/ on this window =Load preset - Enter the settings or take the default settings and immediately OK
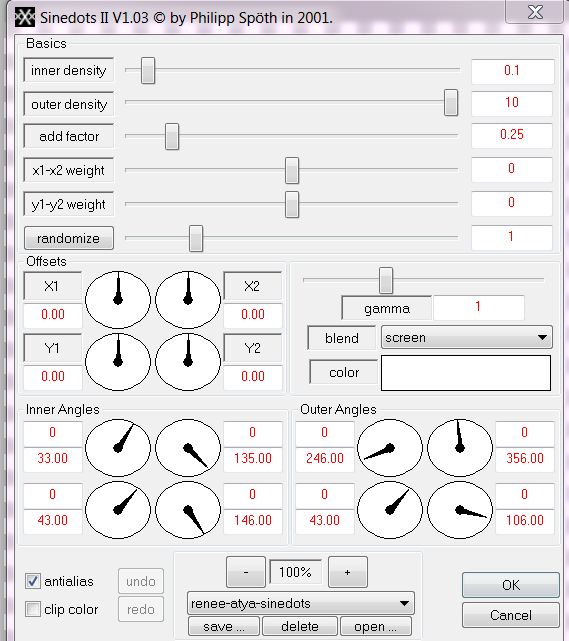
68. Layers - New Raster Layer 69. Effects-Plugins -Dragon fly- SinedotsII V 1.03 - (Preset is included into the zipfile) and load the Preset and OK- Or if this is not working for you with these settings as show in the example below
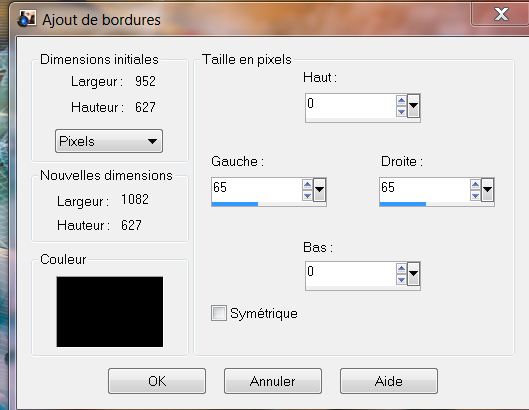
70. -Double click on this layer and set the Blendmode to Soft Light 71. Open the tube ''atya-pont ''Edit - Copy -Edit - Paste as new layer on your working area - Move to the bottom right side / Double click on this layer and set the Blendmode to Hard Light 72. Open the tube ''hérisson '' Edit - Copy -Edit - Paste as new layer on your working area - Move to the bottom right side 73. Open the tube ''atya -baluchon ''Edit - Copy -Edit - Paste as new layer on your working area - Move to the right side 74. Layers - Merge -Merge All 75. Image - Add borders-Symmetric checked:1 pixels #a71708 76. Image - Add borders-Asymmetric with these settings-Black
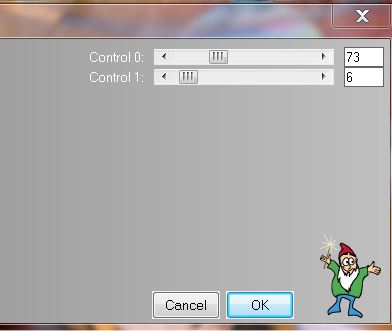
77. Activate your magic wand with the default setting: click on the 2px black borders 78. Effects- Plugins - L and K's - Frederiek
79. Image - Add borders-Symmetric checked: 25 pixels #a71708 80. Activate the tube "text "/Edit/copy-Edit paste as a new layer on your working area / Ore write your own text .
Save as JPG I hope you enjoyed this lesson This lesson was written by Renée 22 September 2012 Any resemblance with an existing lesson is merely a coincidence * * Don't forget to thank the people who work for us and with us. I named the tubeurs - Testers and the translators. Thanks Renée. * 2014 reçu de TWInc I am part of Tutorial Writers Inc. My tutorials are regularly recorded ReneeGraphisme_All rights reserved
|
 Translations