|
New
Translations here
Cinéma Obsession DOWNLOAD material here
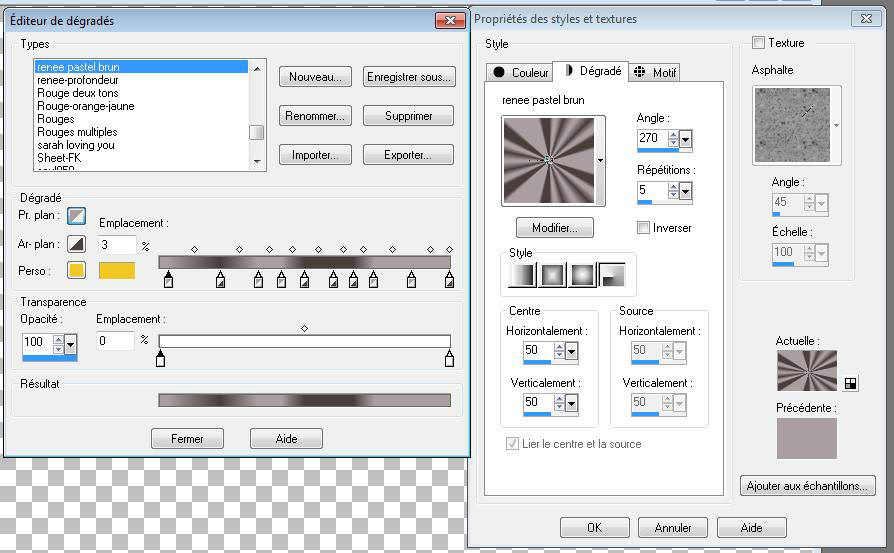
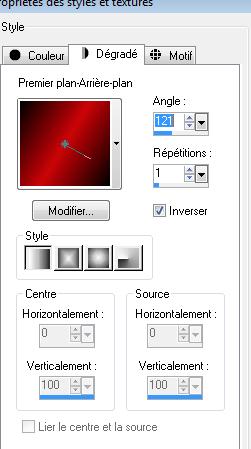
. Let's start the lesson. 1. Open the backgroundimage ''fond1'' -Window - Duplicate (or shift+D) - Close the original and proceed on the copy 2. Layers-New raster layer 3. Material Properties-Set your foreground to #a99fa0 -Set your background color to #483e3d - Material of the foreground - select my file in the list : '' pastel brun'' gradient Put your foreground on the radial gradient with settings below
4. Layers-New raster layer-Adjust-Blur-Gaussian Blur: Radius 55 5. Effects-Plugins -Mura's Seamless /Hex Pattern with these settings
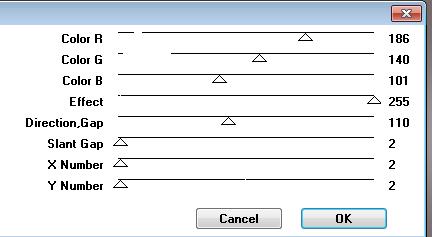
- Layer Palette - Double click on this Layer and set the Blend Mode to "Burn" 6. Properties Foreground -Set your foreground color to #c71317 e 7. Layers-New raster layer 8. Selections –load/save selection –load selection from disc and choose: ''cinema_obsession_1'' -Open the tube ''renee-sol-au cinema'' Edit/copy- Edit/ paste into selection Selections-Deselect All 9. Effcts-Plugins -Mura's meister / Perspective Tilling with these settings
-Activate the bottom layer in the Layer palette 10. Effects-Illumination Effects-Sunburst with thse settings
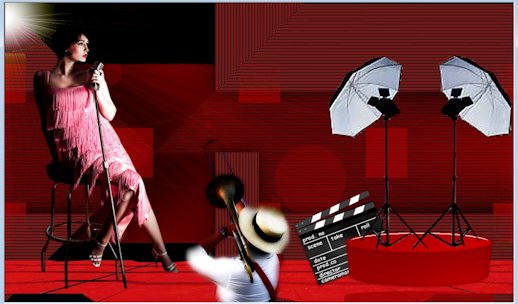
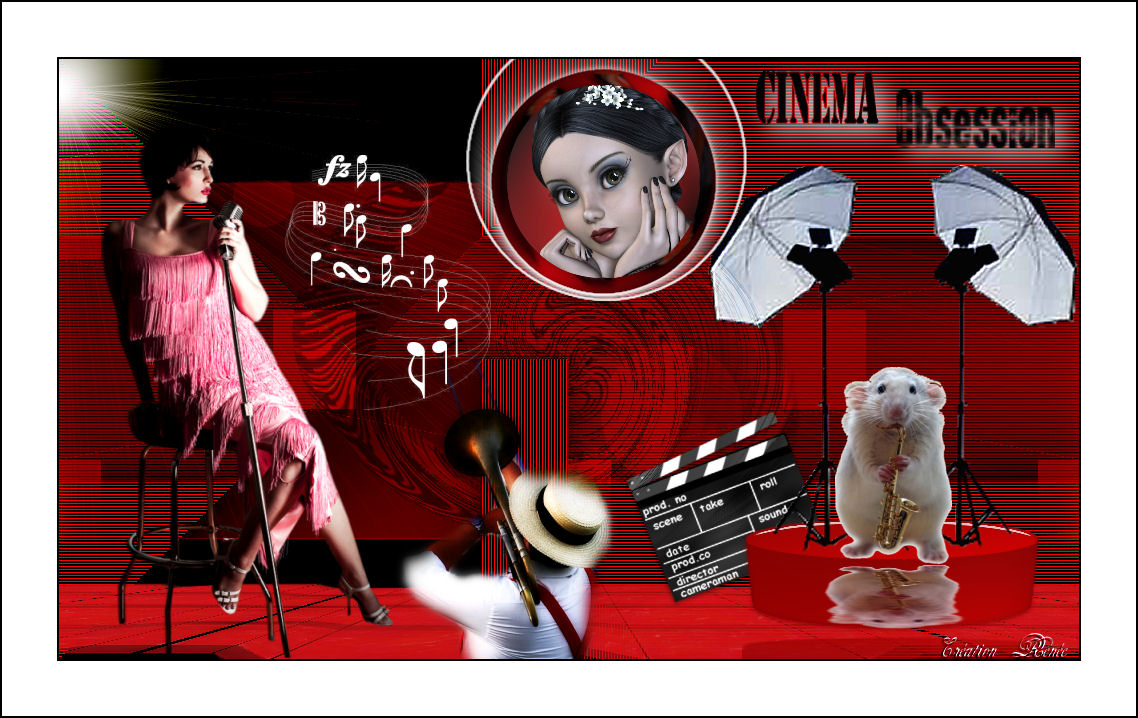
-Activate the top layer in the Layer palette 11. Open the tube ''woman245-Byhebe''/ Edit/copy- Edit/ paste as new layer on your working image- Move tool / place your tube on the left side 12. Open the tube ''bettieloup-trompettiste'' -Edit/copy- Edit/ paste as new layer on your working image /Image Resize 65% resize all layers not checked and move 13. Open the tube ''clap -cinema'' Edit/copy- Edit/ paste as new layer on your working image-Move tool / place your tube on the right side 14. Open the tube ''renee-plot cinema ''Edit/copy- Edit/ paste as new layer on your working image-bottom right 15. Open the tube ''spot sur pied '' Edit/copy- Edit/ paste as new layer on your working image- Move tool / place your tube on the right side Your work look like this now
16. Open the tube ''renee -reflet-cinema '' Edit/ Copy-Edit - Paste as new layer on your working image (do not move it is in the right place) Double click on this Layer and set the Blend Mode to "Overlay "-I have lowered the opacity of that layer to 44% Layers-Arrange-Move Down above raster 2 see screen
17. Activate the top of the Layer-Palette Activate brush , image ''musicnote14 '' in your PSP -File- Export- Custom Brush -Give it a name: ''musicnote14 '' -Activate the Brush Tool and choose the brush:''musicnote14 '' Size 255
18. Layers-New raster layer - Color Palette: Set your foreground color to #ffffff - Stamp your brush on the left side by using your foreground color #ffffff 19. Open the tube ''rat trompettiste '' -Edit/copy- Edit/ paste as new layer on your working image Move tool / place your tube on the right side 20. Layers-Merge-Merge-Visible 21. Layers-New raster layer Material Properties-Set your foreground to #cc0408 -Set your background color to #000000 22. Set your foreground to gradient 'Foreground-background' - Linear -with these settings
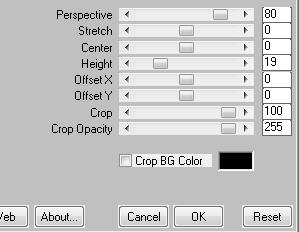
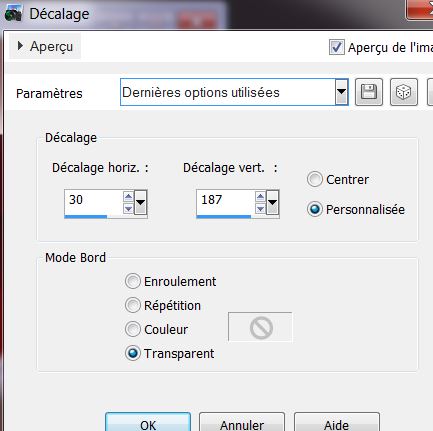
24. Flood Fill Tool: fill the layer with the gradient 25. Effects-Geometric Effects-Circle -Transparent 26. Image Resize 35% resize all layers not checked 27. Effects-Image Effects-Offset with these settings
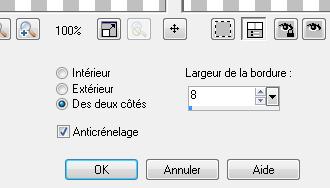
28. Selections -Select All-Selections Float -Selections – Defloat. 29. Layers-New raster layer 30. Open the tube '' fabiana1-MRB_28_03_2009/ - Edit/copy- Edit/ paste into selection Keep Selected Layers-Merge-Merge Down Selections-Modify-Select Selection Borders with these settings-Both Side
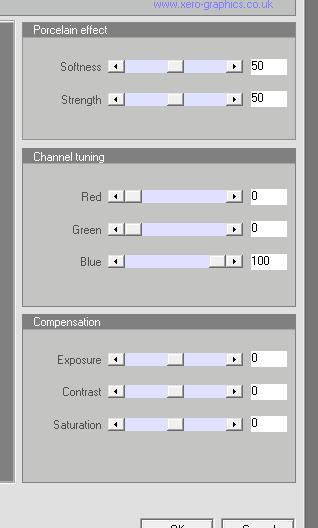
31. Layers-New raster layer / Activate Flood Fill Tool and fill the the selections with the gradient 32. Layers-New raster layer -- Open the tube ''renee-cinema10 --Edit/copy- Edit/ paste into selection -Selections-Deselect All 33. Layers-Merge-Merge 2x Down 34. Effects-Plugins -Xero /porcelaine with these settings
35. Effects-Plugins eyecandy5 /blacklight -tab Settings/User settings choose my preset: ''renee-cinema '' 36. Open the tube text- Edit/copy- Edit/ paste as new layer on your working image and move .Ore write your own text. 37. Image - Add borders-Symmetric checked: 2 pixels black 38. Image - Add borders-Symmetric checked: 55 pixels white 39. Image - Add borders-Symmetric checked: 2 pixels black Save as JPG
I am part of Tutorial Writers Inc. My tutorials are regularly recordedt ReneeGraphisme_All rights reserved
*
|
 Translations