|
New
Translations here
Comme une orange
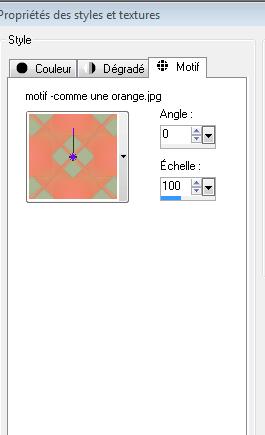
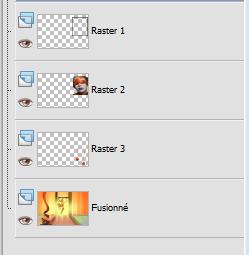
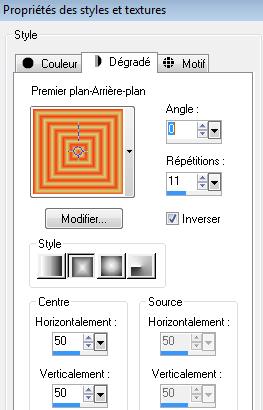
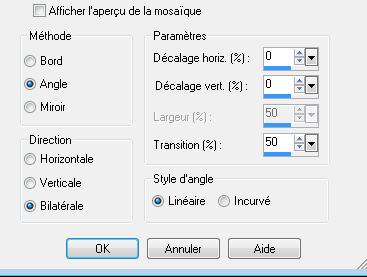
Let's start the lesson. Open the Color Palette 1. Open the image ''fond comme une orange" Window - Duplicate (or shift+D) - Close the original and proceed on the copy -Promote Background Layer =Raster 1'' 2. Layers- New raster layer Open texture ''comme une orange ''in your psp - Set your foreground to >>Pattern >''comme une orange ''>--Configure Pattern (Motif) like this
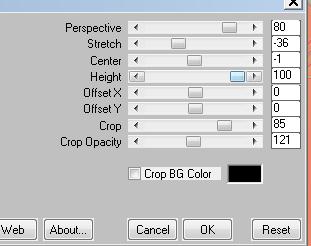
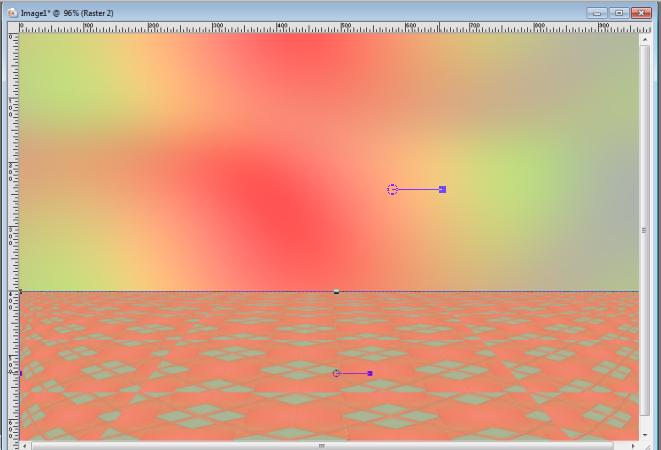
3. -Activate your Flood Fill Tool- Fill with the pattern 4. Effects-Plugins - Mura's meister /Perspective Tilling with these settings
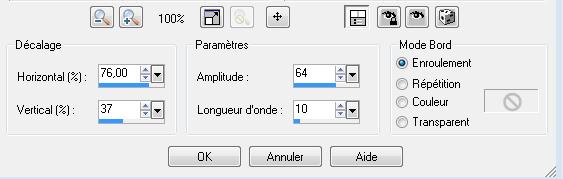
5. Effects-Plugins - Distort /Spherizewith these settings
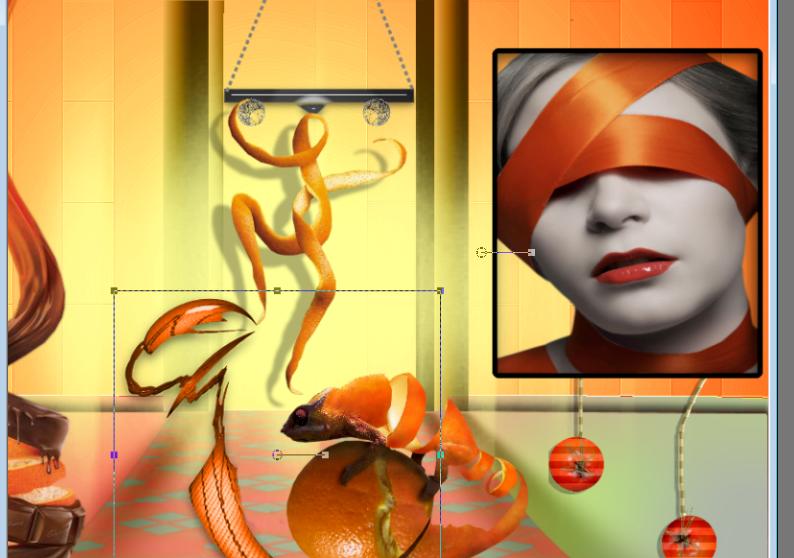
6. Repeat: Effects- Plugins Distort /spherize checked ''Vertical only'' /amount 100 7. Activate the Pick Tool/Deformation tool (K)Mode Scale Pull the Top Node down to 400 high as shown in the example below - Hit the M key of your Keyboard to remove the Nodes
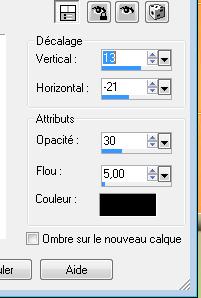
Stay on this layer 8. Selections - load/save selection - load selection from disk and choose my selection: '' comme_ orange_1'' 9. Hit the Delete Key of your Keyboard-Selections-Deselect All 10. Effects-3D Effects-Drop Shadow with these settings
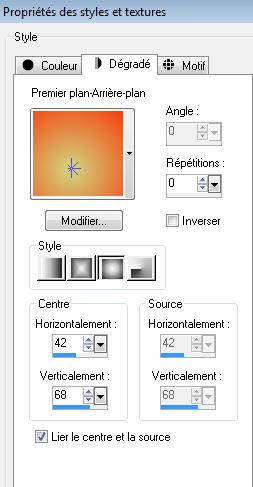
11. Layers- New raster layer 12. Selections - load/save selection - load selection from disk and choose my selection: '' @renee-selection-comme une orange 2 '' 13. Material Porperties- Set your foreground color to #cfd77e -Set your background color to #f83d0c- Set your foreground to gradient 'Foreground-background' - Sunburst with these settings Flood Fill Tool: fill the selection with the gradient
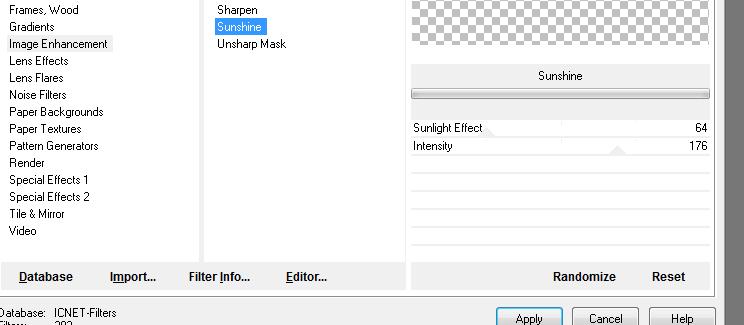
14. Flood Fill Tool: fill the layer with the gradient 15. Effects-Plugins - ICnet Filters -Image Enchancement/Sunshine with these settings
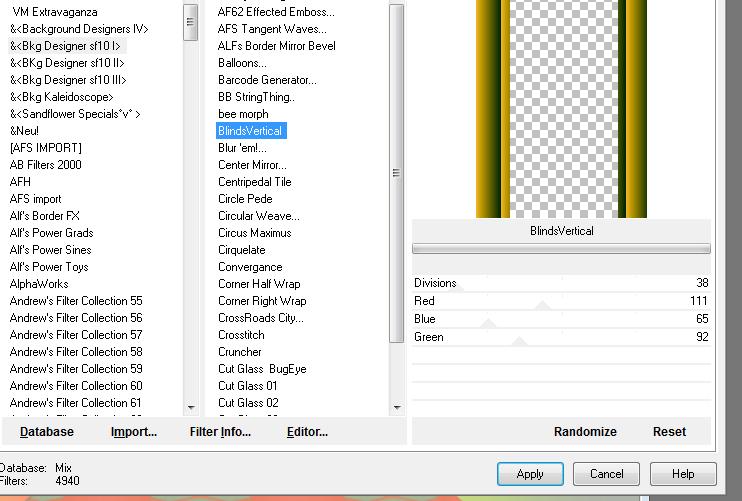
16. Effects-Plugins - L and K's /Katharina paramètre 100 / 0 17.Effects-Edge Effects- Enhance More 18. Selections Deselect All 19. Layers-Arrange-Move Down 20. Layers- New raster layer 21. Selections - load/save selection - load selection from disk and choose my selection: ''@enee-selection-comme une orange 3'' Color Palette: Set the foreground color to #efb52b - Flood Fill Tool: fill the selection with #efb52b 22. Effects-Plugins-Unlimetid & <BKGdesigner sf10I /Blinds vertical with these settings
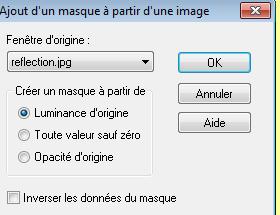
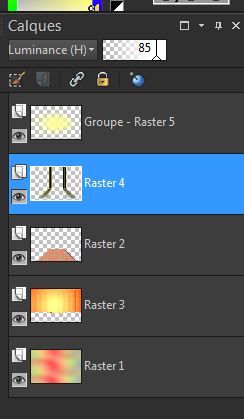
23. Selections-Deselect All Effects-Image Effects-Offset with these settings H= 0 and V = 45 24. Effects-Plugins - EyeCandy 5 - Perspective shadow-Tab-Settings-User/settings and choose my preset ''renee comme une orange perspective'' 25. Layer Palette -Double click on this layer and set the Blendmode to "Luminance Legacy " and set the layer opacity of this layer to 85 26. Layers-Arrange-Bring to Top 27. Layers- New raster layer Color Palette: Set the foreground color to #ffff98 Flood Fill Tool: fill the selection with the foreground color #ffff98 28. Layers- New Mask layer from Image and select Mask ''reflection''
- Layers- Merge- Merge- Group Layers- Arrange-Move Down as shown below
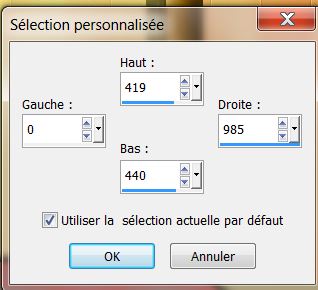
29. Layers- New raster layer 30. Selection Tool ( S ) Custom selection use settings below
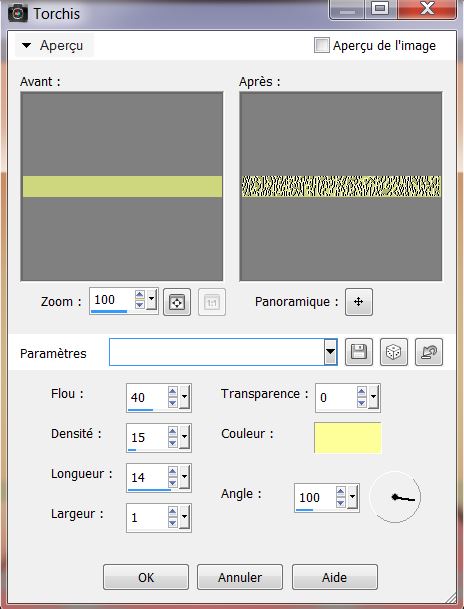
31. Flood Fill Tool: fill the selection with #cfd77e 32.Effects-Distortion Effects-Straw Wall with these settings-color #ffff98
Activate the top of the layer palette 29. Open the tube ''renee-comme une orange-rampe'' Edit/copy-Edit paste as a new layer on your working area and move
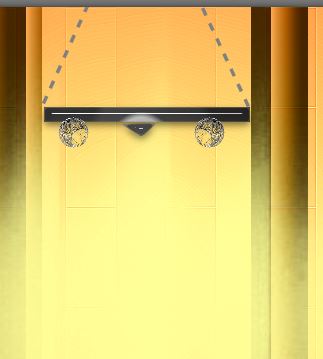
30. Activate Pen Tool with these settings :draw two lines as shown below /Size 4 /color #808080
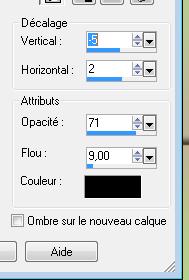
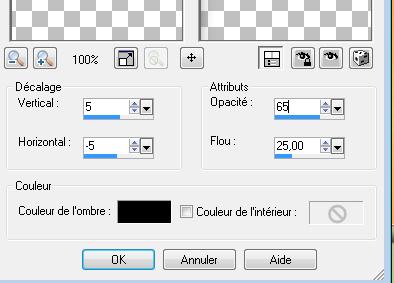
-Vector- Convert to raster layer 31. Layers- Merge- Merge Down 32. Open the tube - ''Calqueguisorangechocolat24052012'' Edit/copy- Edit/ paste as new layer on your working area 33. Open the tube ''comme_orange_barre'' Edit/copy- Edit/ paste as new layer on your working area and move 34. Open the tube ''calqueguisorange24052012 'Image Resize a 45% Edit/copy- Edit/ paste as new layer on your working area and move - Effects-3D Effects-Drop Shadow with these settings
35. Layers- Merge- Merge-Visible 36. Layers- New raster layer 37.Selections - load/save selection - load selection from disk and choose my selection:''@renee-selection comme une orange 4'' 38. Effects-3D Effects-Cutout with these settings
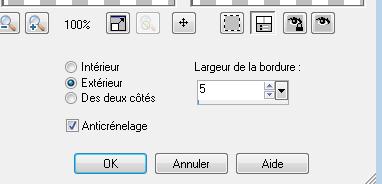
39. Layers- New raster layer - Open the tube ''cat tube 134 dec 08'' Edit/copy-Edit Past into selection - Keep Selected 40. Layers-Arrange-Move Down 41. Activate the top of the Layer-Palette 42. Selections-Modify-Select-Selection Borders with these settings
43. Activate Flood Fill Tool and fill the selections with color black / Selections-Deselect All 44. Effects-Plugins -EyeCandy 5 -Impact - Glass -Preset Clear 45. Open the tube ''renee-comme une orange-grappe'' Edit/copy-Edit paste as a new layer on your working area and move 46. Effet EyeCandy 5 Impact -Glass - Preset Clear Layers-Arange-Move Down and repeat /Your work look like this now
- Activate the top of the Layer-Palette 47. Open the tube ''calguislezardorange24052012'' /Image Mirror /Image Resize a 50% -Edit/copy- Edit/ paste as new layer on your working area 48. Open the tube ''renee-comme une orange-pince '' Edit/copy- Edit/ paste as new layer on your working area and move as shown in the example below
49. Open the tube ''renee-comme une orange-pastilles '' Edit/copy- Edit/ paste as new layer on your working area and move 50. Layers- Merge- Merge Visible 51. Image Resize a 80% resize all layers not checked 52. Layers- New raster layer 53. Material Properties: Set your foreground color to #cfd77e- -Set your background color to #f83d0c Set your foreground to gradient 'Foreground-background' - Rectangular-with settings below. Flood Fill Tool: fill the layer with the gradient
54. Effects-Distortion Effects- Ripple with these settings
55. Effects- Image Effects- Seamless Tiling using the default settings
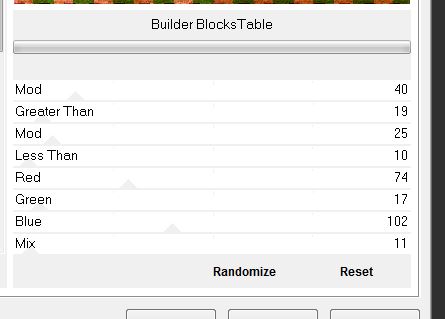
56. Layers-Arrange-Move Down -Activate the top of the Layer-Palette 57. Layers- New raster layer / 58. Selections - load/save selection - load selection from disk and choose my selection:''@renee-selection comme une orange5'' 59.Activate Flood Fill Tool and fill the selection with color black/-Effects-Edge Effects-Enhance 60. Selections- Deselect All 61. Effects-Plugins - EyeCandy5 Impact / perspective /drop shadow blury 62 Open the tube 'papillon orange ''Edit/copy- Edit/ paste as new layer on your working area -Layers- Duplicate 2x and move 63. Layers- Merge- Merge Down-and repeat (1 layer of butterflies) 64. Effects-Plugins - EyeCandy5 Impact / perspective /drop shadow blury 65. Open the tube ''charnière ''Edit/copy- Edit/ paste as new layer on your working area and move to the right 66. Layers-Duplicate /Image Flip Image Mirror 67.Layers- Merge- Merge Down 68. Effects-3D Effects-Drop Shadow with these settings 0/ -12 /30 /5 black 69. Open the tube ''comme_une_orange_pastilles '' Edit/copy- Edit/ paste as new layer on your working area and move 70. Image - Add borders-Symmetric checked:5 pixels black 71. Image - Add borders-Symmetric checked:50 pixels white 72. Activate the Magic Wand and select the black border of 50 pixels 73. Open the tube ''texture comme une orange '' Edit/copy-Edit Paste into selection - Selections-Promote selection to layer *Keep Selected * 74. Effects-Plugins -Unlimited <Sandflowers Specila *V* /Builder Blocks Table with settings below
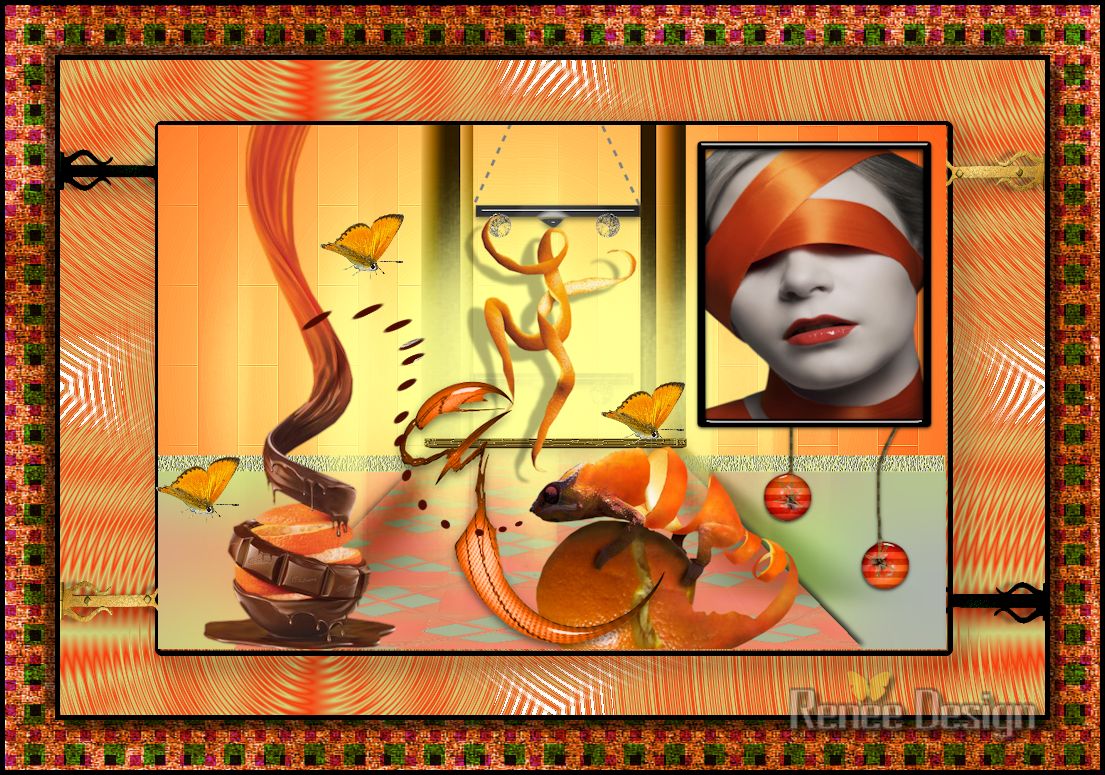
- Selections-Invert 75. Effects-3D Effects-Drop Shadow using the default settings and repeat in negative -10/-10 76. Selections-Deselect All 76. Image - Add borders-Symmetric checked:5 pixels black Save as JPG
I hope you enjoyed this tutorial . Renée This lesson was written by Renée 12/2009 Edited and update 13/11/2013 * Any resemblance with an existing lesson is merely a coincidence * * Don't forget to thank the people who work for us and with us. I named the tubeurs - Testers and the translators. Thanks Renée. I am part of Tutorial Writers Inc. My tutorials are regularly recordedt ReneeGraphisme_All rights reserved
*
|
 Translations