|
Energie New
Translations DOWNLOAD material here
Let's start the lesson. 1. File - New - New Transparent Image:945 x 645 pixels 2. Material Properties: Foreground color to this color: #c8802c Background color to this color : #680b0a 3. Prepare a foreground/background linear gradient with settings below
4. Activate Flood Fill Tool and fill the layer with the gradient 5. On the same layer 6. Activate the Burn Brush with these settings-Limit- Shadows
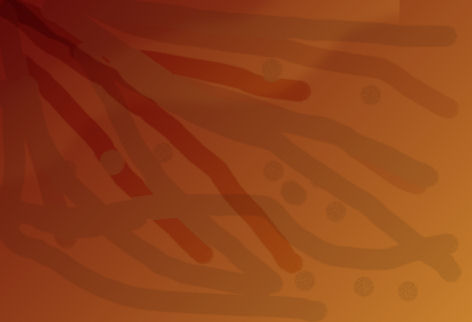
7. Draw lines from left to right do it gently to create a natural effect - Change the mode>> limit = Midtones
-and put it again on your working area as shown in the example - Change the mode>> limit = Highlights - Now draw lines like this on the example ---and sign a few points
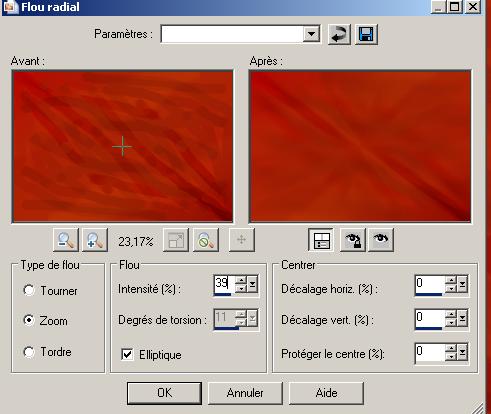
8. Layers- Duplicate -Image -Mirror -Image Flip 9. Adjust-Sharpness-Sharpen 10. Layer Palette -Double click on this layer and set the blendmode to Hard Light Layers- Merge- Merge Down 11. Adjust- Blur- Radial Blur with these settings
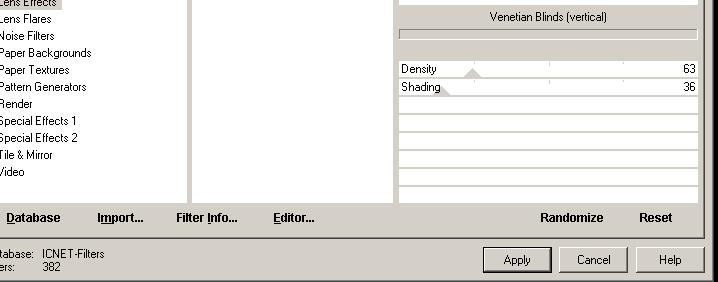
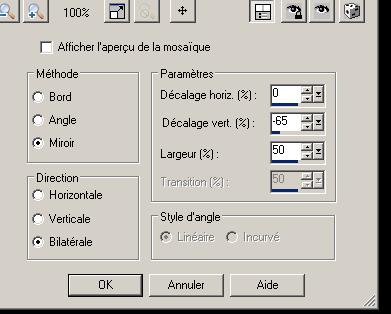
13. Effects-Plugins -Simple -Pizza slice mirror - and repeat !! 14. Layers- Duplicate 15. Effects- Plugins - Land K's -Raisa to 246 / 167 16. Effects- Plugins - Simple -Diamonds - Layer Palette -Double click on this layer and set the blendmode to Color 17. Effects- Edge Effects- Enhance More 18. Layers- Merge- Merge Down 19. Effects-Plugins -ICNET FILTERS– Special Effect 1- Venitian Blinds vertical
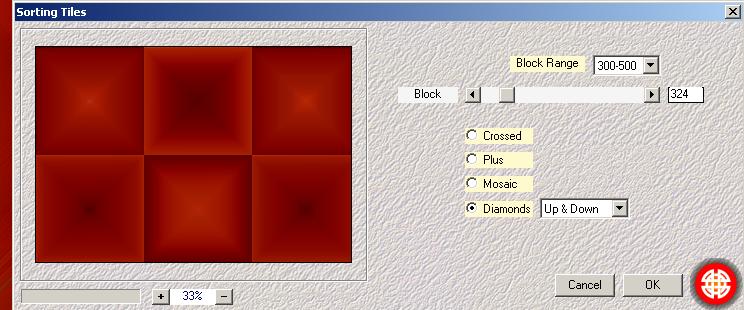
21. Layers- Duplicate 22. Effects- Plugins- Mehdi -Sorting Tiles with these settings
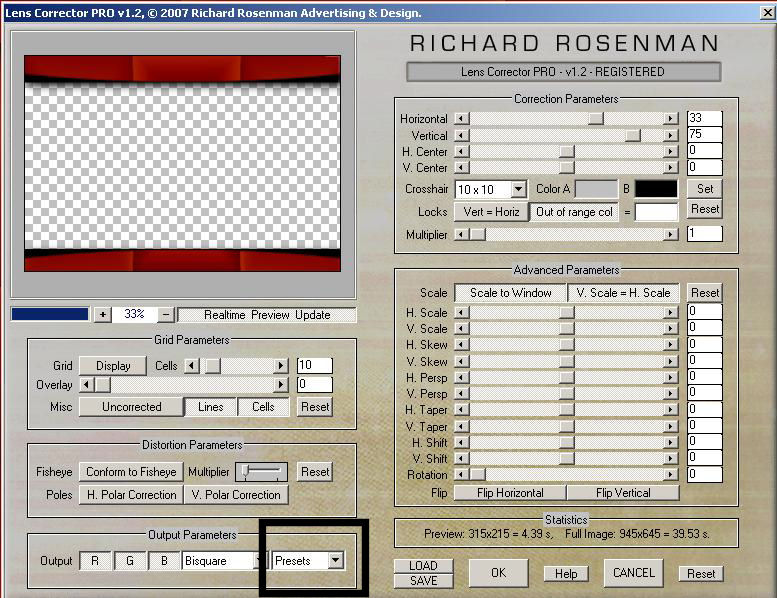
23. Selections - load/save selection - load selection from disk and choose my selection: ''renee-energie2'' 24. Selections- Promote selection to layer 25. Selections Deselect All 26. Effects-Plugins - Eyecandy 5 perspective shadow –Tab- Settings- Preset - Drop shadow blury 27. Effects- Plugins -Richard Roseman -Lens Corrector The colors of the filter are >> #c0c0c0 - Black and White
Click on preset and then choose
28. Activate the Magic Wand with these settings
Select the black parts
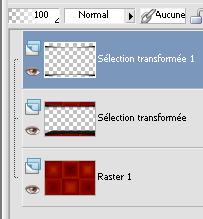
29. Effects- Plugins -EyeCandy 5 Extrude – tab Settings/User settings choose my preset: 30. Selections- Promote selection to layer 31. Selections Deselect All - You are there in your work
32. Activate the top of the layer-Palette ( Promoted selection 1 ) 33. Effects- Geometric Effects-Circle- Transparent - Layer Palette -Double click on this layer and set the blendmode to Soft Light 34. Open the tube ''renee-energie-image 1'' /Edit/copy-Edit paste as a new layer on your working area and place to the left 35. Effects- Plugins - FMTile Tools -Blend Emboss using the default settings 36. Adjust- Sharpness-Sharpen 37. Layers- Duplicate-Image Mirror 38. Open the tube ''anna.br-1230-mascara'' /Edit/copy-Edit paste as a new layer on your working area and place 39. Layers- Arrange- Move 2x Down - Layer Palette -Double click on this layer and set the blendmode to Soft Light - Stay on this layer 40. Open the tube ''castorke_tube_div_71_072012'' activate layer (copy of merged )/Edit/copy-Edit paste as a new layer on your working area and place 41. Activate the top of the layer-Palette 42. Open the tube ''logane_coccinelle1_09mai2022'' Image Resize 65% -Image Mirror /Edit/copy-Edit paste as a new layer on your working area and place 43. Activate Clone Brush with these settings
Activate the layer of the girl/ Clone some fire and go back to the ladybuget /Go to the spot where you want to apply your shape and push your left mouse button to apply/ see screen
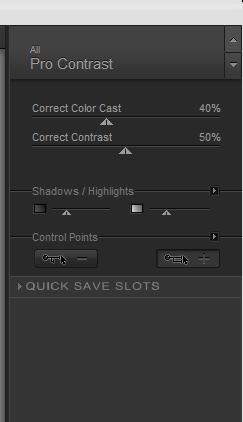
44. Effects- Plugins -EyeCandy 6 -Perspective shadow-Setting Tour-Drop height 1 If you have Filter -EyeCandy 5 with these settings-Drop Shadow High Tab- Basic Overall Blur to 10.53 45. Open the tube ''mou_bug_'' Image Resize 45% Edit/copy-Edit paste as a new layer on your working area and place -Repeat -Effects- Plugins -EyeCandy 6 Perspective Shadow/Drop Heigh 1 46. Layers- Merge-Merge Visible 47. Effects- Plugins -Nick Color effex Pro3- Pro contraste
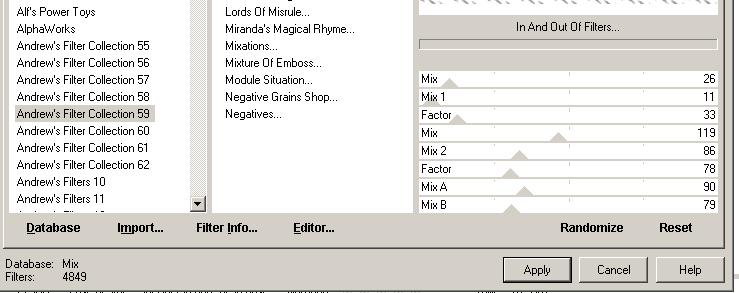
48.Image - Add borders-Symmetric checked:5 pixels black 49.Image - Add borders-Symmetric checked: 55 pixels white 50. With the magic wand -select the border of 55 pixels 51. Effects- Plugins- Andrew's Filter collection 59- In And -Out Of Filters
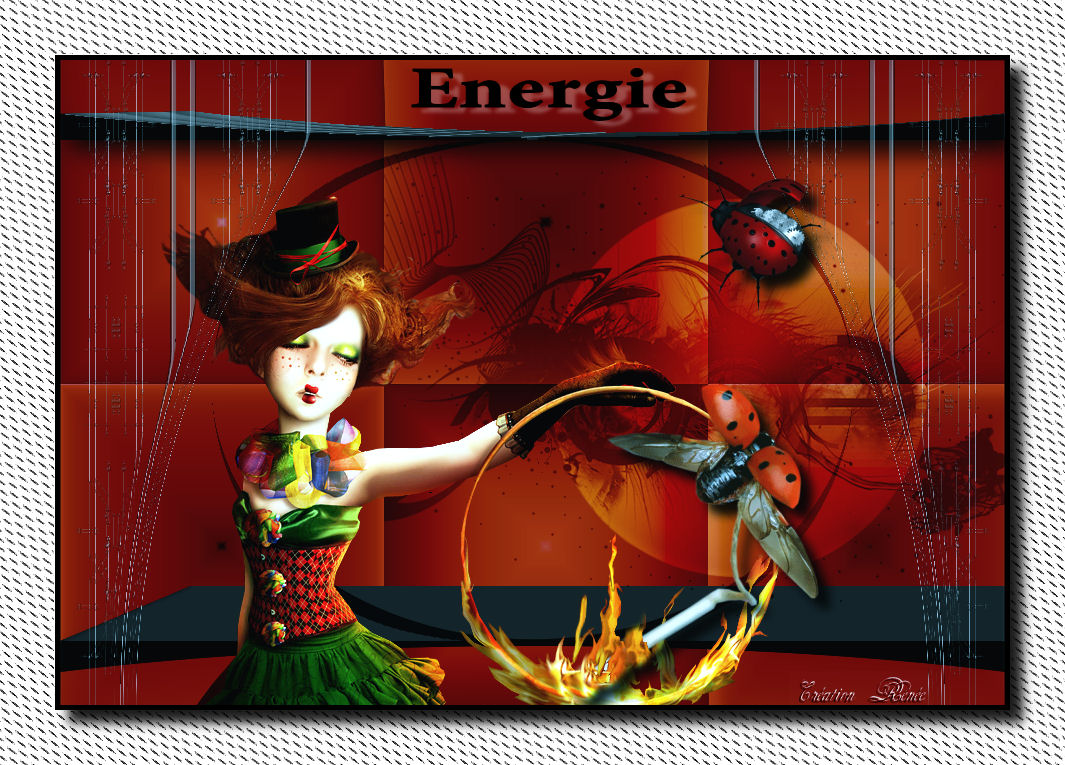
52. Effects- Edge Effects- Enhance 53. Selections- Invert 54. Repeat-Effects- Plugins- EyeCandy 6- perspective shadow with the same settings (see point 44) 55. Open the text/ Edit/copy-Edit paste as a new layer on your working area .Ore write your own text Save as JPG I hope you enjoyed this lesson
Any resemblance with an existing lesson is merely a coincidence * * Don't forget to thank the people who work for us and with us. I named the tubeurs - Testers and the translators. Thanks Renée. * 2014 reçu de TWInc I am part of Tutorial Writers Inc . My tutorials are regularly recorded. ReneeGraphisme_All rights reserved
*
|
 Translations


