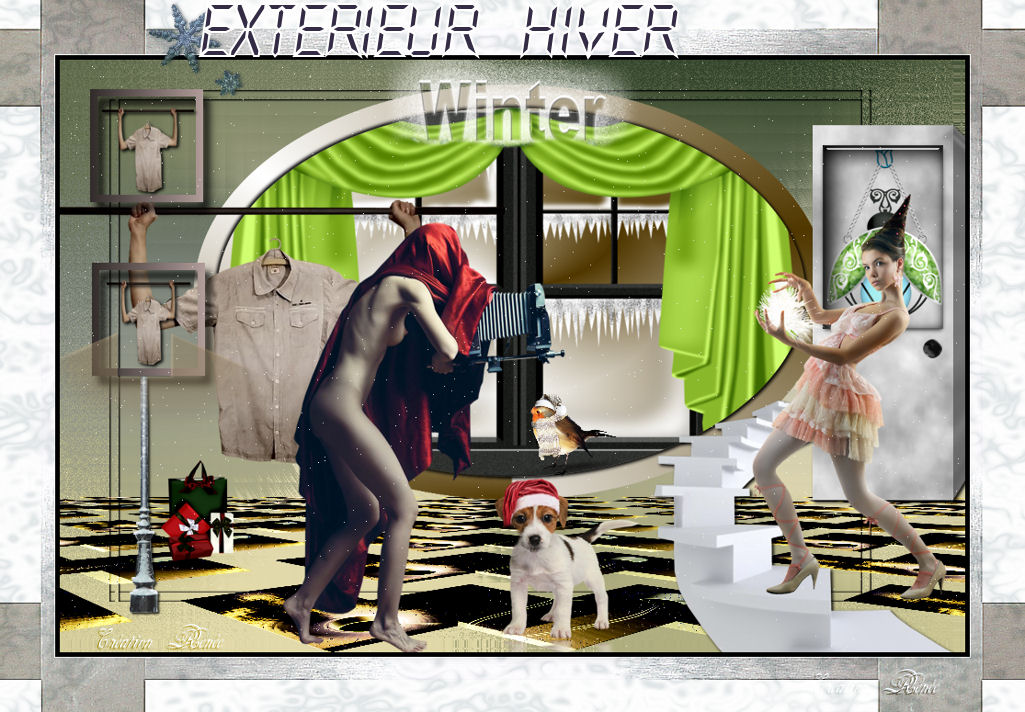
|
New
Extérieur Hiver Traducteur
Let's start the lesson.
1. File - New - New Transparent Image: 985 x645 pixels 2. Material Properties: Foreground color to this color:#f3ebf8 Background color to this color : #0d2863 3. Prepare a linear gradient configured like this.
4. Food Fill:fill the layer with the gradient 5. Effects-Plugins -Flaming Pear flexify
6. Effects- Plugins- Unlimited- &<Bkj Designer – Circus maximus to 116
7. Effects- Plugins -Nick Color Pro.3 –/Bi Color Filters / Color set= green brown 1
8. Selection Tool ( S ) Custom selection use settings below
9. Selections- Invert 10. Effects-Texture Effects-Mosaic Glass with these settings
11. Effects - 3D Effects - Drop shadow with these settings
- Repeat: Effects - 3D Effects - Drop shadow / negative 12. Selections-Deselect All 13. Effects- Plugins- Unlimited- <&<Bkj designer IV- Splash * Preset into the zipfile
14. Layers- Duplicate 15. Effects- Plugins - Flaming pear - Flexify 2
16. Effects- Plugins - EyeCandy 5 - Extrude tab Settings/User settings choose my preset ''renee-metal1'' 17. Activate the Magic Wand click in the middle like this :
18. Layers - New raster layer!!!!- Activate Flood Fill Tool and fill the selection with this color #f3ebf8 19. Selections- Deselect All 20. Effects- Plugins -EyeCandy 5 -Glass –Tab Settings- preset clear 21. Layers- Merge-Merge Down 22. Image-Flip
23. Effects- Plugins -Mura's
Meister - perspective Tilling - click Reset - 24. Activate Pick Tool -Mode scale-Put it down to 480
25. Material Properties: Foreground color to this color: #51400d- Background color to this color : #e1df94
26. Effects- Plugins – Unlimited -PluginsAB02 – xyxy Patterns
- *you can change the colors MIX 1 and MIX 2 if you have differences, but the results vary slightly 27. Layer Palette -Double click on this layer and set the Blendmode to Normal or Hard Light your choice 28. Material Properties: Foreground color to this color white#ffffff -Background color to this color :#503700 - Prepare a Sunburst Gradient as configured
29. Layers- New raster layer- Flood Fill Tool: fill the layer with the gradient 30. Effects- Plugins -simple -Half wrap 31. Effects- Distortions Effects-Polar Coordinates-Rectangular to Polar-Transparent 32. Image Resize 70% (Resize all the layers not checked) With the move tool, move it in the middle of your work 33. Selections -All - Selections Float- Selections -Defloat. 34. Selections- Modify-Contract 25 pixels 35. Layers- New raster layer 36. Open the tube ''nnw_Ibw_window '' Edit/Copy-Edit Paste into selection 37. Repeat: Effects - 3D Effects - Drop shadow with the same settings /positive and negative 38. Selections- Deselect All 39. Open the tube ''renee-exterieur hiver -image 1 ''/Edit/copy-Edit paste as a new layer on your working area and place 40. Open the tube ''tubeclaudiaviza-mix33'' activate raster 1 of the tube /Edit/copy-Edit paste as a new layer on your working area and place
41 Open the tube
''bouton''- /Edit/copy-Edit paste as a new layer on your working area and place on the window/ Layers -Duplicate and move (You do not see it in connection with the photographer 42. Open the tube ''cadres'' /Edit/copy-Edit paste as a new layer on your working area and place /Selection Tool-Rectangle-Draw a selection in the middle of the upper frame /// Selections-Deselect All 43. Layers - New raster layer!!!/ Open the tube ''tubeclaudiaviza-fantasia148'' /Edit/Copy-Edit Paste into selection Selection Tool-Rectangle-Draw a selection in the middle of the bottom frame /Edit-Paste into selection (tube is still in your PSP memory) /Selections-Deselect All 44. Layers- Merge- Merge Down (Frame and the tube ) 45. Return to tube''tubeclaudiaviza-fantasia148'' 46.Image Resize with 55% Edit/copy-Edit paste as a new layer on your working area and place/Effects - 3D Effects - Drop shadow with the same settings /positive and negative 47. Layers- Arrange- Move Down ( the frame) 48. Open the tube ''Nicole-filleboule'' Image Resize with 65% /Edit/copy-Edit paste as a new layer on your working area and place 49. Open the tube ''sacs cadeaux ''Image Resize with 25% /Edit/copy-Edit paste as a new layer on your working area and place 50. Open de tube ''nicole-photographe'' Image Resize with 65 %/ Edit/copy-Edit paste as a new layer on your working area and place 51. Open the tube ''pied de cadre ''/Edit/copy-Edit paste as a new layer on your working area and place like this
52. Open the tube ''winter ''/Edit/copy-Edit paste as a new layer on your working area and place 53. Open the tube ''passero'' /Edit/copy-Edit paste as a new layer on your working area and place Everything is in place? 54. Layers-Merge-Merge All 55. Effects- Plugins -Xero - sparkles
56. Open the tube ''chien hiver '' Edit/copy-Edit paste as a new layer on your working area and place 57. Effet Eye Candy5 Impact - perspective -Tab- Settings -Preset -Reflect in front - Layers-Merge-Merge All 58. Image - Add borders-Symmetric checked:5 pixels black 59. Image - Add borders-Symmetric checked:60 pixels white 60. With the magic wand -select the border of 60 pixels 61. Open the tube ''cadre hiver '' Edit/Copy-Edit Paste into selection 62. Selections- Promote selection to layer 63. Selections- Deselect All 64. Effects- Edge Effects- Enhance More 65. Layers- Duplicate 66. Effects- Plugins - Xtras elemental
67. Set the layer opacity of this layer to 28 68. Layers-Merge-Merge All -Open the text/ Edit/copy-Edit paste as a new layer on your working area .Ore write your own text Save as JPG
I am part of Tutorial Writers Inc. My tutorials are regularly recorded. ReneeGraphisme_All rights reserved
* |

 Translations


