|
New
Translations here
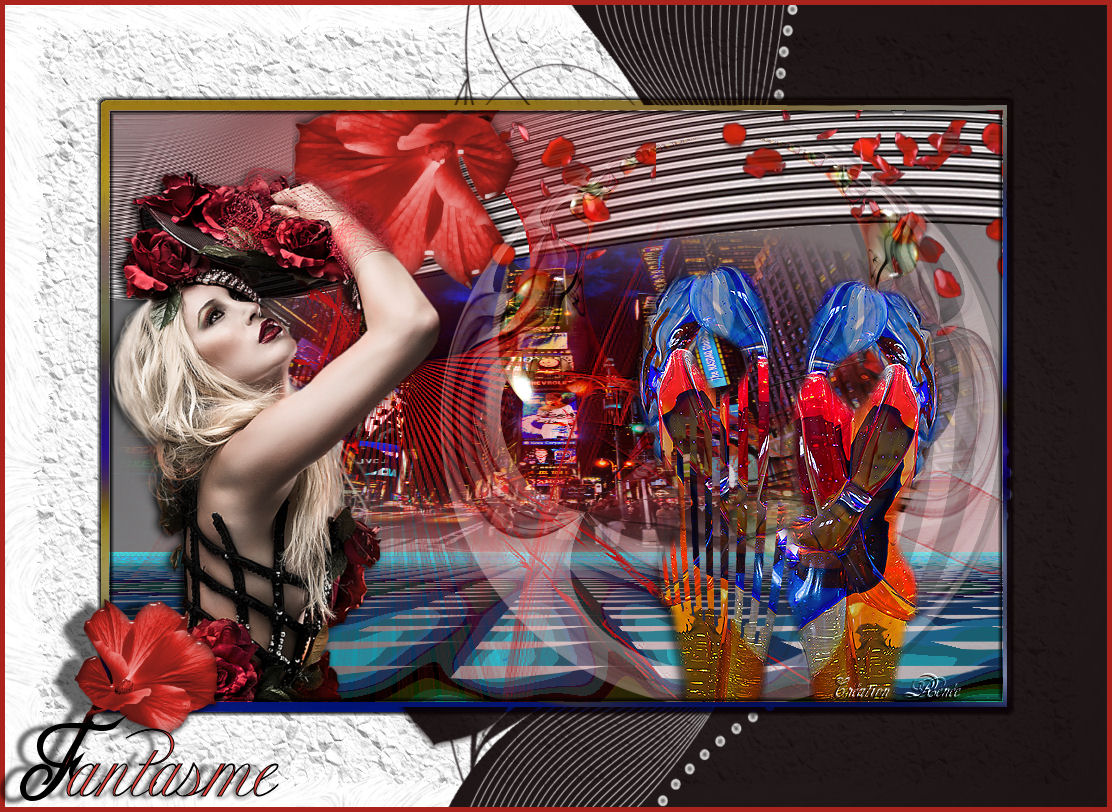
Fantasme
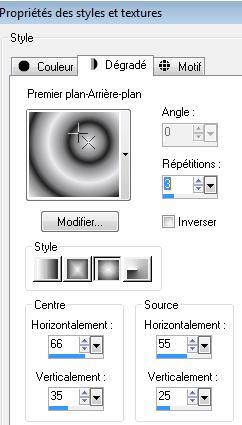
Let's start the lesson. 1. File - New - Transparent Layer 900 x 600 pixels 2. Color-palette:Set your foreground color to color #ebebef -Set your background color to color: #404040 Color Palette:Set your foreground to gradient 'Foreground-background' -Sunburst -configured like this.
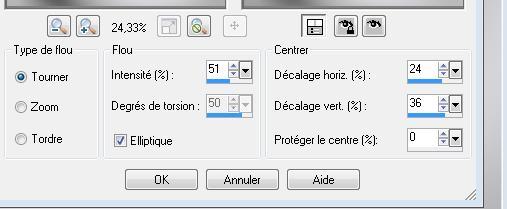
3. - Activate Flood Fill Tool and fill the layer with the gradient 4. Adjust- Blur- Gaussian Blur : Radius 30 5. Adjust- Blur- Radial Blur use settings below
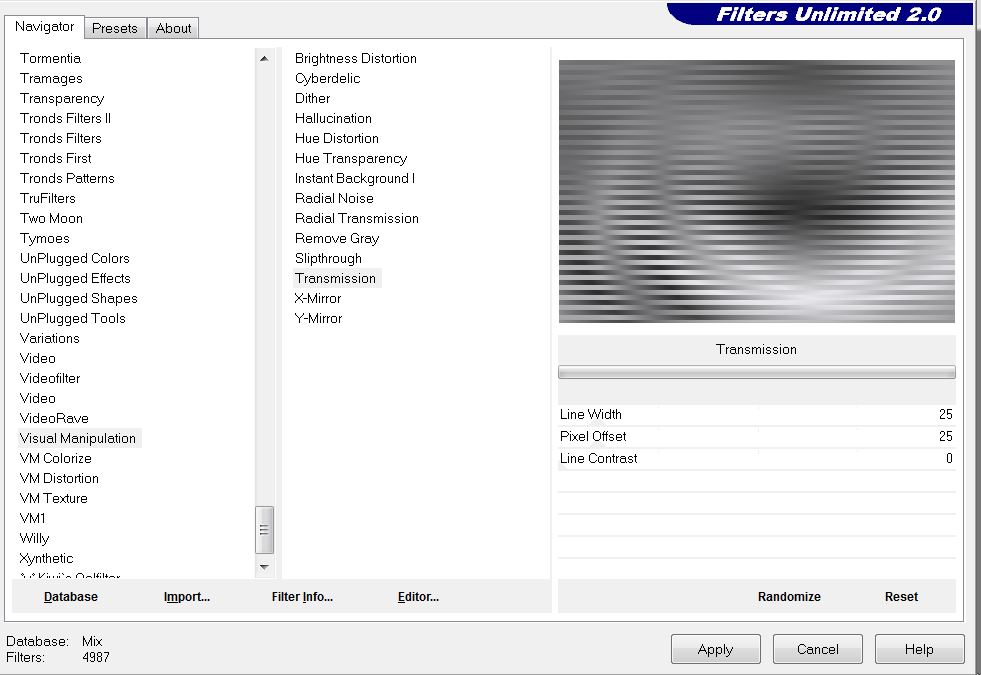
- Repeat- Adjust- Blur- Radial Blur 6. Effects- Plugins-Unlimited - Visual Manipulation - transmission
7. Layers- Duplicate 8. Effects- Edge Effects- Enhance 9. Effects- Distortion Effects-Warp use settings below
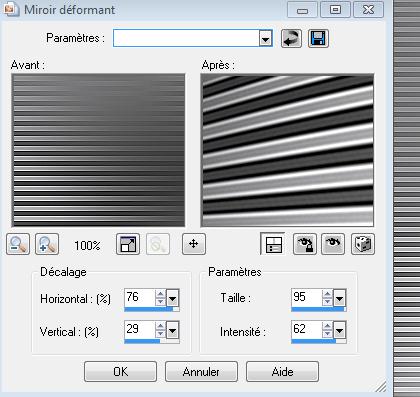
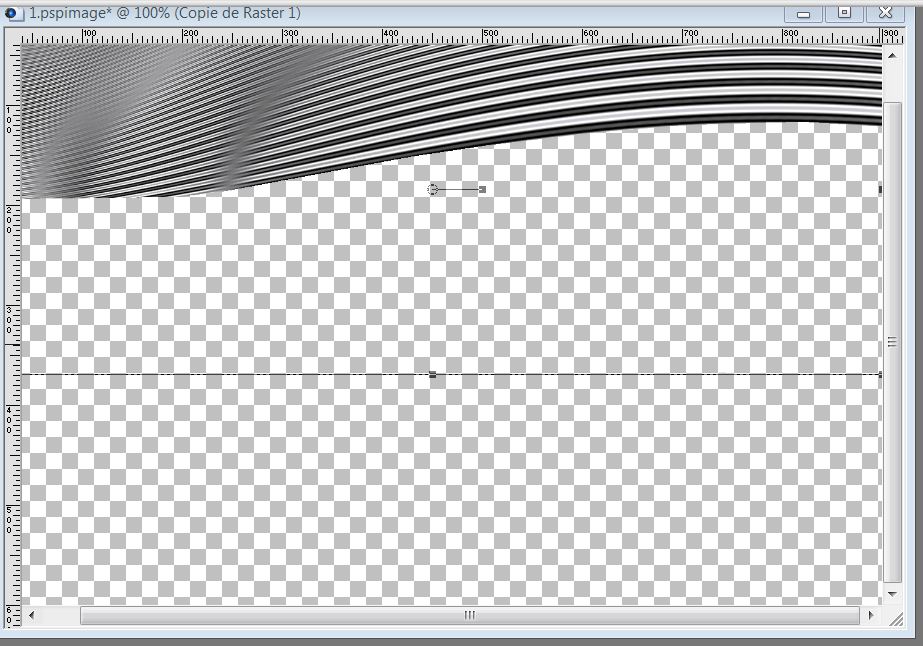
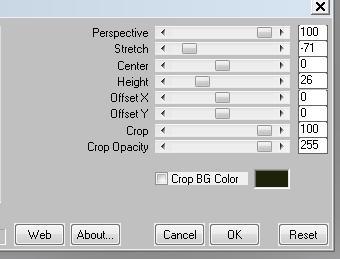
10. Selections –load/save selection –load selection from disc and choose:'' @renee-oups1'' - Delete 11. Selections- Deselect All 12. Activate Pick Tool(K) Mode Scale- now pull the nodes slightly up -Order to obtain this effect as shown in the example below - Layer-Palette- Activate the layer underneath 13. Adjust- Blur- Gaussian Blur : Radius 35 -Activate top layer in the Layer palette 14. Layers- Duplicate- Image Mirror-Image Flip 15. Effects- Plugins- Muras meister - Perspective tilling
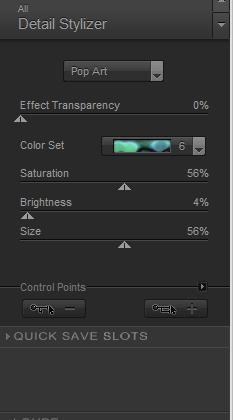
if a line appear at the bottom of the work there erase please 16. Effects- Plugins - Nick Color effex Pro 3-Detail Stylizer-Pop art
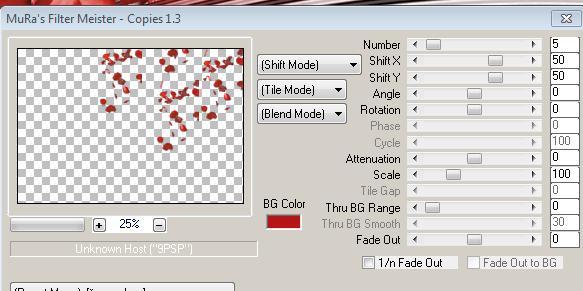
- **Do you have problems with this- image is into the zipfile and paste as a new layer on your working area and move 17. Activate top layer in the Layer palette 18. Layers- New Raster Layer 19. Selections –load/save selection –load selection from disc and choose: ''@renee-oups2'' 20. Open the tube « DBK_building_029Mist »/ Edit-Copy-Edit Paste into selection 21. Selections- Deselect All 22. Layers- New Raster Layer - Activate Flood Fill Tool and fill the layer with #b61417 23. Layers- New Mask layer from Image and choose Mask:« « Narah-mask-abstract142 » -Effects- Edge Effects- Enhance More - Layers- Merge -Merge Group 24. Open the tube « coquelicot » Image Flip /Image Resize to 55% 25. Edit/ Copy-Edit - Paste as new layer on your working image and move to the bottom left 26. Open the tube ''SVB-499-BEAUTY'' - Image Resize to 80% - Edit/ Copy-Edit - Paste as new layer on your working image and move 27. Effects- 3 D Effects- Drop Shadow with these settings: 2/ -3 /100 /12 noir Editer Copier le tube pétale /Edit/ Copy-Edit - Paste as new layer on your working image - place at the top right corner 28. Effects- Plugins- Muras Meister/ copies About this filter click on reset and then set the parameters it gives more accurate results!
29. Open the tube ''Coppia by Eugenia-CLo'' / Edit/copy- Edit/ paste as new layer-Move Tool-Move to the bottom right side - Effects- 3D Effects- Drop Shadow with the same settings 2/ -3 /100 /12 black 30. Open the tube ''fantasme -image 1/ Edit/copy- Edit/ paste as new layer-and move - Layers- Arrange- Move Down- Double click on this Layer and set the Blend Mode to "Hard Light " 31. Layers- New Raster Layer 32. Selections –load/save selection –load selection from disc and choose: ''@renee-oups 3 '' -Pot of Paint:settings of your paint pot to 22%-Activate Flood Fill Tool and fill the selection with the foregroundcolor
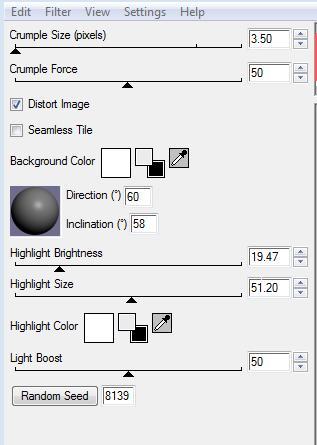
33. Open the tube ''Coppia by Eugenia-CLo'' - Image Mirror - Edit/copy- Edit/ paste as new layer-and move 34. Layers- Merge- Merge Visible 35. Image - Add borders-Symmetric checked: 1 pixels black 36. Image - Add borders-Symmetric checked: 100 pixels #ffffff 37. With your Magic Wand, select the white Border of 100 pixels 38. Layers- New Raster Layer 39. Open the Mask « mask6 »Edit-Copy-Edit Paste into selection - Keep Selected - Activate bottom layer in the Layer palette 40. Effects- Plugins - Alien Skin - Xenofex2 /Crumple use settings below
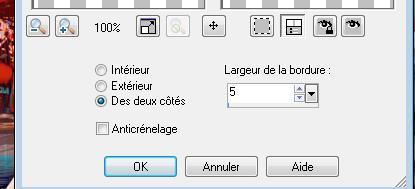
41. Selections- Invert 42. Selections-Modify-Select Selection Borders with these settings
43. Layers- New Raster Layer 44. Open the tube "couleur " Edit-Copy-Edit Paste into selection 45. Effects- 3 D Effects-Chisel use settings below
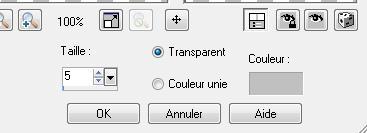
46. Selections- Deselect All 47. Image - Add borders-Symmetric checked: 5 pixels #aa231d 48. Open the "texte " Edit/copy- Edit/ paste as new layer-and move to the bottom left 49. Effects- 3 D Effects- Drop Shadow with these settings: 2/-20/60/5 black Save as JPEG
I am part of Tutorial Writers Inc. My tutorials are regularly recordedt ReneeGraphisme_All rights reserved
*
|
 Translations


 -
-