|
New
**********
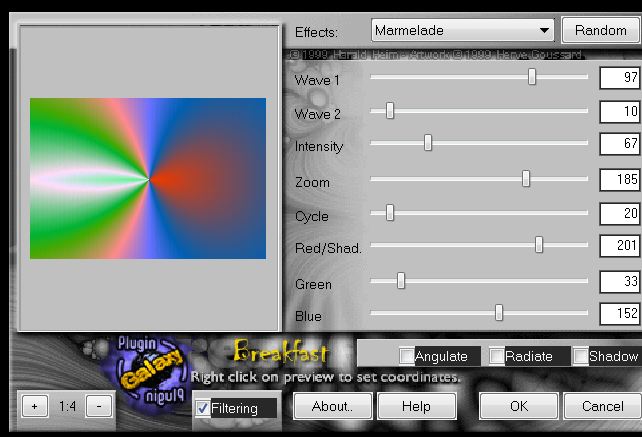
1. File - Open - New transparent Image 950 x 650 pixels -Flood Fill Tool: fill the layer with color black 2. Effects –Filter Plugin Galaxy « Breakfast »
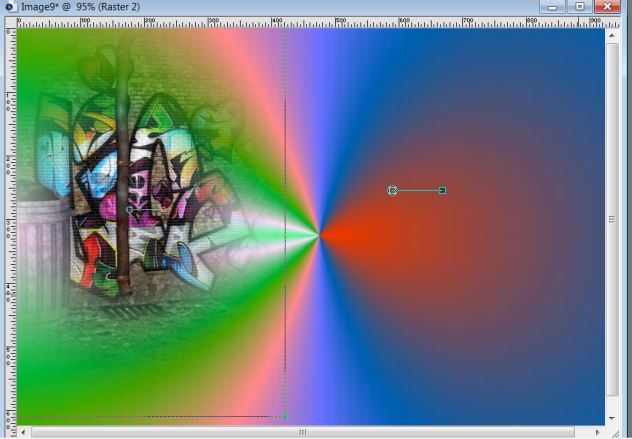
3. Open the tube ''L_graffiti-street_04'' Edit/copy-Edit paste as a new layer. With your move tool move to the left
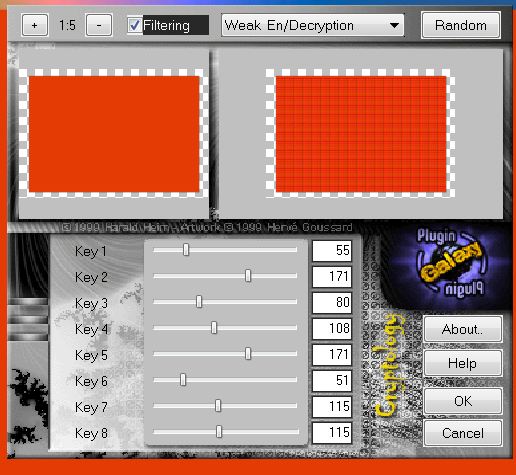
4. Layer Palette: change your Blend Mode to "Hard Light" .Reduce the opacity of this layer to 89% 5. Layers- New Raster layer - Flood Fill Tool: fill the layer with this color: -#e43a04 5. Image- Resize 90% Resize all Layers not checked 6. Effects-Filter Plugin Galaxy « Cryptology »
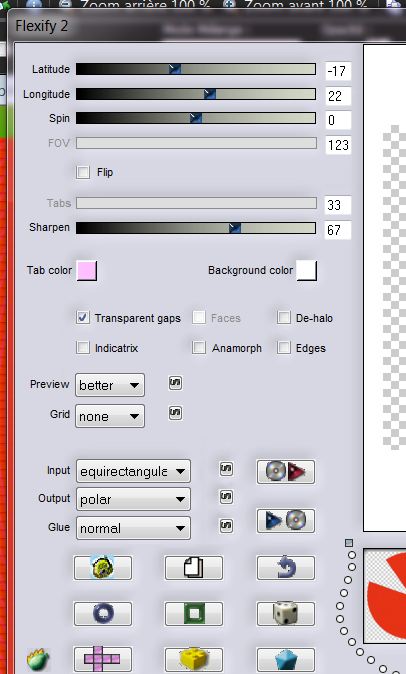
7. Effects-Filter- Flaming Pear / Flexify 2
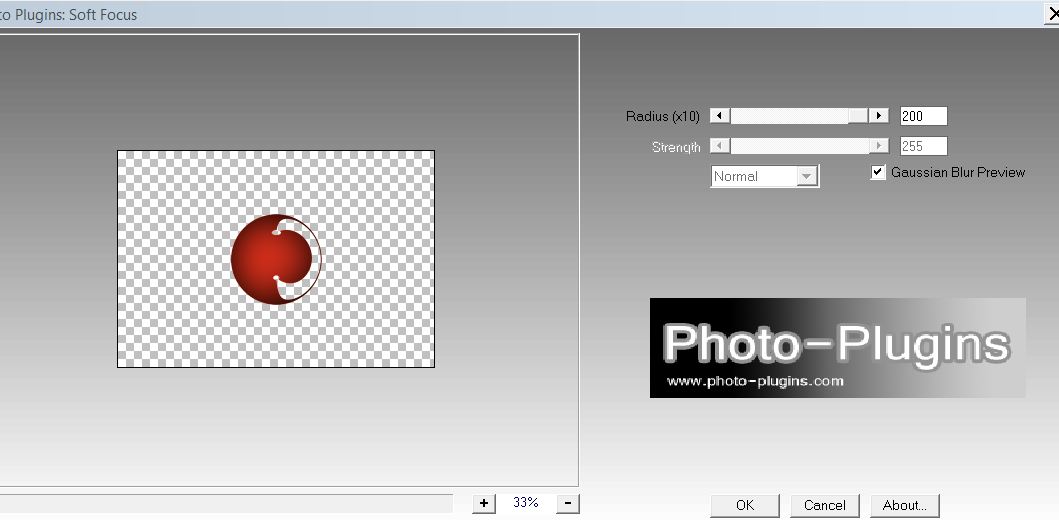
8. Image- Resize 42% Resize all Layers not checked 9. Effects-Filter Photo Plugins / Soft Focus
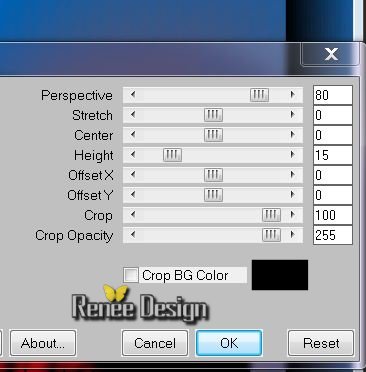
10.Effects- Geometric effects -Perspective vertical
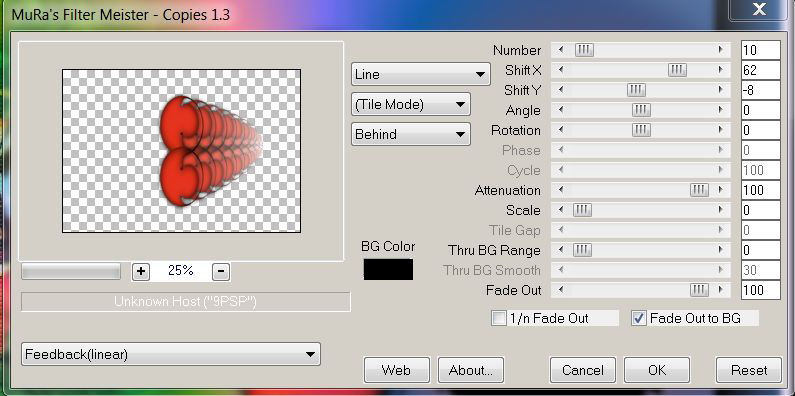
11. Layers- Duplicate- Image-Flip 12. Layers-Merge- Merge- Down 13. Effects - 3D Effects-Drop Shadow: 1/0/100/24 black - Layer Palette-change the Blend Mode to "Hard Light. Opacity 100% 14. Effects-Filter Muras'Meister / copies
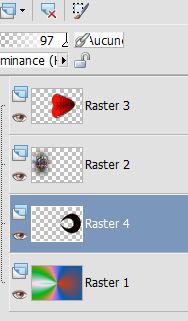
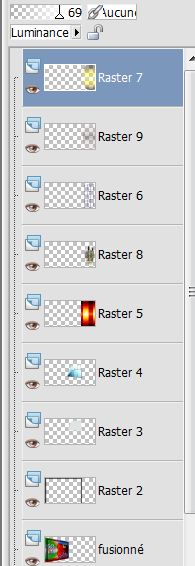
- Aktivate the bottom of the Layer- palette 15. Layers- New Raster layer 16. Selections - load/save selection - load selection from disk and choose : ''renee-graffiti-street '' - Flood Fill Tool: fill the selection with color black 17. Selections-Deselect All - Layer Palette-change the Blend Mode to "Luminance-Legacy. Reduce the opacity of this layer to 97% -You have this in your layers palette
18. Layer-Palette: aktivate raster 3 19.Layers-Duplicate 20. Image Free rotate / 90° left 21. Effects - Filter Muras'Meister -Perspective Tilling -
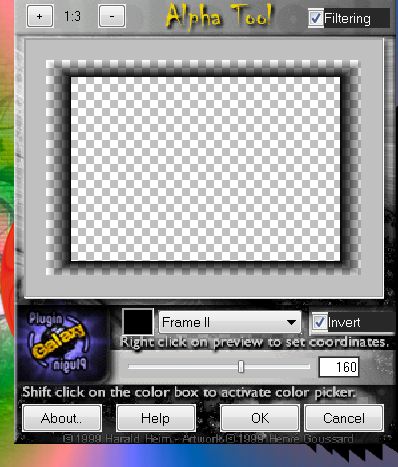
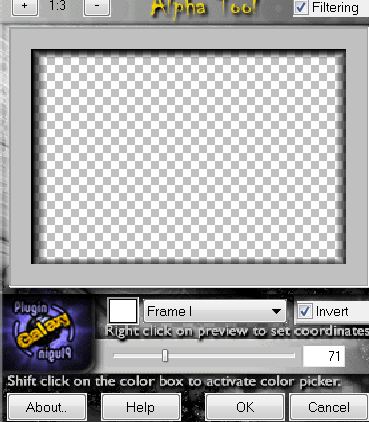
22. Effects- User Defined Filter -Emboss 3 / default . Aktivate the top of the Layers palette 23. Layers- New Raster layer 24. Effects-Filter - Plugin Galaxy -Alpha Tools
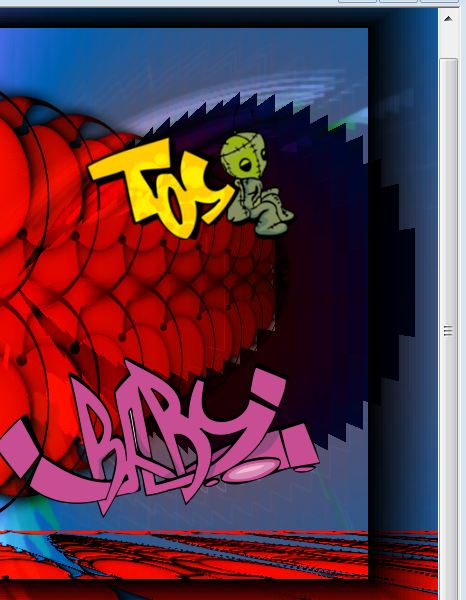
- Aktivate the top of the Layers palette 25. Layers- New Raster layer 26. Selections - load/save selection - load selection from disk and choose : ''renee-graffiti-Street 2'' - Flood Fill Tool: fill the selection with color white 27. Selections-Deselect All - Layer Palette: change your Blend Mode to "Overlay" 28. Effects-Filter -Eye Candy 5 Impact - blacklight -Tab-Settings- User Settings and choose my preset ''renee-graffiti_street- blacklight'' 29. Open tubes ''Graffiti_babyCibijoux and Graffiti_ToyCibibijoux ''Edit/copy-Edit/paste as a new layer. With your move tool place it in the right place like this
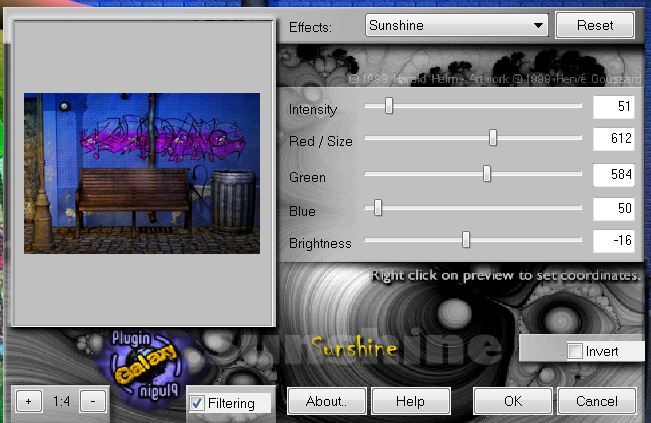
30. Effects-Filter EyeCandy 6 - Perspective shadow -Drop Height 1'' of both tubes / (This filter is not in your psp? Create a drop shadow to your taste) 31. Layers - Merge - Merge all layers - Promote Background layer 32. Effects-Filter Andromeda -Perspective - It open - Place the work against the left edge 33. Layers- New Raster layer 34. Layers- Arrange-Move Down 35. Selections- Select All 36. Activate tube ''Lgraffiti_street_09 '' Edit/copy-Edit paste into selection 37. Selections-Deselect All 38. Effects-Filter Plugin Galaxy -Sunshine
39. Aktivate the top of the Layers palette 40. Layer- New Raster layer 41. Effects-Filter Plugin galaxy- AlphaTool>> frame 1 / 71
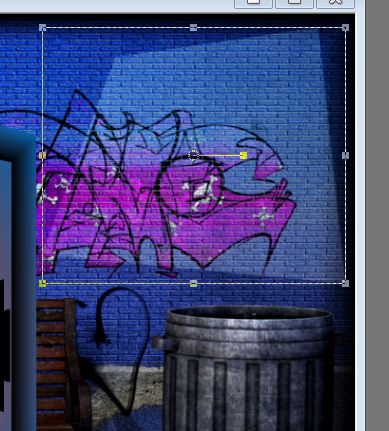
42. Activate tube ''renee-graffiti-ecran''/ Edit/copy-Edit/paste as a new layer. With your move tool place it in the right place like this Layer Palette: change the Blend Mode to "Soft Light"
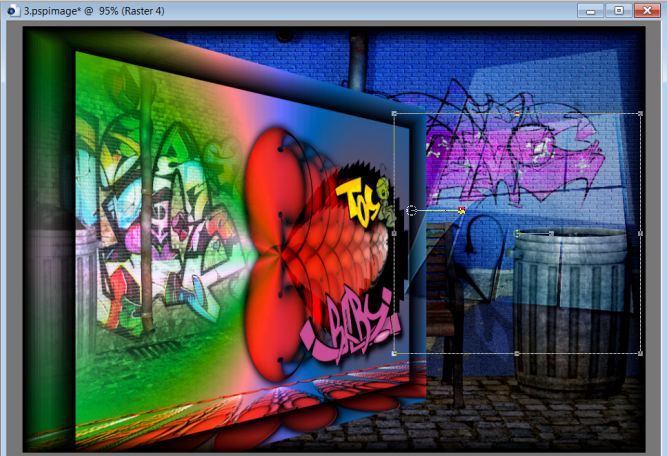
43. Activate tube ''renee-graffiti-ecran2'' Edit/copy-Edit/paste as a new layer With your move tool place it in the right place like this
44. Effects-Edge Effects- "Enhance More" 45. Aktivate the bottom of the Layers palette = raster 1 46. Image- Canvas Size with these settings
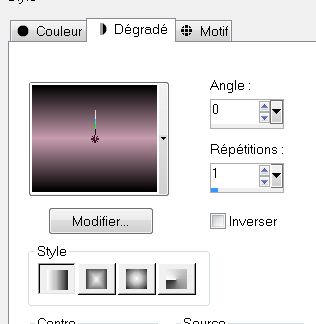
47. With your magic wand select the transparent part of right 48. Layer- New Raster layer 49. Material of the foreground - select my file in the list ''lyndegradient 008'' Prepare a linear gradient configured like this. Flood Fill Tool: fill the selection with the gradient
50. Selections-Deselect All 51. Effects-Filter - Photo Effex – Scanlines
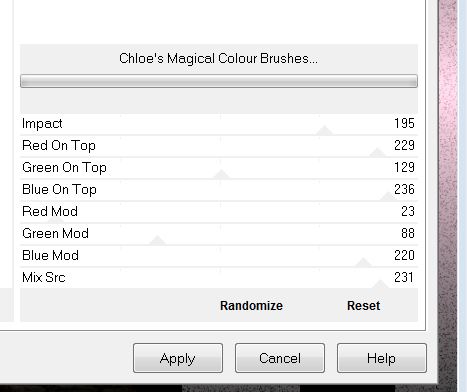
52. Effects-Filter Unlimited -Plugin AB 16/ Cloe's Magical Colour Brushes
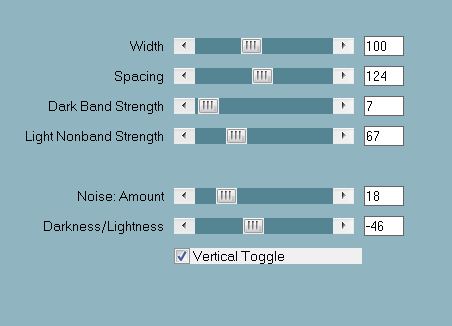
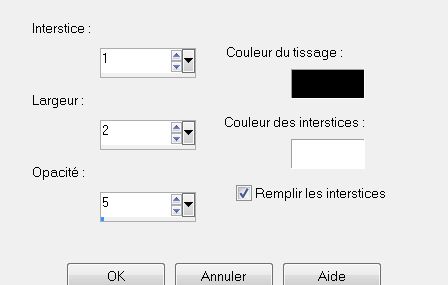
53. Layers- Arrange-Move Down 54. Layer- New Raster layer 55. Selections - load/save selection - load selection from disk and choose : ''renee-graffiti-street-1 '' - Flood Fill Tool: fill the selection with this color: #3e33c1 56. Effects-Textur Effects-Weave with these settings
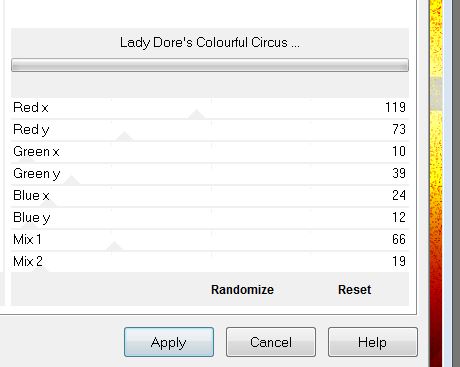
57. Effects - 3D Effects-Drop Shadow: /1/3/100/0 black 58. Selections-Deselect All - Layer Palette: change your Blend Mode to "Luminance" 59. Layers- New Raster layer 60. Selections - load/save selection - load selection from disk and choose :''renee-graffiti-3'' 61. Activate tube ''tube-by-stephane-661-05-02-08''/ Edit/copy-Edit paste into selection 62. Effects-Edge Effects-Enhance 63. Selections-Deselect All 64. Layers-Arrange-Move Down 65. Layers- New Raster layer 66. Selections - load/save selection - load selection from disk and choose : ''renee-graffiti 4'' 67.Activate tube ''effet_graffiti_rond'' / Edit/copy-Edit paste into selection 67. Pot of Paint configured like this - No new raster layer! Flood Fill Tool: fill the selection with this color: #3e33c1 -Layer Palette: change your Blend Mode to "Luminance" Reduce the opacity of this layer to 67% (Pot of Paint opacity 100 %) 68. Effects-Filter - Unlimited -Plugin AB01- /Lady Dore's Colourful Circus
69. Selections-Deselect All - Layer Palette look like this now
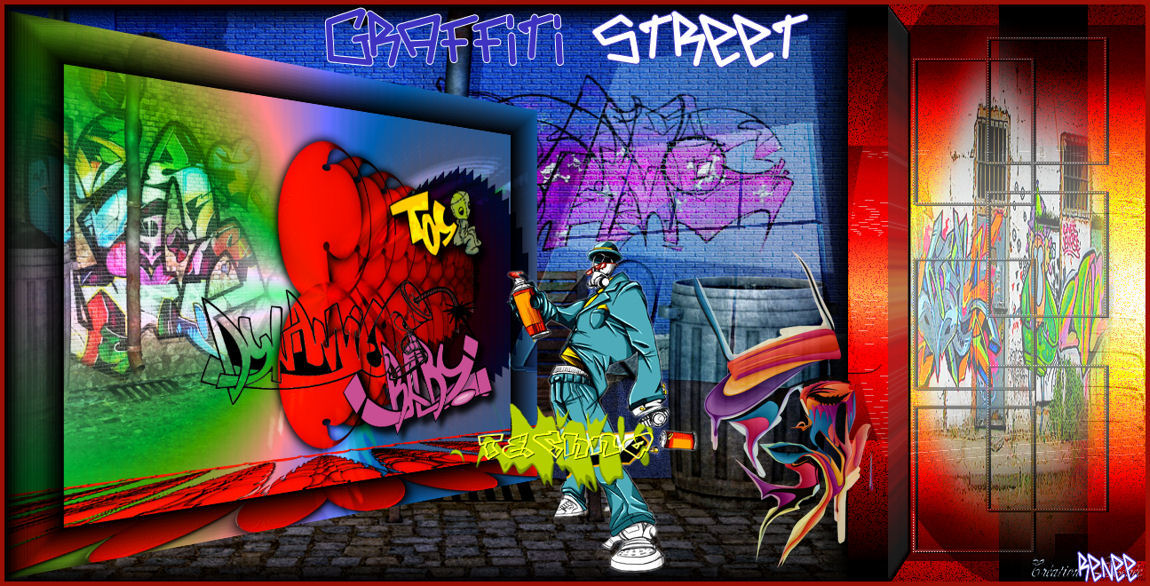
70. Layers- Merge-Merge -Visible 71. Selections - load/save selection - load selection from disk and choose : 'renee-graffiti 5''/Promote selection to layer 72. Selections-Deselect All 73. Effects-Filter EyeCandy 5 Impact - Extrude – Tab-Settings- User Settings and choose my preset ''renee-graffiti_extrude'' 74. Effects -3D Effects-Drop Shadow: 1/3/100/0 black 75. Activate tube ''dynamyte-CibiBijoux ''be placed on the raster 1 of the tube / Edit/copy-Edit/paste as a new layer . With your move tool place it in the right place 76. Activate tube ''cal_guis_7_04_2008''= be placed on the raster 2 of the tube / Edit/copy-Edit/paste as a new layer. With your move tool place it in the right place 77. Activate tube ''Liza tube 339''/ Image Resize 2 x 55% . Edit/copy-Edit/paste as a new layer. With your move tool place it in the right place Reduce the opacity of the layer to 85% 78. Layers - Merge - Merge all layers 79. Image - Add Borders - Symmetric 5 pixels #9a0f06 80. Material Properties: FG-Color to color: #3e33c1 BG-Color to color white Text Tool: Font: ''adrenaline:zero" Write your own text
I am part of Tutorial Writers Inc. My tutorials are regularly recorded
*
|
 Translations


 Let's Start