|
Let's start the lesson .
1.Open a new transparent image of 965 x 645
2.Material Properties: Foreground color to this color: #969696 Background color to this color : #d9090a
3. Prepare a rectangular gradient configured like this.

4. Pot of Paint -Attention !! Tolerence 200

5.Activate Flood Fill Tool and fill the layer with the gradient
6. Effects- Art Media Effects-Brush Strokes with these settings-Background color
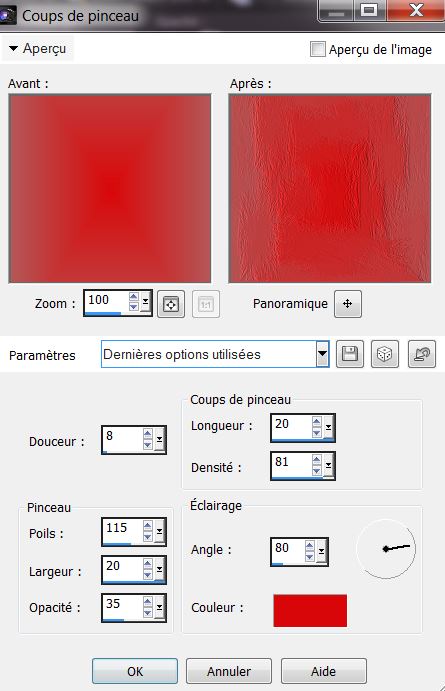
*
This process takes some time*
7.Effects- Edge Effects- Enhance
8. Layers- Duplicate
9. Image
Free Rotate 90° right
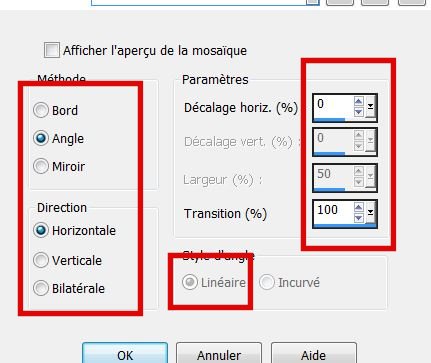
10. Effects-Image Effects-Seamless Tiling with these settings
11.
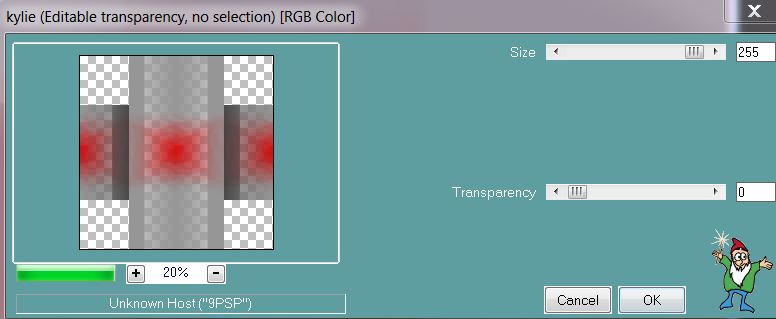
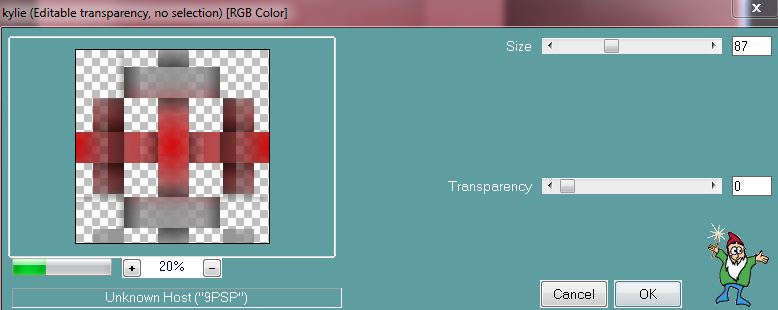
Effects- Plugins – PhotoschopfunII- Kylie
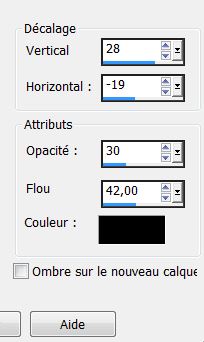
12. Effects - 3D Effects - Drop shadow with these settings:
13. Layers-Duplicate
14. Effects- Plugins – PhotoschopfunII- Kyle use settings below
15.
Effects- Plugins
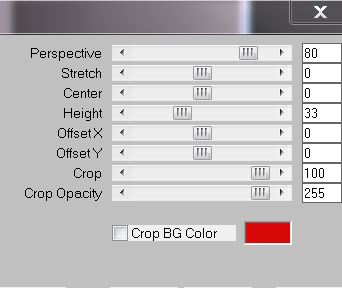
- Mura's Meister – Perspective Tilling /Background color #d9090a
16. Effects-Plugins EyeCandy 5- Impact – Perpsective shadow- Preset /
Drop Shadow Low
17. Layer-New Raster Layer
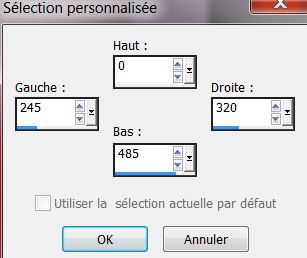
18. Selection Tool ( S ) Custom selection use settings below
19. Activate Flood Fill Tool and fill the selection with the gradient
20. Selections-Deselect All
21. Effects- Plugins – PhotoschopfunII- Kyle - Size = 15 and
Transparency = 0
22. Effects-Plugins EyeCandy 5- Impact – Perpsective shadow- Preset
Drop Shadow Low
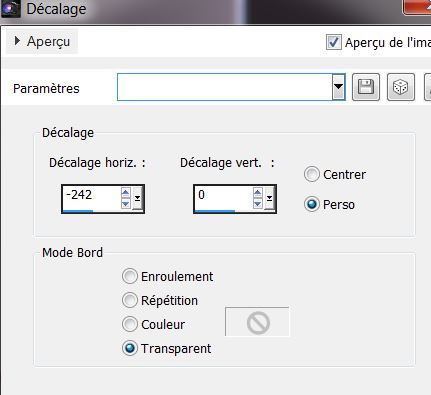
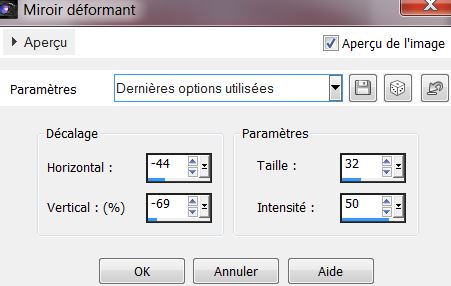
23. Effects- Image Effects-Offset use settings below
24. Effects- Distortions Effects-Warp with these settings
25. Layers- Duplicate/Image Mirror
26. Layers- Merge-Merge Down
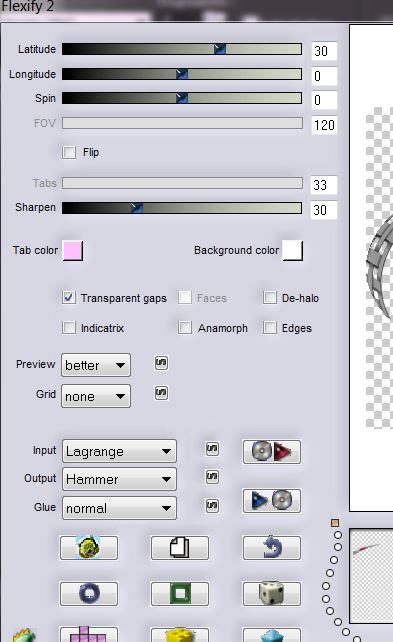
27. Effects- Plugins - Flaming Pear - Flexify 2 with these settings
28. Effects- Plugins - EyeCandy 5 Impact - Perspective Shadow –Preset
- drop shadow blury
29. Layer-New Raster Layer
30. Selections - load/save selection - load selection from disk and choose my selection:''legende_des_animaux_1''
31. Pot of Paint-Tolerence 100

32.Activate Flood fill tool and fill the selection with the BG-Color
33. Selections-Deselect All
34. Effects- Plugins EyeCandy 5 Impact- Glass-tab Settings/User settings - choose my preset - Preset''
la_legende_des_animaux_glass''
35. Layer-New Raster Layer
36. Selections - load/save selection - load selection from disk and choose my selection:''legende_des_animaux_2''
37. Activate Flood fill tool and fill the selection with the FG-Color
38. Selections-Deselect All
39. Effects- Plugins - EyeCandy 5 Impact -Glass -tab Settings/User settings - choose my preset- ''
la_legende_des_animaux_glass''
40 Effects - 3D Effects - Drop shadow with these settings: 0/0/65/12 color black
41. Layer-New Raster Layer
42. Selection Tool ( S ) Custom selection use settings below

43.Activate Flood fill tool and fill the selection with the BG-Color
44. Selections-Deselect All
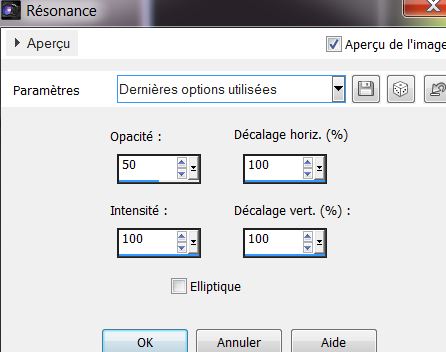
45. Effects- Reflections Effects- Feedback with these settings
46. Effects - 3D Effects - Drop shadow with the same settings
47. Effects- Distortion Effects- Wave use settings below

48. Activate the bottom of the Layer-Palette=Raster 1
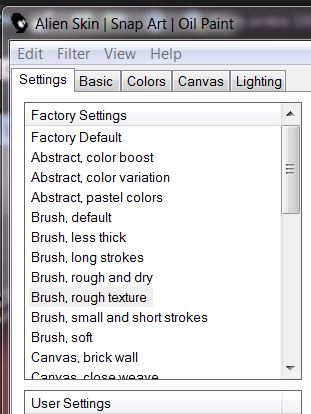
49. Effects- Plugins - EyeCandy - Snap Art –Tab Settings- Oil paint - Preset
- Brush,rough texture
50. Activate the top of the Layer-Palette
51. Layer-New Raster Layer
52. Selections - load/save selection - load selection from disk and choose my selection: ''legende_des_animaux_3''
53. Material Properties: : Change the rectangular gradient into a sunburst gradient as configured
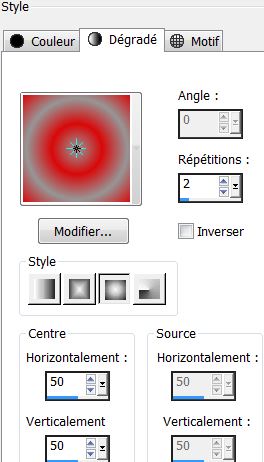
54. Activate Flood Fill Tool and fill the selection with the sunburst gradient
55. Selections-Deselect All
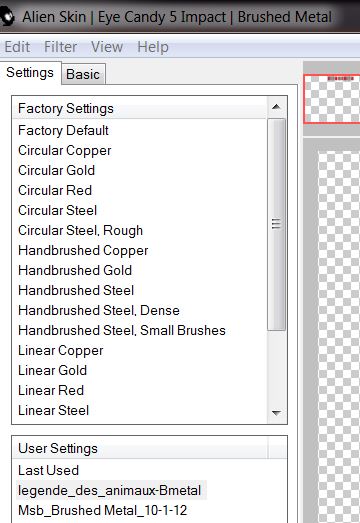
56 Effects- Plugins EyeCandy 5 Impact - Brushed metal-tab Settings/User settings - choose my preset ''legende_des_animaux_Bmetal''
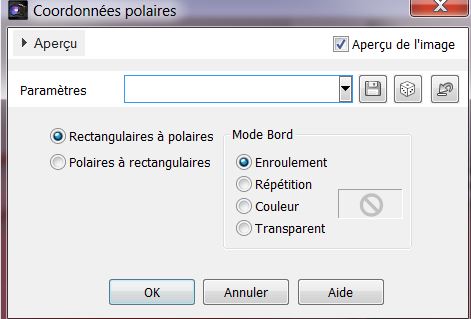
57.
Effects- Distortions Effects-Polar Coordinates-Rectangular to Polar with these settings
58. Effects- Plugins -EyeCandy 5-Impact – Extrude -tab Settings/User settings - choose my preset- ''la_legende_des_animaux_extrude''
59. Open the tube -''image _1 ''Edit/copy-Edit paste as a new layer on your working area and place
60. Open the tube -''image _2'' Edit/copy-Edit paste as a new layer on your working area and place
61. Open the tube ''7e35b14b'' Image Resize 55% -Edit/copy-Edit paste as a new layer on your working area and place
62. Effects - 3D Effects - Drop shadow with these settings: 3/-2/42/6 color black
63. Open the tube''b8ddf17e''Image Resize 85% Edit/copy-Edit paste as a
new layer on your working area and place
64. Effects - 3D Effects - Drop shadow with these settings: 3/-2/42/6 color black
65. Open the tube ''yoka_TG_birds'' Edit/copy-Edit paste as a new layer on your working area. With your move tool move to the right corner
66. Open the tube''image_3 Edit/copy-Edit paste as a
new layer on your working area do not move !!!. Reduce the opacity of this layer to: 55%
67. Effects - 3D Effects - Drop shadow with these settings: 3/-2/42/6 color black
68. Open the tube ''Bilby'' .Edit/copy-Edit paste as a
new layer on your working area .With your move tool move to the left corner
69. Layers- Merge-Merge Visible
70. Edit-
Copy!!!!
71. Image - Add borders-Symmetric checked: 1 pixel color black
72. Image - Add borders-Symmetric checked: 15 pixels background color
73. Image - Add borders-Symmetric checked: 80 pixels color white
74.
Activate Magic Wand and click in the white border of 80 pixels
75 .Edit Paste into selection-(Image is still in your PSP memory)
76. Adjust-Blur-Gaussian Blur-Radius 15%
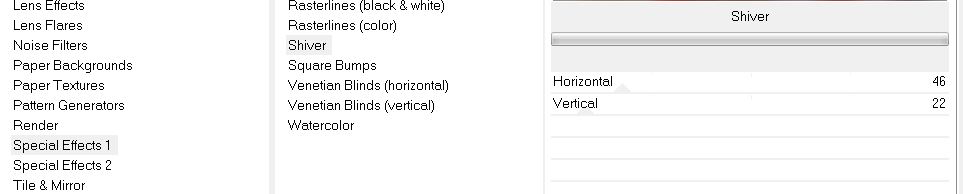
77. Effects-Plugins Unlimited ICNET FILTERS -Special Effect 1 -
Shiver with these settings
78. Selections- Promote selection to layer
79. Effects- Edge Effects- Enhance More
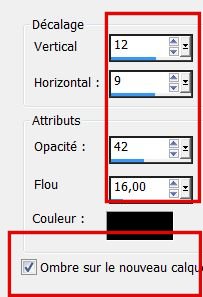
80. Selections- Invert
81. Effects - 3D Effects - Drop shadow with these settings/ Shadow on new layer checked
82. Selections-Deselect All
83 Layer Palette: Layers-Arrange-Bring to Top (Shadow layer )
84. Layers- Duplicate/Image Mirror
85 Layers- Merge-Merge Visible
86. Open the tube ''image_4'' Edit/copy-Edit paste as a new layer on your working area.Do not move !!
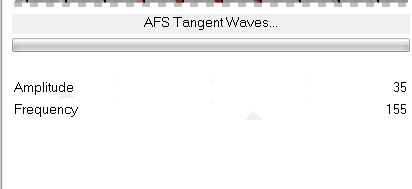
87. Effects- Plugins -
Unlimited 2.0- <&Bkj Desifner sf10 I> AFS Tangent Waves
with these settings
88. Layer Palette -Double click on this Layer and set the Blend Mode to "Soft Light " Reduce the opacity of this layer to 93%
89. Effects- Plugins -FM Tile Tools – Blend Emboss default settings
90. Effects- Plugins Adjust Variation click 3x lighter
91. Layers- Merge-Merge Visible
92. Image - Add borders-Symmetric checked: 2 pixels color black
93. Activate the Text-Edit - Copy -Edit - Paste as new layer on your working area and move .Ore write your own text
94. Layers - Merge - Merge all
95. Image
Resize 995 Pixels Width
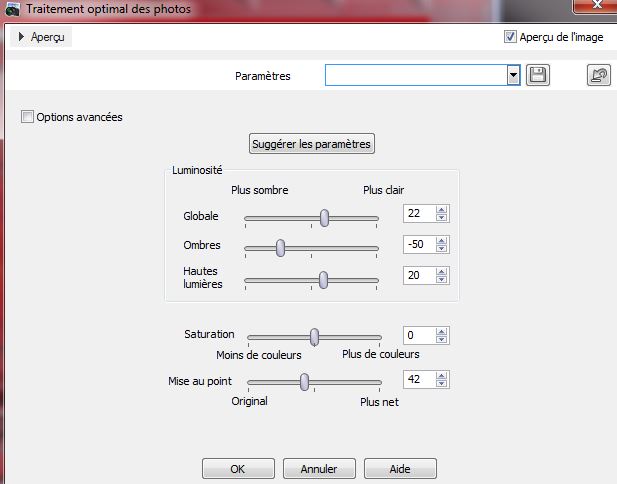
96. Adjust-Smart Photo Fix use settings below
I hope you enjoyed this lesson
This lesson was written by Renée
12/05/2013

|


 Translations