|
New
Translations here
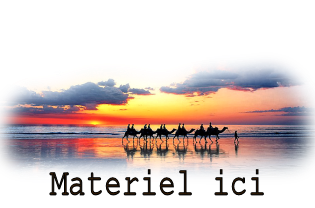
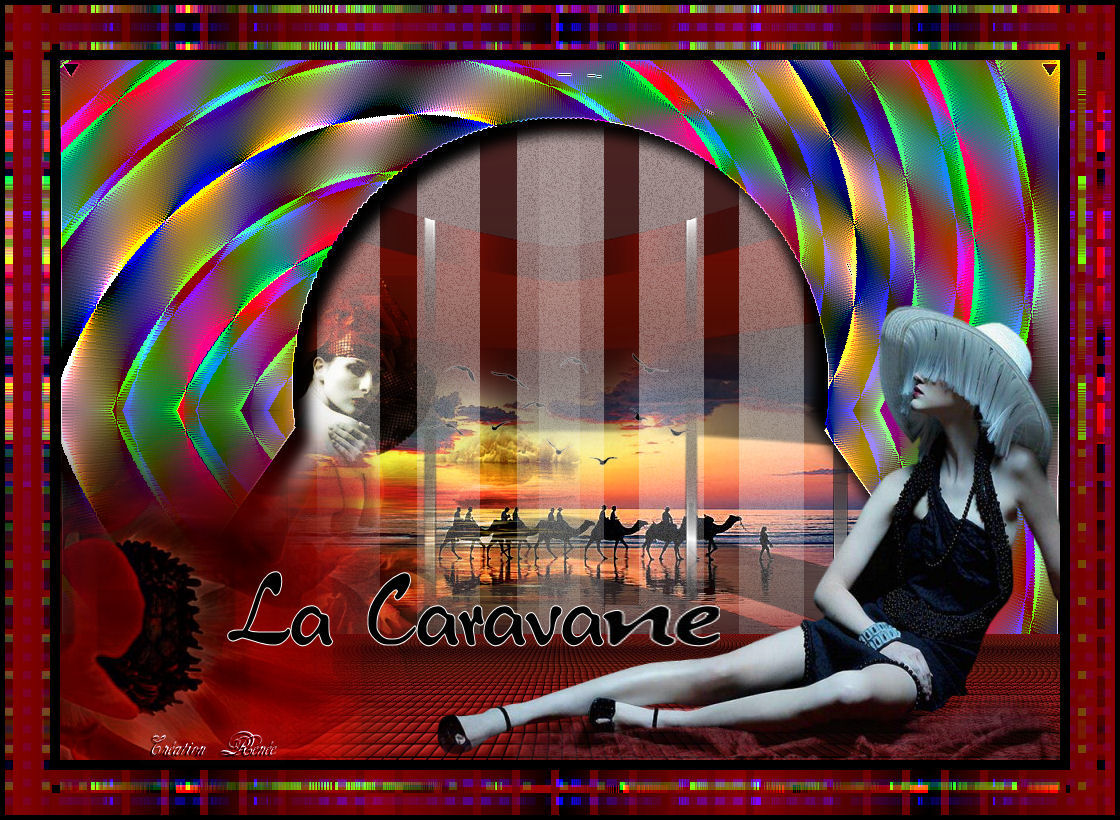
La Caravane
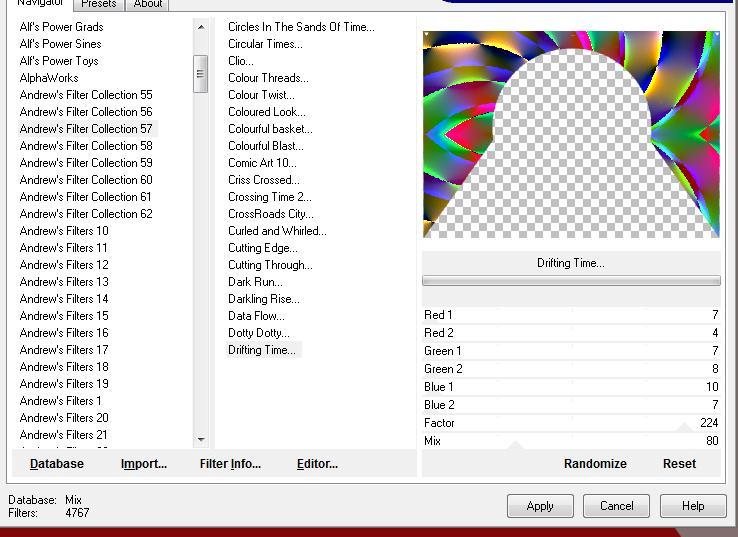
- Let's start the lesson. 1. File: Open a new transparent image of 1000 x 700 pixels 2. Color-palette:Set your foreground color to color #8b0c0a -Set your background color to color black 3. Color Palette: Set your Foregroundcolor to Foreground/Background Gradient (Corel_06_029) - Style: Linear 0/1 invert checked/ Activate Flood Fill Tool and fill the Layer with the gradient 4. Layers- New Raster Layer 5. Selections –load/save selection –load selection from disc and choose my selection: '' @renee-happy1'' 6. Layers- New Raster Layer -Color-palette:Set your foreground color to color #826e6f- Activate Flood Fill Tool and fill the selection with the foregroundcolor #826e6f 7. Effects- Plugins - Unlimited Andrew's Filter collection 57 /Drifting time
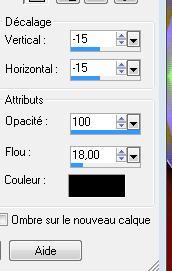
8. Selections- Deselect All 9. Effects- 3 D Effects- Drop Shadow with these settings
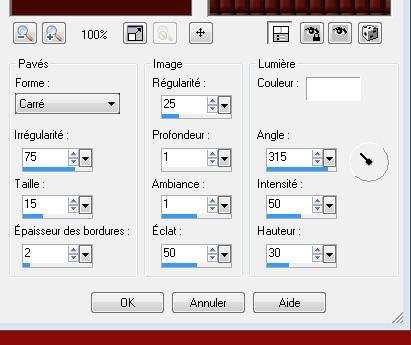
Repeat Drop Shadow with these settings +15/+15 10. Layers- New Raster Layer Activate Flood Fill Tool and fill the layer with the gradient (stepp 2) 11. Effects- Textureffects- Tiles with these settings
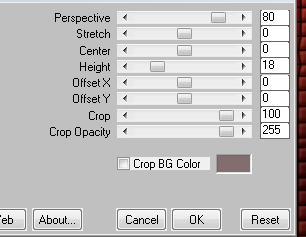
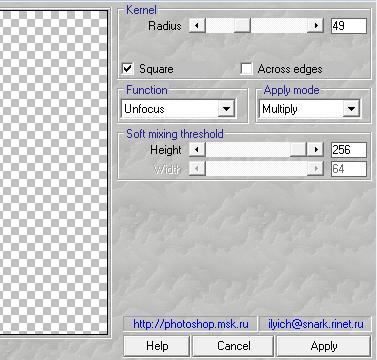
12. Effects- Plugins - Mura's Meister /perspective tilling
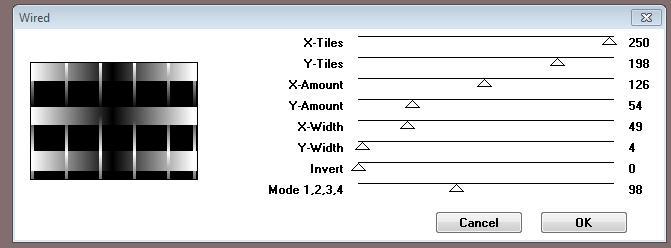
13. Layers- New Raster Layer -Activate Flood Fill Tool and fill the layer with the foregroundcolor #826e6f 14. Effects- Plugins - VM Instart /wired
15. Effects- Geometric Effects /Perspective Horizontal 45 transparent-Repeat 1x
16. Effects- Plugins - Transparency /Eliminate black
18. Effects-Plugins- Andromeda perspective /side walls/it open centered 19. Effects- Image Effects- Offset with these settings /H= -175 and V= 0 -transparent checked
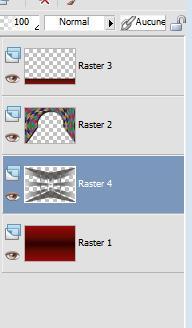
-Layers- Arrange- Move 2x Down -Layer Palette look like this now
21. Effects- Distortion Effects- Punch 95 -Activate the bottom of the layer palette 22. Open the tube « caravane « / Edit/ Copy-Edit - Paste as new layer on your working image and move 23. Open the tube « femme »/ Edit/ Copy-Edit - Paste as new layer on your working image and move to the left Double click on this Layer and set the Blend Mode to "Hard Light " 23. Open the tube « passereau «/ Edit/ Copy-Edit - Paste as new layer on your working image do not move 24. Open the tube « nicole femme / Edit/ Copy-Edit - Paste as new layer on your working image - Move to the bottom right 25. Effects- 3 D Effects- Drop Shadow with these settings 2/-1/100/8 black 26. Open the tube « image 13 » / Edit/ Copy-Edit - Paste as new layer on your working image - Move to the bottom left 27. Effects- Plugins - Amphisoft /sorting shaman use settings below
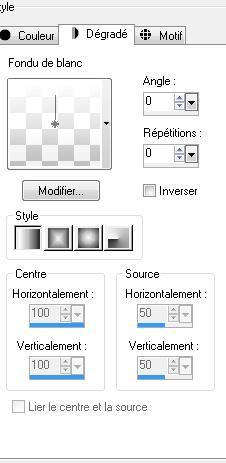
28. Layers- New Raster Layer 29. Selections –load/save selection –load selection from disc and choose my selection: ''@renee-happy3'' 30.Change foreground material into a "fading white foreground " linear gradient with these settings.
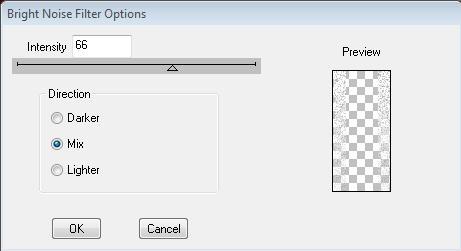
-Activate Flood Fill Tool and fill the selection with the gradient Keep Selections 31. Effects-Plugins - DBS/Bright noise filter Options
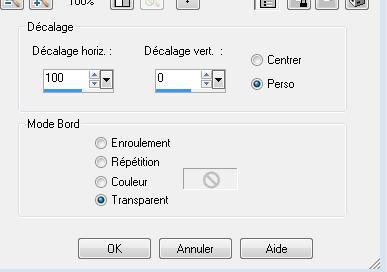
32. Selections- Deselect All 33. Layers- Duplicate 34. Effects- Image Effects- Offset with these settings
35. Layers- Duplicate 36. Effects- Image Effects- Offset with these settings
37. Layers- Merge- Merge 2x Down -Layer Palette - Double click on this Layer and set the Blend Mode to "Screen" Set the layer opacity of this layer to 55% Layers- Arrange-Move Down underneath raster 2(Layer Palette look like this now )
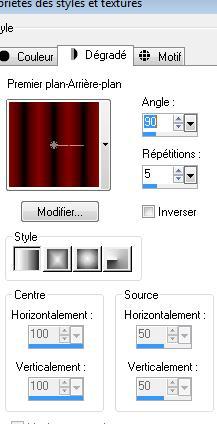
38. Click on your Text Tool/(Font juliet -Size 72 ) -(Font included in the zip ) Write your Text (color black and white) 39. Image - Add borders-Symmetric checked: 1 pixels black 40. Image - Add borders-Symmetric checked: 45 pixels white 41. Activate the Magic Wand and select the white border of 45 pixels -Color-palette:Set your foreground color to color #8b0c0a -Set your background color to color black -Prepare a foreground/background gradient - linear with these settings-Activate Flood Fill Tool and fill the selection with the gradient
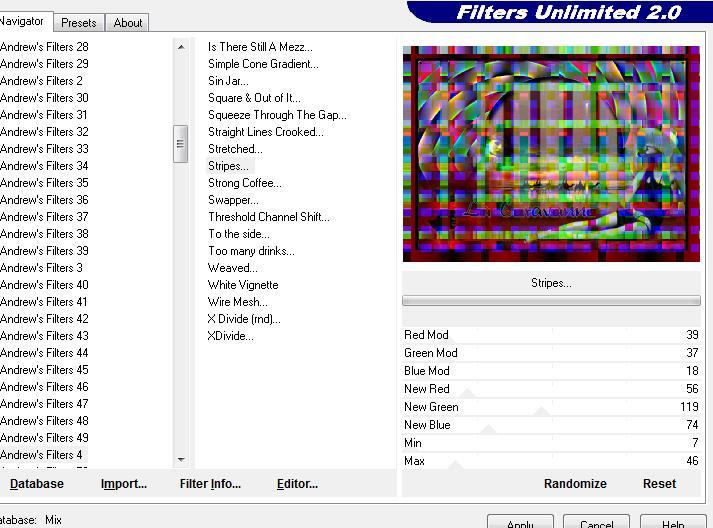
42. Effects- Plugins Unlimited /Andrew's filters 4 / Stripes
43. Image - Add borders-Symmetric checked: 5 pixels black Save as JPEG
I am part of the Tutorial Writers Inc. My tutorials are registered regularly ReneeGraphisme_All rights reserved
*
|
 Translations