|
New
Translations here
Le passage
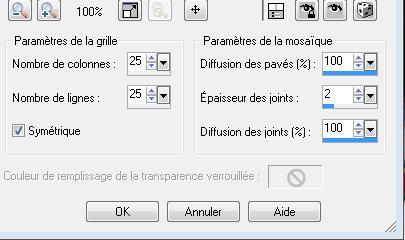
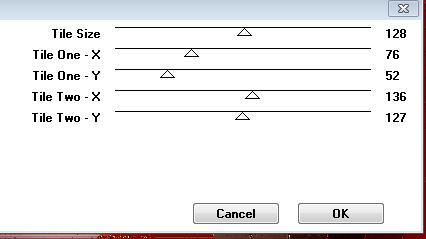
Let's start the lesson. 1. Open a transparent image of 965 x 645 pixels 2. Selections-Select All 3. Open the tube ''dragon'' Edit/copy-Edit paste into selection-Selections-Deselect All 4. Effects- Textur Effects-Mosaic Antique with these settings
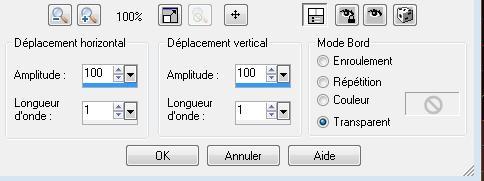
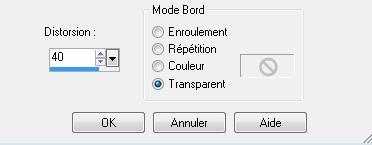
5. Effects-Plugins - FM Tile tools /blend emboss using the default settings 6. Layers-New raster layer 7. Effects-Plugins - Simple /pizza slice mirror 8. Layers- Duplicate !!! Double click on this Layer and set the Blend Mode to "Overlay " 9. Effects-Distortion Effects- Wave with these settings
10. Double click on this Layer and set the Blend Mode to "Hard Light " 11.Layers-Merge- Merge-Down 12. Effekte-Plugins - Simple /Top left mirror 13.
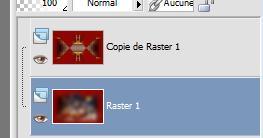
Activate the bottom layer of the layer -palette =raster 1 - Your work look like this now
14. On the bottom layer -Effects-Plugins - VM instant art /Tripolis using the default settings
15.
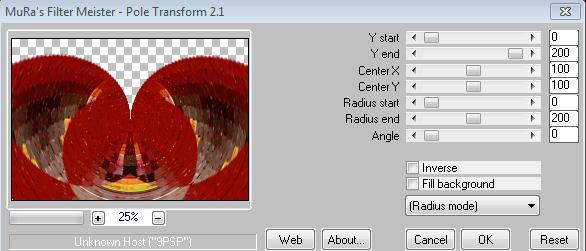
16. Effects-Plugins - Mura's Meister /Pôle transformation using the default settings
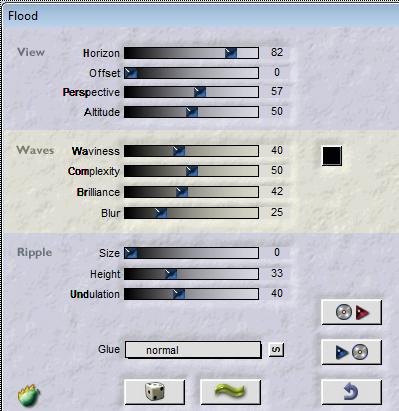
17. On the copy of raster 1 / Effects-Plugins - Flaming pear / Flood with these settings
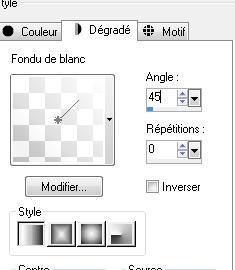
18. Layers-New raster layer 19.Change foreground material into a "fading foreground white " linear gradient with these settings
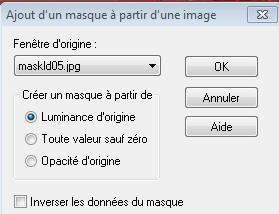
20.Activate Flood Fill Tool and fill the layer with the gradient 21. Layers- New Mask layer from Image and select Mask
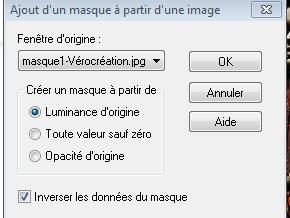
22. Layers- Merge-Merge Group 23. Open the tube ''VPC_ShesAlwaysNear@vasilich ''/Edit - Copy -Edit - Paste as new layer on your working area. -With your move tool move to the bottom right side 24. Open the tube ''effet mosaic'' -/Edit - Copy -Edit - Paste as new layer on your working area. -With your move tool move to the upper left corner 25. Open the tube ''plot'' -/Edit - Copy -Edit - Paste as new layer on your working area. -With your move tool move to the left 26. Open the tube ''image 502'' -/Edit - Copy -Edit - Paste as new layer on your working area. -With your move tool move to the left /Blend Mode "luminance" 27. Open the tube ''nuage ''-/Edit - Copy -Edit - Paste as new layer on your working area. -With your move tool move to the left 28. Layers-New raster layer 29. Activate Flood Fill Tool and fill the layer with the gradient 30. Layers- New Mask layer from Image and select Mask »masque 1-Verocreation''
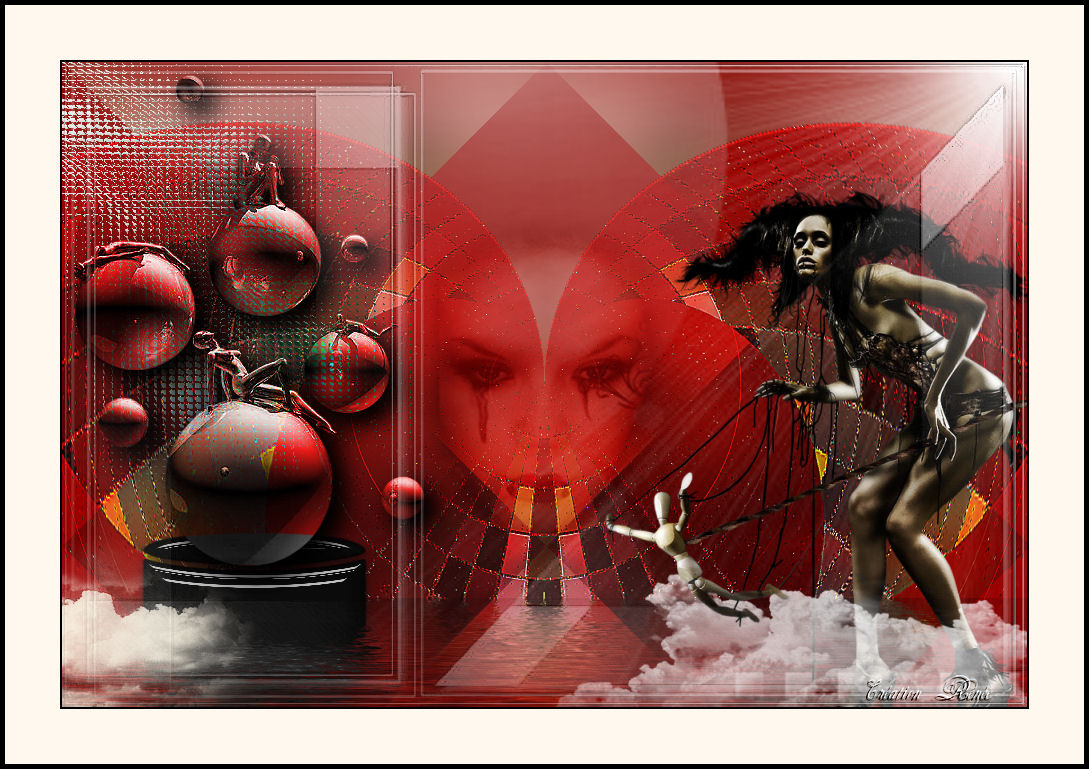
31. Layers- Merge-Merge Group 32. Effects-Edge Effects Enhance /Double click on this Layer and set the Blend Mode to "Hard Light " 33. Open the tube ''g11'' Edit/copy- Edit/ paste as new layer (do not move it is in the right place) /Double click on this Layer and set the Blend Mode to "Soft Light " 34.Layers- Merge- Merge All 35. Open the tube du texte Edit/copy- Edit/ paste as new layer on your working area and move . 36. Image - Add borders-Symmetric checked: 2 pixels black 37. Image - Add borders-Symmetric checked: 55 pixels white 38. Image - Add borders-Symmetric checked: de 5 pixels black Save as JPG
I am part of Tutorial Writers Inc. My tutorials are regularly recordedt ReneeGraphisme_All rights reserved
|
 Translations


