|
New
Translations here
LES VAMPS
Let's Start
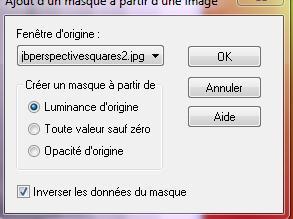
2. Color-palette:Set your foreground color to color #c6130f -Set your background color to color #e0f642 3. Color Palette: Set your Foregroundcolor to Foreground/Background Gradient - Style: Linear 45/5 invert not checked Activate Flood Fill Tool and fill the layer with the gradient 4. Layer- New Raster Layer //Activate Flood Fill Tool and fill the layer with the layer with the foregroundcolor #c6130f 5. Layers- New Mask layer from Image and choose Mask:« jbperspectivesquare2 »
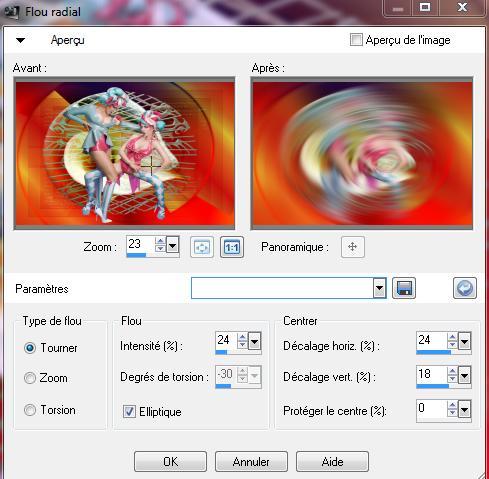
6. Layers- Merge- Merge Group 7. Effects- Edge Effects- Enhance More/In the Layer- Palette- Double click on this layer and set the Blend Mode to "Multiply" 8. Layer- New Raster Layer 9. Selections- Select All 10. Open the image » fondregis »(do not close)// Edit/Copy-Edit Paste into selection 11. Selections- Deselect All 12. Layers-Load/Save Mask-Load mask from Disk and select « hjr_mask-cicles » Layers- Merge- Merge Group 13. Adjust-Sharpness-Sharpen 14. Layers- New Raster Layer 15. Selections –load/save selection –load selection from disc and choose:« @cible-en-vue 16. Open the tube « Annytube_floral »//Edit/Copy-Edit Paste into selection /In the Layer- Palette- Double click on this layer and set the Blend Mode to "Hard Light" -Keep Selected !! 17. Layers- New Raster Layer 18. Open the tube « 162silvanaorsi « Edit/Copy-Edit Paste into selection Image Mirror 19. Effects- Plugins- Eyecandy5 impact/chrome –tab Settings/User settings choose my preset:preset "@renee light" 20. Selections- Deselect All /In the Layer- Palette- Double click on this layer and set the Blend Mode to "Éxclusion" 21.Open the tube « ginatubesfemme 2168 » - Edit/ Copy-Edit - Paste as new layer on your working image 22. Layers- Merge- Merge Visible 23. Layers- Duplicate 24. Adjust-Blur-Radial Blur- with these settings
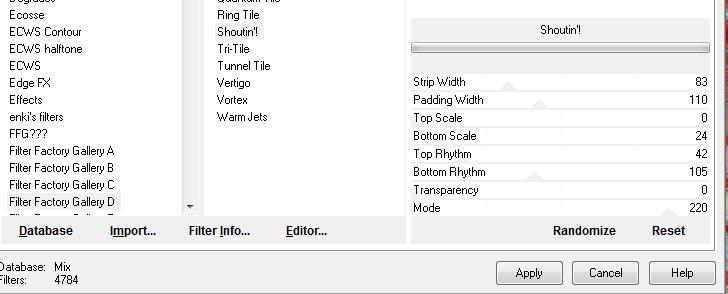
25. Effects-Image Effects-Seamless Tiling using the default settings 26. Effects- User defined Filter / emboss5 using the default settings 27. Effects-Plugins -Distorsion Filtres /Cracked a 97 28. Effects- Plugins- Unlimited Filtre Factory Gallery D/shoutin! with these settings
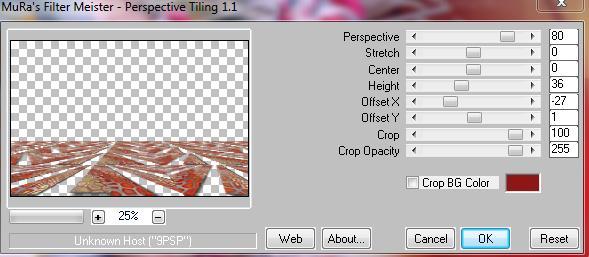
29. Effects –3D Effects- Drop Shadow with these settings: 12/12/65/19 black 30. Effects- Plugins- Muras'sMeister /perspective tilling use settings below
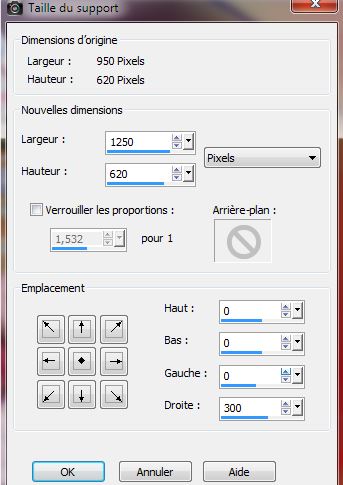
-In the Layer- Palette- Double click on this layer and set the Blend Mode to "Darken" 31. Selections –load/save selection –load selection from disc and choose:''@renee-vamps1" /hit delete on your Keyboard 32. Selections- Deselect All Repeat-Effects –3D Effects- Drop Shadow with the same settings 33. Layers- Merge- Merge Visible 34. Image -Canvas Size with these settings 1250 x 620
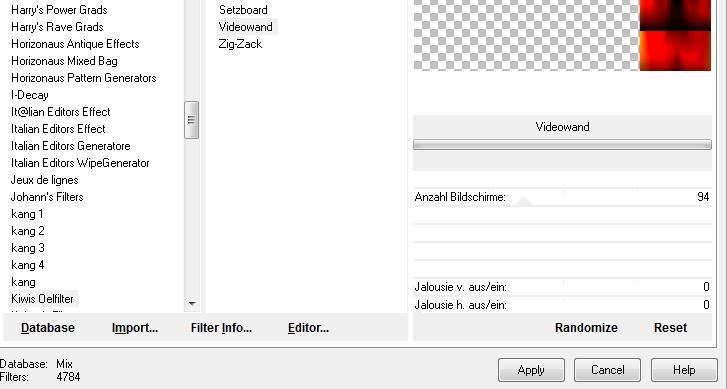
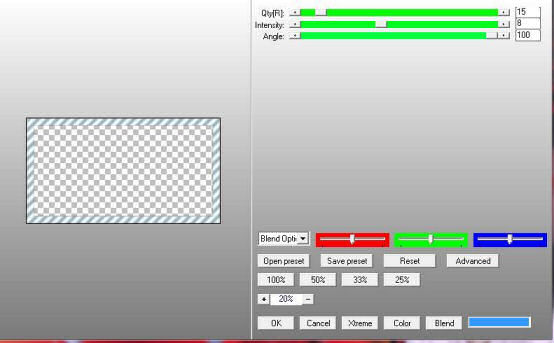
35.Activate the Magic Wand and select the transparent border 36. Layers- New Raster Layer / Open the image again « fondregis » Edit/Copy-Edit Paste into selection 37. Selections- Deselect All 38. Effects-Plugins - Kiwis Oelifter /videowand use settings below
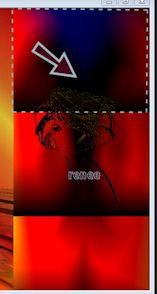
-Selection Tool - Rectangle -select the rectangle from the top ( see screen)
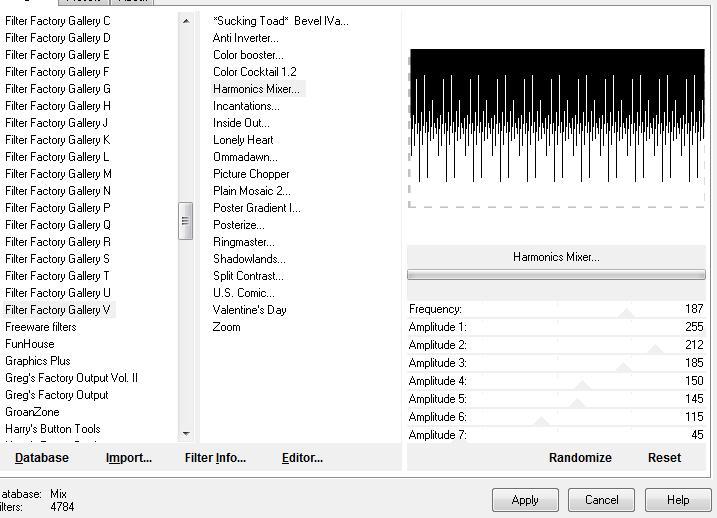
39. Effects-Plugins- Kiwi's Oelifer /Setzboard a 212 -Repeat-Effects-Plugins- Kiwi's Oelifer /Setzboard a 42 40. Selection Tool - Rectangle -Select the second rectangle 41. Layers- New Raster Layer / Open the tube « ecran »Edit/Copy-Edit Paste into selection 42. Selections- Deselect All -Layer palette – Make raster 1 active 43. Selection Tool - Rectangle -Select the last rectangle 44. Effects- Plugins -Unlimted / Filter factory Gallery V /Harmonics Mixer use settings below
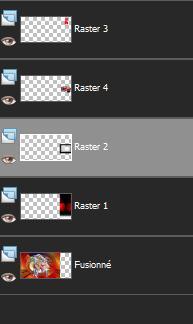
45. Open the tube « féminine nature «/ Image Resize to 35% / Edit/ Copy-Edit - Paste as new layer on your working image and move to the upper right corner Layer palette – Make raster 2 active 46. Selections –load/save selection –load selection from disc and choose:"@renee-vamps2" 47. Layers- New Raster Layer «/ Open the tube '' Manif2007_09-septembre-voiture-01 '' Edit/Copy-Edit Paste into selection 48. Selections- Deselect All You should have this result as shown in the print screen below
49. Open the tube « ginatubesfemme 2066 / Image Resize to 35% / Edit/ Copy-Edit - Paste as new layer on your working image and move 50. Open the tube '' ligne rouge '' /Edit/ Copy-Edit - Paste as new layer on your working image and move to the right(-see finished image 51. Layers- Duplicate and move to the left side 52. Layers- Merge -Merge Down 53. Effects-Plugins- Eyecandy5 Impact /bevel –tab Settings/User settings choose my Preset "@renee-vamps" 54. Image - Add borders-Symmetric checked: 15 pixels color black 55. Image - Add borders-Symmetric checked: 50 pixels #a1b8be 56. Image - Add borders-Symmetric checked: 5 pixels color black 57. Activate the Magic Wand and select the Border of 50 pixels 58. Selections- Promote selection to Layer 59. Effects-Plugins- AP Lines -LineBurst If you do not have this filter effect,the png tube "cadre" is in the download folder - Edit/Copy-Edit Paste into selection
I am part of the Tutorial Writers Inc. My tutorials are registered regularly ReneeGraphisme_All rights reserved
*
|
 Translations