|
Transaltions here
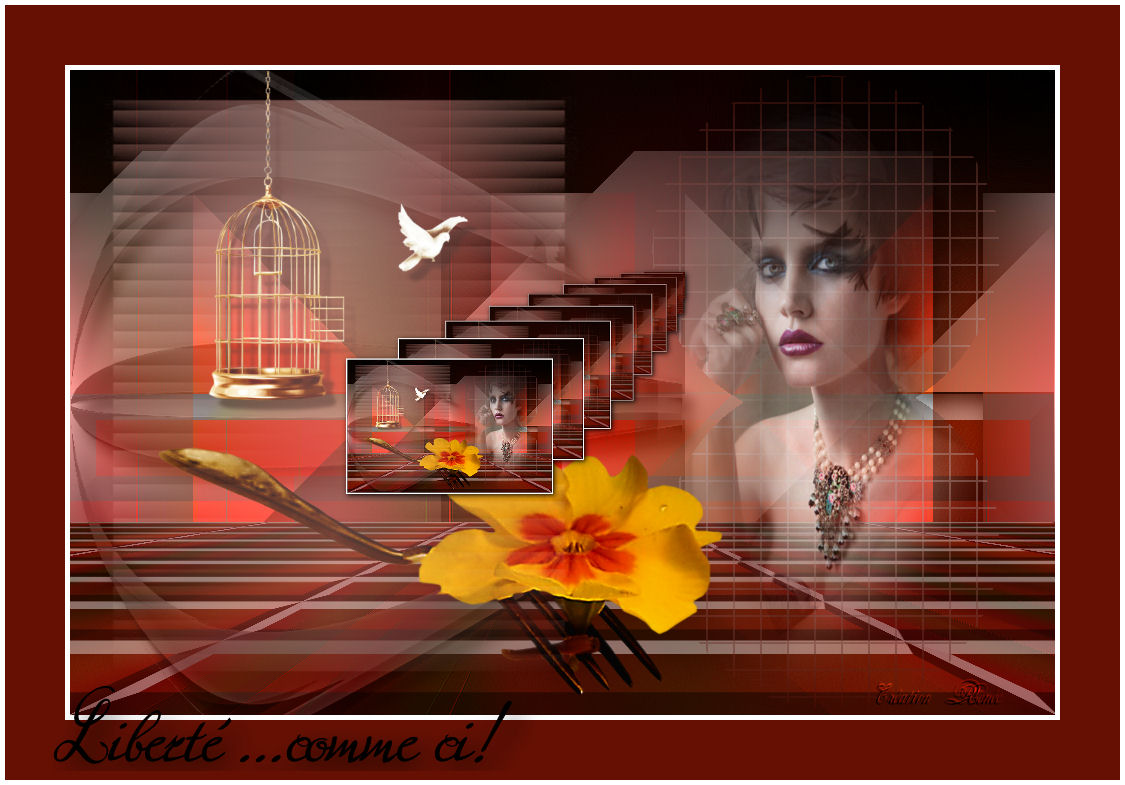
Liberte ....comme ci!
New
Let's start the lesson. 1. Open the image ''liberte -meme -ci fond1" Window - Duplicate (or shift+D) - Close the original and proceed on the copy -Promote Background Layer =Raster 1 2. Set your foreground color to #d5bbb7
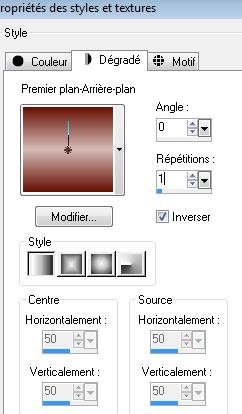
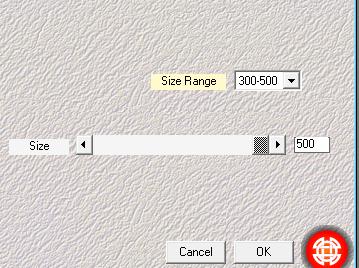
3. Layers - New raster layer.Activate Flood Fill Tool- fill the layer with your gradient. 4. Effects-Plugins - Medhi/ Weaver
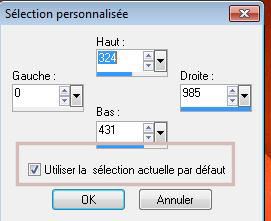
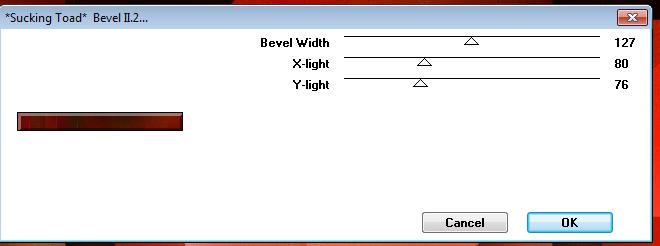
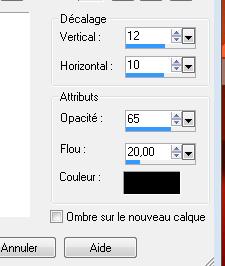
5. Image Resize 75% All layers not checked. 6. Effects-Plugins - Simple /Pizza slice mirror 7. Effects-Plugins - EyeCandy 5 Impact /perspective shadow-Tab-Settings -Preset- drop shadow blury 8. Effects-Plugins - Simple /4way average 9. Effects-Plugins- Simple - top left mirror 10. Effet Eyecandy5 /perpsective shadow -tab Settings/User settings choose my preset: ''renee-liberte-comme-ci'' - Double click on this layer and set the Blendmode to Dodge 11. Open the tube ''renee-liberte-comme-ci-image1'' Edit/copy- Edit/ paste as new layer on your working area . Do not move it is in the right place - Double click on this layer and set the Blendmode to luminance -Legacy 12. - Activate the bottom of the layer-Palette 13.Selections Tool (S) Custom Selection with these settings 14. Effects-Plugins- Unlimited - Toadies * Sucking bevel II.2
15. Selections- Promote selections to layer 16. Selections-Deselect All 17. Layers-Arrange- Bring to Top 18. Effects- 3D Effects- Drop Shadow with these settings
19. Effects-Plugins - Mura'sMeister /perspective tilling with these settings
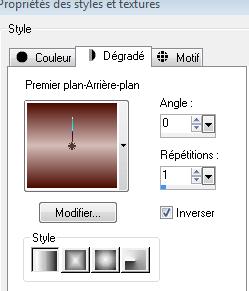
20. Layers - New raster layer. 21. Selections - load/save selection - load selection from disk and select my file: ''renee liberte -même-si'' 22. Set your foreground color to #d5bbb7-Set your background color to #4c0c02 -Set your foreground to gradient 'Foreground-background' - Linear -with these settings
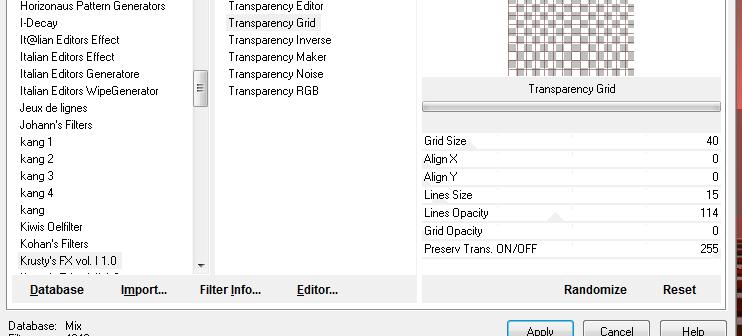
- Flood fill the selection with your gradient. 23. Effects-Plugins -Unlimited- Krusty'sFXvol.I.1.0/Transparency Grid with these settings
24. Effects- Edge Effects-Enhance 25. Layers - New raster layer. 26. Open the tube ''Benice_misted_woman_L157''/Edit/copy-Edit Paste into selection-Selections-Deselect All 27. Layers-Merge- Merge- Down 28. Open the tube ''renee-liberte -meme-si-image2'' Edit/copy-Edit paste as a new layer on your working area and move 29. Open the tube ''image_danae-fourchette_et_fleur_BY-thafs''/Edit/copy- Edit/ paste as new layer on your working area .With your move tool place it in the right place like this
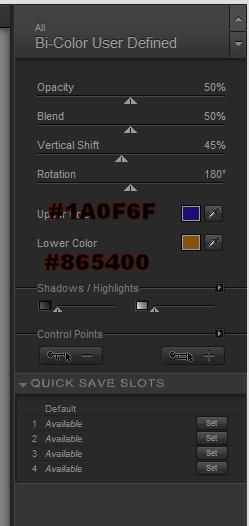
30. Effects -Plugins- Nick Color Pro.3/ Bi Color User Defined with these settings
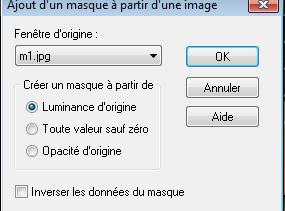
31. Open the tube ''freedom_bird cage-mar's creation'' Edit/copy-Edit paste as a new layer. With your move tool place it in the right place 32. Layers - New raster layer. 33. Set your foreground color to #d5bbb7 34. Set your foreground to gradient "Fading Foreground"-- Linear - Angle 0- Repeats 0- Invert not checked. - Flood fill the layer with your gradient. 35. Layers- New Mask layer from Image and select Mask/masque ''m1.jpg''
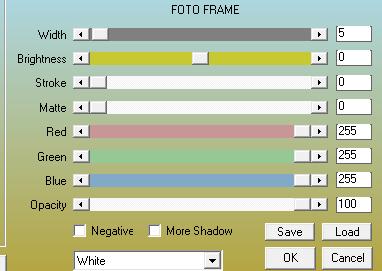
36. Double click on this layer and set the Blendmode to Hard Light /Set the layer opacity of this layer to 73% 37. Layers- Merge- Merge All 38. Layers- Duplicate 39. Effects-Plugins- AAA Frame /Foto Frame with these settings
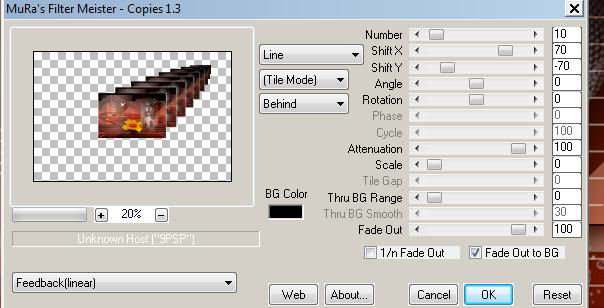
40. Image Resize with 35% (Resize all the layers not checked)/(do not move it is in the right place) 41. Effects-Plugins - Mura's Meister/copies with these settings
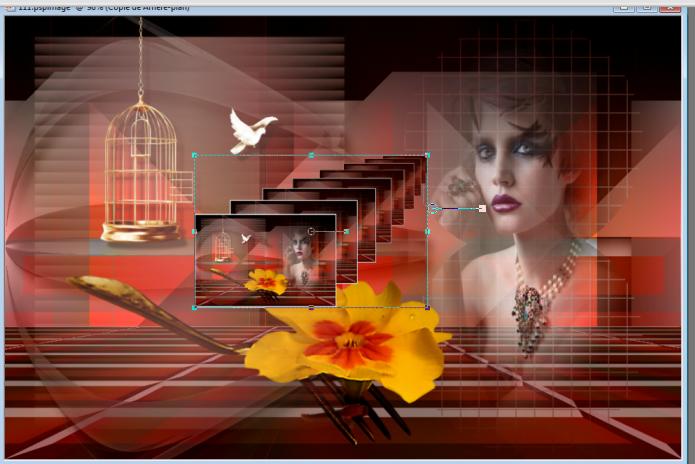
42. Image -Resize with 60% (Resize all the layers not checked) - With your Pick Tool (K) place it in the right place as shown in the example below
43. Effects-Plugins -EyeCandy5 Impact tab-Settings-Preset -Drop Shadow Lowest 44. Layers- Merge- Merge-All 45. Image - Add borders-Symmetric checked: 5 pixels white 46. Image - Add borders-Symmetric checked: 50 pixels #661003 47. Image - Add borders-Symmetric checked: 5 pixels white - Open the tube texte /Edit - Copy -Edit - Paste as new layer on your working area -Ore write your own text -(Font Zoe.otf is included into the zipfile) Save as JPG
I hope you enjoyed this lesson Renée This lesson was written by Renée 2010 Placing 08/2010 Any resemblance with an existing lesson is merely a coincidence * * Don't forget to thank the people who work for us and with us. I named the tubeurs - Testers and the translators. Thanks Renée.
I am part of Tutorial Writers Inc. My tutorials are regularly recorded ReneeGraphisme_All rights reserved
*
|
 Translations