|
New
Translations here
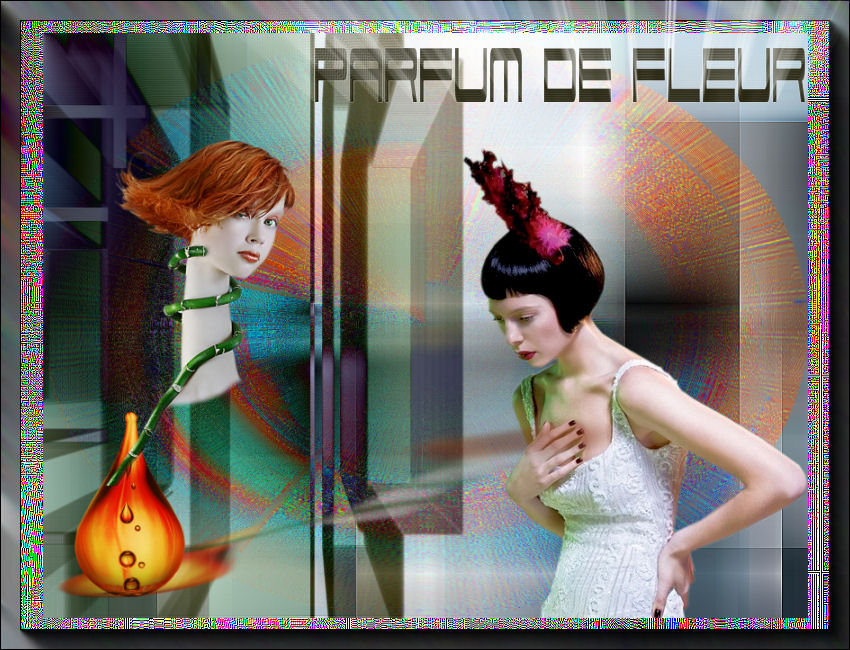
PARFUM DE FLEUR
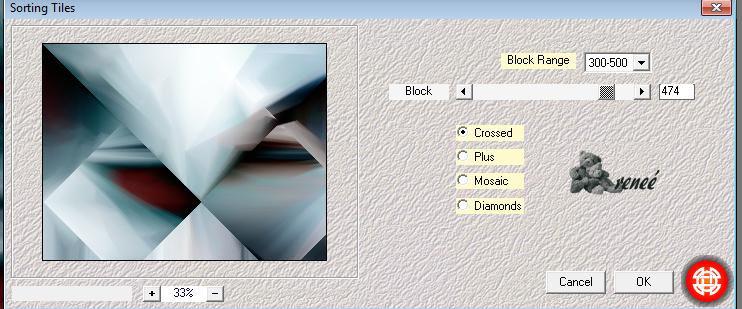
Let's start the lesson. 1. Open a transparent image of 850 x 650 pixels 2. Selections-Select All 3. Open the image « arriereplan14 « Edit/copy- Edit/ paste into selection 4. Selections - Deselect all 5. Effects-Plugins -Mehdi /Sorting Tiles with these settings
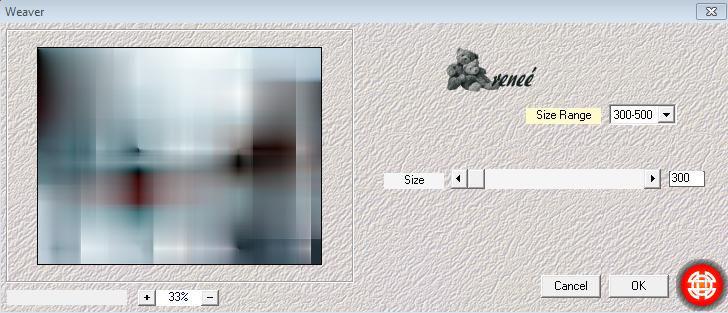
6. Effects-Plugins -Medhi/ weaver with these settings
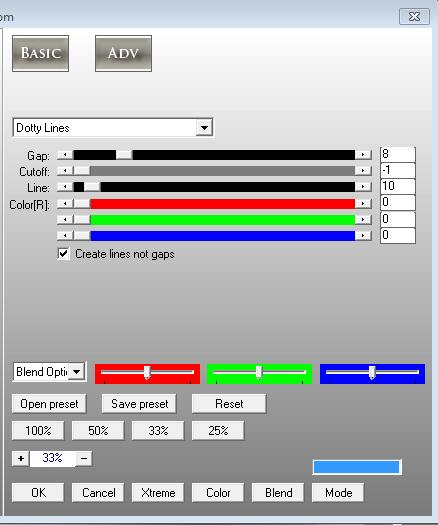
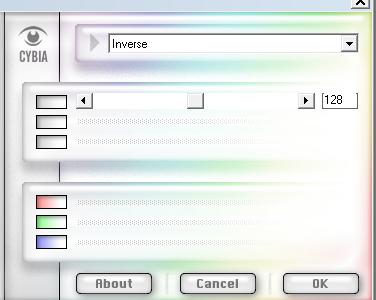
7. Layers- Duplicate-on this layer 8. Effects-Plugins -AP 01 /Lines Silverling with these settings 9. Effects-Edge Effects-Enhance 10. Effects-Plugins - Cybia - Coulour work with these settings
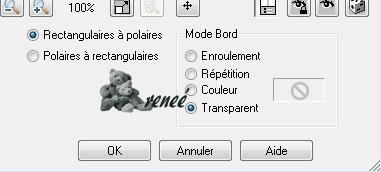
-Double click on this layer and set the Blendmode to Color 12. Effects- Distortions Effects-Polar Coordinates-Rectangular to Polar
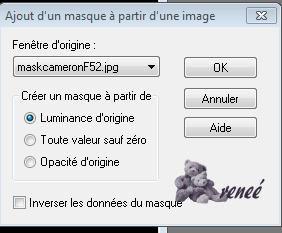
13. Open the tube "cercle central" -Edit/ Copy-Edit - Paste as new layer on your working area (do not move it is in the right place) /Double click on this layer and set the Blendmode to Color 14. Layers- New raster layer -Color-palette:Set your foreground color to #2a1d35 -Activate Flood Fill Tool and fill the layer with the foreground color #2a1d35 15. Layers- New Mask layer from Image and select Mask '' maskcameronF52.jpg''
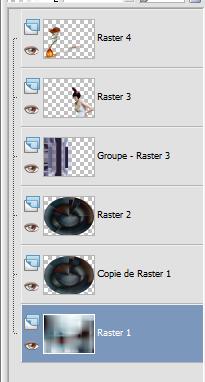
-Layers- Merge- Merge Group 16. Effects-Plugins - Eyecandy5 /blacklight -tab- Settings/User settings choose my preset: ''renee bicolors1'' -Double click on this layer and set the Blendmode to Difference 17.Open the tube'' femme-191'' -Edit/ Copy-Edit - Paste as new layer on your working image Image Mirror 18. Effects-Image Effects-Offset with these settings H =242 and V= -53 / transparent 19. Open the tube « sonja -tube-druppel-2008 /Image Resize 55% -Edit/ Copy-Edit - Paste as new layer on your working image -With your move tool: move to the bottom left side 20. Open the tube "105-tubed-by-thafs "Edit/ Copy-Edit - Paste as new layer on your working area /With your move tool: move to the left side >see finished image 21. Layers-Merge-Merge Down 22. Effects-Plugins Eyecandy5/perspective shadow-tab- Settings/User settings choose my preset: ''reneebis2'' 23. Layers- Duplicate Activate bottom layer in the Layer palette=raster 1 / Layers- Duplicate
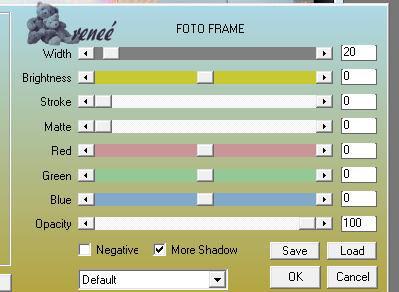
24. Close bottom layer but keep top layer active- Layers-Merge-Merge Visible -Open the bottom layer =raster 1 25. Activate top layer in the Layer palette 26. Image resize with 90 % resize all layers not checked 27. Activate bottom layer in the Layer palette 28. Effects-Edge Effects-Enhance More /apply again for a stronger effect - Stay on the bottom layer =raster 1 29. Effects-Plugins-AAA Frame -Foto frame with these settings /attention - More Shadow checked
31. With the move tool, move it in the top right corner /Effects-Plugins-Eyecandy 5 /blacklight -tab- Settings/User settings choose my preset: '' reneefleur2'' Save as JPG
I am part of Tutorial Writers Inc. My tutorials are regularly recordedt ReneeGraphisme_All rights reserved
|
 Translations