|
New
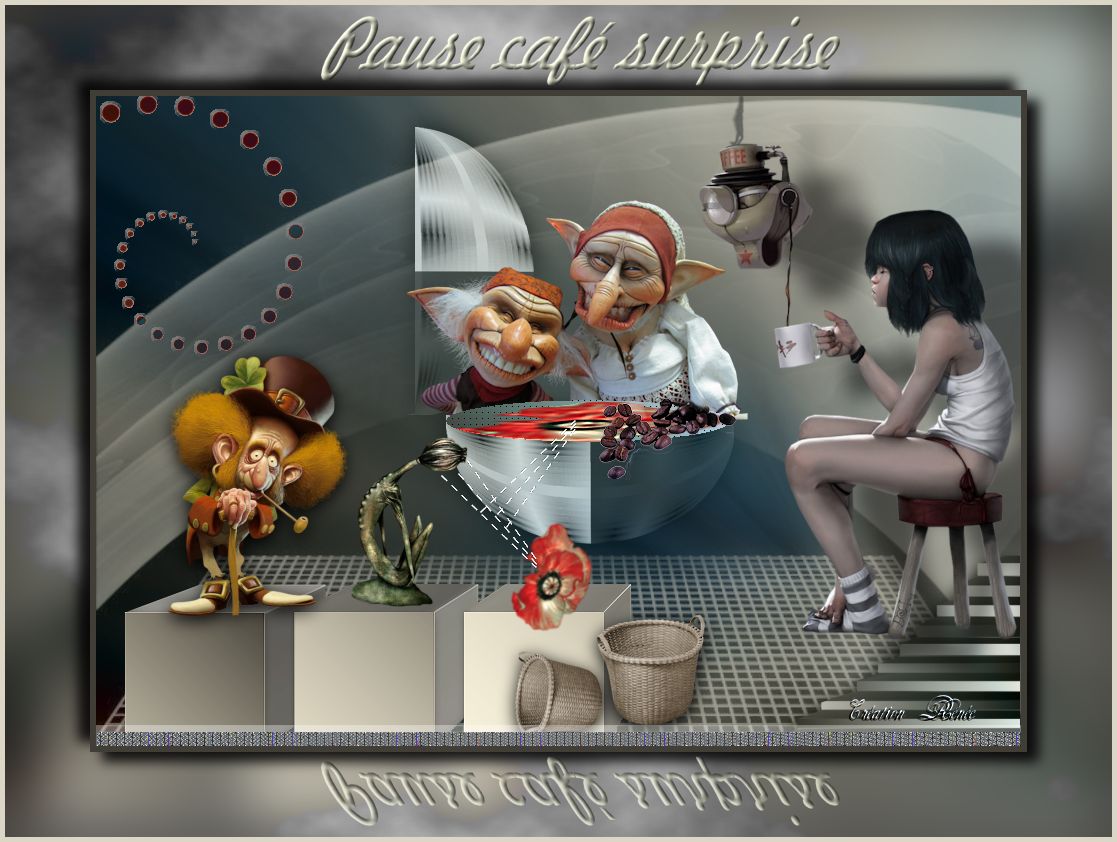
Pause Café Surprise Translations here
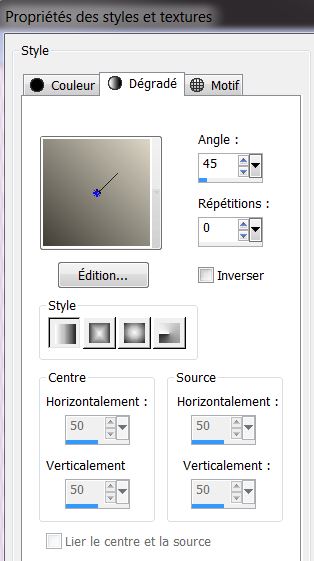
Let's Start 1. File - New - Open a new transparent image 925 x 650 pixels 2. Color-palette:Set your foreground color to color #413e37 - Set your background color to color #dbd6c5 3. Set your foreground to gradient 'Foreground-background' -Linear -configured like this.
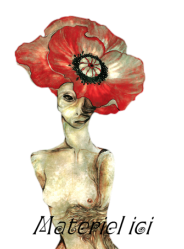
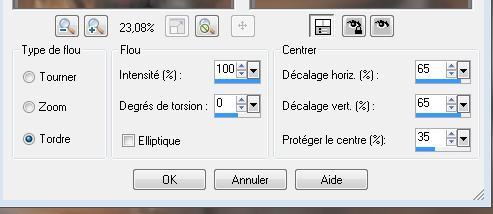
4. Activate Flood Fill Tool and fill the layer with the layer with the gradient 5. Layers- New Raster Layer 6. Selections- Select All - Open the tube '' 2270693 '' -Edit/ Copy-Edit - Paste into selection 7. Selections- Deselect All 8. Effects-Image Effects-Seamless Tiling use the default settings 9. Adjust- Blur- Radial Blur use settings below
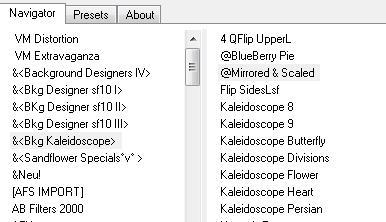
10. In the Layer- Palette- Double click and set the Blend Mode to "Difference " -Set the layer opacity of this layer to 71% 11. Open the tube « fond ''Edit/ Copy-Edit - Paste as new layer on your working image (do not move it is in the right place) 12. Effects- Plugins -Unlimited 2.0 - Bkg Designer Kaleidoscope/ @ Mirrored & Scaled
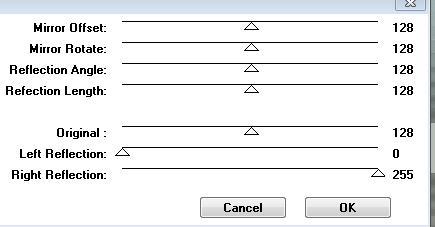
- Repeat:Effects- Plugins -Unlimited 2.0 - Bkg Designer Kaleidoscope/ @ Mirrored & Scaled 13. Effects- Plugins - Balder Olrik /Mirror x use settings below
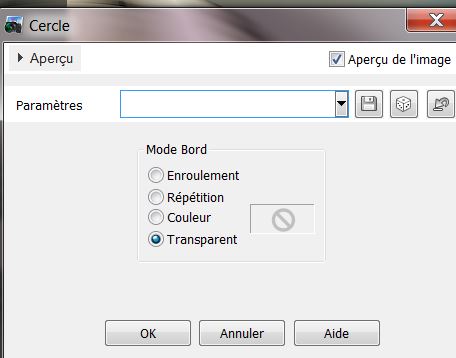
14. Effects-Plugins-Geometric Effects- Circle- Transparent
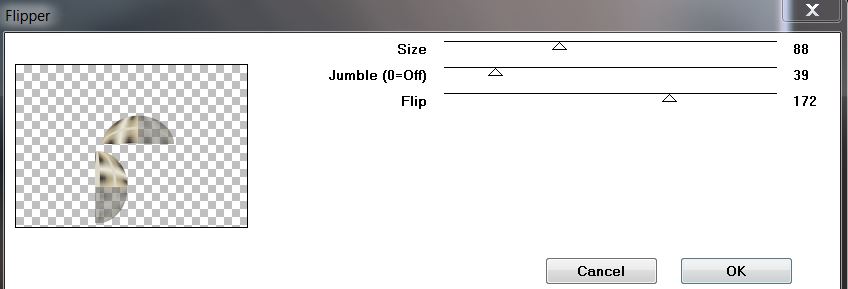
15. Image Resize 45 % resize all layers not checked 16. Effects- Plugins - VM Distorsion/Flipper (if you do not have this filter effect, paste the png which is in the download folder)
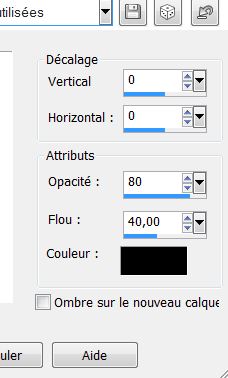
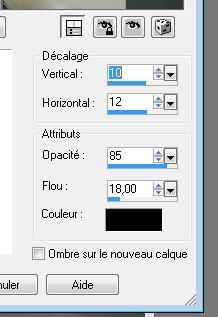
17. Effects- 3 D Effects- Drop Shadow with these settings
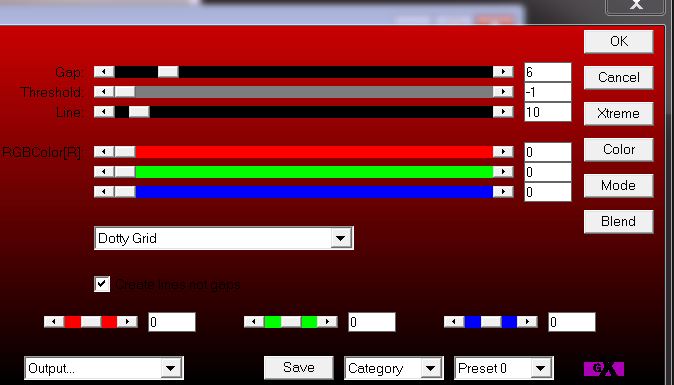
18. In the Layer- Palette- Double click and set the Blend Mode to "Luminance- Legacy " -Set the layer opacity of this layer to 87% 19. Layers- New Raster Layer 20. Selections –load/save selection –load selection from disc and choose my selection: ''pause_cafe_1''/Activate Flood Fill Tool and fill the selection with the gradient 21. Effects- Plugins - AP 01(Innovation)- Lines Silverling use settings below
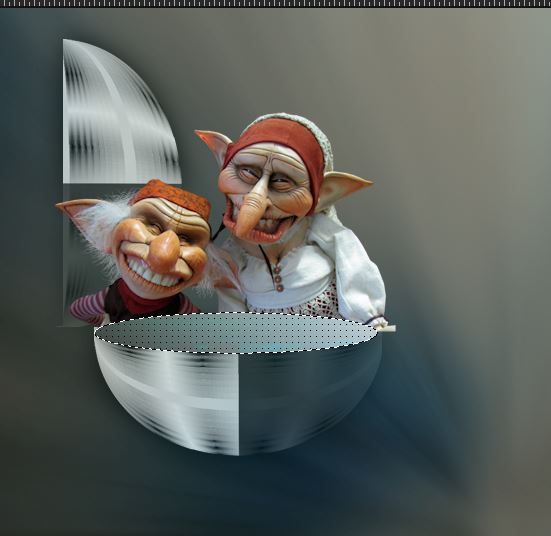
22. Selections- Deselect All-In the Layer- Palette- Double click and set the Blend Mode to "Luminance " 23. Open the tube « ajgv-lovable -couple 020611''/Image Resize 60% -Edit/ Copy-Edit - Paste as new layer on your working image and move Repeat: Selections –load/save selection –load selection from disc and choose my selection:''pause_cafe_1''-/ Delete Keep Selected
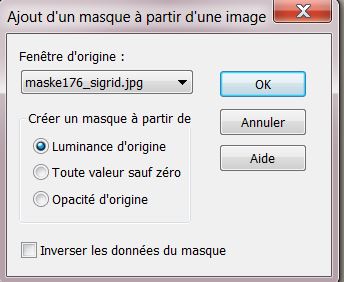
24. Layers- New Raster Layer / Open the tube ''fleur.png'' -Edit/ Copy-Edit - Paste into selection 25. Effects- User Defined Filter- Emboss 3 -using the default settings / Selections- Deselect All 26. Activate the top of the layer palette 27. Layers- New Raster Layer / Activate Flood Fill Tool and fill the layer with the background color 28. Layers- New Mask layer from Image and choose Mask: ''maske 176-sigrid''
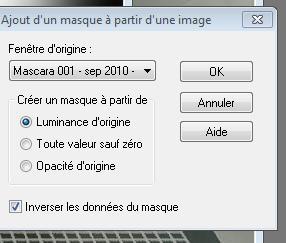
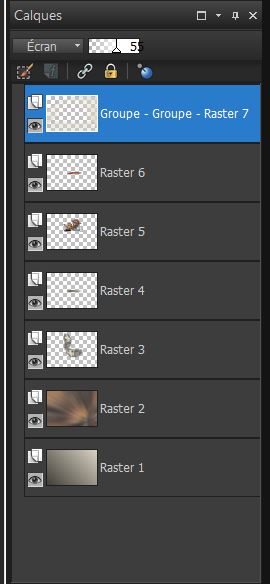
Layers- Merge- Merge- Group 29. In the Layer- Palette- Double click and set the Blend Mode to "Screen " -Set the layer opacity of this layer to 59% Stay on this Layer / Layers- New Mask layer from Image and choose Mask:« Mascara001-sep2010 »
* Layers- Merge- Merge- Group Layer Palette look like this now
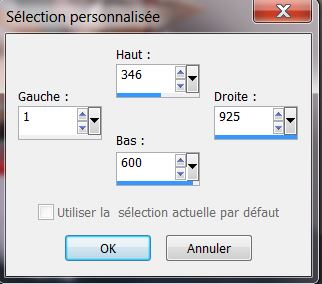
30. Layers- New Raster Layer 31.Activate Selection Tool -Custom Selection (S) with these settings
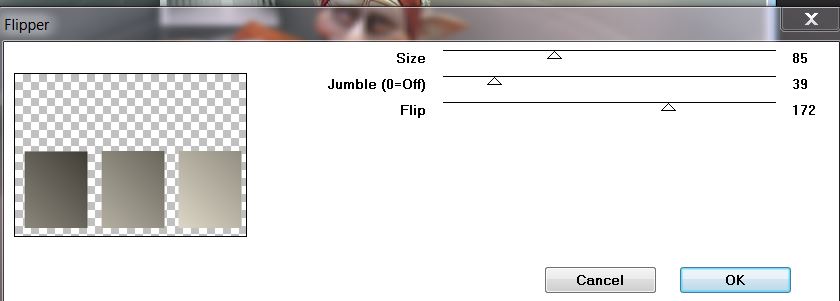
Activate Flood Fill Tool and fill the layer with the layer with the gradient 32.Selections- Deselect All 33. Effects- Plugins -VM distorsion /Flipper use settings below
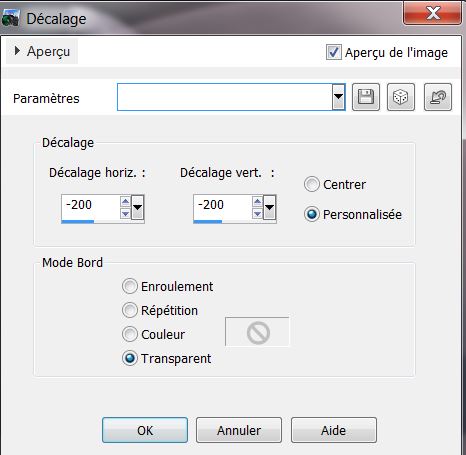
34. Image Resize 55 % resize all layers not checked 35. Effects- Image Effects- Offset use settings below
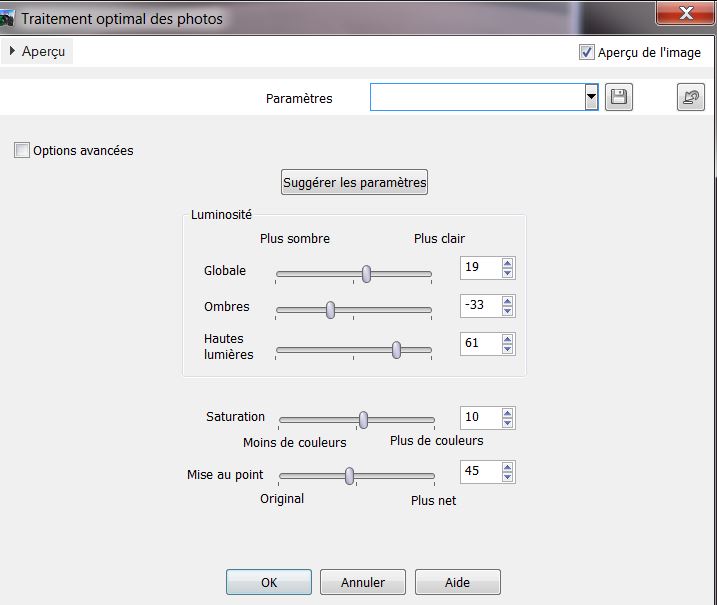
36. Effects- Plugins- Eyecandy5/Extrude -tab Settings/User settings choose my -Preset '' pause_cafe_extrude'' 37. Adjust- Photo Fix with these settings
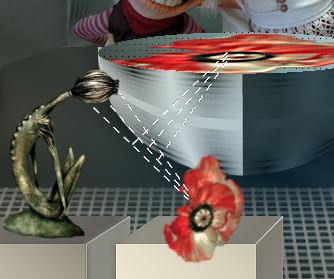
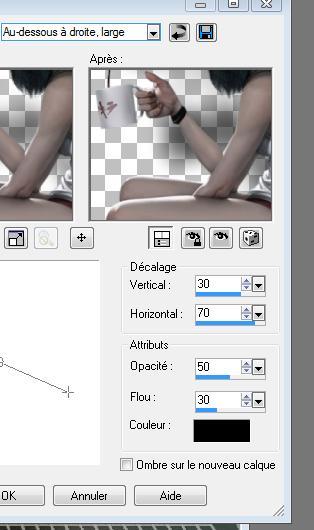
38. Open the tube'' Alies546-fantasy-26062011''/Image Resize 55% -Edit/ Copy-Edit - Paste as new layer on your working image and move 39. Effects- 3 D Effects- Drop Shadow with these settings 4/0/100/25 black 40. Open the tube « calguispoppysart20202011 » /Image Resize 45% -Edit/ Copy-Edit - Paste as new layer on your working image and move Edit/ Copy-Edit - Paste as new layer on your working image and move /(Attention erase down the small point) - Open the tube « fleur « - Edit/ Copy-Edit - Paste as new layer on your working image and move - Activate your Pen Tool with these settings - Set the foreground color to color #ffffff
draw lines like this
Effects- Edge Effects- Enhance 41. Open the tubes ''grains_cafe'' et "paniers_osier '' - Edit/ Copy-Edit - Paste as new layer on your working image and move 42. Open the tube '' escalier ''-Edit/ Copy-Edit - Paste as new layer on your working image and move 43. Open the tube « calguiscoffe12092011 »/Image Resize 70% --Edit/ Copy-Edit - Paste as new layer on your working image and move 44. Effects- 3 D Effects- Drop Shadow with these settings
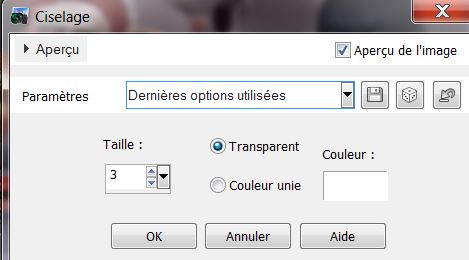
45. Open the tube ''languette ''-Edit/ Copy-Edit - Paste as new layer on your working image and move 46. Open the tube « 258 » -Edit/ Copy-Edit - Paste as new layer on your working image and move 47. Effects- 3D Effects- Chisel use settings below
- In the Layer- Palette- Double click and set the Blend Mode to "Difference" 48. Layers- Merge Merge Visible 49. Image - Add borders-Symmetric checked: 5 pixels color #413e37 50. Edit/Copy !! 51. Image - Add borders-Symmetric checked: 85 pixels background 52. Activate the Magic Wand and select the Border of 85 pixels /Edit - Paste into selection image (Image is still in your PSP memory) 53. Adjust- Blur- Gaussian Blur ; Radius 30 54. Effects- Plugins - Unlimited 2.0 / & BkGround design IV /@ smoke 218/218/217 -Repeat this filter 1x 55. Selections- Invert 56. Effects- 3 D Effects- Drop Shadow with these settings
- Repeat: Effects- 3 D Effects- Drop Shadow negative -10/-12 57. Selections- Deselect All 58. Image - Add borders-Symmetric checked: 5 pixels color #dbd6c5 59. Open the tube " texte"- Edit/Copy -Edit paste as new layer on your working image and move -Ore write your own text 60. Layers- Duplicate- Image Flip--Set the layer opacity of this layer to 69% 61. Layers- Merge- Merge All. Save as JPEG
I am part of the Tutorial Writers Inc. My tutorials are registered regularly ReneeGraphisme_All rights reserved
*
|
 Translations