|
New
Translations here
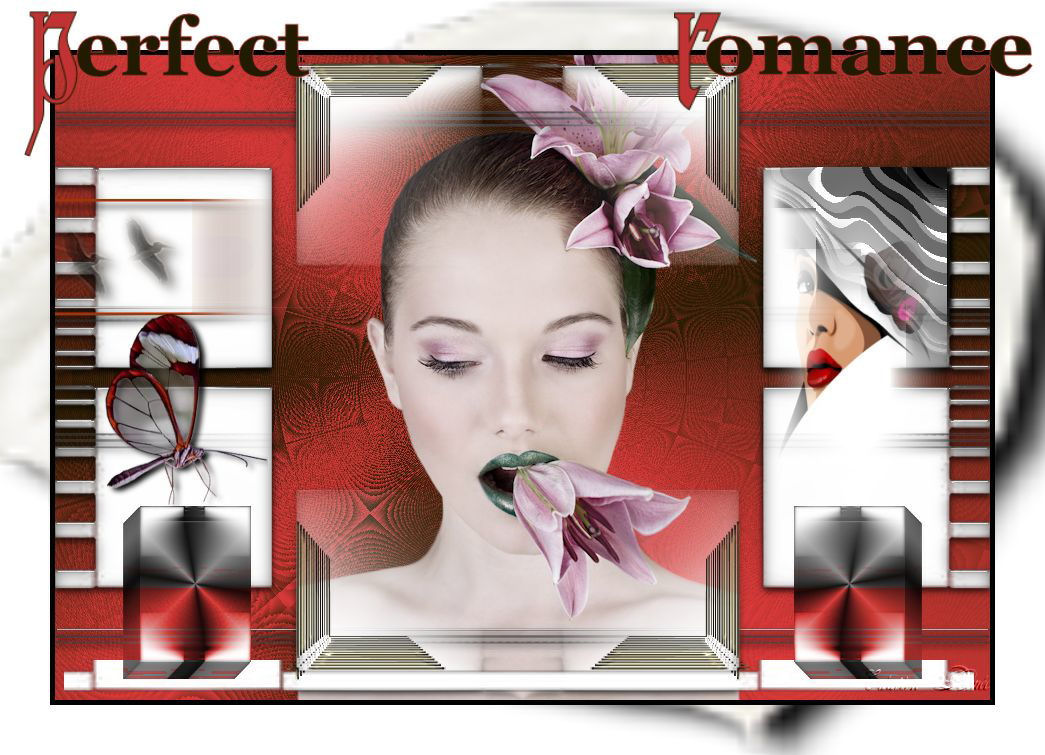
Perfect Romance
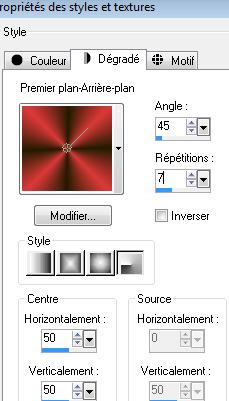
- Let's start the lesson. 1. Material Properties: Set your foreground color to #db3939 -Set your background color to: #231b01 2. Open a new transparent image 935 x 645 pixels 3. Color Palette: Prepare a foreground/background radial gradient with settings below -Flood Fill Tool and fill the layer with the gradient
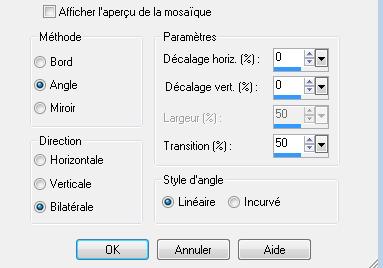
4. Effects-Plugins -Unlimited - &>Bkg Designer/ sf10III>Radial Split 05 to 65 5. Activate the tube ''perfect romance-image1 ''/ Edit/copy-Edit/paste as a new Layer on your working area (do not move it is in the right place) 6. Effects-Plugins - EyeCandy 5 /glass –Tab-Settings-User Settings and choose my Preset ''renee perfect romance'' 7. Layers-Duplicate 8. Effects-Image Effects-Seamless Tiling using the default setting
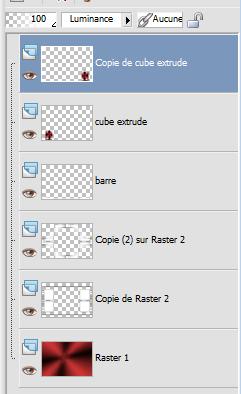
9. Layers- Duplicate 10. Selections - load/save selection - load selection from disk and choose my selection:/''renee-perfect-romance 2'' !! 11. Layers- New raster layer -Flood Fill Tool :fill the selection with the gradient - Layer Palette: Set the Blend mode to Overlay 12. Layers- Merge- Merge Layers Down 13. Selections -Invert /Press the Delete button on your key board 14. Selections-Deselect All 15. Image Resize at 25% Resize all layers not checked ( =Cube) 16. Effects-Plugins - Eyecandy 5 /impact Extrude –Tab-Settings-User Settings and choose my Preset ''renee -extrude-perfect-romance'' 17. Open the tube barre " renee-barre-perfect-romance'' Edit/copy -Edit/paste as a new Layer -With your move tool move to the as shown in the example below 18. Layers- Arrange-Move Down under the Cube as shown below
19. Cube: Layer Palette: Set the Blend mode to Luminance 20. Cube: Image Free Rotate 180 to the left
21. Layers- Duplicate /Image Mirror - You are there in your work/ Layer palette look like this now
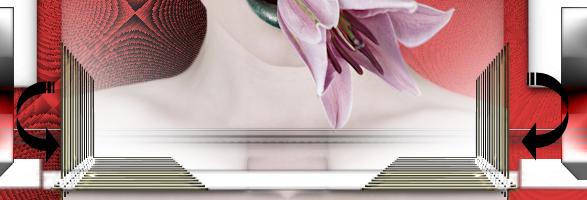
22. Open the tube ''corner-perfect -romance'' Edit/copy-Edit paste as a new layer on your working area . With your move tool place it in the right place as shown below 23. Layers- Duplicate /Image Mirror and move
24. Layers- Merge- Merge Layers Down 25. Layers- Duplicate /Image Flip 26. Open the tube ''oiseaux -perfect-romance" /Edit/copy-Edit paste as a new layer on your working area . With your move as shown below
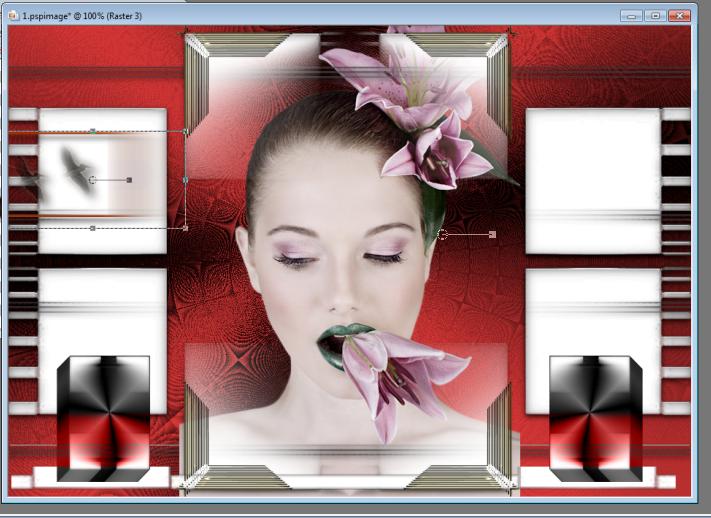
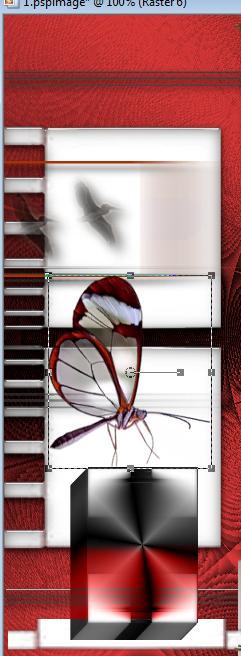
27. Open the tube ''renee-coin-droit-perfect-romance'' Edit/copy-Edit paste as a new layer on your working area . With your Move Tool- move to the right side 28. Open the tube ''papillon ''Edit/copy-Edit paste as a new layer on your working area . With your Move Tool -move to the left side
29. Layers- New raster layer 30. Selections - load/save selection - load selection from disk and choose my selection: ''renee-perfect-romance3'' 31. Open the tube /''Liliane_Misted-Woman '' Edit/copy-Edit/paste into selection 32. Selections-Deselect All 33. Open the tube ''21-03 Stephy Dream'' Activate and paste as a new layer on your working area 34. Layers- Arrange- Move Down (underneath copy of raster 2) 35. Eraser Tool-We will remove the remains of the white parts to the right and the left site of the woman as shown below
36. Layers - Merge - Merge All 37. Image - Add borders-Symmetric checked: 5 pixels black 38. Image - Add borders-Symmetric checked: 50 pixels white -If you want to write your text Set your foreground color to #c23232 -Set your background color to black - Text Tool - Font " Funky "/Size 185 -Type P - Text Tool - Font Georgia /Size 75 -Swap your materials, so the darker color is on the foreground -Type your text - Repeat the same for the other part of your text **The Text is included with the material" pspimage'' Paste it as a new layer on your working area** 39. Activate the Magic Wand and select the white border of 50 pixels 40. Layers- New raster layer 41. Open the tube ''fleur blanche ''Edit/copy-Edit/paste into selection 42. Selections-Deselect All 43. Image - Add borders-Symmetric checked: 5 pixels black. Save as JPG *
I hope you enjoyed this lesson Renée This lesson was written by Renée Placing 2011 * Any resemblance with an existing lesson is merely a coincidence *
* Don't forget to thank the people who work for us and with us. I named the tubeurs - Testers and the translators.
Thanks Renée. * I am part of Tutorial Writers Inc.
My tutorials are regularly recorded
ReneeGraphisme_All rights reserved
*
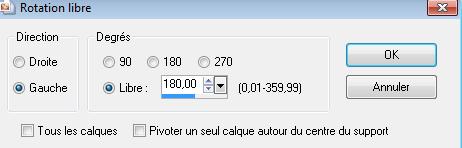
|
 Translations