|
Let's start the lesson.
1.
Open de background image ‘’ Pscicomemorie_fond’’ - Window - Duplicate (or shift+D) - Close the original and proceed on the copy -Promote Background Layer =Raster 1
2.
Activate the tube ‘’
‘’Pscicomemorie_black_and_white_lines
- Edit/copy- Edit/ paste as new layer on your working image (do not move it is in the right place)
3.
Effects-Plugins – Unlimited - &<Bkg Kaleidoscope>- 4 QFlip
ZBottomR
4.
Effects-Plugins –Transparency – Eliminate
white
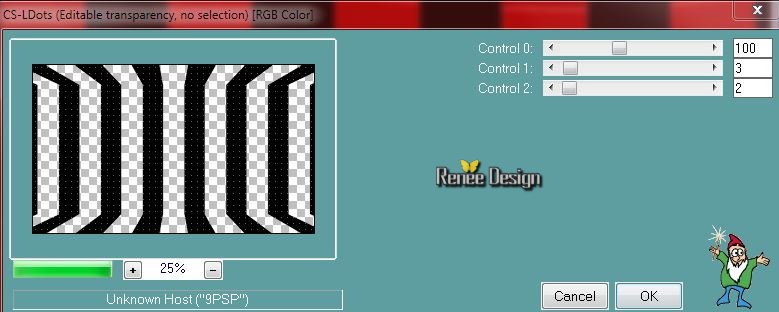
5. Effects-Plugins – Carolaine & Sensibility – CSL Dots with these settings
6. Effects-Plugins – Graphic Plus - Cross Shadow using the default settings
7. Activate
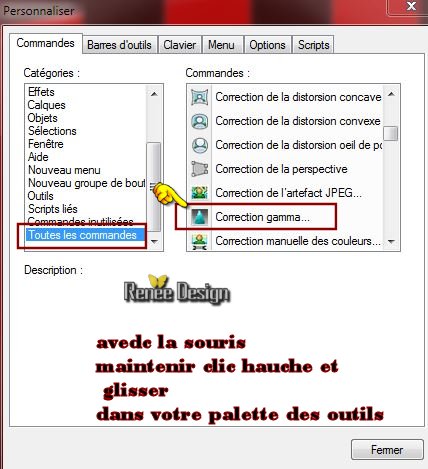
Gamma Correction Tool( Shift+G )
- –Is Gamma Correction Tool not listed ?View -Customize-Commands-All Commands select 'Gamma Correction" on the right side .With the mouse button pressed drag it between the other tools in your psp
Activate Gamma Correction Tool( Shift+G ) with these settings

8. Color-palette:Set your foreground color to white-Layers-New raster layer- Flood Fill Tool - fill the layer with your forgroundcolor white
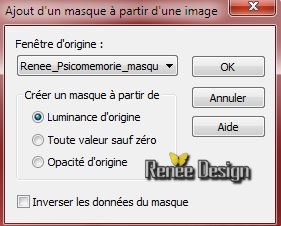
9.
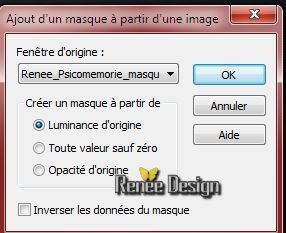
Layers- New Mask layer from Image and select Mask
« Renee_Psicomemorie_masque »
10. Effects-Edge Effects-Enhance More
- Layers-Merge-Merge Group
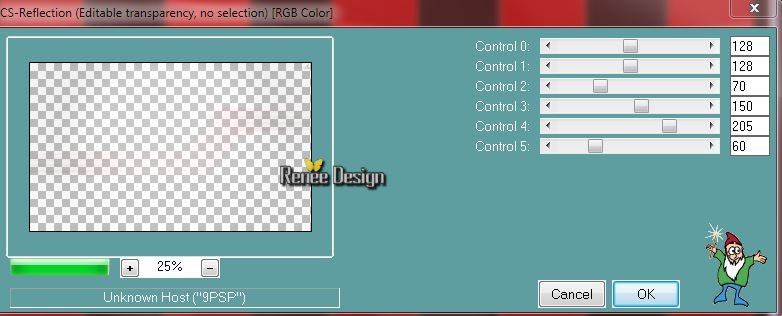
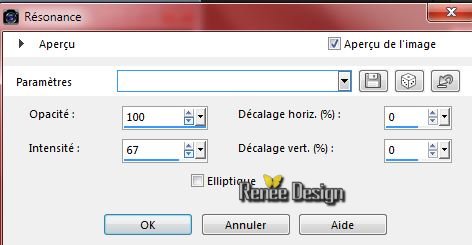
11. Effects-Plugins - Carolaine & Sensibility –
CS-Reflection with these settings
- Layer-palette: Make Raster 2 active
12.
Selections –load/save selection –load selection from disc and choose: ‘’
Pscicomemorie_1’’
13.
Selections-Promote selection to layer
Keep selected !!
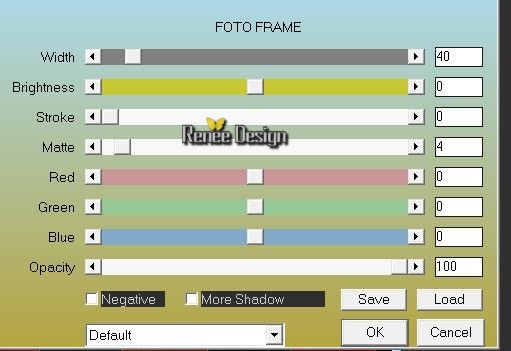
14. Effects-Plugins - AAA Frame - Foto Frame with these settings
Selections-Deselect All
15. Layers-Duplicate /Image Mirror
16. Layers-Merge-Merge-Down
17. Layers-Arrange-Bring to Top
18.Effects-Plugins –EyeCandy 5 Impact – Extrude – tab Settings/User settings choose my preset:
‘’Pscicomemorie_extrude’’
19.
Layers-New raster layer
20.
Color-palette:Set your foreground color to #8c0000-Flood Fill Tool: fill the layer with the foreground color #8c0000
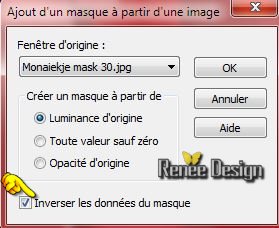
21.
Layers- New Mask layer from Image and select Mask
« monaiekje mask 30’’
-
Layers-Merge-Merge-Group
22.
Effects-Edge Effects-Enhance More
23.
Layers-Duplicate
24.
Image Mirror
25.Layers-Merge-Merge Down
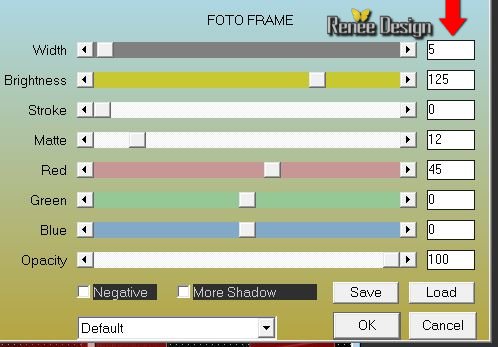
26.
Effects-Plugins -AAA Frame - Foto
frame with these settings
27.
Image Resize 55%
resize all layers not checked
28.
Effects-Reflection Effects-Feedback with these settings
29.
Layers-Duplicate
30.
Effects-Plugins - Mura’s Meister Perpective tilling
using the default settings
31.
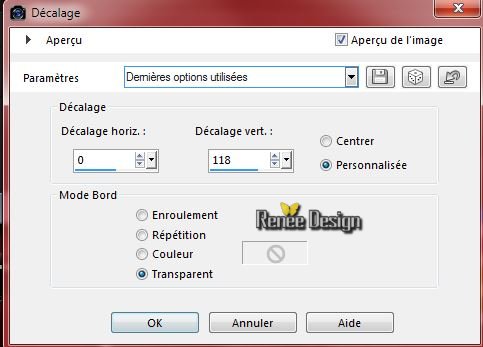
Effects-Image Effects-Offset with these settings
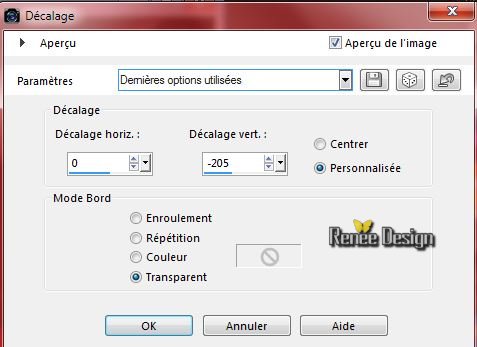
32.
Repeat: Effects-Image Effects-Offset with the same settings
33.Double click on this layer and set the Blendmode to "Exclusion"
34.
Layers-New raster layer
-
Color-palette:Set your foreground color to white- Flood Fill Tool: fill the layer with the foreground color white
35.
Layers- New Mask layer from Image and select Mask ‘’
Renee_Psicomemorie_masque2’’
-
Layers-Merge-Merge Group
36.
Effects-Plugins - Simple – 4Way Average
37.
Effects-Edge Effects-Enhance More
38.
Layers-New raster layer
39.
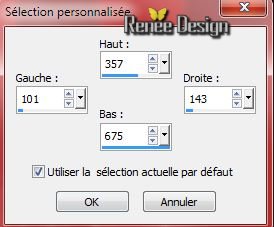
Selection Tool ( S ) Custom selection use settings below
40.
Color-palette:Set your foreground color to #8c0000-Flood Fill Tool: fill the selection with the foreground color #8c0000
41.
Effects-Plugins – EyeCandy5 Texture- Brickwalls
– tab Settings/User settings choose my preset:
« Pscicomemorie_texture_brickwalls »
Selections-Deselect All
42. Effects-3D Effects-Drop Shadow with these settings : -3/13/100/1 black
43. Layers-Duplicate
44. Image
Mirror
45. Layers-Merge-Merge Down
- Color-palette:Set your background color to #000000
46.
Effects-Plugins –Unlimited – ICNET FILTERS- Color Effects- Bi-Color
(fore-/background color)
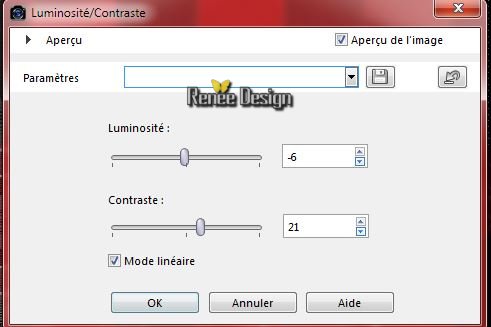
47. Adjust–Brightness and Contrast-Brightness and Contrast with these settings (effect is minimal)
Preparation: Color-palette:Set your foreground color to #dad4d5 -Set your background color to#595959
48. Layers-New raster layer
49. Flood Fill Tool - fill the layer with the foreground color
50.
Selection Tool ( S ) Custom selection use settings below
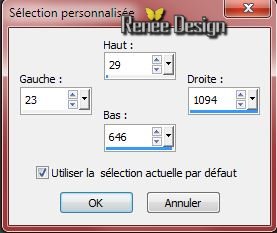
51. Flood Fill Tool - fill the selection with the background color
52.
Selection Tool ( S ) Custom selection use settings below
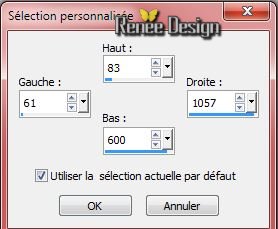
53. Flood Fill Tool - fill the selection with the foreground color
Selections-Deselect All
54.
Selections-Select All
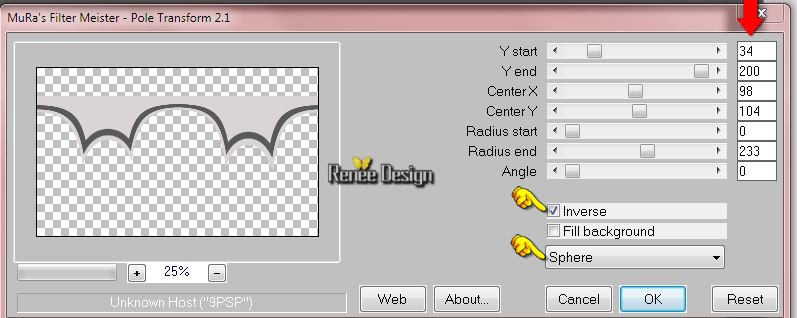
55. Effects-Plugins –Mura’s Meister – Pole
transformation with these settings
Selections-Deselect All
56.Effects-Image Effects-Offset with these settings
57. Double click on this layer and set the Blendmode to "Soft Light "
58. Activate the tube ‘’ Renee_tube_Psicomemorie.pspimage’’
- Image
Resize 678 pixels Height
- Edit/copy- Edit/ paste as new layer on your working image
-With your Move Tool:move to the right side as shown in the example below
59. Activate the tube ‘’ Renee_tube_Cage.pspimage’’
- Image
Resize 50%
- Edit/copy- Edit/ paste as new layer on your working image
With your Move Tool:move to the bottom left side (see finished image)
60. Activate the tube ‘’ Pscicomemorie_decos.pspimage »
You may minimize your tube for a moment, but do not close, we will need it again soon
- Make layer ’’deco_1 »active
- Edit/copy- Edit/ paste as new layer on your working image (do not move it is in the right place)
61. Activate the tube ‘’ psicomemorie_effetblanc’’
- Edit/copy- Edit/ paste as new layer on your working image (do not move it is in the right place)
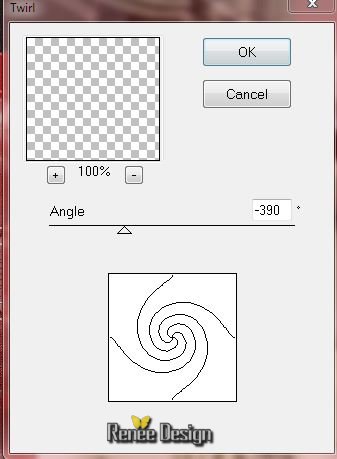
62. Effects-Plugins – Distort- Twirl with these setting
63.
Selection Tool ( S ) Custom selection use settings below
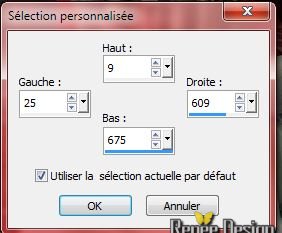
64.
Effects –Plugins - Unlimited - Andrew's Filters 1-AB Filters...
a 66
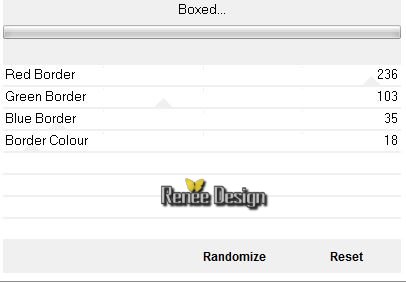
65.
Effects –Plugins- Unlimited - Andrew's Filters
1--Boxed..with these settings
66.
Set the Layer Opacity of this Layer to 57%
Selections-Deselect All
67. Activate the tube again ‘’ Pscicomemorie_decos.pspimage «
- Make layer‘’reflet ‘’ active
- Edit/copy- Edit/ paste as new layer on your working image
(do not move it is in the right place)
68. Double click on this layer and set the Blendmode to "Color "
On the same tube
69. Make layer ‘’deco_2 »active
Edit/copy- Edit/ paste as new layer on your working image
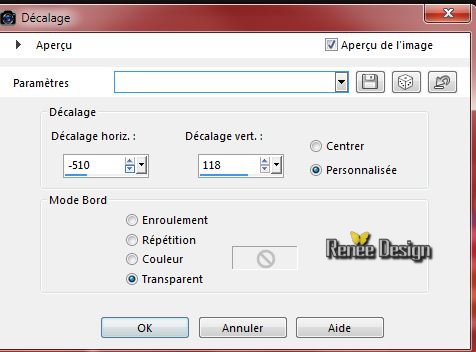
70. Effects-Image Effects-Offset with these settings
71.
Effects-Plugins –Unlimited – Kang 1- the Woven world with these settings 136/128
72.
Effects-Plugins – Eyecandy 5Impact –Perspective
shadow – tab Settings/User settings choose my preset:’’ Pscicomemorie-shadow’’
- Color-palette:Set your foreground color to white
73. Activate the Brush ‘’ Pscicomemorie_Renee_pinceau’’ in your psp
- File- Export- Custom Brush
Give it a name " Pscicomemorie_Renee_pinceau’"
74. Layers-New raster layer
75. Activate the Brush Tool and choose the brush:" Pscicomemorie_Renee_pinceau’" with these settings Stamp your brush in the right place by using your foreground color (see finished image)

76. Activate the tube again » Pscicomemorie_decos »
- Make layer ‘’deco_4’ active
- Edit/copy- Edit/ paste as new layer on your working image
- With your move tool move to the right side
77. Image - Add borders-Symmetric checked:1 pixel black
78. Image - Add borders-Symmetric checked:2 pixels #8c0000
79. Image - Add borders-Symmetric checked:20 pixels white
80. Image - Add borders-Symmetric checked:2 pixels #8c0000
81. Image - Add borders-Symmetric checked:10 pixels white
82. Image - Add borders-Symmetric checked:1 pixel black
83. Image - Add borders-Symmetric checked:50 pixels white
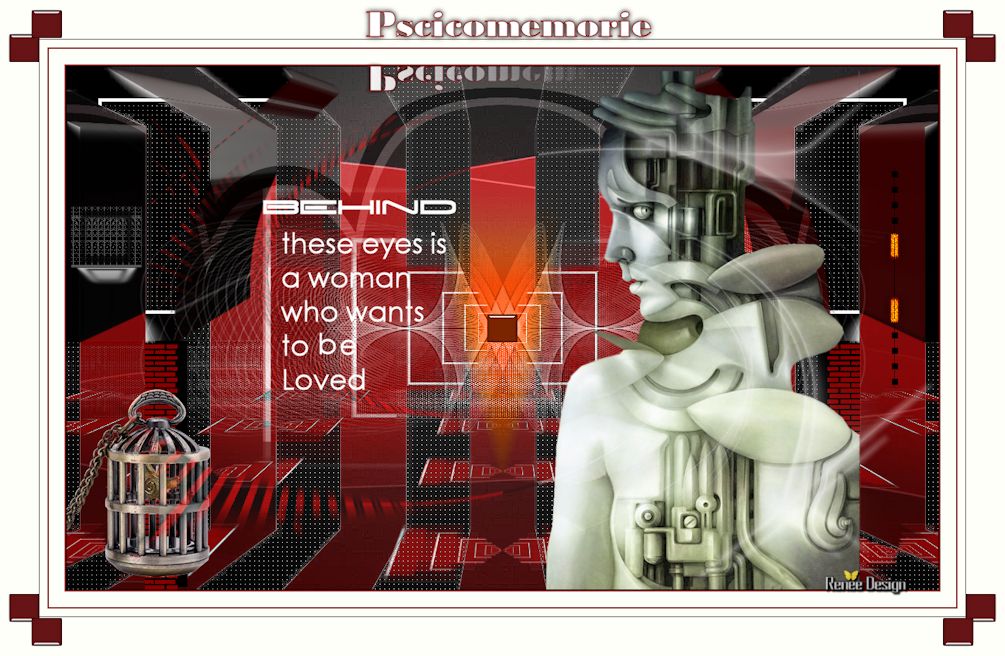
84. Text Tool: Font ‘’bodoni ‘’
85.: Color-palette:Set your foreground color to #8c0000 Set your background color to white
-Activate Text Tool: Type the text: » Pscicomemorie »/Size 48
Pixels
-
Covert to raster layer
86.
Effects-3D Effects-Drop Shadow with these settings : 0/0/100/10 black
87.
Layers-Duplicate
88.
Image Flip
Place well below the title
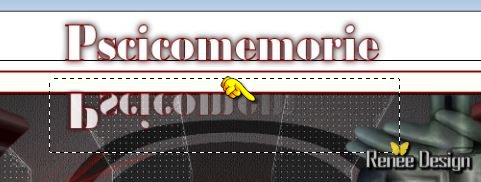
89. Selection Tool ( S ) – Selection type - Rectangle
Select the title as shown in the example below
90. Effects-Plugins – AlphaWorks- Horizontal FadeOut
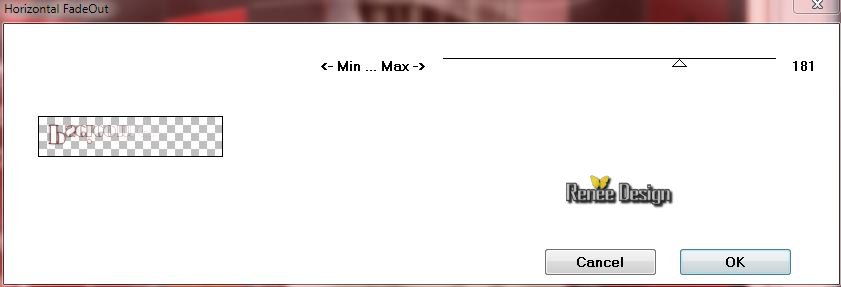
Selections-Deselect All
91. Activate the tube ‘’carre_final’’
- -Edit/copy- Edit/ paste as new layer on your working image
- With your move tool move to the upper left corner
92. Layers-Duplicate –Image Mirror
93. Layers-Merge-Merge-Down
94. Layers-Duplicate – Image Flip
95. Layers-Merge-Merge All
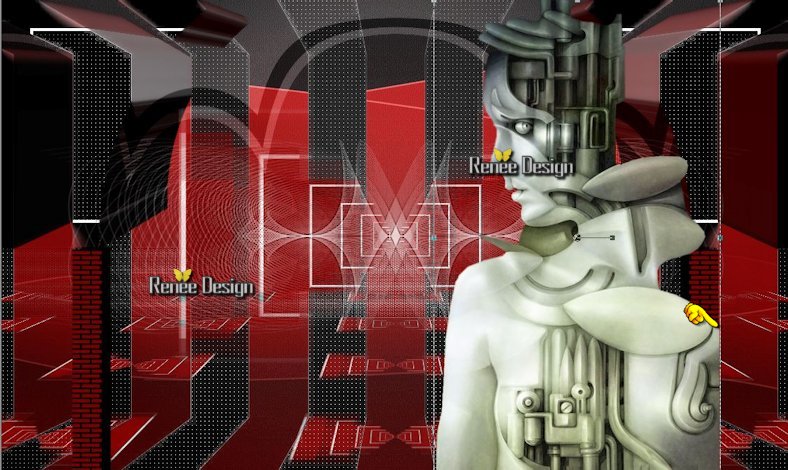
96. Image
Resize 1005 pixels Width.
Save as JPG
I hope you enjoyed this tutorial .
Renée
This lesson was written by Renée 16/05/2015
edited and update on
2015
*
Any resemblance with an existing lesson is merely a coincidence *
* Don't forget to thank the people who work for us and with us.
I named the tubeurs - Testers and the translators.
Thanks Renée.
*
*
| 
 Translations


 When you see this logo the filter is imported in Unlimited

 All rights reserved