|
Traducteur
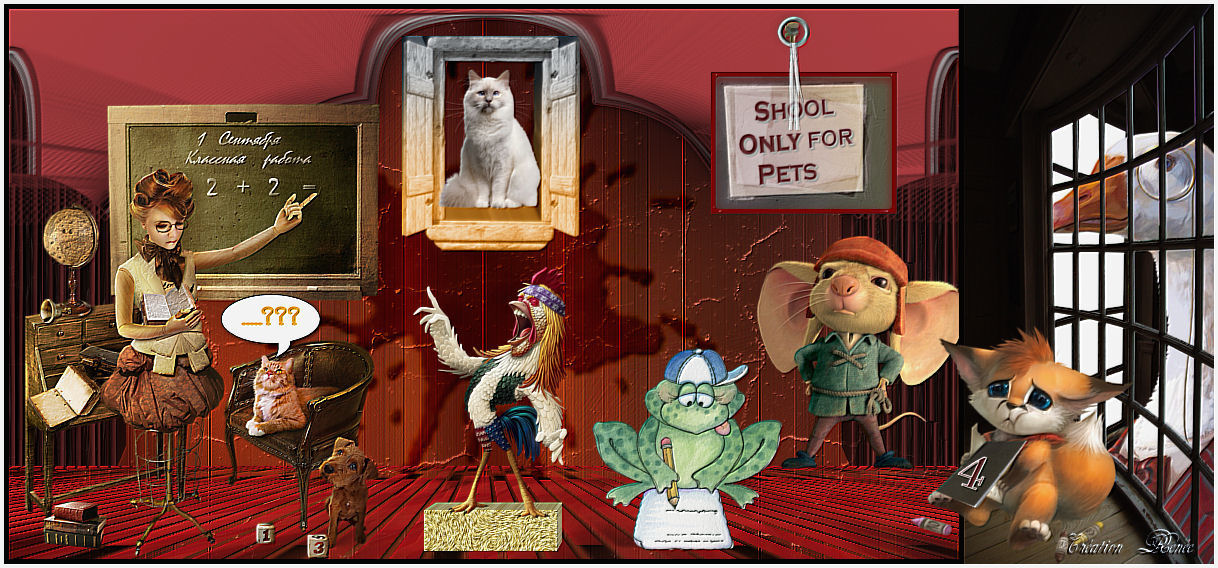
School only for Pets
New
**********
Plugins You can find my filters here http://espace-gigi.com/filtres/mesfiltres.htm
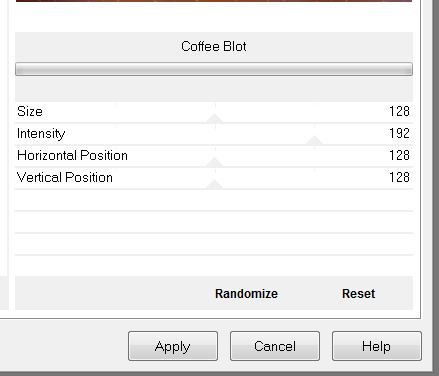
1. Open the Background image ''only-for-pets-fond 1" Window Duplicate-Promote Background Layer =Raster 1 2. Effects- Plugins -Unlimited -Photo Agin kit's -Coffee Blot
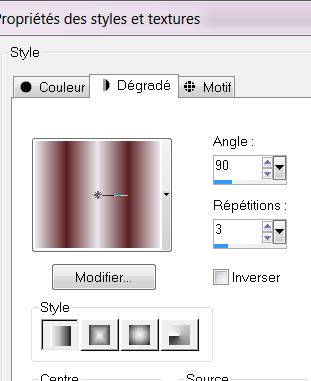
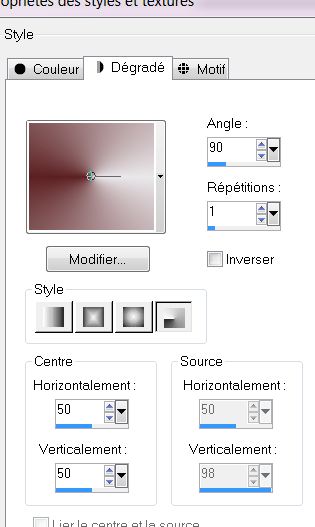
3. Layers- Duplicate 4. Adjust-Blur- Gaussian Blur Radius: 40% 5. Effects- Plugins - L and K's - Raisa /255 – 0 6. Layers- Duplicate -Image Mirror 7. Layers- Merge- Merge Down - Double click on this layer and set the Blendmode to Hard Light and set the layer opacity of this layer to 50% 8. Effects- User Defined Filter- Emboss 3 / using the default settings and Repeat 1x 9. Layer- New raster layer 10. Selections - load/save selection - load selection from disk and choose my selection: '' Renee only for pets 1'' 11. Material Properties: Foreground color = #eae8eb -Background color =#5c2022 - Prepare a linear gradient configured like this.
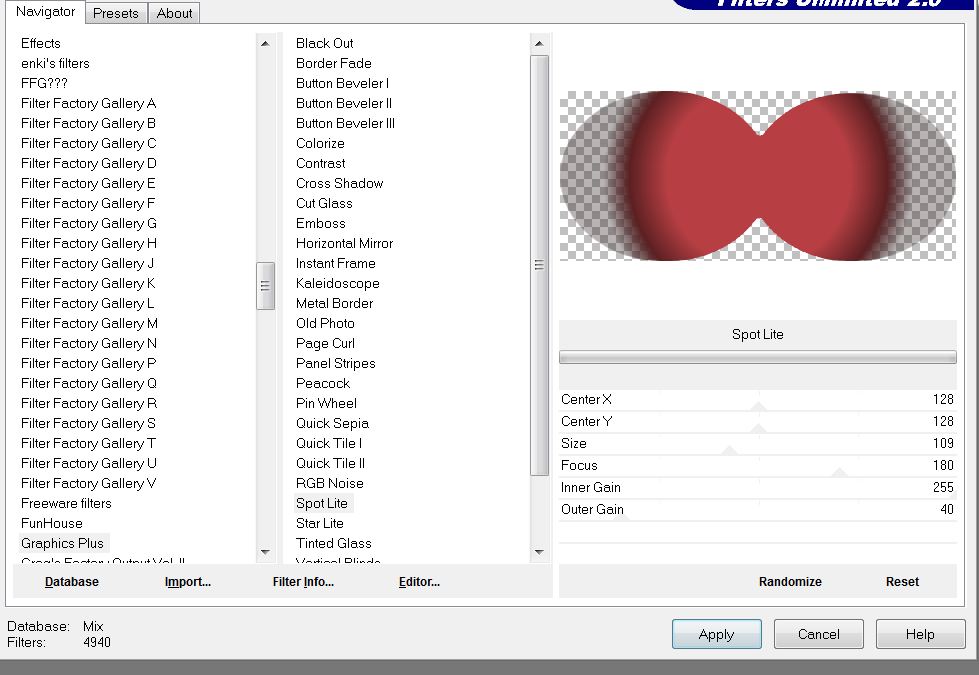
12.Activate Flood Fill Tool and fill the selection with the gradient 13. Selections - Modify- Contract- 15 pixels – Hit the Delete key 14. Selections- Modify- Expand 5 pixels 15. Layer- New raster layer 16. Activate Flood Fill Tool and fill the layer with the background color #5c2022 17. Effects- Plugins -Unlimited- Graphic plus - Spot lite
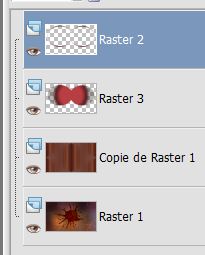
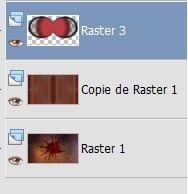
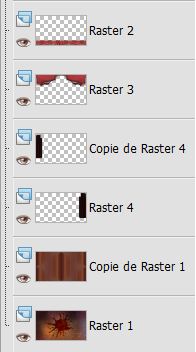
18. Layers- Arrange- Move Down - Your Layer Palette look like this now:
19. Effects- Plugins -Eye Candy 5Impact - perpective shadow- tab Settings/User settings choose my preset: ''renee-only-for-pets 1'' 20. Selections -Modify - Contract 15 pixels 21. Effects- Plugins -Eye Candy 5Impact - perpective shadow- tab Settings/User settings choose my preset: ''renee-only-for-pets 1'' 22. Selections-Deselect All 23. Layers- Merge- Merge Down - Your Layer Palette look like this now:
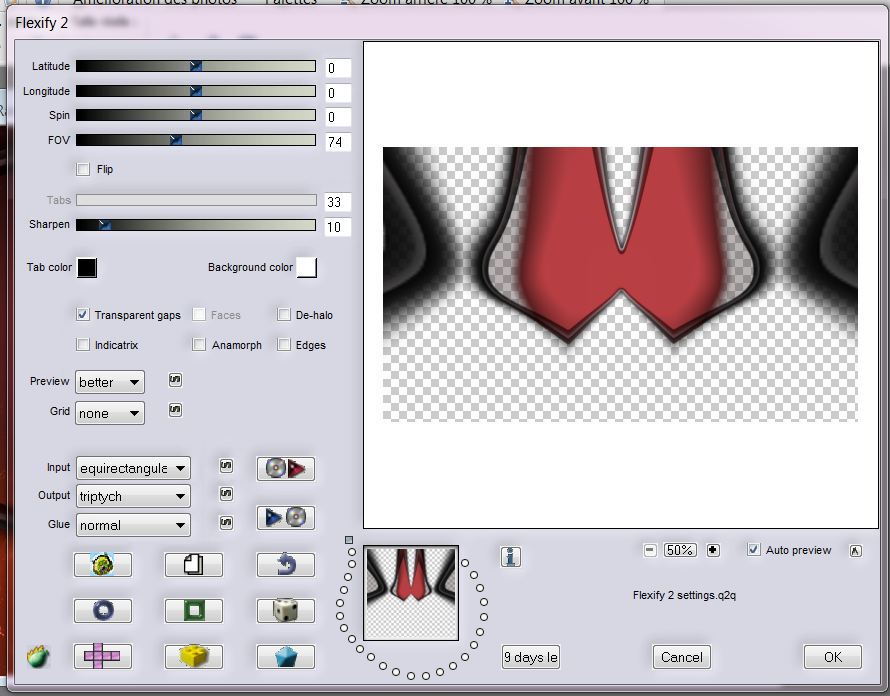
24. Effects- Plugins Flaming pear - flexify 2 with these settings
25. Effects- Plugins - Mura's Meister- Pole transformation 2.1
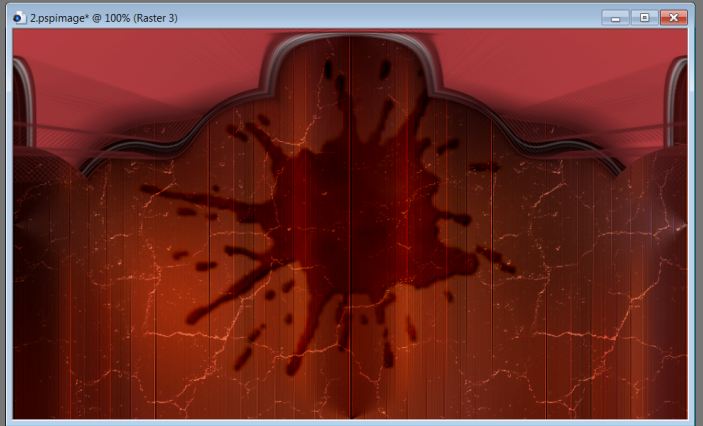
- With your Eraser Tool-Erase the 2 small parts in black as shown in the example 26. Effects- Plugins - Eye Candy 5 Impact -Black light -¨tab Settings/User settings choose my preset: ''renee-only-for-pets-light'' - Your work look like this now
27. Layer- New raster layer 28. Selections- Select All 29. Open the tube ''WS-FL_RedDalhia18011''Edit/copy-Edit paste into selection 30. Selections- Deselect All 31.Effects- Image Effects- Seamless Tiling with these settings
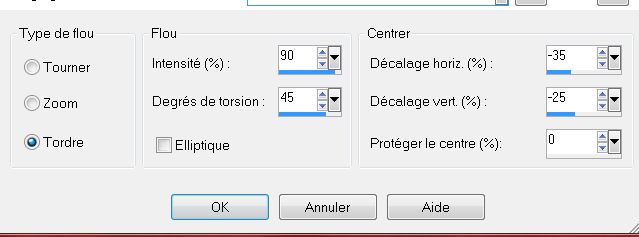
32. Adjust- Blur- Radial Blur with these settings
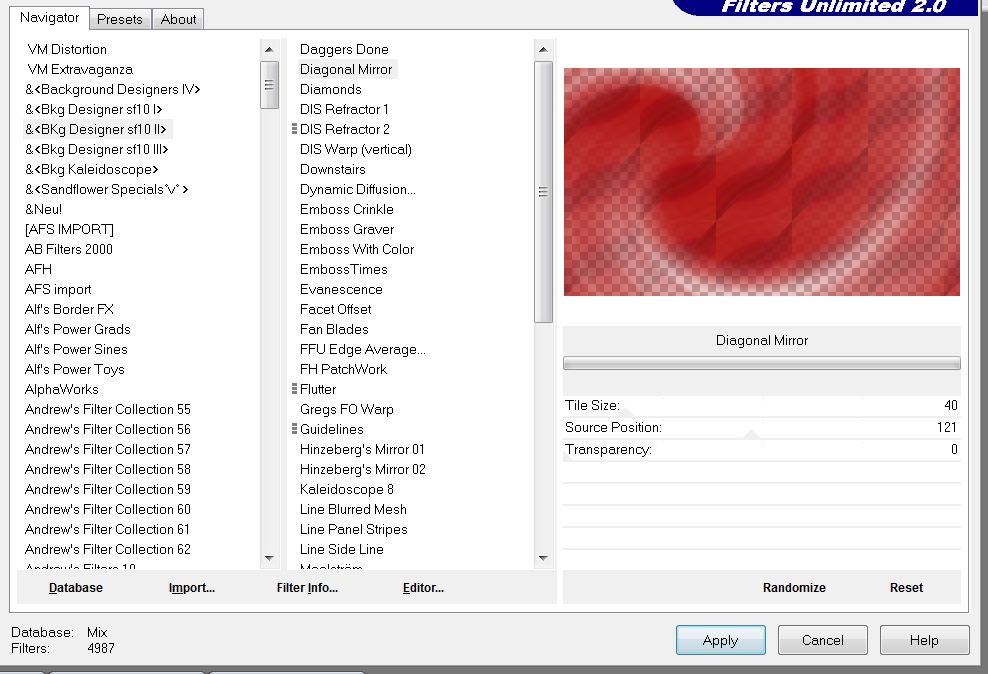
33. Effects- Plugins - Unlimited -&<BkjDesigner sf10 II - Diagonal Mirror
34. Effects- Edge Effects- Enhance 35. Effects- Image Effects- Seamless Tiling with these settings 36. Effects- Plugins-Unlimited - VM extravaganza - Shoutin' !
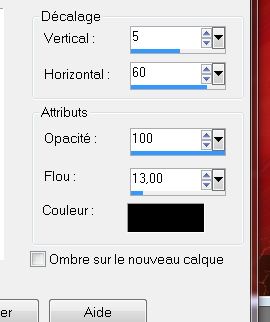
37. Effects-3D effects-Drop Shadow with these settings
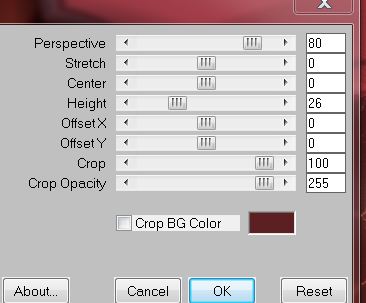
38. Effects- Plugins -Mura's Meister-Perpective Tilling
39. Effects- Image Effects- Offset with these settings H= 0 and V = - 50 40. Layer- New raster layer 41. Selections - load/save selection - load selection from disk and choose my selection: ''renee-only-for-pets2'' Properties Foreground: Prepare a radial gradient configured like this.Activate Flood Fill Tool and fill the selection with the gradient .
42. Effects- Plugins -Eye candy 5Impact -Textures -tab Settings/User settings choose my preset: ''renee-only-for-pets-texture-woods'' 43. Selections- Select All 44. Effects- Plugins -Eye candy 5 Extrude -tab Settings/User settings choose my preset: ''extrude-pets'' 45. Layers- Arrange- Move Down under raster 3 in the layer palette 46. Layers- Duplicate / Image Mirror - Your layer palette looks like this
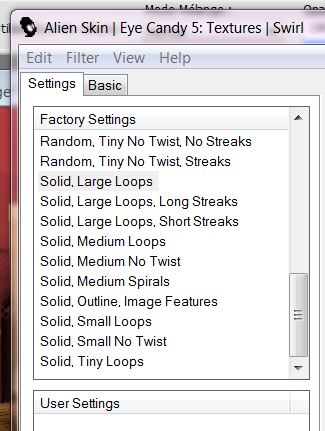
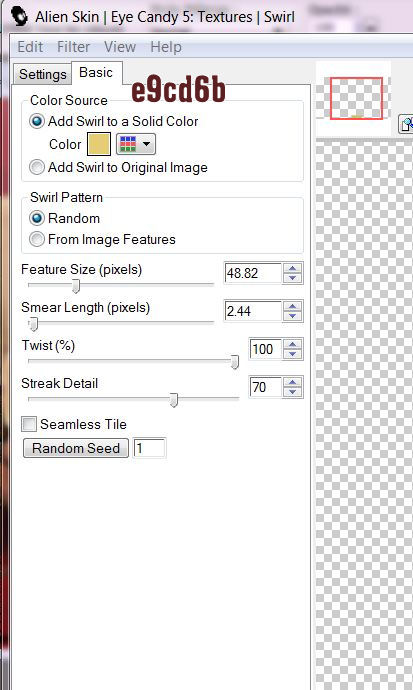
47. Open the tube ''fenetre'' Edit/copy-Edit paste as a new layer on your working area and move 48. Open the tube ''beau_chat_blanc_tubed_by_thafs'' / Image Resize 3 x with 60% Edit/copy-Edit paste as a new layer on your working area and move 49. Open the tube ''a_l_ecole_tubed_by_thafs » Image Resize with 60% Edit/copy-Edit paste as a new layer on your working area and move 50. Layer- New raster layer 51. Selections - load/save selection - load selection from disk and choose my selection:''renee-only-for-pets3'' / Activate Flood Fill Tool and fill the selection with the background color 52. Effects-Plugins- EYE CANDY5 - texture - Swirl with these settings as shown in the example below
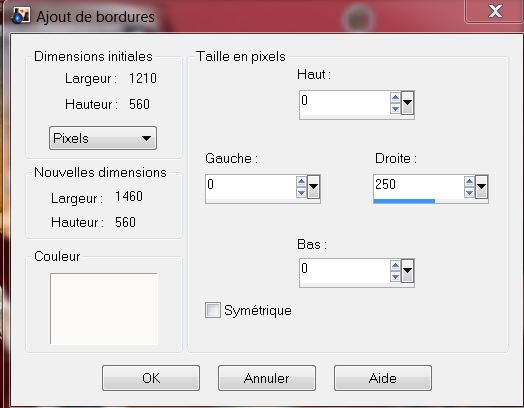
53. Selections- Deselect All 54. Effects- Plugins -EyeCandy 5 extrude -tab Settings/User settings choose my preset: ''renee-pets-extrude'' 55. Effects- Edge Effects- Enhance 56. Open the tube ''Yoka-Funny-Musical-Rooster19062012'' -Image Resize with 20 % Edit/copy-Edit paste as a new layer on your working area and move 57. Open the tube ''ToughMouse_Grace'sTLC'' Image Resize with 60% Edit/copy-Edit paste as a new layer on your working area and move 58. Open the tube ''renee-ardoise -only for pets ''and open the tube '' clou'' !! Edit/copy-Edit paste as a new layer on your working area and move 59. Open the tube ''pfl53_grenouille_lettre'' / Image Resize with 35% -Edit/copy-Edit paste as a new layer on your working area and move 60. Open the tube ''mode_article 11 '' select the speech bubble /Edit/copy-Edit paste as a new layer on your working area and move–Write the text 61. Layers- Merge- Merge Visible 62. Image - Add borders-Symmetric checked: 5 pixels black 63. Image - Add borders asymmetric with these settings- white
64. Activate Magic Wand and select the white part 65. Layers- New raster layer 66. Open the tube ''senga_window_2011 Edit/copy-Edit-paste into selection - Keep Selected 67. Image Mirror 68. Selections- Promote selection to layer 69. Selections- Deselect All 70. Open the tube ''Treagen2246_11_10_12'' / Image Resize with 60 % Edit/copy-Edit paste as a new layer on your working area and move - Activate the top of the Layer Palette 71. Open the tube de Syl « « SVB Crayola Cake ''(aktivate raster 1 of the tube / Image Resize with 75 % Edit/copy-Edit paste as a new layer on your working area and move 72.Layers- Merge- Merge All 73.Image - Add borders-Symmetric checked:4 pixels white 74. Effects- Plugins -FM Tile Tools Blend Emboss using the default settings Save as JPG
I hope you enjoyed this lesson Renée This lesson was written by Renée Placing 22 October 2012 *
Any resemblance with an existing lesson is merely a coincidence * * Don't forget to thank the people who work for us and with us. I named the tubeurs - Testers and the translators. Thanks Renée.
I am part of Tutorial Writers Inc. My tutorials are regularly recorded. ReneeGraphisme_All rights reserved
*
|

 Translations


 Let's start the lesson.