|
New
Translations here
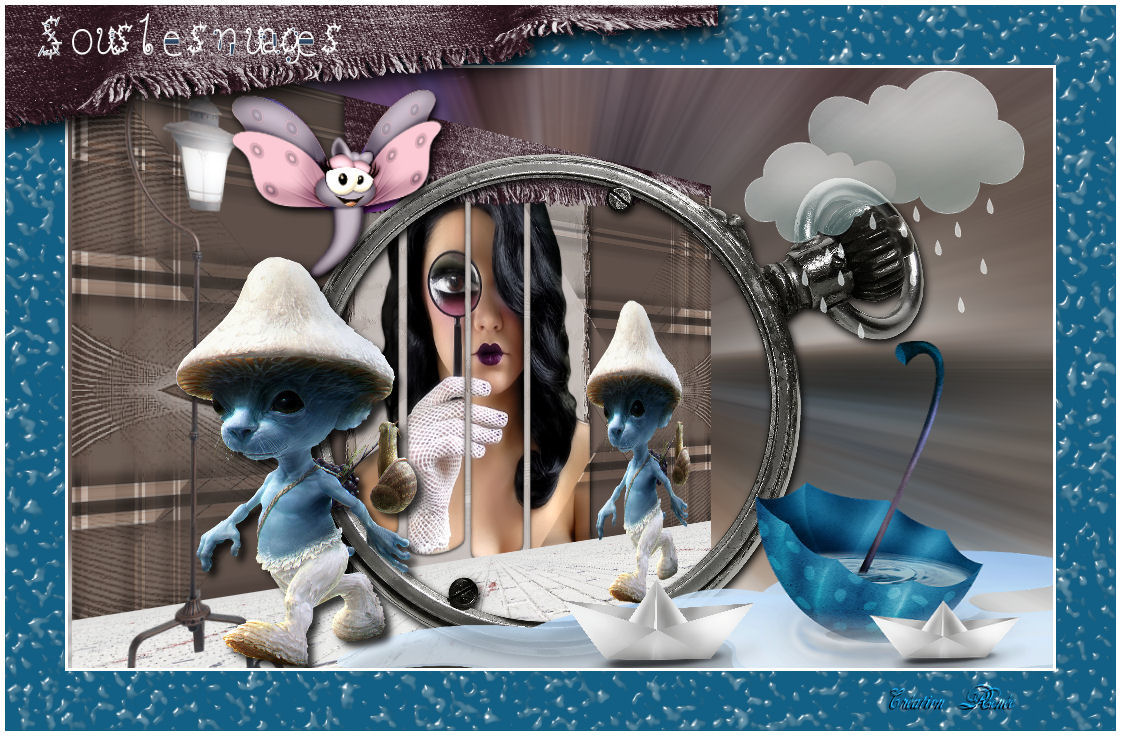
A Closer ... Under the clouds
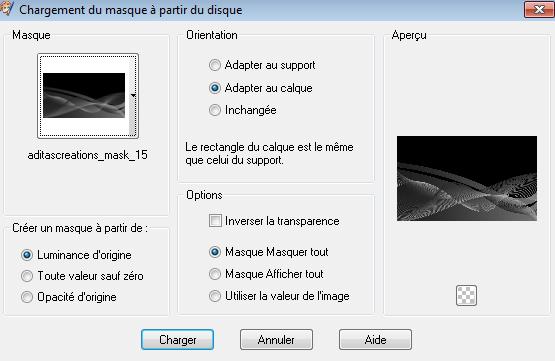
These Plugins are used for this Tutorial Simple Mura's Meister Andromea perspective EyeCandy 4000 You can find my filters here : http://www.reneegraphisme.fr/filtres/Mes filtres.html ******************** Tubes are of ATTENTION : If it is your intention to share these tubes or these lessons in a group, please ask permission to the owner . The tube may not be send without the lesson . Please do not make changes to the tube, because this tube was made for this lesson only. It is forbidden to share this tutorial without a link to the original lesson. Thank you very much Renée * These tubes were received from tubeurs sharing groups. Or found by me searsching on the net. I Am grateful to have been given permission these beautiful tubes so please use any copyright information as needed. If one of these tubes is yours? Contact me so I can make a link to your site or remove it. Thanks Renée . Let's start the lesson. 1. File - New - New Transparent Image 985 x 600 pixels 2. Activate Flood Fill Tool and fill the layer with #59473d 3. Layers- New raster layer /Activate Flood Fill Tool and fill the layer with white 4. Layers- Load/Save mask-Load Mask from Disk and select: /aditascreations_mask_15
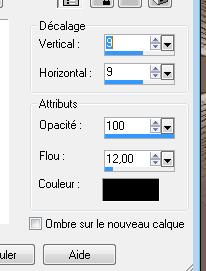
5. Layers- Merge- Merge Group 6. Effects- Plugins -Simple- Pizza Slice Mirror /Repeat plugins Simple 7.Layers- New raster layer 8. Selections - load/save selection- load selection from disk and select my file ''renee-sous-les-nuages'' 9. Open the tube ''mur'' Edit - Copy -Edit - Paste into selection/Selections- Deselect All 10.Layer Palette: Double click on this layer and set the Blendmode to Luminance Legacy and set the Layer Opacity of this Layer to 71% 11. Effects 3D Effects - DropShadow with these settings
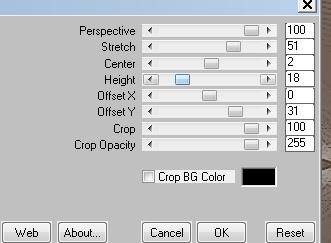
12. Repeat Drop Shadow: negativ V = -8/and H= -8 13. Layers- Duplicate /Image Free Rotate 90° Right / Do not move it is in the right place 14. Effects- Plugins - Mura's Meister /Perspective Tilling with these settings
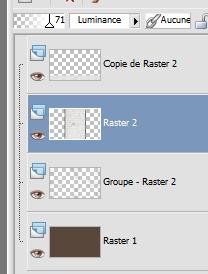
16. Layer Palette: Double click on this layer and set the Blendmode to "Normal" and set the Layer Opacity of this Layer to 100% 17 Layer Palette-activate the layer underneath=raster 2
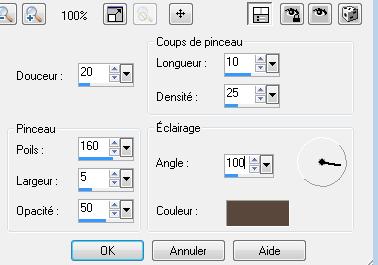
18.Effects- Art Media Effects-Brush with these settings- color #59473d
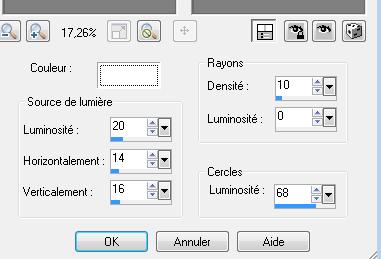
19. Open the tube ''KWGGBLPI'' Edit -Copy -Edit - Paste as new layer on your working area and move 20. Open the tube ''SD.Tube April103-12'' / Image Resize with 75% and repeat 1x Edit -Copy -Edit - Paste as new layer on your working area and move 21. Open de tube ''wishingonastar_light_kw.png'' /Image Mirror /Edit -Copy -Edit - Paste as new layer on your working area and move to the left side 22. Effects- Illumination Effects-Sunburst with these settings-color white
23. Open the tube ''woman-519-bycrealine
modifié ''/(original into the zipfile with respect for the creator Thanks ) / With your move tool place it in the right place as shown in the example below
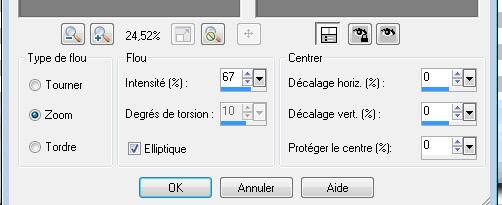
24. Layers- Arrange - Move Down underneath raster 3 25. Open the tube ''sous-les-nuages -image8'' Edit/copy-Edit paste as a new layer on your working area and move 26. Layers- Arrange - Move Down underneath raster 3 27. Layers- Merge- Merge All 28. Layers- Duplicate 29. Effects- Plugins - Andromeda Perspective / Sit walls /it open close - Layer Palette: activate the merged layer (fusionné )/Adjust- Blur- Radial Blur with these settings -Elliptical checked**
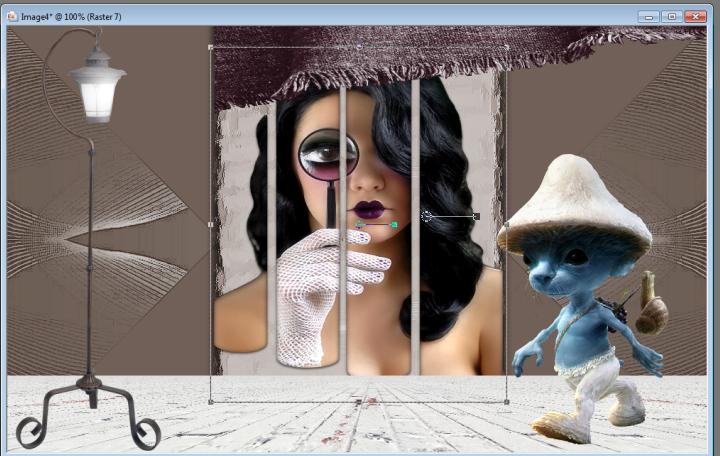
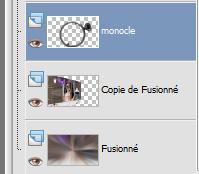
30. Activate the top of the layer-Palette 31. Open the tube ''libellule'" Edit/copy-Edit paste as a new layer on your working area and move 32. Open the tube ''sous eau parapluie'/ Edit/copy-Edit paste as a new layer on your working area and move 33. Open the tube ''nuage '' Edit/copy-Edit paste as a new layer on your working area and move/ Double click on this layer and set the Blendmode to "Hard Light " and set the layer opacity of this layer to 71% 34. Open the tube ''april bis " Edit/copy-Edit paste as a new layer on your working area and move 35. Open the tube ''monocle" Edit/copy-Edit paste as a new layer on your working area and move Layers- Arrange-Bring to Top as shown below / Layer Palette look like this now-You should have this result
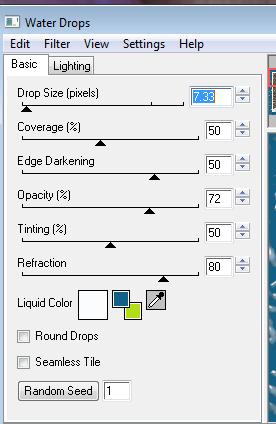
36. Open the tube ''cocotte" /Edit/copy-Edit paste as a new layer on your working area and move 37. Layers- Merge Merge All 38. Image - Add borders-Symmetric checked: 3 pixels white 39. Image - Add borders-Symmetric checked: 60 pixels #126086 40. With the magic wand select the 60 pixels Border 41. Effects- Plugins - EyeCandy4000/water drops with these settings - colors #FAFCFE - #245B93 -#AFE00B
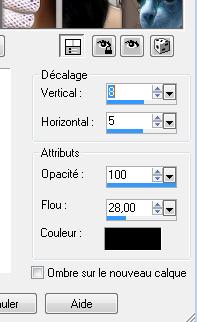
42. Open the tube ''KWGGBLPI'' Edit/copy-Edit paste as a new layer on your working area and move / Selections- Deselect All 43. Effects - 3D Effects - Drop shadow with these settings
44. Image - Add borders-Symmetric checked: 5 pixels white Save as JPG I hope you enjoyed this lesson Renée
|
 Translations