|
New
Translations here
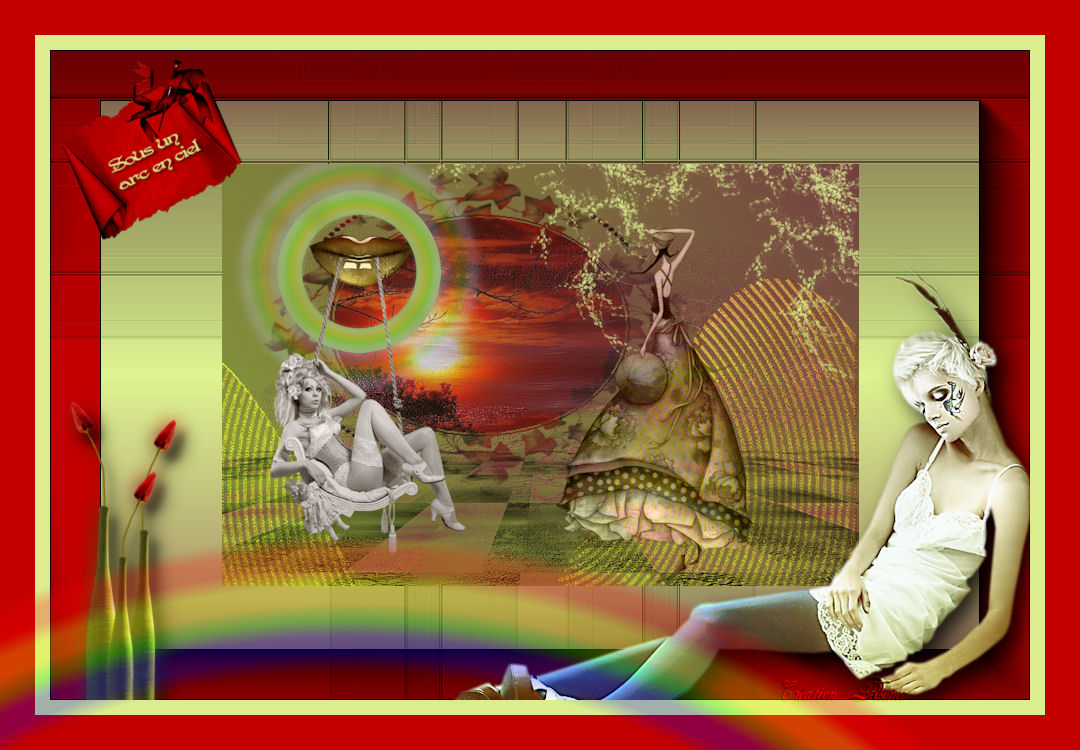
Under the rainbow
Let's start the lesson.
2.File: Open een new transparent image 980
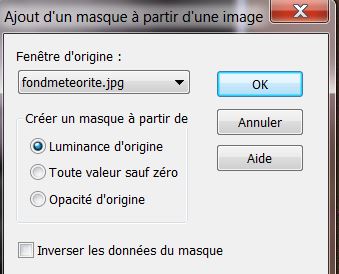
x 650 pixels 4. Layers- New Raster Layer //Activate Flood Fill Tool and fill the layer with the background color #743c42 5. Layers- New Mask layer from Image and choose Mask: « fond météorite »
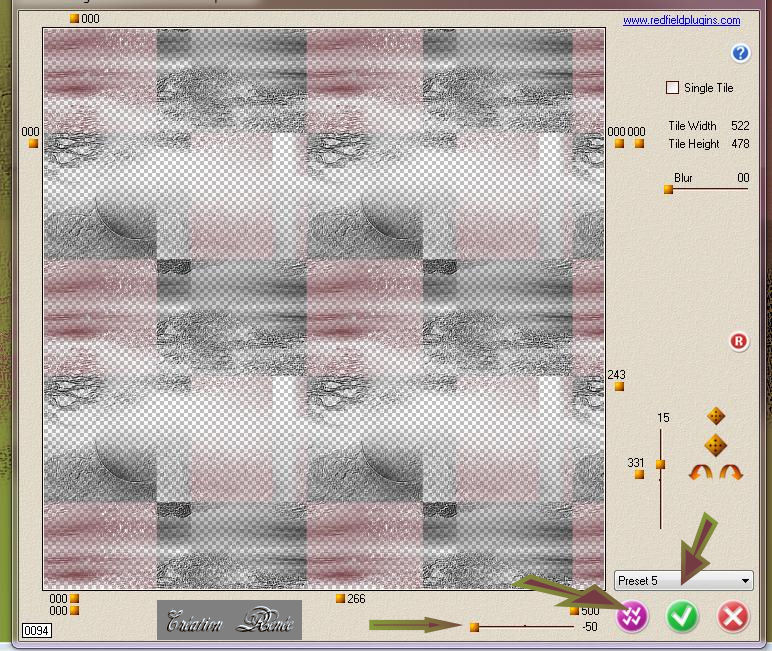
6. Effects- Edge Effects-Enhance / Layers- Merge- Merge Group 7. Effects- User Defined Filter/Emboss3 using the default settings 8. Layers- Duplicate 9. Effects- Plugins-L and K 's/Pia / a 228 10. Effects- Plugins -Redfield /Seamless Workshop **select preset>> 5
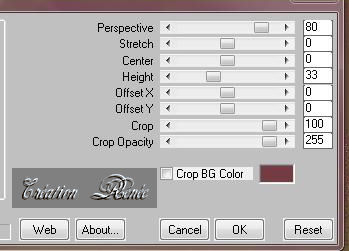
11. Effects- Plugins- Mura's Meister / Perspective Tilling
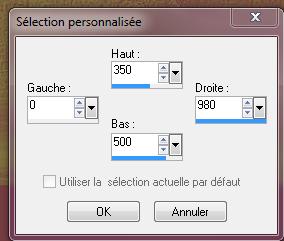
12. Adjust-Sharpness-Sharpen 13. Activate Selection Tool -Custom Selection (S) Rectangle with these settings
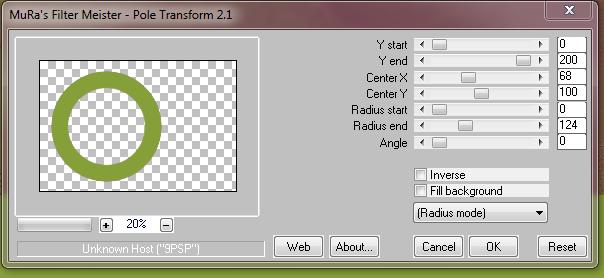
14. Layers- New Raster Layer //Activate Flood Fill Tool and fill the selection with the foregroundcolor 15. Selections- Deselect All 16. Effects- Plugins-Mura's Meister /Pôle transformation
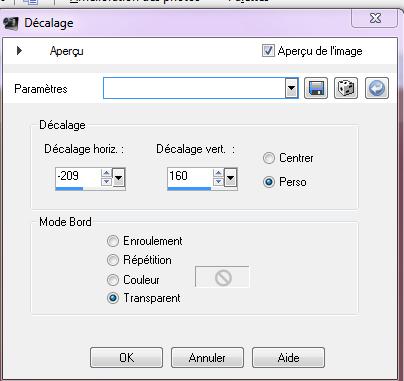
17. Image Resize 45% all layers not checked 18. Effects- Plugins- Eyecandy5/blacklight -tab Settings/User settings choose my preset: Preset « reneearcenciel » 19. Effects- Image Effects- Offset use settings below
20. Layers- New Raster Layer 21.Selections –load/save selection –load selection from disc and choose:'' @arc-en-ciel'' - Activate Flood Fill Tool and fill the selection with this color #dff492 22. Effects- Plugins-Neology / Transparent Bullseye only ring a 64 23. Selections- Deselect All Layer Palette - Double click on this Layer and set the Blend Mode to " Overlay" 24. Effects- Plugins-AP16 (power blend) / Distort Gridge
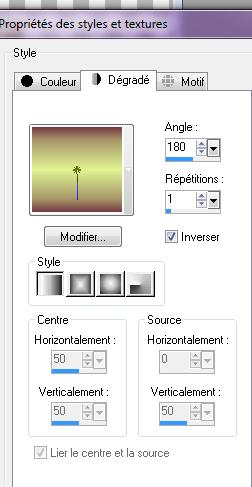
25. Open the tube « levres « /Edit/ Copy-Edit - Paste as new layer on your working image 26. Open the tube « betsie648-04-02-2011 « Image Mirror /Image Resize to 85% /Edit/ Copy-Edit - Paste as new layer on your working image and move 27. Open the tube « feuillage .png '' /Edit/ Copy-Edit - Paste as new layer on your working image and move 28. Open the tube « Mira-MLC-gaelle -boissonnard-bb218 »Image Resize to 55% / Edit/ Copy-Edit - Paste as new layer on your working image - Layer Palette - Double click on this Layer and set the Blend Mode to " Luminance- Legacy " 29. Activate bottom layer in the Layer palette 30. Layers- New Raster Layer 31. Selections –load/save selection –load selection from disc and choose:''@arc-en-ciel2'' 32. Open the tube'' 1PIVBM-PAYSAGES-080709 ''Edit/Copy- Edit Paste into selection 33. Selections- Deselect All Set the layer opacity of this layer to 86% 34. All in Place? Layers- Merge- Merge Layers All 35. Image Resize to 65% alle layers not checked 36. Layers- New Raster Layer 37.Color-palette:Set your foreground color to color #dff492 --Set your background color to color #743c42
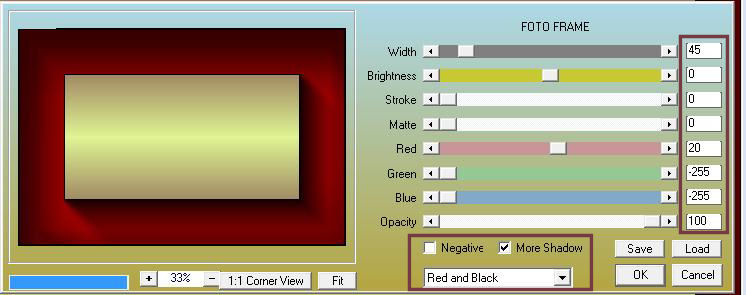
38. Activate Flood Fill Tool and fill the layer with the gradient 39. Layers- Arrange- Move Down *Stay on this Layer =Raster 1 40. Effects-Plugins- AAA Frame / Foto frame
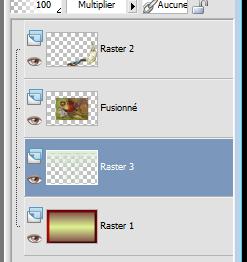
41. Activate top layer in the Layer palette 42. Open the tube « one-little-indian-tube-by-thafs »Image Resize to 90% //Edit/ Copy-Edit - Paste as new layer on your working image 43. Activate bottom layer in the Layer palette =Raster 1 44. Layers- New Raster Layer 45. Selections- Select All- Open the tube « effet grille « Edit/Copy- Edit Paste into selection 46. Layer Palette - Double click on this Layer and set the Blend Mode to "Multiply " /Selections- Deselect All - You should have this result as shown in the print screen below
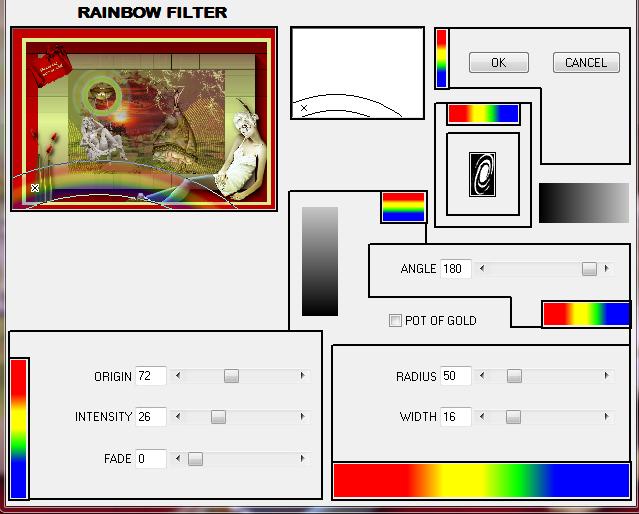
47. Activate top layer in the Layer palette 48. Open the tube ''@nn-060411-vaseflowers-hannad-tds '' /Edit/ Copy-Edit - Paste as new layer on your working image 49. Effects-3 D Effects- Drop Shadow with these settings: 11/8/75/14 black 50. Layers- Merge- Merge Layers- Visible 51. Open the tube "text arc en ciel" /Edit/ Copy-Edit - Paste as new layer on your working image /Image Free Rotate Left 30° Layers- Merge- Merge Layers- All 52. Image - Add borders-Symmetric checked:15 pixels #dbed8f 53. Image - Add borders-Symmetric checked:35 pixels #c30000 54. Effects- Plugins- Andromeda /Rainbow
I am part of the Tutorial Writers Inc. My tutorials are registered regularly ReneeGraphisme_All rights reserved
*
|
 Translations