|
Let's start the lesson
1.
File - New - New Transparent Image: 1095 x 685 pixels
2.
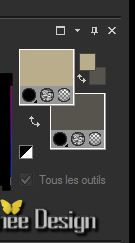
Material Properties: Foreground color to color: #baad8b Background color to color: #56544d
3.
Flood Fill Tool: Fill the layer with the BG-Color
4.
Layers-New raster layer
5.
Effects-Plugins -Medhi - Wavy Lab1.1- (FG-Color and BG-Color) 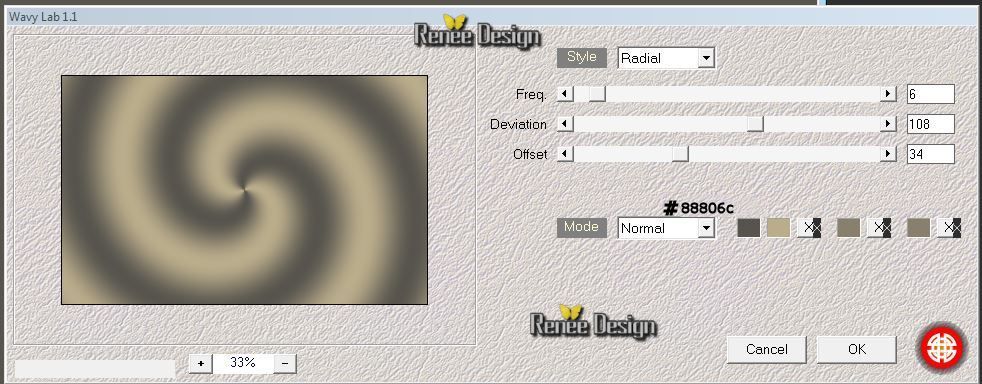
6.
Effects-Plugins Ulimited - Color Filters- Blue Sky /
176/128
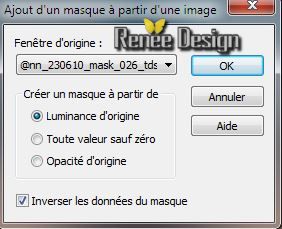
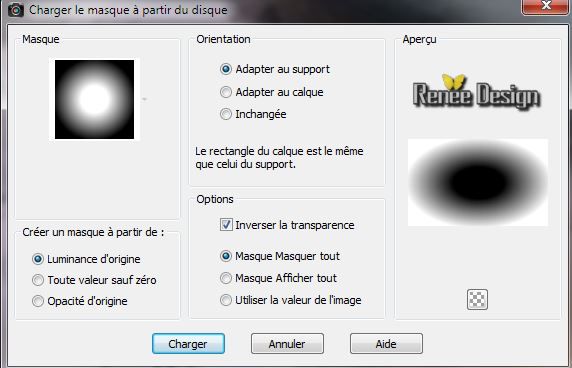
7. Layers-New Mask Layer From Image and choose Mask:
8. Layers- Merge -Merge Group
9. Effects-Edge Effects-Enhance
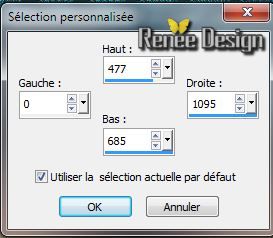
10.
Selections-Gustom Selection with these settings(S)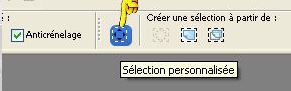
11. Edit-Cut-Edit paste as a new layer
Selections - Deselect all
12.
Effects-Geometric Effects-Circle - /Transparent
13. Effects-Plugins - Steampunk 15 Extrude in tab Settings/User Settings and choose my preset ""steampunk15_extrude"
14.
Effects - Image Effects - Seamless tiling with these settings/
Syde by Syde
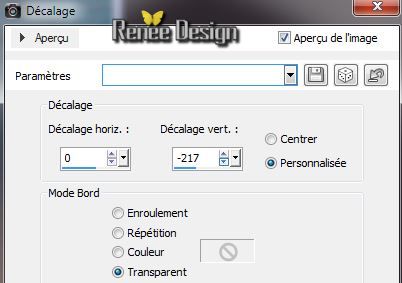
15. Effects - Images Effects - Offset
16.Layer-Palette: activate layer underneath (Group-Raster2)
17. Layers-New raster layer
18.
Selections - load/save selection - load selection from disk and choose ''steampunk_15''
19. Activate the tube''steampunk15_paysage'' / Edit - Copy -Edit - Paste into selection
20.
Selections - Deselect all
21. Activate the tube ''forme_2''/Image Resize 75%
22. Edit - Copy -Edit - Paste as a new layer
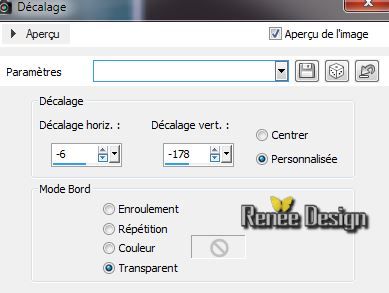
23. Effects - Images Effects - Offset
24.
Effects- Plugins-EyeCandy 5 -Impact - Glass tab Settings/User Settings and choose my preset
''steampunk15_glass''
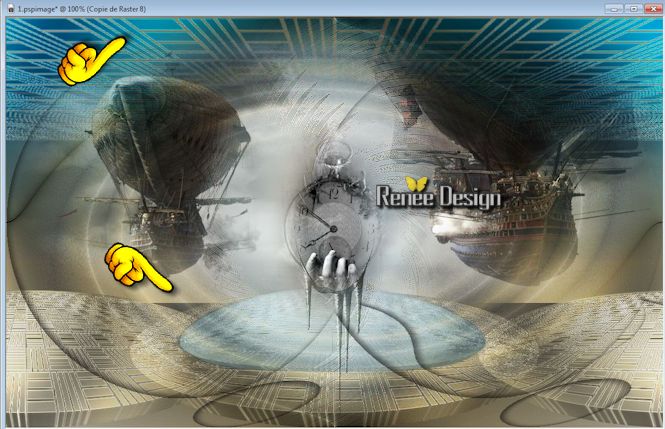
25. Activate the tube''steampunk15_horloge '' Edit - Copy -Edit - Paste as a new layer ( do not move)
26. Effects-Distortion Effects-Wind-Settings From Left:
100
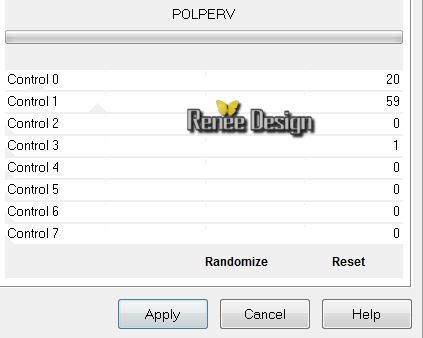
27. Effects-Plugins
Unlimited - Sybia -POLPERV
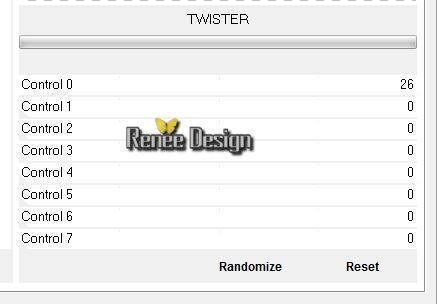
28. Effects-Plugins Unlimited - Sybia-TWISTER
29. Effects - 3D Effects - Drop shadow: 1/1/100/0 /Color: #1d5162
30. Effects-Edge Effects-Enhance / Layer Palette: change your Blend Mode to "Screen" or "Normal "
Activate the top of the layer-Palette
31. Activate the tube''steampunk15_horloge '' Edit - Copy -Edit - Paste as a new layer ( do not move )
32. Image
Resize 65 %
(All layers not checked)
33. Layer Palette: chance de Blend Mode to "Luminance-Legacy"
34. Effects-Plugins -EyeCandy Nature- Icicles tab Settings/User Settings and choose my preset "'
steampunk15_Icicles''
35. Effects-Plugins
Unlimited -Icnet Filters - Color Filters - Blue sky 176
/128
36. Layers-Duplicate
37.
Prepare a linear gradient configured like this.
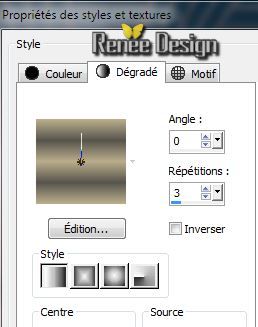
38. Activate Flood Fill Tool and fill selection with the gradient
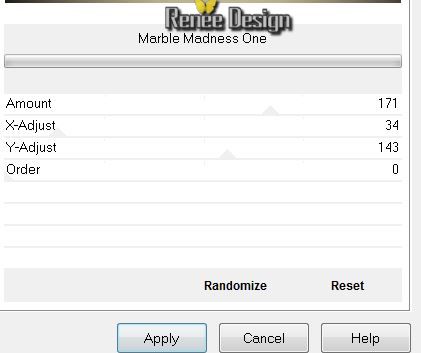
39. Effects-Plugins
Unlimited -Filter Gallery A- Marble Madness One
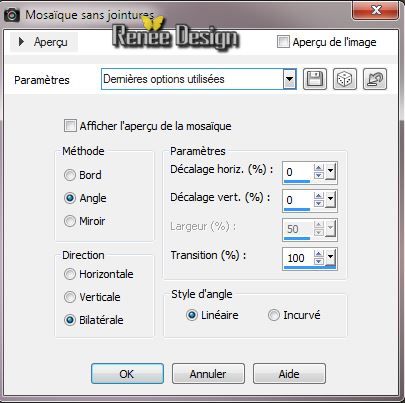
40.Effects - Image Effects - Seamless tiling with these settings
41.
Layers-Maske- Load/Save Mask -Load Mask From Disk and choose
/20/20
42.Layers-Merge-Merge Group
43. Effects-Distortion Effects-Twirl with these settings
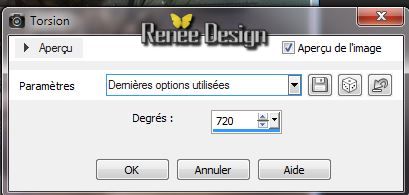 Repeat with the same settings Repeat with the same settings
44. Layer Palette: chance de Blend Mode to "Overlay'
45. Layers-New raster layer
46.
Selections - load/save selection - load selection from disk and choose ''steampunk15_1"
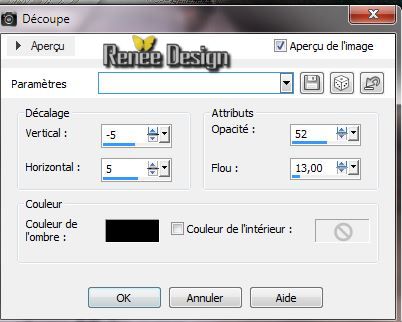
47. Effects-3D Effects-Cutout with these settings
Selections - Deselect all
48.Layers-Duplicate
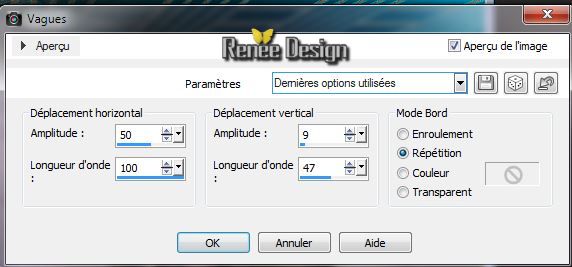
49. Effects-Distortion Effects-Wave with these settings
50. Activate Eraser Tool: remove the part as shown in the example.
Like this
50. Activate the tube ''steampunk_15_oeil" be placed on the raster 2 of the tube
51. Edit/copy-Edit paste as a new layer . With your move tool move to the bottom right corner
52. Layer-Palette: Change the Blend Mode to :" Luminance Legacy"
53. Activate the tube''steampunk_shutdown_icon_by_yereverluvinuncleber-d4se1p6.pspimage''/
Edit - Copy -Edit - Paste as a new layer /With your move tool move to the bottom right corner
54.
Activate the tube ''steampunk15_9art.pspimage''/ Edit - Copy -Edit - Paste as a new layer
55. Activate the tube ''steampunk_15_deco_1''/Edit - Copy -Edit - Paste as a new layer and place
56. Layers-Duplicate /Image Mirror - Place it in the right place
57. Layers-Merge-Merge Down /Reduce the opacity of this layer to
83%
58.
Effects-Plugins -Eye Candy5 Impact - Perspective
shadow tab Settings/User Settings and choose my preset ''steampunk_15_shadow"
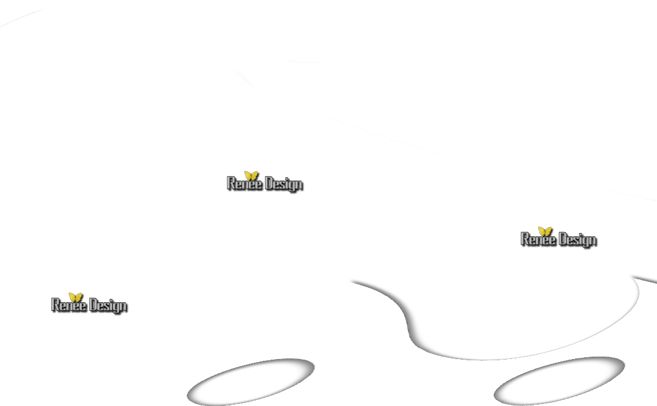
59. Layers- New raster layer
60.
Selections - load/save selection - load selection from disk and choose ''steampunk15_2''/Activate Flood Fill Tool and fill selection with color white
61.
Effects-Plugins -EyeCandy 5 Impact -Chrome tab Settings/User Settings and choose my preset
''steampunk15_chrome''
-.Selections - Deselect all
62.
Effects-Plugins - EyeCandy 5 Impact-tab Settings/User Settings and choose my preset "steampunk15_shadow2"
63. Layers-Merge-Merge Visible
64. Activate the tube
''steampunk_time_folder_icon_by_yereverluvinuncleber-d5dr1t1.pspimage''/
-Activate raster 2 and3
of the tube. Edit- Copy -Edit - Paste as a new layer and move. The Blend Mode is already set. Do not change ! (Normal and Screen)
65. Image - add borders: 5 pixels Color: #ffffff
66. Image - add borders: 5 pixels Color: #005d78
67. Image - add borders: 15 pixels Color: #ffffff
68. Image - add borders: 1 pixels Color: #000000
69. Image - add borders: 35 pixels Color: #ffffff
70.Image - add borders: 1 pixels Color: #000000
71. Activate the tube'' titre'' /Edit - Copy -Edit - Paste as new layer on your working area and move.
Layers-Merge- Merge All ( flatten)
Image
Resize 995 pixels Width
I hope you enjoyed this lesson
Renée
This lesson was written by Renée the 4/06/2014
Created the
06/2014
*
Any resemblance with an existing lesson is merely a coincidence
*
* Don't forget to thank the people who work for us and with us. I named the tubeurs - Testers and the translators.
Thanks Renée. | 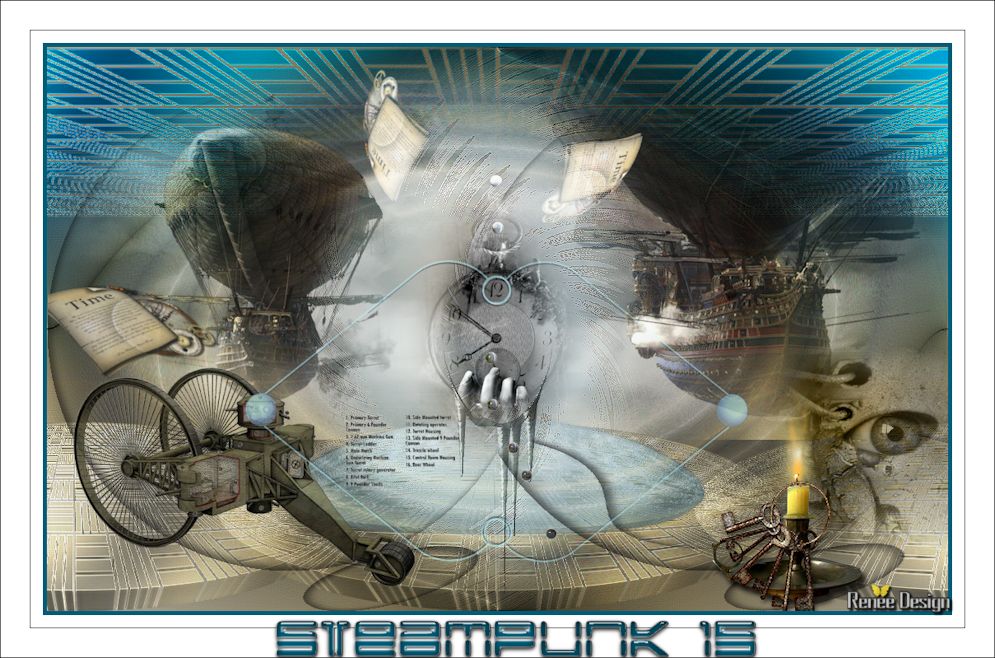
 Translations