|
Let's start the lesson.
Open your color paletten in PSP
- Material Properties: Foreground color to color:#e3d9d1 Backgroud color to color: #8a9060
1. Open Image ''
fond_steampunk_17'/ Promote Background layer=raster 1
2. Layers-New raster layer
-Flood Fill Tool: fill the layer with foreground color
3. Layers-New Mask Layer From Image and choose Mask
''Krystubes139210188330_gros''
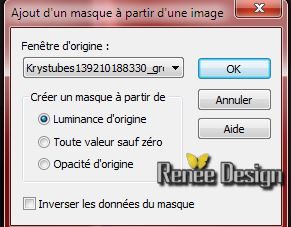
- Layers- Merge -Merge Group
4. .Effects-Image Effects-Seamless Tiling use the settings below
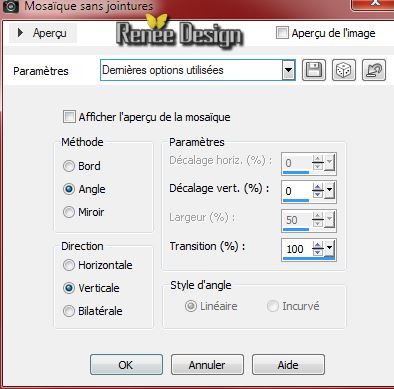
5. Layers- Duplicate
6. Image Free Rotate
/ 90° Right
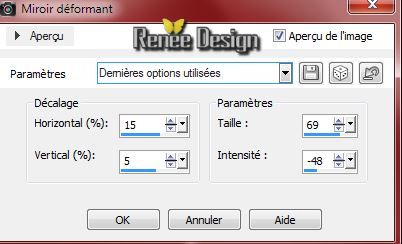
7. Effects- Distortion Effects-Warp use settings below
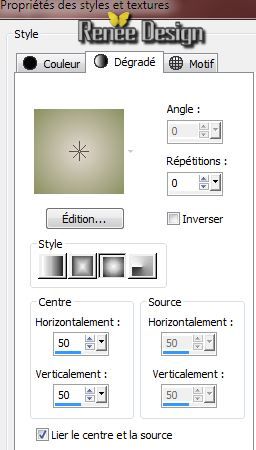
8. Prepare a Sunburst Gradient as configured
9. Layers-New raster layer
10. Selections - load/save selection - load selection from disk and choose ""steampunk_17 ''
- Activate Flood Fill Tool and fill selection with the gradient
Selections- Deselect All
11. Effects- Artistic Effects - Chrome
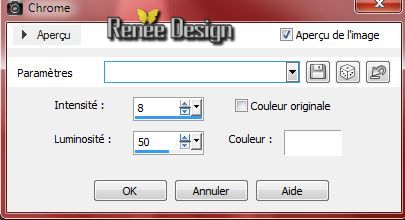
12.Effects-Plugins- FM Tile Tools- Blend Emboss Default
13.Effects-Plugins-Mura's Meister -perspective Tilling use settings below
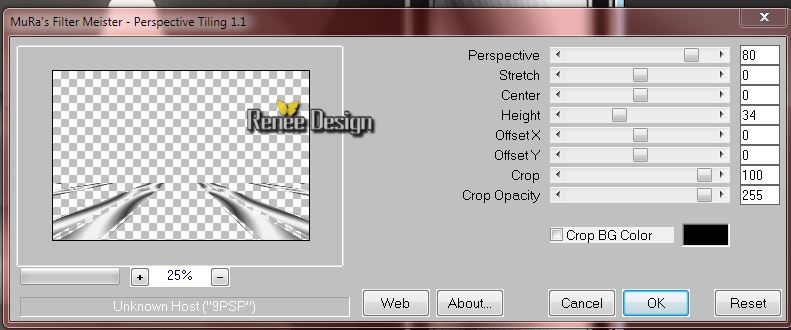
- Activate your Erase Tool: erase the two lines on the both sides for a nice result
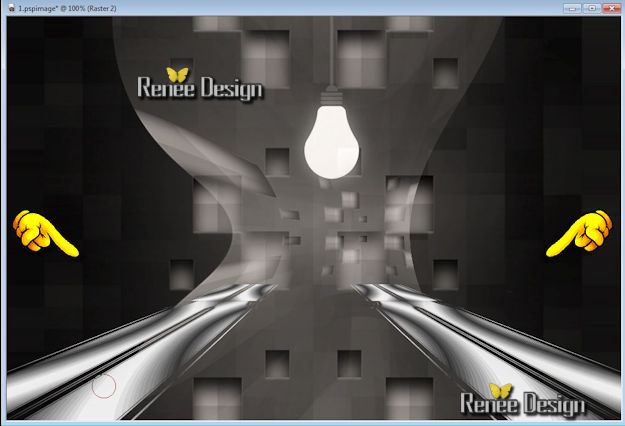
14.Effects-Plugins- Eyecandy 5 Impact -Extrude in tab Settings/User Settings and choose my preset-
''steampunk17_extrude''
-
Stay on the same layer
15. Selection Tool ( S ) Custom selection use settings below
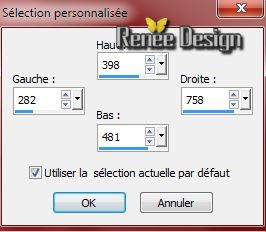
16. Effects- Distortion Effects-Wind From left 100
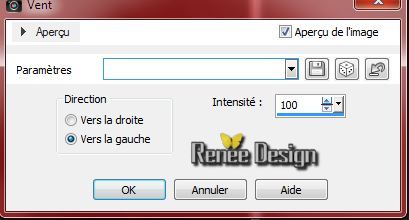
- Repeat Effects- Distortion Effects-Wind From right 100
17. Effects- Plugins -Eyecandy 5 Impact extrude (same Settings)
Selections- Deselect All
18. Effects - 3D Effects - Drop shadow use settings below/color black
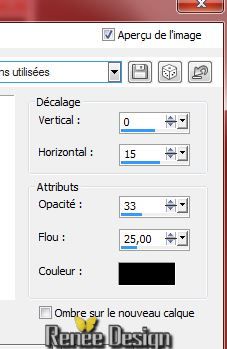
19. Layers-New raster layer
20. Selections - load/save selection - load selection from disk and choose ''steampunk_17_1''
21.
Activate the tube ''Dark Steampunk Ark - misted tube of A
PSP Devil.pspimage''/Edit - Copy -Edit - Paste into selection.
22.
Selections-Modify-Select-Selection Borders with this settings
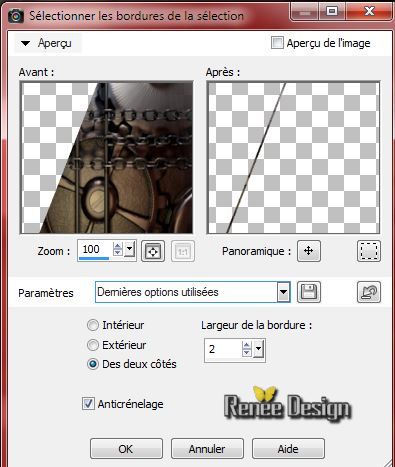
23.
Activate your Flood Fill Tool: fill the selection with the foreground color
Selections- Deselect All
24. Effects- Plugins EyeCandy 5 Impact / Persective
shadow/Preset ''Drop shadow blury''
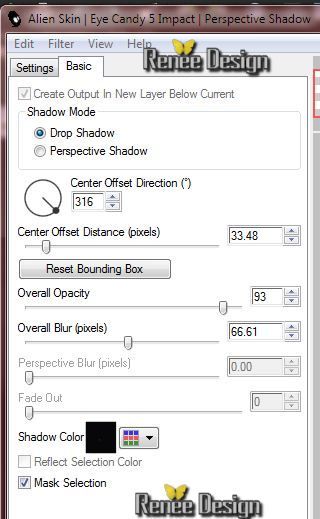
25.
Layers- Duplicate /Image Resize 55% All layers not checked
26.
With your move tool move like this
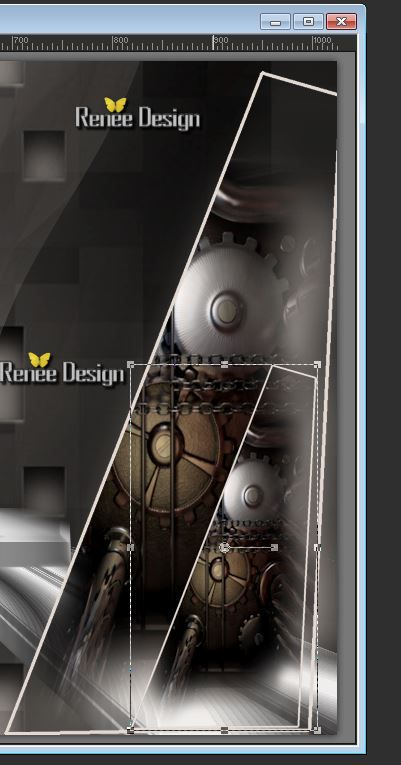
27.
Layer Palette - Double click on this Layer and set the Blend Mode to "Screen "
28.Layers- Merge -Merge Down
29.
Layers- Duplicate
30.
Effects-Image Effects-Seamless Tiling use the settings below
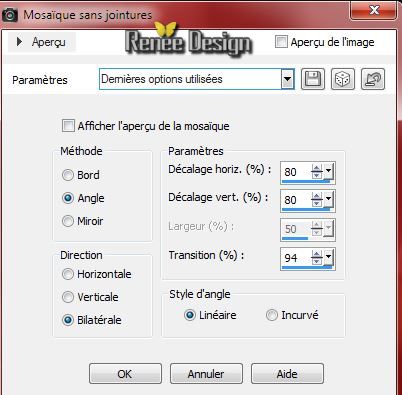
31.
Layer Palette - Double click on this Layer and set the Blend Mode to "Dodge"
32.
Activate your Eraser Tool(X) erase this line
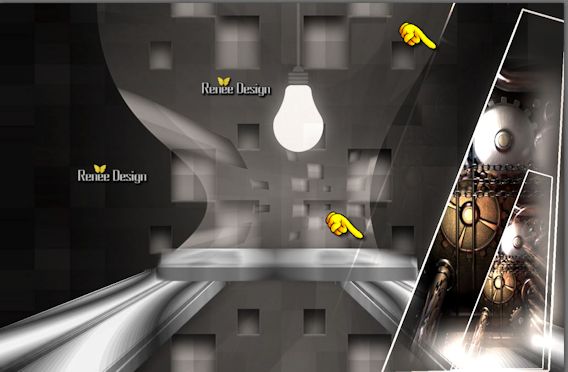
33.
Activate the tube ''BindingGI_SteamPunkSampler.pspimage''/Edit - Copy- Edit - Paste as new layer .With your move tool move to the left
-Layer Palette - Double click on this Layer and set the Layer Opacity of this Layer to 77%
34.
Activate the tube ''strangeclock''/Edit - Copy
- Edit - Paste as new layer
-
Image - Mirror-And place see the example
35.
Layers-New raster layer
36.
Selections - load/save selection - load selection from disk and choose ''steampunk_17_2"
37.
Activate Image ''Papier_rouille_steampunk''/ Edit - Copy -Edit - Paste into selection.
Selections- Deselect All
38.
Effects - 3D Effects - Drop shadow:1/1/100/25 Color white
Eraser Tool(X) : erase a part of this chain
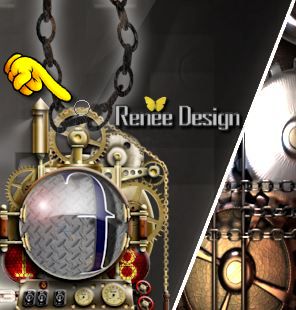
Your Layer Palette look like this now:
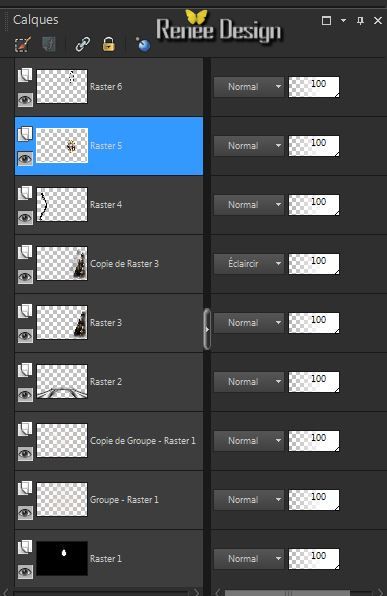
- Layer-Palette:activate the layer underneath(=Raster 5)
39.
Effects-Illumination Effects-Lights and select my file
"Preset_Lights_steamp_17"(Is in the zip )
or set the parameters manually
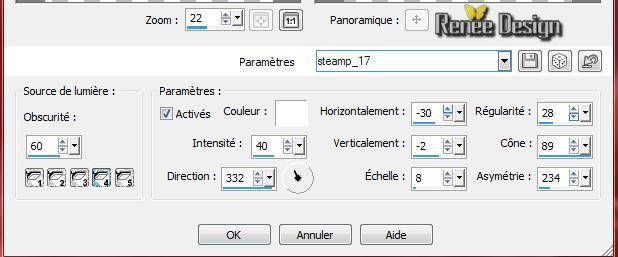
Activate the top of the layer-Palette (=chain)
40.
Layers- Merge-Merge Down
-
Activate the top of the layer-Palette
41.
Layers-New raster layer
42
Selections - load/save selection - load selection from disk and choose ''steampunk_17_3
43.
Effects- 3D Effects-Chisel
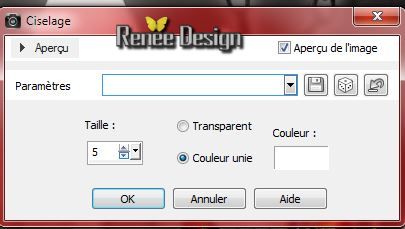
Keep selected
44. Activate the tube ''huy_jorsaleem__steampunk_city_by_tubed_by_thafs''/
Edit/copy-Edit paste as a new layer . With your move tool -move the tube to the left in the selection
-Look for the person. Look at the big picture!!
45.
Selection-Invert -
Edit - Cut (Or hit the Delete Key of your Keyboard)
46.
Layer-Arrange Move Down (under Raster 6)
-
Layer Palette - Double click on this Layer and set the Blend Mode to "Screen"
Selections- Deselect All
Activate the top of the layer-Palette
47.
Activate the tube ''nuages_tubed_by_thafs.pspimage''/Edit - Copy-
Edit - Paste as a new layer .With your move tool move to the left top corner
-
Layer Palette - Double click on this Layer and set the Blend Mode to "Luminance" and set the Layer Opacity of this layer to 69%
48.
Activate the tube ''alera_demilo_by_blacksadd_tubed_by_thafs.pspimage''/Image
Resize 75% - Edit/copy-Edit paste as a new layer . With your move tool move to the left
49.
Layers-New raster layer - Activate Flood Fill Tool: fill the layer with color white
50.
Layers-Maske- Load/Save Mask -Load Mask From Disk and choose ''Narah_mask_0151.jpg"
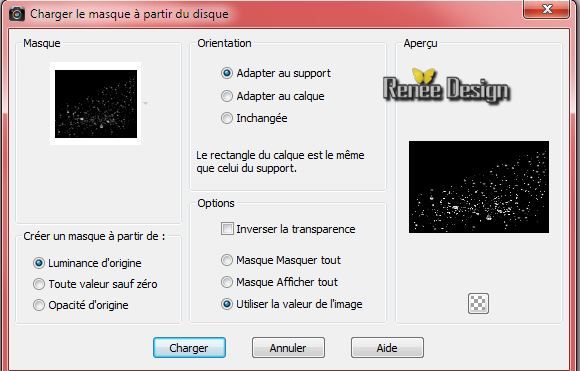
51.
Layers- Merge- Merge Group
52.
Selections - load/save selection - load selection from disk and choose ''steampunk_17_4''/
Edit - Cut (Or hit the Delete Key of your Keyboard)
53.
Adjust-Sharpness-Sharpen More
54.
Layers-Merge-Merge Visible
55.
Image Canvas Size use settings below
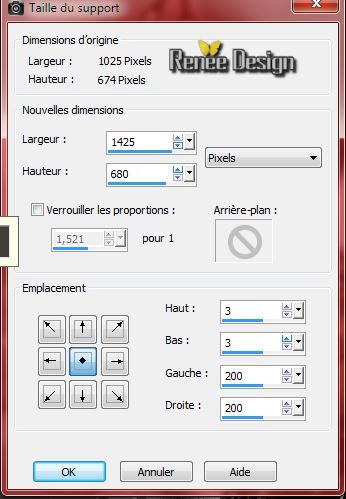
56.
Layers-New raster layer
57.
Material Properties: Foreground color to color:#850101
58.
Effects- Plugins Medhi -Wavy Lab (these colors and black)
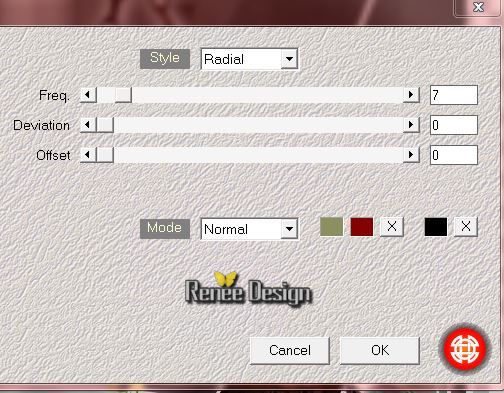
58.
Adjust-Blur-Gaussian Blur : Radius 30%
59 .
Effects- Plugins AP 01 -Lines Silverling
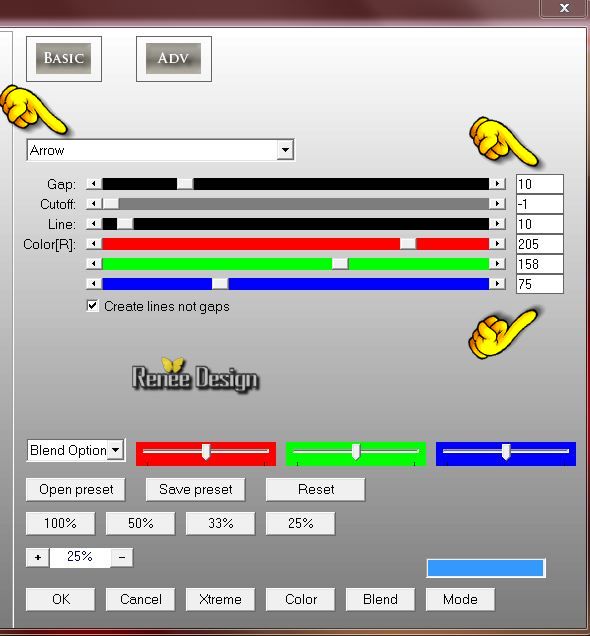
60.
Effects- Plugins Vanderlee Unplugged X
-Transition
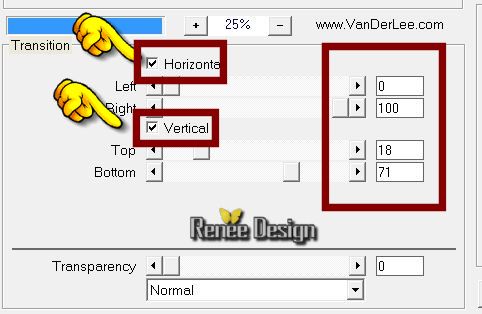
Layer-Arrange Move Down
61.
Selections - load/save selection - load selection from disk and choose ''steampunk_17_5''/
Promote Seletion to layer
62.
Effects- 3D Effects-Inner Bevel-Color: #84c3dc
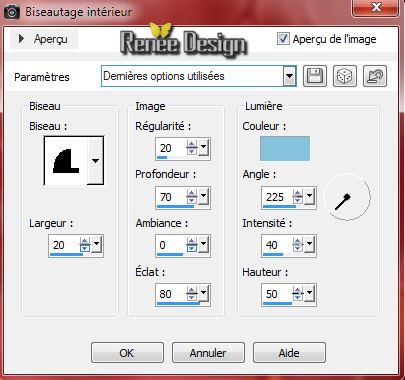
Selections- Deselect All
Activate the top of the layer-Palette
63.
Layers-New raster layer
64.
Pot of Paint- opacity at 70% - Activate Flood Fill Tool: fill the layer with color white
65.
Layers-Maske- Load/Save Mask -Load Mask From Disk and choose ''Narah_Mask_0503'
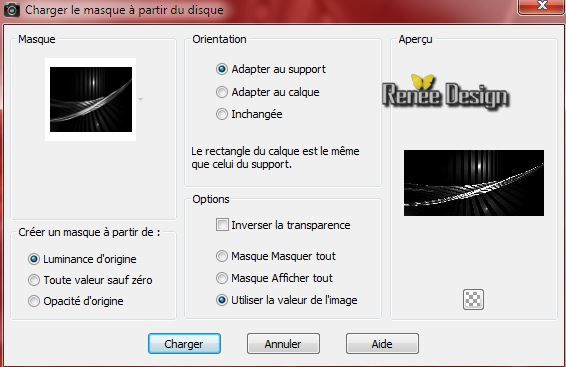
Layers- Merge- Merge Group
66.Effects- Distortion Effects-Wave use settings below
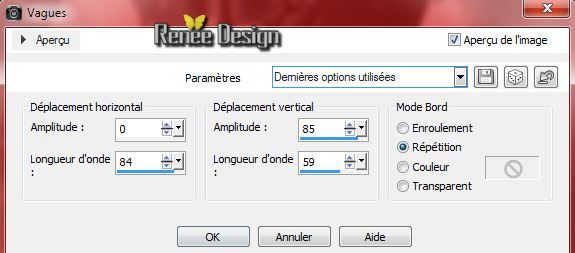
67.
Activate the tube ''timbre_poste_steampunk17''/Edit - Copy
- Edit - Paste as new layer
68.
Layers- Arrange- Move Down
Activate the top of the layer-Palette
69.
Activate the tube ''titre_steampunk17'' Edit - Copy
- Edit - Paste as new layer
Your Layer Palette look like this now:
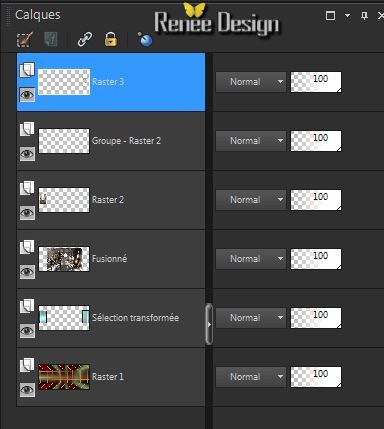
-
Layer palette: Activate the merged layer (Fusionné)
70. Effects- Plugins EyeCandy 5 Impact -Perspective shadow in tab Settings/User Settings and choose my preset
''steampunk17_shadows"
71.
Image - add borders-Symmetric checked : 1 pixel Color black
72.
Image - add borders-Symmetric checked -: 10 pixels Color white
73.
Image - add borders-Symmetric checked : 1 pixel Color black
74.
Image Resize 1025 pixels Width
I hope you enjoyed this lesson
Renée
This lesson was written by Renée the 3/07/201
Created the
07/2014
*
Any resemblance with an existing lesson is merely a coincidence
*
* Don't forget to thank the people who work for us and with us. I named the tubeurs - Testers and the translators.
Thanks Renée. |