|
Steampunk_19
Let's start the lesson.
- Material Properties: Foreground color to: #f6f4f5 Background color to: #44495c
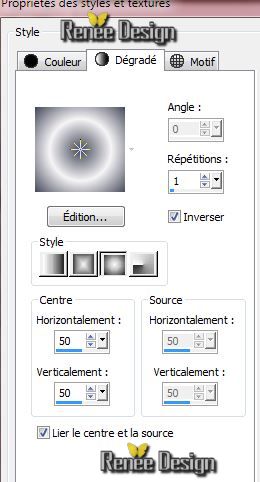
- Prepare a sunburst gradient configured like this.
1. File - New - New Image:1015 x 625 pixels -Transparent
-Flood Fill Tool: Fill the layer with the gradient
2. Effects-Plugins- Simple- Center Tiles
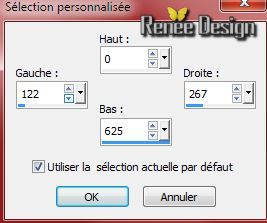
3. Selection Tool ( S ) Custom selection use settings below
4. Selections-Promote selection to layer
5.Effects - 3D Effects - Drop shadow with these settings:2/2/100/10 color black
Selections-Deselect All
6. Layers-Duplicate /Image Mirror
- Layers- Merge-Merge Down
7. Layers-Duplicate
8. Effects- Plugins - Simple - Zoom out and flip
- Layer Palette -Double click on this Layer and set the Blend Mode to "Multiply" and lower the opacity down to: 59%
9. Layer-Palette: activate layer underneath (Promoted selection)
10. Effects- Plugins -Toadies - What are you with these settings: 20/20
10.
Layers- Merge-Merge Visible
11. Effects- Plugins Unlimited2.0 -
Icnet Filters- Color Filters-Blue Sky with these settings: 176/128
12.
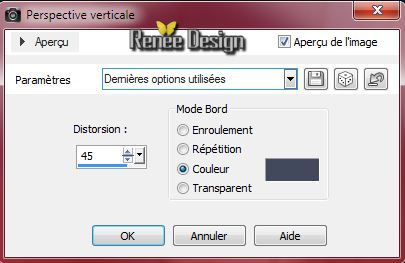
Effects- Geometric Effects -Perspective vertical-Background color
13. Effects-Plugins- Toadies - What are you with these settings: 128/107
14.
Effects-Edge Effects- Enhance More
15.
Selections - load/save selection - load selection from disk and choose my selection: ''steampunk_19_1''
16.
Selections-Promote selection to layer
17.
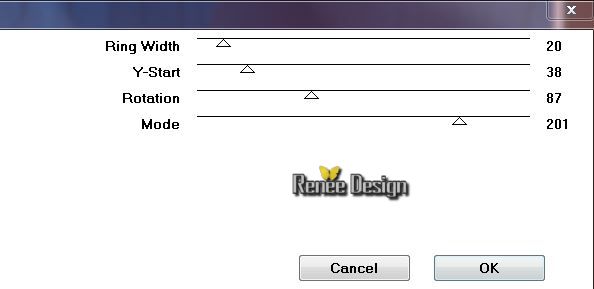
Effects-Plugins- VM Distorsion /Circulator II
Selections-Deselect All
18.Effects - 3D Effects - Drop shadow with these settings:9/0/85/18 color black
19.
Layers-Duplicate /Image Mirror
-Layers- Merge-Merge Down
20.
Effects- Plugins -Simple - 4 Way average
21.
Layers-Duplicate
22. Effects- Plugins Unlimited 2.0
- Toadies - Sucking Toad Bevel II.2 with these settings: 115/62/43
-
Layer-Palette: activate layer underneath (Promoted selection)
- This is what you should have now
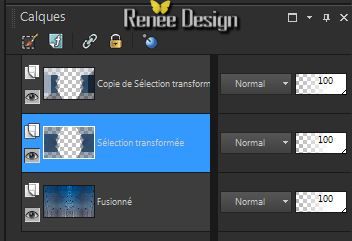
23.
Effects- Plugins Unlimited2.0 -Toadies - Plain Mosaic
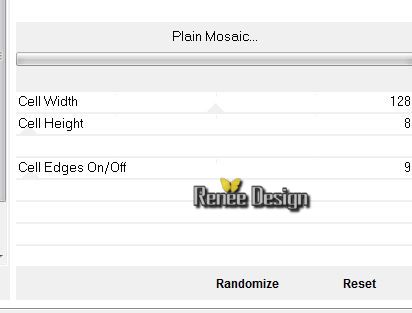
24.
Aktivate the bottom of the Layers palette (merged)
25.
.Selections - load/save selection - load selection from disk and choose my selection: ''steampuk_19_2"
26.
Selections-Promote selection to layer
27. Effects- Plugins - EyeCandy 5 Textures / Stones Walls -tab Settings-User settings - choose my -Preset
''steampunk19_stones''
-
Selections-Deselect All
28.
Layers- Arrange- Bring to Top
29. Effects-Plugins- EyeCandy 5 impact - Extrude-tab Settings-User settings - choose my Preset
''steampunk19_extrude''
30.
Effects-Edge Effects- Enhance
- Layer-Palette: activate layer underneath (Promoted selection)
31. Activate the
tube''KRYSSTEAMPUNK12-O7-14-077.pspimage''/ Edit - Copy -Edit - Paste as new layer on your working area and move (erase the signature)
-
Layer Palette -Double click on this Layer and set the Blend Mode to "Luminance-Legacy " and lower the opacity down to: 75%
- Activate the top of the layer-Palette
32.
Activate the tube ''KRYSSURREALISME-25-06-14-207.pspimage''/
Image Resize to 75% / Edit - Copy -Edit - Paste as new layer on your working area
33. Image- Free Rotate 90° Right /With your move tool move to the left side(erase the signature)
- Layer Palette -Double click on this Layer and set the Blend Mode to "Luminance-Legacy " and lower the opacity down to: 89%
34.Effects - 3D Effects - Drop shadow with the same settings
This is what you should have now
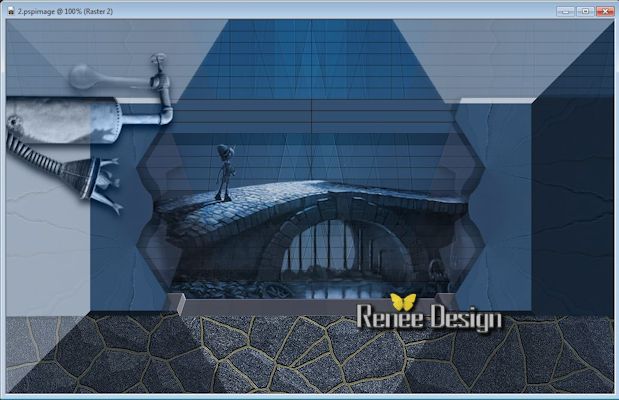 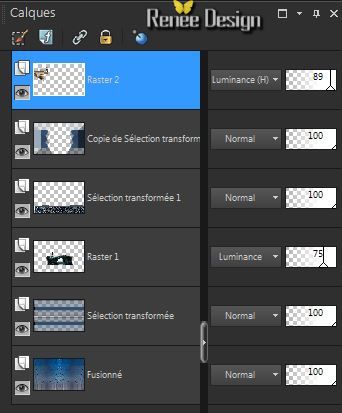
- Layer-Palette: activate layer underneath (Copy of Promoted selection)
35. Effects-Plugins - Flaming Pear Flood-choose my Preset ''
Steampunk_19_flood''
- Activate the top of the layer-Palette
36.
Layers- New raster layer
37.
Selections - load/save selection - load selection from disk and choose my selection:
''steampunk_19_3"/
-
Activate Flood fill tool and fill the selection with the foreground color (click 2 times in the selection )
Selections-Deselect All
38.
Layers- New raster layer
39.
.Selections - load/save selection - load selection from disk and choose my selection: '' steampunk_19_4"/
Activate Flood fill tool and fill the selection with the background color (click 4 times in the selection )
Selections-Deselect All
40.
Layers- New raster layer
41.
.Selections - load/save selection - load selection from disk and choose my selection: '' steampunk_19_5"/
Activate Flood fill tool and fill the selection with the foreground color (click 1 times in the selection )
Selections-Deselect All
42.
Layers- New raster layer
43.
.Selections - load/save selection - load selection from disk and choose my selection: '' steampunk_19_6"
Activate Flood fill tool and fill the selection with the background color (the color is slightly different )
44. Effects-Plugins- EyeCandy 5 Texture- Brick Wall-tab Settings -User settings - choose my Preset ''
steampunk19-extrude _brique''
Selections-Deselect All
45. Effects-Plugins- EyeCandy 5 Impact - Extrude -tab Settings-User settings - choose my/
Preset''steampunk19-extrude _brique''
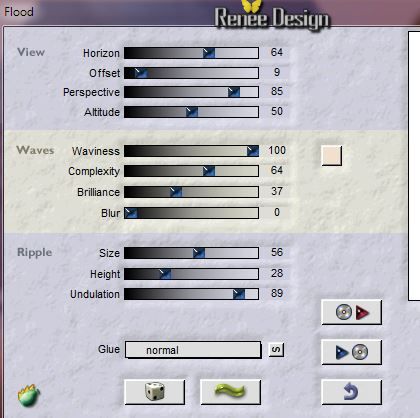
46. Effects-Plugins- Flaming Pear - Flood use settings below
47.
Adjust-Sharpness-Sharpen
48.
Activate the tube '' KRYSSTEAMPUNK11-O7-14-076.pspimage''/Image
Resize to 80% -Edit - Copy -Edit - Paste as new layer on your working area and move
49.
Layers- New raster layer
50.
.Selections - load/save selection - load selection from disk and choose my selection: '' steampunk_19_7''/
Pot of Paint: opacity 35% -Activate Flood fill tool and fill the selection with the foreground color(click 2 times in the selection )
51.
Activate the tube '' KRYSSURREALISME"-15-07-14-212''/Image
Resize to 80% /
Edit - Copy -Edit - Paste as new layer on your working area and move
52. Effects-Plugins- EyeCandy 5 Impact - Perspective shadow-Tab-Factory Settings-preset
''drop shadow blury''
53.
Activate the tube '' 191453.pspimagesteampunk_19_image1.pspimage''/Edit - Copy -Edit - Paste as new layer on your working area and move (paste in place the two tubes)(Layer-1
and Layer_2)
54.
Activate the tube ''agraphes''-Edit - Copy -Edit - Paste as new layer on your working area and move
55.
Activate the tube '' STP18.pspimage'' erase the signature/Edit - Copy -Edit - Paste as new layer on your working area and move
56.
Aktivate the Pen Tool(V): Foreground color to color white and choose my form : '' aliciar_3"
/Size 1

-
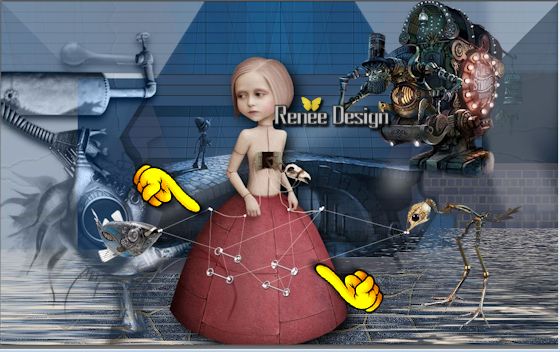
With your foreground color draw a line like this
57.
Vector layer-Convert to Raster layer
58.
Layers- Merge-Merge Visible
59.
Image - add borders-Symmetric checked 2 pixels color#1f4d78
60.
Image - add borders-Symmetric checked 10 pixels color#ffffff
61.
Image - add borders-Symmetric checked 1 pixels color#1f4d78
62.
Image - add borders-Symmetric checked 50 pixels color#ffffff
63.
Activate the tube" titre"/Edit - Copy -Edit - Paste as new layer on your working area and move. Or write your own text
64.
Activate the tube "déco" Edit - Copy -Edit - Paste as new layer on your working area .With your move tool move to the left side
65.
Layers- Duplicate - Image Mirror
66.
Image - add borders-Symmetric checked 1 pixels color #1f4d78
67.
Image - add borders-Symmetric checked 20 pixels color #ffffff
Save as JPG
I hope you enjoyed this lesson
Renée
This lesson was written by Renée 29/07/2014
Created the
08/2014
*
Any resemblance with an existing lesson is merely a coincidence *
* Don't forget to thank the people who work for us and with us. I named the tubeurs - Testers and the translators.
Thanks Renée.
|