|
Let's start the lesson.
1. Open the Background Image ''fond_time_is_away '' Window - Duplicate (or shift+D) - Close the original and proceed on the copy
2. Layers- New raster Layer
3. Activate Flood Fill Tool and fill the layer with color white
4. Layer Palette -Double click on this layer and set the Blendmode to Soft Light
5. Layers-Merge- Merge Visible
6.
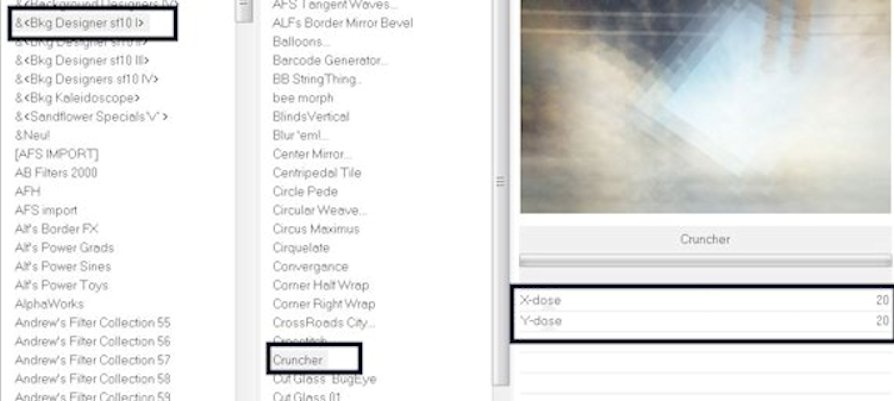
Effects- Plugins - Unlimited
2.0 /
&<BKG Designer sf10 I- Cruncher
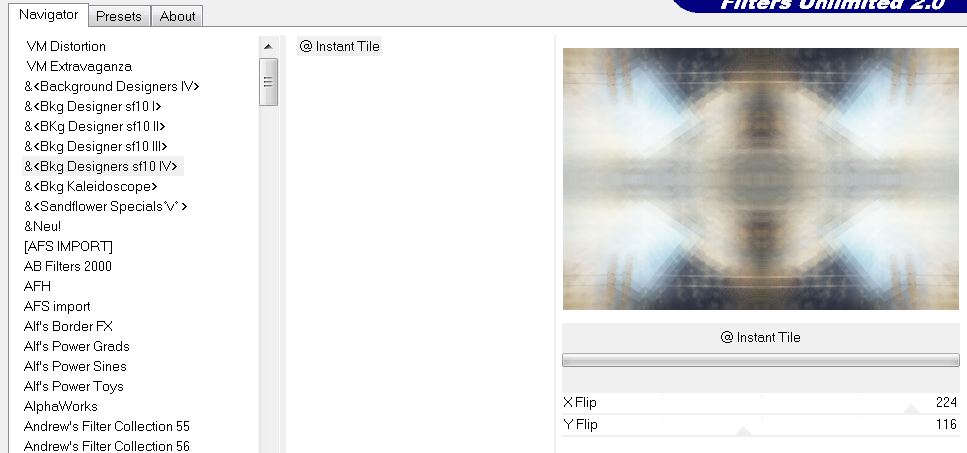
6. Effects- Filter Unlimted
2.0 / &<Bkg Designers
sf10IV> / @ Instant Tile
7. Effects - Edge Effects - Enhance
8. Layers - Duplicate
9.
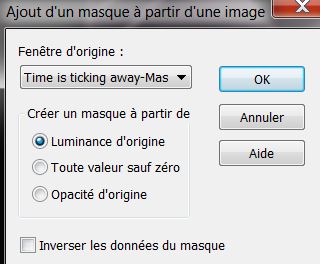
Layers- New Mask layer from Image and choose Mask:
''Time is ticking away-Masc''
10. Layers- Merge-Merge Group
11. Effects- Edge Effects -Enhance More
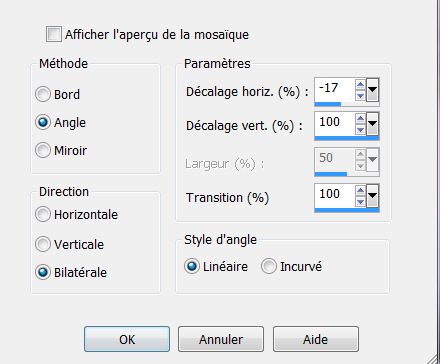
12. ..Effects-Image Effects-Seamless Tiling use the settings below
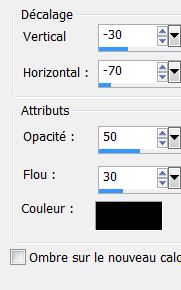
13. Effects - 3D Effects - Drop shadow with these settings:
14. Layers - New raster layer
15. Selections - Select all- Selections - Modify - contract with 45 pixels
16. Open the Background Image ''fond_time_is_away '' (Point 1) Edit/Copy-Edit paste into selection
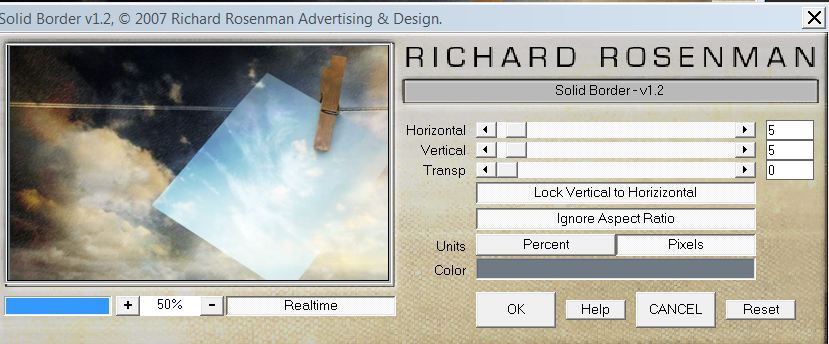
17. Effects- Plugins -Richard Roseman
- Solid Border use settings below-Color #707a85
18. Effects- Illumination Effects- Lights-select my file-Preset '' -Light-eclairage-time
away'' First !! Reset to Default
- click on my preset
and OK
19. Selections - Deselect all
20. Effects - 3D Effects - Drop shadow with these settings 2/ -3 /55 / 19 Black
21. Activate the tube ''time_is_away_texte //Edit/copy-Edit paste as a new layer on your working area
22. Effects- Image Effects- Offset use settings below
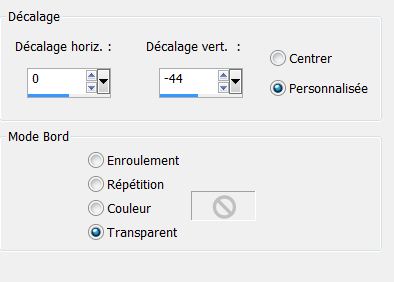
- Layer Palette -Double click on this layer and set the Blendmode to Overlay and set the layer opacity of this layer to 77%
23. Effects- Plugins -
unlimited 2.0 / &<Bkg
Designers sf10IV> / @ Instant Tile

24. Open the tube
''steampunk8_logane'' Edit/copy-Edit paste as a new layer on your working area //Do not move it is the right place
25. Layers - New raster layer
26. Selections - load/save selection - load selection from disk and choose my selection:' ''renee_time_is_away''
27. Activate Flood Fill Tool and fill the selection with color black
28. Effects-Plugins -
Eyecandy 5 -Bevel -Tab Settings/User settings choose my preset: ''time_is_away_bevel''
29. Selections - Deselect all
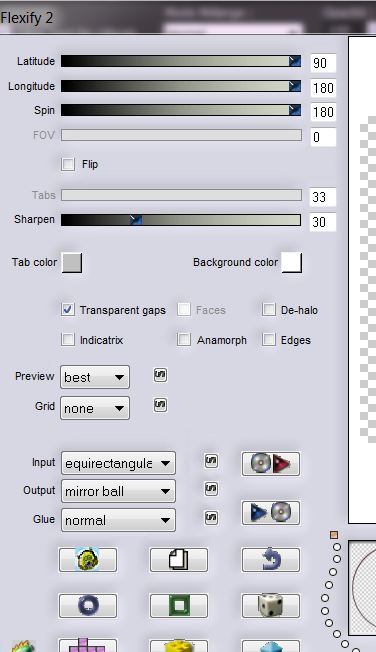
30. Effects- Plugins – Flaming Pear
-Flexify2use settings below
31. Layer Palette -Double click on this layer and set the Blendmode to Hard Light and set the layer opacity of this layer to 38%
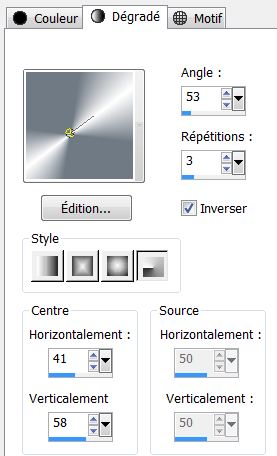
32. Material of the foreground - select my file in the list : ''time_is_away'' Put your foreground in a Radial Gradient with these settings Background color to color White
33. Layers- New Raster Layer - Flood Fill Tool: fill the layer with the gradient
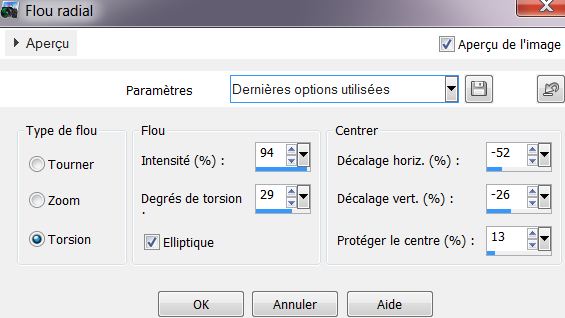
34. Adjust-Blur-Radial Blur with these settings
35. Layers-Duplicate /Image
Mirror
36. Layer Palette -Double click on this layer and set the Blendmode to Hard Light /Layers - Merge - Merge Down
37. Layers-Duplicate / Layer Palette -Double click on this layer and set the Blendmode to Burn
38. Layers - Merge - Merge Down
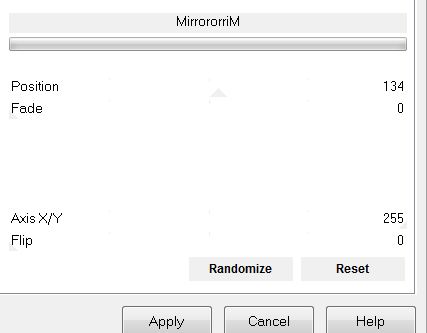
39. Effects-Plugins – VM Toolbox-
MirrorriM
40. Effects- Plugins – Mehdi – Sorting
Tiles
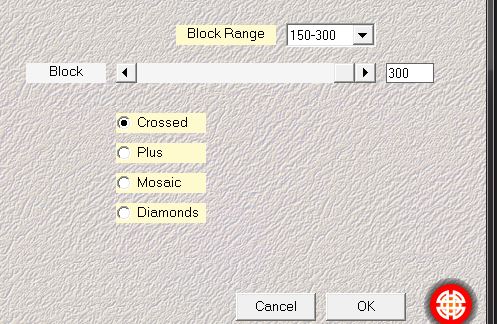
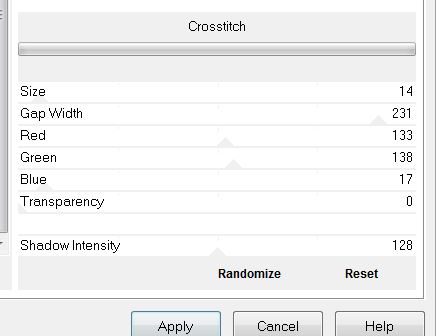
41. Effects- Plugins -Unlimited 2.0 / - &<Bkg Designer
sf10I> Crosstich
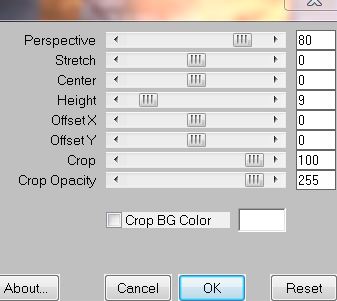
42. Effects- Plugins -Mura's Meister
-Perspective Tilling
43. Layers- New raster Layer
44. Selections - load/save selection - load selection from disk and choose my selection:''renee_time_is_away_1''
45. Activate Flood Fill Tool and fill the selection with the Radial Gradient
46. Selections - Deselect all
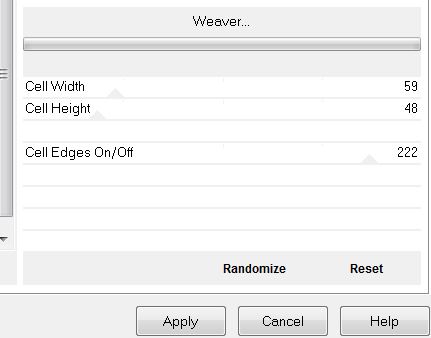
47. Effects- Plugins -Toadies- Weaver
48. Effects- Edge Effects- Enhance
49. Effects-User Defined Filter - Emboss 3 use default settings
50. Layers- Duplicate
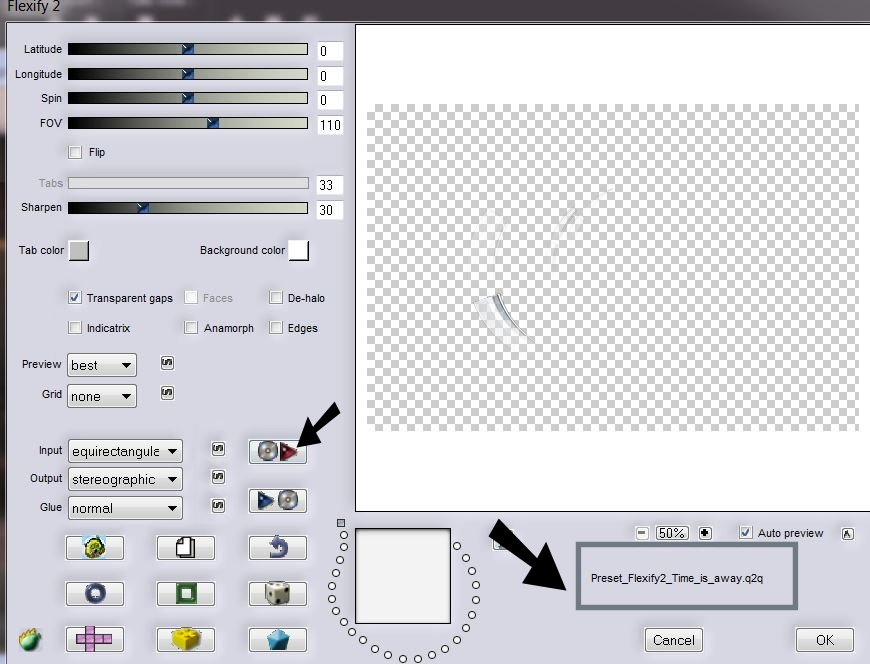
51. Effects-Plugins -Flaming Pear
/Flexify 2
-
click on the red arrow >>select my file
''Preset Flexify2_time_is_away'' click on my preset and OK
52. Layers - New raster layer
53. Selections - load/save selection - load selection from disk and choose my selection: ''renee_time_is_away_2''-Flood Fill : fill the selection with color white (click 3 times in the selection)
54. Selections - Deselect all
55. Effects- Plugins -Eye
Candy 5 -Impact -Perspective shadow Tab-Settings- Preset Drop shadow
blury
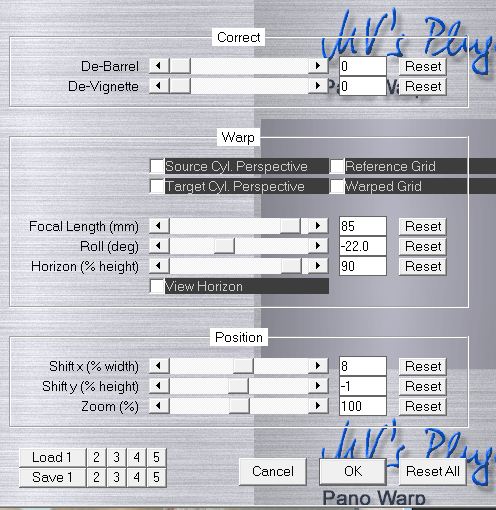
56. Effects- Plugins -MV'S Plugin – Panowarp use settings below
57. Open the tube ''
steampunk3_logane'' >>activate raster 3 of the tube// Edit - Copy-Edit - Paste as new layer on your working area and move like this /Hit the K key of your Keyboard -shrink slightly in width see example
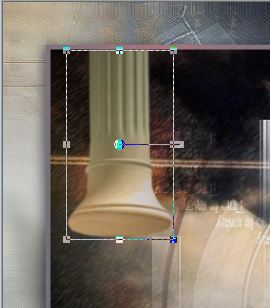
- Layer Palette -Double click on this layer and set the Blendmode to Normal
58. Use the same tube'' steampunk3_logane'' >>>activate raster 2 of this tube //Edit - Copy-Edit - Paste as new layer on your working area// Hit the K key of your Keyboard and place like this
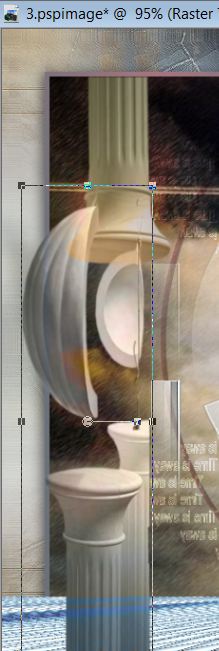
- Layer Palette -Double click on this layer and set the Blendmode to Luminance Legacy
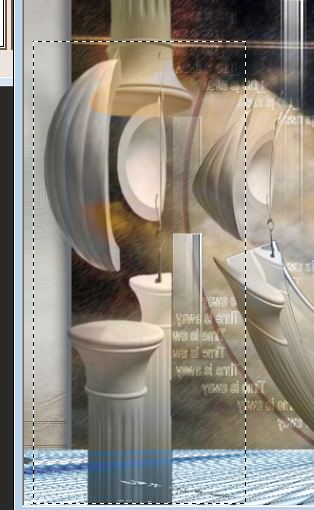
59. Selection Tool -Rectangle
(S) Draw a selections like this
60. Selections - Float
Selections – Defloat.
61. Layers- Duplicate
- Selections - Deselect all
62. Effects- Geometric Effects -
Circle - Wrap
63. Effects - 3D effects - Drop Shadow:
5/-3/65/19 Black
64. Use the same tube''logane ''steampunk3_logane'''' activate raster 5 of the tube Edit/copy -Edit/paste as a new Layer on your working area and place
- Layer Palette -Double click on this layer and set the Blendmode to Multiply
65. Open the tube
''Joannie_woman_02-01-2013 '' Image Resize 65 % Edit/copy -Edit/paste as a new Layer on your working area and place
66. Effects-Plugins -EyeCandy
5 Impact -Perspective shadow Tab-Settings -Drop shadow Blury
67. Layers- Merge- Merge All
68. Image - Add borders-Symmetric checked: 2 pixels Color #707a85
69. Image - Add borders-Symmetric checked: 40 pixels Color #ffffff
70. Image - Add borders-Symmetric checked: 5 pixels Color #707a85
71. With the magic wand -select the border of 40 pixels
72. Effect-Plugins -Toadies – Weaver
- use the default settings
73. Adjust - Blur - Gaussian Blur - Radius 25
74. Selections - Deselect all
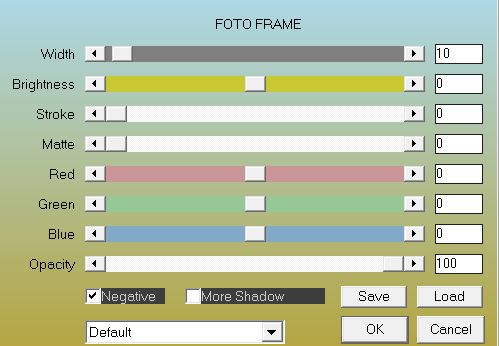
75. Effet AAA - Frame - Foto
frame
76. Open the text/ Edit/copy-Edit paste as a new layer on your working area .Ore write your own text
/Effects - 3D effects - Drop Shadow: with the same settings as above
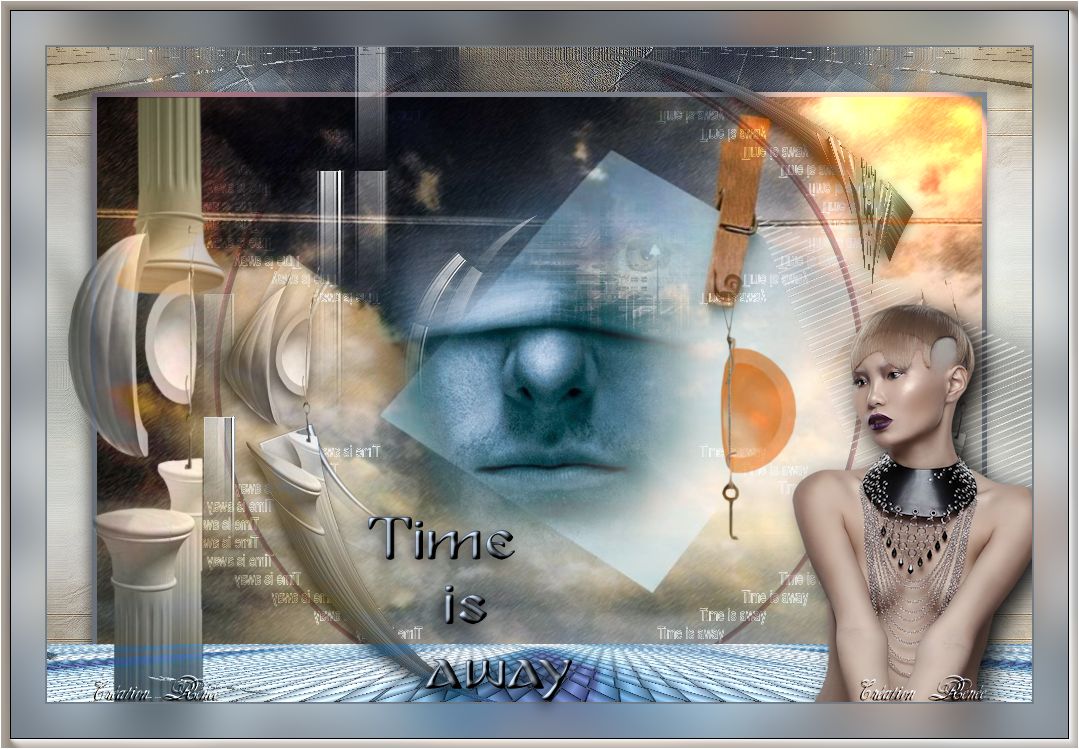
Save as JPG
I hope you enjoyed this lesson
This lesson was written by Renée13/03/2013 
|
 Time
is away
Time
is away

 Translations