|
New
Translations here
*
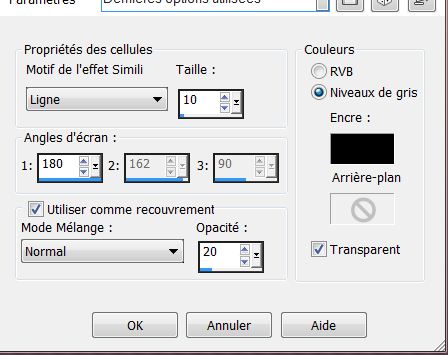
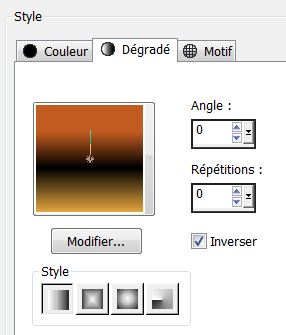
- Let's start the lesson. 1. File - New - New Transparent Image: 955 x 625 pixels 2. File - New - New Transparent Image: #facfa2 -Background color to this color: #6e4a50 3. Prepare a linear gradient with these settings: 0/0 check invert / Activate Flood Fill Tool and fill the layer with the gradient 4 . Effects- Artistic Effects- – Halftone with these settings -Line
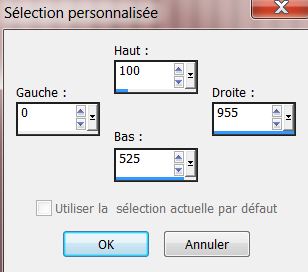
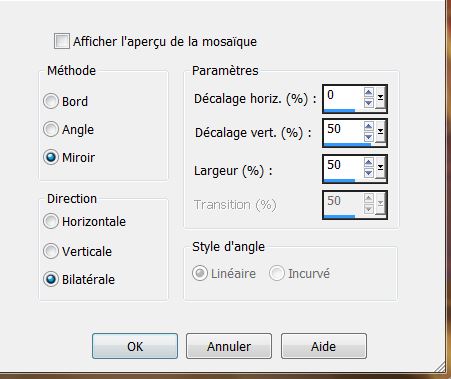
5. Effects- Plugins – Xero - Porcelaine using the default settings 6. Layers- New raster layer 7. Activate Selection Tool - Custom selection with these settings
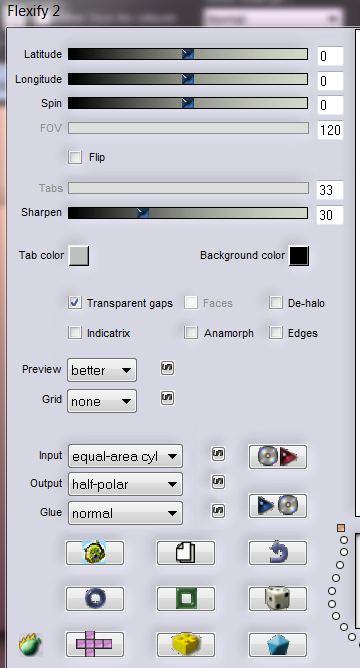
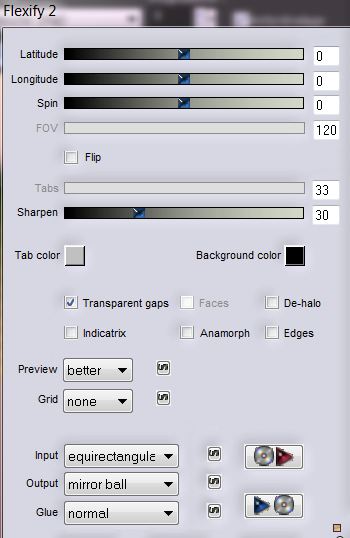
-Activate Flood Fill Tool and fill the selection with the gradient 8. Effects- Artistic Effects- – Halftone with the same settings 9. Effects- Plugins – Xero - Porcelaine using the default settings 10.Selections -Deselect All 11. Effects- Plugins EyeCandy 5 Impact / perspective shadow / Preset – Drop shadow blury 12. Effects- Plugins - Flaming Pear - Flexify 2 with these settings
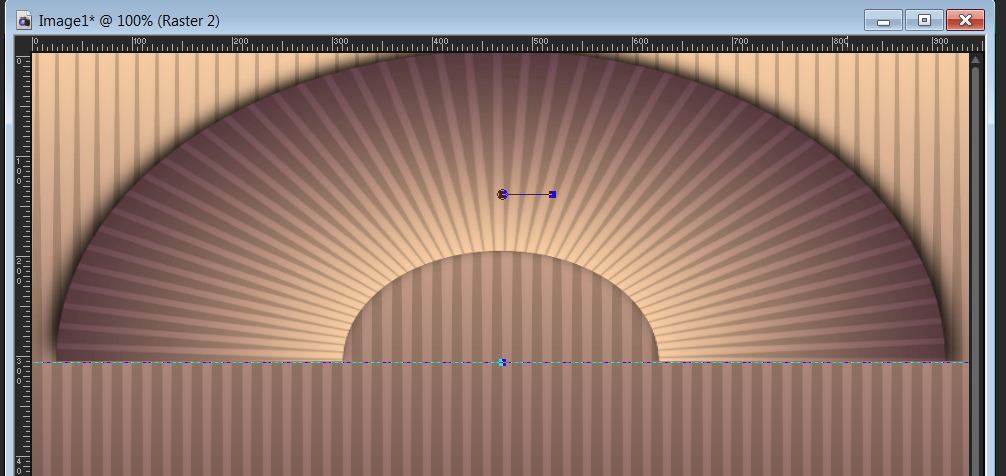
13. Image Flip - Activate your Pick Tool-push upward to 300 pixels high- Pull the Left and Right Nodes outwards like this
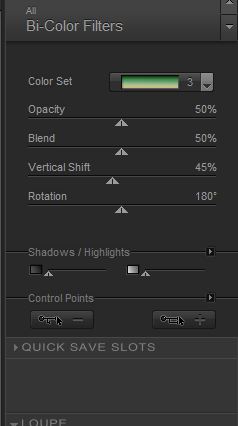
14. Effects- Plugins -Nick color Pro 3.1 Effex /Bi - Color Filters/Color set = Green brown 3
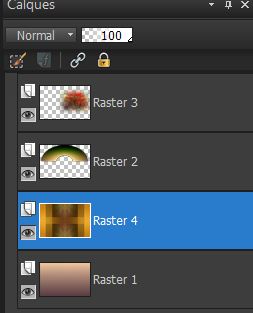
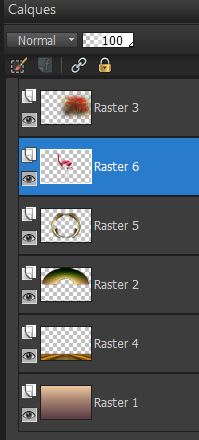
15. Open the tube ''3027-luzcristina -Edit-Copy-Edit-Paste as a new layer area and move to the right side 16. Layer Palette -Double click on this layer and set the Blendmode to Hard Light and set the layer opacity of this layer to 75% 17. Layers- New raster layer 18. Selections- Select All 19. Open the tube ''texture dore'' Edit-Copy-Edit-Paste into selection 20. Selections- Deselect All 21. Effects- Plugins -Simple – Half wrap 22. Effects- Plugins -Simple -Blintz 23. Effects- Plugins -Toadies - What are you / 35/54 24. Effects- Plugins -Unlimited 2.0 -Filter Factory Gallery F – Quadrant replicate - Layers- Arrange- Move 2x Down- Your Layer Palette look like this now
25. Layer Palette- Activate raster 4 /Edit/copy-Edit paste as a new layer on your working area 26. Effects- Plugins -Mura's Meister - Perspective Tilling with these settings
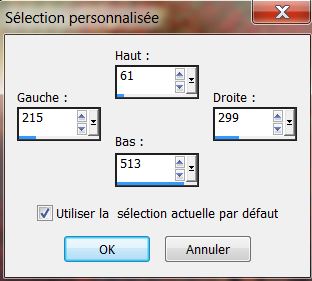
27. Effects- Distortion Effects - Punch /Strength 87% 28. Activate the top of the Layer Palette 29. Layers- New raster layer 30.Activate Selection Tool - Custom selection with these settings
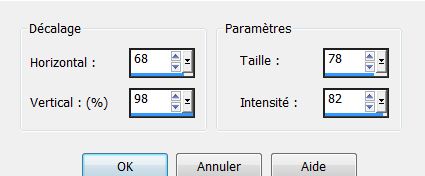
31. Edit-Paste into selection – (it is still in cache). 32. Selections- Deselect All 33.Effects- Distortion Effects- Warp with these settings
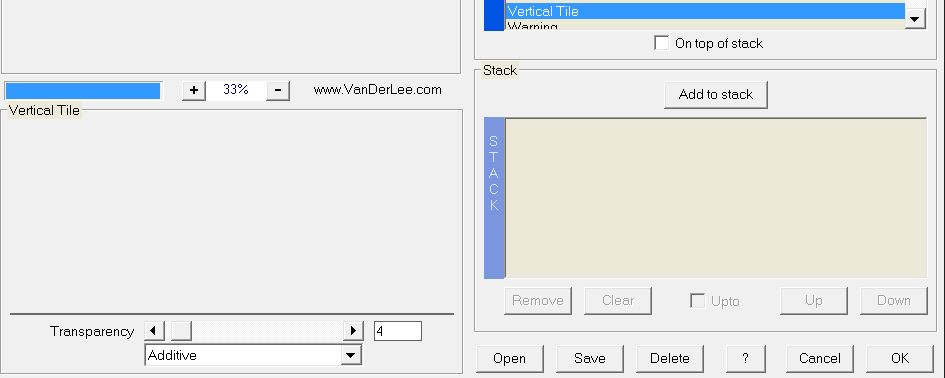
34. Effects- Plugins -Vanderlee - Unplugged XVertical Tile-Transparency 4-Additive
35. Layers- Duplicate - Image Mirror /Layers- Merge- Merge Down 36. Effects-Image Effects-Seamless Tiling using the default settings
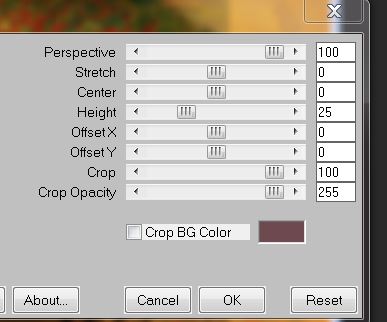
37. Effects- Plugins – Flaming Pear Flexify 2 with these settings
38. Layers- Arrange- Move Down 39. Effects- Plugins -EyeCandy 5- Extrude -tab Settings/User settings choose my preset:''-renee uncoeurpour2_extrude'' 40. Open the tube ''nicole-body-painting / Image Resize 78% /Image Mirror Edit/copy-Edit paste as a new layer on your working area and move 41. Layers- Arange- Move Down - Your Layer Palette look like this now:
42. Activate the top of the Layer Palette 43. Layers- New raster layer 44. Selections - load/save selection - load selection from disk and choose my selection: ''renee_un coeur pour deux_1'' -Properties Foreground-Change the gradient and select ''renee printemps '' Prepare a linear gradient configured like this. Flood Fill Tool: fill the selection with the gradient
45. Selections- Deselect All 46. Effects- Plugins -Eyecandy 6 – extrude- tab Settings/User settings choose my preset: 47. Open the tube ''grenouille time_0265'' -Edit-Copy-Edit-Paste as a new layer area and move to the left side 48. Open the tube ''Alies 12CP57-strange couple-27012013''Image Resize 60%- Edit-Copy-Edit-Paste as a new layer area and move to the right side Layer-Palette: Change the Blend Mode to Luminance Legacy 49.Layers- Merge- Merge All (flatten) 50.Image - Add borders-Symmetric checked: 5 pixels color #071c00 51.Image - Add borders-Symmetric checked: 35 pixels color white 52. With the magic wand select the border of 35 pixels 53. Activate Flood Fill Tool and fill the selection with the gradient ( ''renee printemps'' ) with the same settings 54. Effects- Plugins - Picture man collection rubber /Explosions
55. Effects- Edge Effects- Enhance-Selections- Invert 56. Effects- Plugins -Eye candy 5 - perpsective shadow- Preset / Drop shadow blury using the default settings 57. Selections- Invert 58. Effects-Plugins - Eye Candy 5- perpsective shadow- Preset / Drop shadow blury 59. Selections- Deselect All-Activate the tube "text "/Edit/copy-Edit paste as a new layer on your working area / Ore write your own text 60. Image - Add borders-Symmetric checked: 5 pixels color #071c00 Save as JPG I hope you enjoyed this lesson Thanks Renée This lesson was written by Renée 2008 Placing 30/01/2013 **-*-*-** Any resemblance with an existing lesson is merely a coincidence * * Don't forget to thank the people who work for us and with us. I named the tubeurs - Testers and the translators. Thanks Renée. 2014 reçu de TWInc I am part of Tutorial Writers Inc. My tutorials are regularly recorded. ReneeGraphisme_All rights reserved
|
 Translations