|
New
Translations here
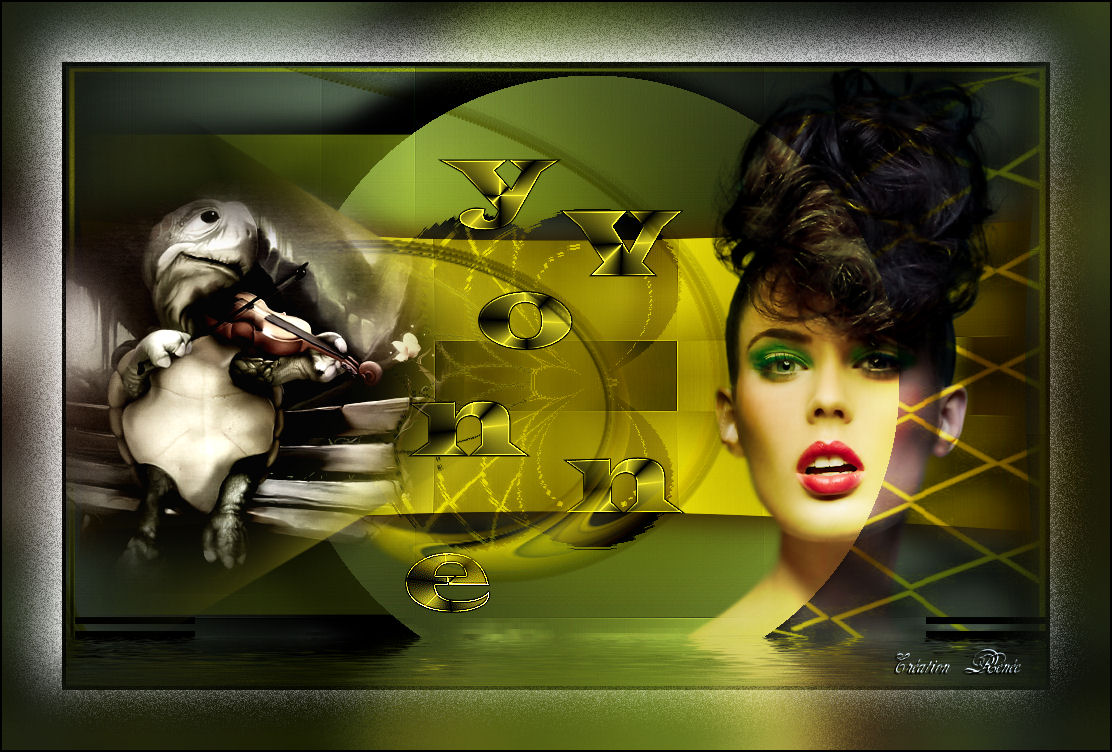
Yvonne
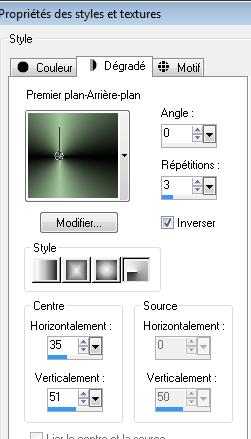
Let's start the lesson. 1. Open a transparent image of 980 x 620 pixels 2. Preparation: Color-palette:Set your foreground color to #000000 -Set your background color to #a3c69c - Properties Forground; Set your Foregroundcolor to forground-background radial gradient, with these settings
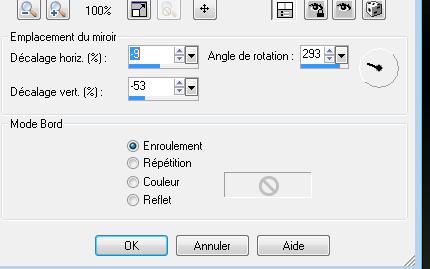
3. Flood Fill Tool - fill the layer with your forground-background gradient 4. Effects-Reflection Effects-Rotating Mirror with these settings
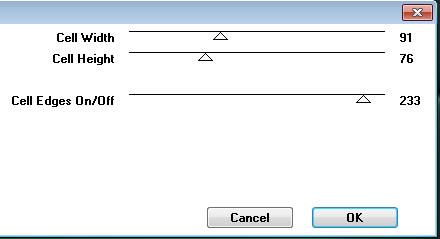
5. Layers-Duplicate-Image Mirror-Image Flip-Set the layer opacity of this layer to 48% 6. Layers-Merge-Merge-Down 7. Effects-Plugins -Unlimited -Toadies /weaver with these settings
8. Effects-Edge Effects-Enhance 9. Layers-Duplicate 10. Activate the Pick Tool/Deformation tool (K)Mode Scale Push the Top Node down to 150 px -Push the Bottom Node up to 550px
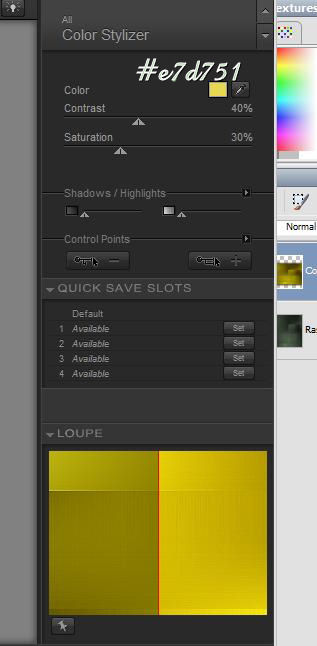
11. Effects-Plugins - Eyecandy5 Imapct /Perspective shadow -tab Settings/User settings choose my preset: ''renee -yvonne'' 12. Effcts-Plugins - Nick Color effex Pro3 / Color Stylizer
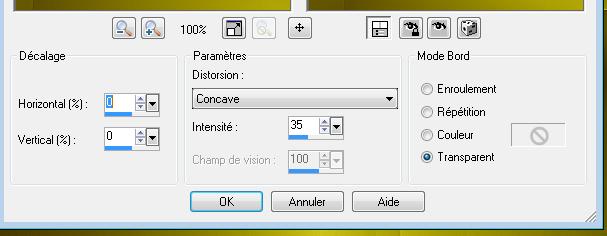
13. Effects-Distortion Effects-Lens Distortion with these settings
14. Effects-Plugins Simple -Top left mirror 15. Layers-New raster layer /Color-palette:Set your foreground color to#d6cc21- Flood Fill Tool - fill the layer with your forgroundcolor #d6cc21 16. Layers- New Mask layer from Image and select Mask
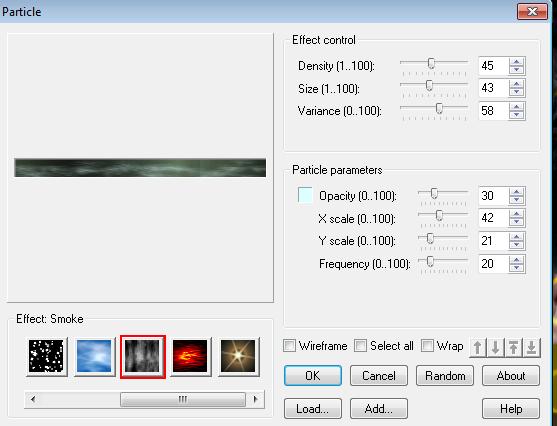
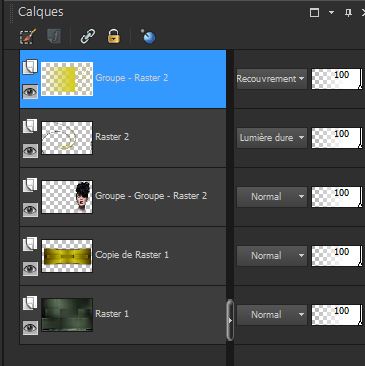
17. Layers-Merge-Merge Group- Double click on this layer and set the Blendmode to Overlay 18. Open the tube ''woman_406bycrealine'/ - Image Resize 85% - Edit/copy- Edit/ paste as new layer on your working image 19. Effects-Image Effects-Offset with these settings H = 232 and V = -50 Transparent 20. Layers- New Mask layer from Image and select Mask - . ''fade suave '' Layers-Merge-Merge Group 21. Repeat the same Mask effect" fade suave " Layers-Merge-Merge Group 22. Layers-Arrange-Move Down 23. Activate the tube ''renee -effet -yvonne'' - Edit/copy- Edit/ paste as new layer on your working image (Blend mode is Hard Light ) 24. Effects-Image Effects-Offset with these settings H -175 and V - 37 -. Activate the bottom of the layer palette=Raster 1 25. Selections –load/save selection –load selection from disc and choose: ''renee yvonne'' 26. Effects-Plugins - Ulead effect /particle - Smoke with these settings - Color #DAFFFF
- Keep Selected 27. Effects-Plugins -Unlimited - Factory Gallery F/Border Film (click Reset and OK ) Selections-Deselect All -Activate the top of the layer palette=group-raster 2
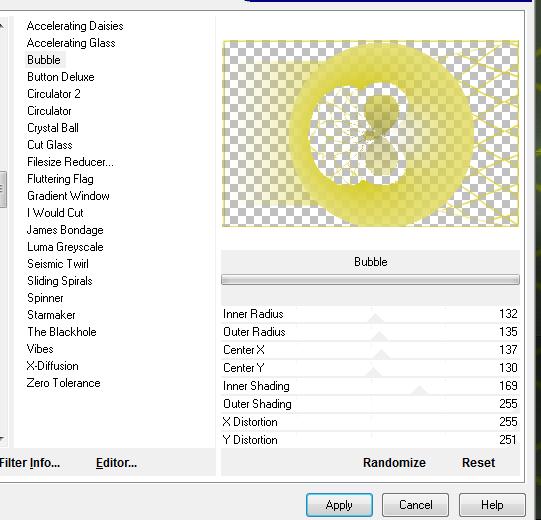
28. Effects-Plugins -Unlimited - Factory Gallery B /Bubble with these settings
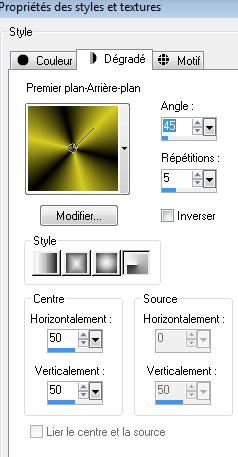
29. Effects-Plugins -EyeCandy5 Impact / perspective shadow with the same settings - preset ''renee-yvonne'' 30. Layers-New raster layer 31. Selections –load/save selection –load selection from disc and choose: ''renee yvonne 2 '' -. Preparation: Color-palette:Set your foreground color to #d6cc21-Set your background color to #000000 Properties Forground; Set your Foregroundcolor to forground-background radial gradient, with these settings
32. Flood Fill Tool: fill the selection with the gradient Selections-Deselect All 33. Activate the tube ''renee -texte -yvonne '' Edit/copy- Edit/ paste as new layer on your working image and move 34. Activate the tube ''renee -tortue ''Edit/copy- Edit/ paste as new layer on your working image and move to the left 35. Layers-Merge-Merge Visible 36. Effects-Plugins - Flaming pear -Flood with these settings
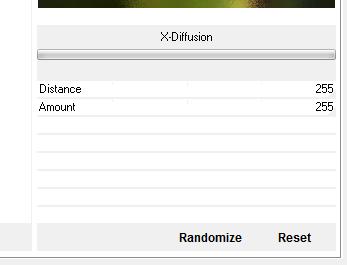
37. Layers-Merge-Merge All 38. Edit/Copy!!! 39. Image - Add borders-Symmetric checked: 4 pixels black 40. Image - Add borders-Symmetric checked: 60 pixels white 41. Layers-New raster layer / With the Magic Wand -select the white border of 60 pixels 42. Edit/ paste into selection (Image is still in your PSP memory) 43. Selections-Promote selection to layer 44. Selections-Deselect All 45. Adjust-Blur-Gaussian Blur: Radius 25% 46. Effects-Plugins -Unlimited - Factory Gallery B / X- diffusion
47. Image - Add borders-Symmetric checked: 5 pixels black Save as JPG
I am part of Tutorial Writers Inc. My tutorials are regularly recordedt ReneeGraphisme_All rights reserved
*
|
 Translations