|
Let's begin
1.
Open your Image '' fond annelies''/promote to background layer. (raster 1)
2.
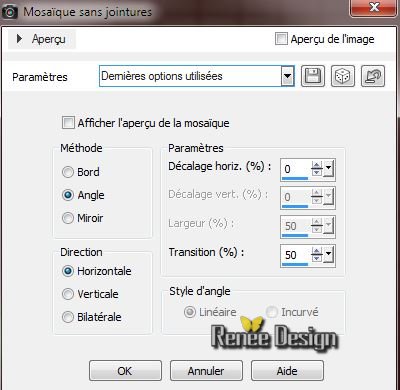
Effects- Image effects-Seamless Tilling
3.
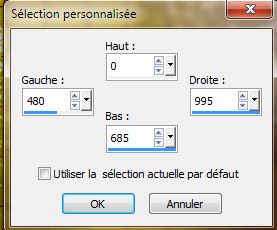
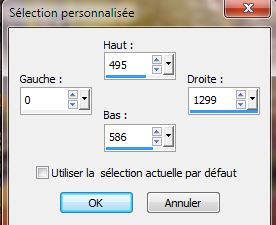
Selections-Custom selections with these settings
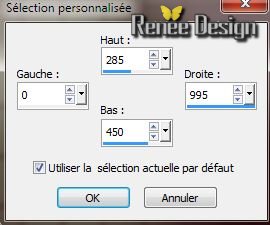
4.Selections- Promote selection to layer
5.
Adjust-Blur-Gaussian Blur:Radius 30
6.
Selection-Select none
7.Material Properties: Foregroundcolor:#442518 and your Backgroundcolor to color:
#6f7846
8.
Effects-Plugins - Simple - 4Way average
9.
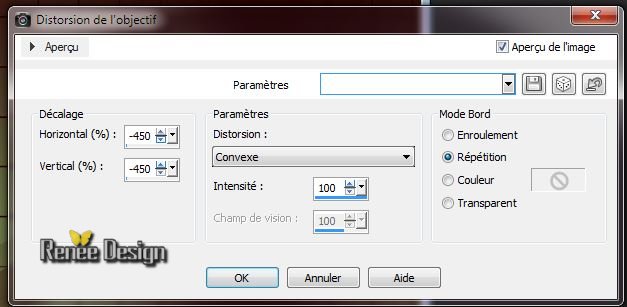
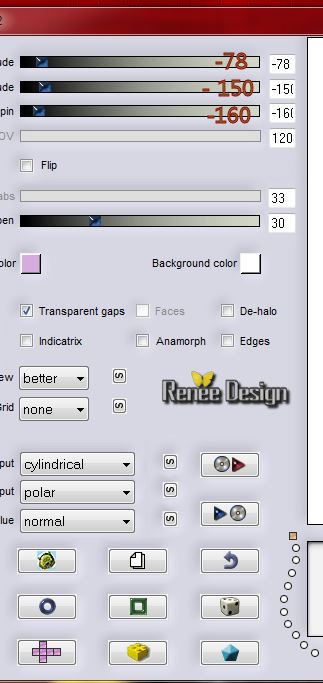
Effects -Distorsion Effects- Lens Distortion
10.
Layers- Duplicate-Image Flip
11.
Layers-Merge-Merge Down
12.
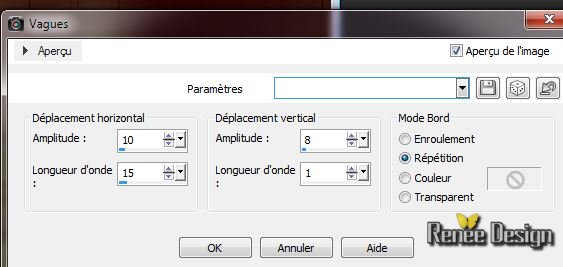
Effects- Distorsion Effects -Wave
13.
Blend Mode of this layer:"Luminance Lagacy" .Lower the opacity to 46%
14.
Layers - Merge- Merge Down
15.
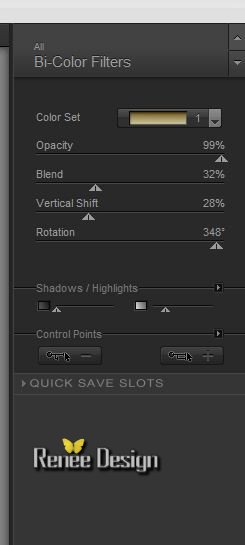
Effects-Nick Color effex Pro3.0 /Bicolor Filters - Color
Set /Brown 1
16. Layers - New raster layer
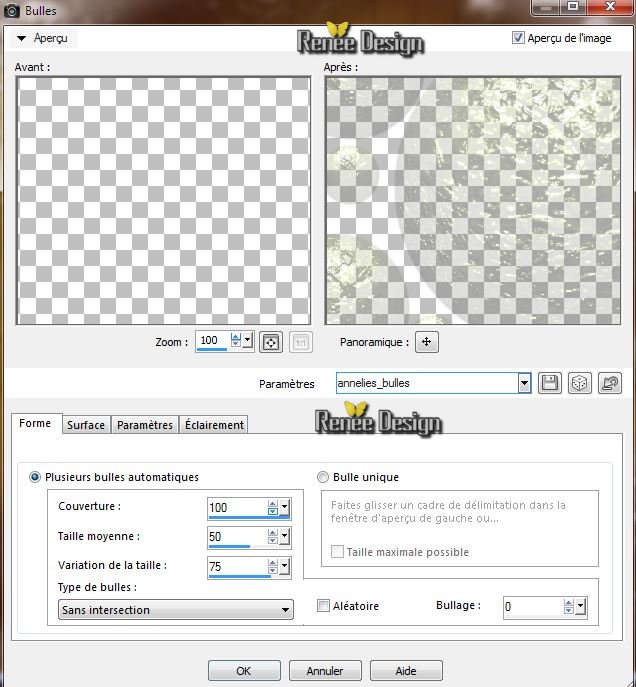
17. Effects
- Artistic Effects-Balls and Bubbles / choose my preset: ''annelies_bulles''
(preset in the materials folder )
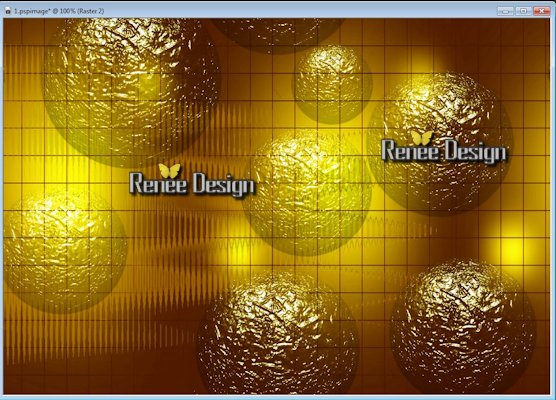
18. Eraser Tool: eraser a few balls away see example/ Blend Mode of this layer "Hard Light"
19.
Material Properties: Foregroundcolor to color : #f2e107 and the backgroundcolor to color: #6f7846
20.
Prepare a linear gradient configured like this 
19.
Selections-Custom selections with these settings
20.
Layers - New raster layer
21.
Flood Fill Tool: Fill the selection with the gradient
22. Effects-Plugins
Simple - Diamonds
23. Effects
-Plugins Simple - Quick Tile
24
Selections-Modify-Contract by 100 pixels
25. Effects-Plugins
Simple - Blintz
26. Effects-Plugins
Simple - Quick Tile
27.Effects -
3D Effects-Drop Shadow 0/0/100/29 black
28
Selection-Select none
29. Effects- Plugins Mura's Meister - Perspective Tilling / click reset and
oké
30.Activate your Pick Tool (K) and push down to 500 pixels
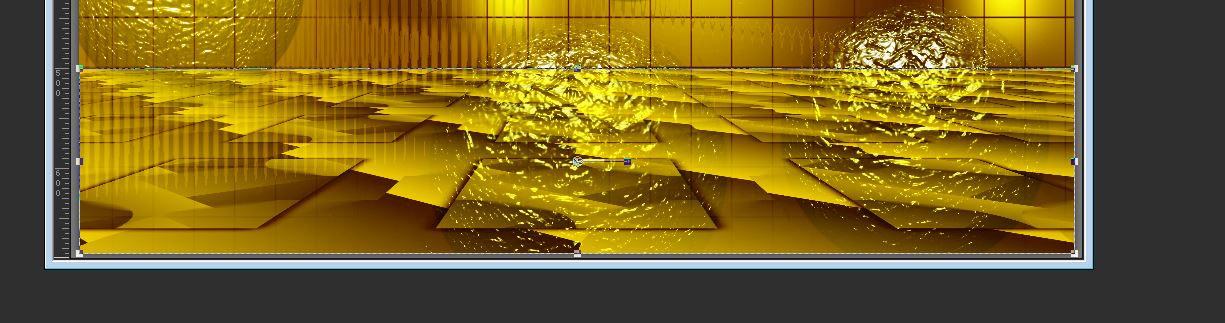
Blend Mode of this layer "Hard Light"
31. Aktivate your layer: Raster 1
32. Layer-New raster layer/ Selections-Select All
Open the image ""annelies_image1'' Edit/copy-Edith past into the selection
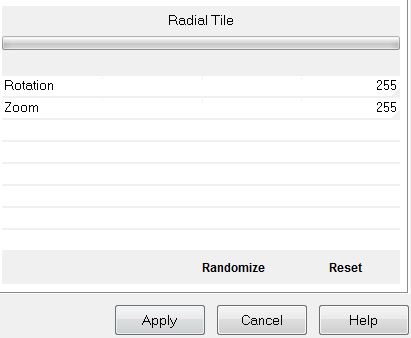
33. Effects-Plugins ICNET
FILTERS /Tiles and Mirror - Radial Tile -
34.Layers-Duplicate
35.
Effects-Plugins - ICNET FILTERS /Tiles and Mirror -Radial
Tile to 88/192
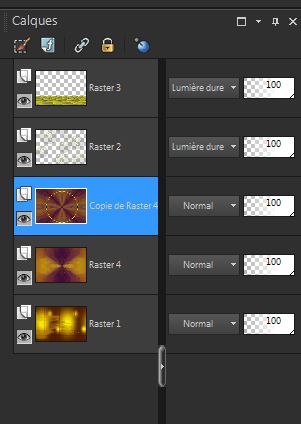
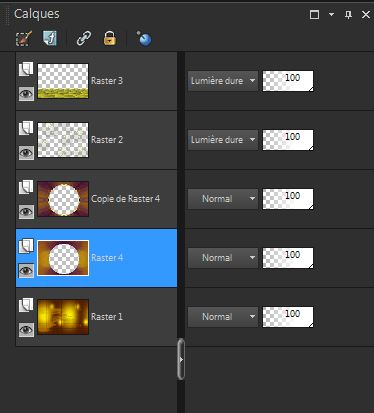
Your Layer Palette looks like this now
36.
Selections - load/save selection - load selection from disk and choose "Annelies_1" - Stay on this layer: Copy of Raster 4/ and Delete
Stay on this layer: Raster
4/ and Delete
Your Layer Palette looks like this now
37. Aktivate the top of the Layers palette
38.Open the tube ''Alies1MAR819-manmirror-070012014''/ Edit/copy-Edit/paste as a new Layer (do not move, it is the right place)
39.
Selections - Invert and Delete
40.
Selections -Invert
41.
Effects - Plugins Eye Candy 5 Impact - Bevel / choose my Preset
''annelies_Bevel''
42.
Selection-Select none
43.
Layers - Merge-Merge Visible
44. Image - Add borders symmetric checked 2 pixels color: #990b00
45. Image - Add borders - asymmetric checked color white

46. With the magic wand: select the white border
47. Open the tube ''texture'' - Edit/copy /Edit/past into the selection
48.
Selections- Invert
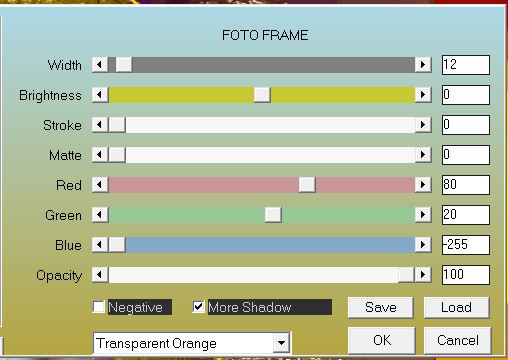
49. Effects-Plugins
AAA Frame - Foto frame
50.
Selections - Invert/ Promote selection to Layer
51. Effects
- Plugins Simple 4 way average
52. Effects- Edge Effects- Enhance More
53. Effects-
Plugins Redfield - Jama 3 D
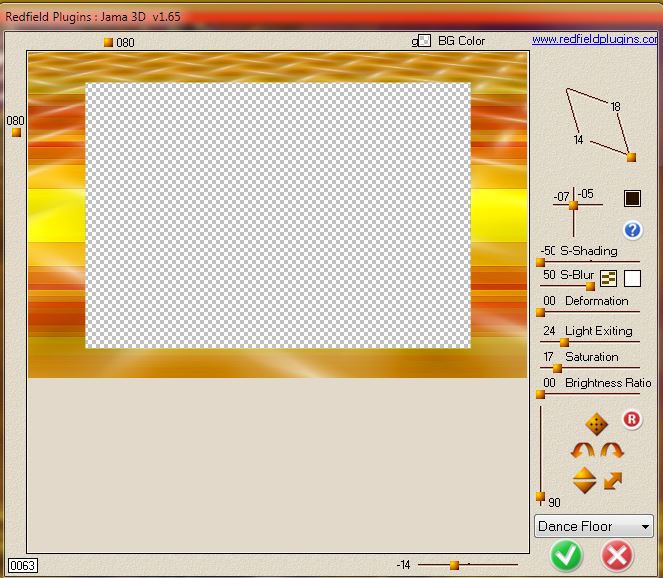
DO NOT DESELECT
54. Layers
- Duplicate
55. Effects
-Plugins Simple -Pizza slice Mirror repeat 2 times
56. Effects
- Edge Effects- Enhance More
Blend Mode of this layer: "Overlay"
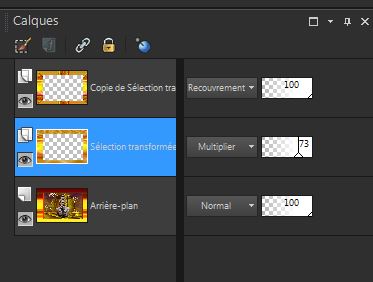
57.
Aktivate the transform selection Layer of the Layers palette /Blend Mode of this layer: "Multiply" and lower the opacity to 73%
Your Layer Palette looks like this now
Selection-Select none
58. Aktivate the top of the Layers palette (the copy transform selection Layer )
59. Effects-Plugins
Flaming Pear - Flexify 2
60. Effects
- Edge Effects- Enhance
Aktivate the top of the Layers palette
61. Layers- New raster layer
62.
Selections-Custom selection with these settings
Flood Fill Tool: Fill the selection with color white
63.
Selections-Select none
64.
Effects -Plugins Unlimited - Filter Factory Gallery J- Drink to me / to
15
65.
Selections - load/save selection - load selection from disk and choose "annelies_2'' / Do not add new layer.Flood Fill Tool: Fill the selection with color: #990b00
66.
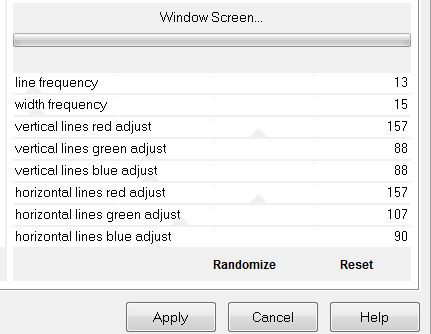
Effects-Plugins -Unlimited - Filter Factory Gallery J/ Window
Screen
67.
Effects -Plugins EyeCandy 5 Impact - Perpsective shadow /choose my Preset''
annelies -shadow'. Selections-Select none
68. Effects
- Image Effects - Offset: H = 0 et V = - 242
Blend Mode of this layer "Overlay"
69. Open the tube ''image_lignes'' Edit/copy-Edit/paste as a new layer
70. Effects
- Image Effects - Offset: H = 0 et V = -375
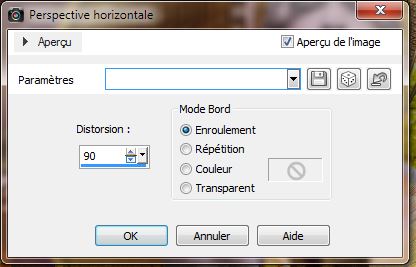
71. Effects- Geometric Effects - Perspective Horizontal
72.
Selections - load/save selection - load selection from disk and choose ''annelies_3'' / Delete
73.
Selections-Select none
74. Layers-Duplicate / Image Mirror
75. Layers-Merge -Merge Down. Blend Mode of this layer "Overlay"
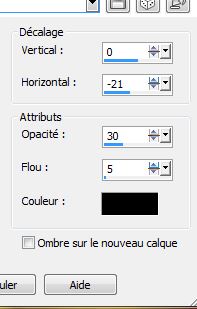
76. Effects
- 3D Effects-Drop Shadow default
77. Layers-New raster layer
78 . Aktivate your Shape Tool:- draw a shape (my button 035) (in the materials folder ) Convert to raster layer

79.
Effects - Plugins Eyecandy 5 Impact - Glass /choose my Preset ''annelies_glass
-2''
80. Layers- Duplcate- Image Mirror /and place
81. Layers -Merge -Merge Down
82. Effects
- 3D Effects-Drop Shadow
83. Open the tube ''Alies_1F A668-woman-17092013'' / Edit/copy-Edit/paste as a new layer place
84. Open the tube ''Alies12FP88-spingflower-09022012013'' / Edit/copy-Edit/paste as a new layer and place on the left
Blend Mode of this layer: "Multiply"
85.
Layers-Merge-Merge Visible
86. Image - add borders symmetric 1 pixel black
87. Image - add borders symmetric 20 pixel : #990b00
88. Image - add borders symmetric 1 pixel black
89. Image - add borders symmetric 25 pixel : #990b00
90. With the magic wand -select the border of 20 pixels
91. Effects - 3D Effects - Cutout/
black
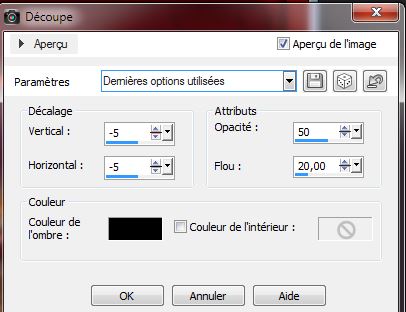
Repeat:
Effects - 3D Effects - Cutout/
black V 5 and H 5
92. Open the tube ''titre 'Edit/copy-Edit/paste as a new layer and place
93. Open the tube "agraphes '' Edit/copy-Edit/paste as a new layer and place / Layers-Duplicate /Image Mirror
94.
Layers - Merge All (Flatten)
95.
Adjust-Sharpness-Unsharp Maske
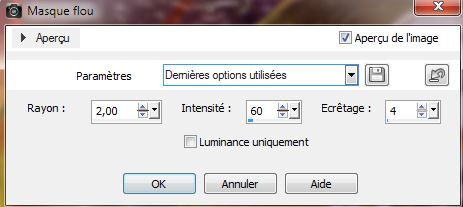
96. Image
Resize to 985 Pixels Width
I hope you enjoyed this lesson
Renée
This lesson was written by Renée
the 13/01/2014
Created the
30/01/2014
*
Any resemblance with an existing lesson is merely a coincidence
Don't forget to thank the people who work for us and with us. I named the tubeurs - Testers and the translators. Thanks Renée

| 

 Translations