|
Let's start the lesson
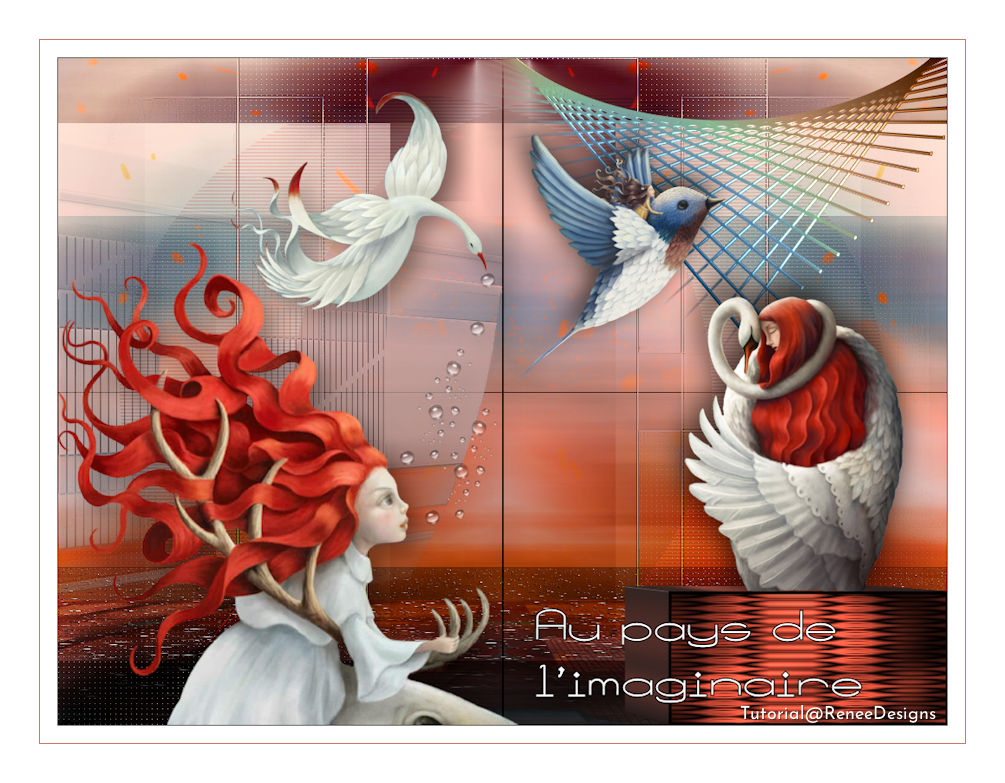
In the Land of Imagination

- Preparation
-Material Properties: Set your Foreground color to color #000000= 1- Set your Background color to color # ffffff= 2

1. File - New -Image 1025 x 769 Pixels- Right Mouse click and choose the Foreground color black
- Promote Background Layer =Raster 1
2.Layers- New Raster Layer
3. Selections –
Select All
4. Open the Tube ‘’
Fond-Pays-Imaginaire’’ -Edit - Copy- Activate your work -Edit - Paste into selection

5. Effects -Plugins-
Unlimited 2.0 – Mock- Windo using the default settings
6. Effects -Plugins-
Unlimited 2.0 – Mock-Bevel : 91
7. Effects- Image Effects- Seamless Tiling-Settings- Side by side
8. Effects - Reflection Effects- Rotating Mirror using the default settings
9. Layers- Duplicate
10. Adjust- Blur- Radial Blur use the settings below

11. Layers- New Mask Layer-From Image and select Mask ‘’
aditascreations_mask_17’’

- Layers- Merge- Merge- Group
12. Effects – Edge Effects – Enhance More
13. Layers-Properties-Set the Blend Mode to " Hard Light "
14. Effects – Plugins- AP [Lines] Lines – Silverlining use the settings below

15. Layers- New Raster Layer
16. Activate Flood Fill Tool
 –Fill the layer with the Background color white =2 –Fill the layer with the Background color white =2
17. Layers- New Mask Layer-From Image and select Mask ‘’
aditascreations_mask_12’’

-Layers- Merge- Merge Group
18. Selections –load/save selection –load selection from disc and select my selection: ’’Pays-Imaginaire 1’’
19. Effects –Plugins
Unlimited 2.0 – Tramage – TowThe Line with these settings: 100/50/100/50
20. Effects – Edge Effects – Enhance More
21. Activate Selection Tool -Custom Selection (S) -Rectangle with these settings


22. Selections- Promote selection to Layer
- Activate the layer underneath (Group- Raster 3)
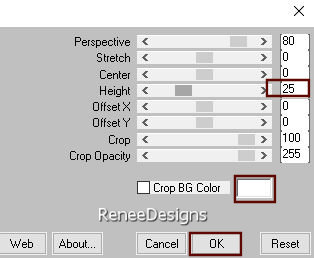
23. Effects – Geometric Effects – Perspective Horizontal use the settings below

24. Effects – Image Effects – Offset with these settings
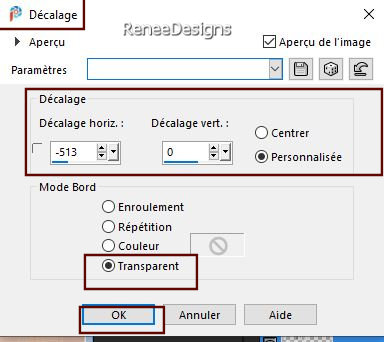
- Activate the layer above
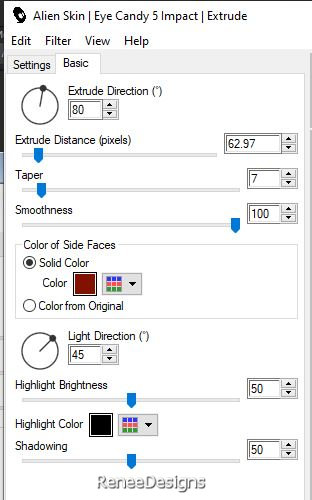
25. Effects - Plugins - Alien Skin EyeCandy 5 - Impact - Extrude- Tab- Settings- User Settings and select my file
''Pays-imaginaire-extrude''/
Solid Color #c14633= 3- Highlight Color #000000=black
26. Effects – Plugins– Mura’s Meister – Perspective Tiling use the settings below
27. Effects – Distortion Effects– Punch 72
28. Layers-Properties-Set the Blend Mode to " Overlay "
29. Effects- 3D-Effects - Drop Shadow with these settings: Color #468eaa=4

- Activate the layer underneath (Group-Raster 3)- Effects- 3D-Effects - Drop Shadow with the same settings: Color #468eaa=4
30. Selections –load/save selection –load selection from disc and select my selection: ’’Pays-Imaginaire 2’’

- To replace the top of the layer-palette
- Material Properties: Set your Foreground color to color #000000= 1- Set your Background color to color # c14633=3
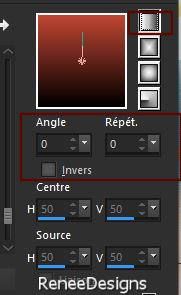
- Prepare a Foreground/Background linear gradient configured like this
31. Layers- New Raster Layer
32. Flood Fill Tool
–
Opacity 40 %– Fill the layer with the gradient (
don't forget to set again the opacity of your Flood Fill Tool to 100
%)
33. Effects – Plugins – L & K – Kaithlyn with these settings: 255/192/208/33
34. Effects –Plugins-
Unlimited 2.0 – Visual Manipulation - Transmission with these settings:
9/25/0
35. Layers-Properties-Set the Blend Mode to " Hard Light "– Lower the Opacity to 73%
- Color Palette-Set your Background color to color # ffffff=2
36. Layers- New Raster Layer
37. Selections –load/save selection –load selection from disc and select my selection: ’’Pays-Imaginaire 3’’
38. Flood Fill Tool
OPACITY 100% –Fill the selection with the Background color=2
39. Effects – Distortion Effects– Wind –Wind direction from Left – Wind Strength 100%
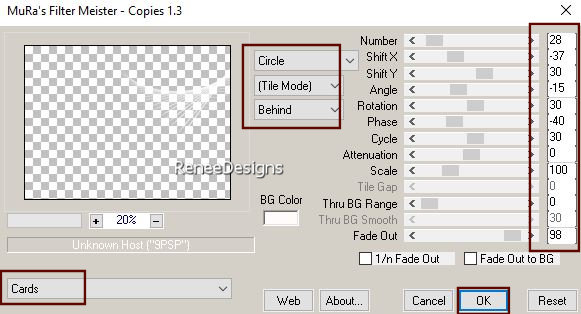
40. Effects – Plugins– Mura’s Meister – Copies use the settings below
41. Pick Tool: (K) on your keyboard -Enter these parameters on the toolbar 437/ -92

Press ( M ) to close the Pick Tool
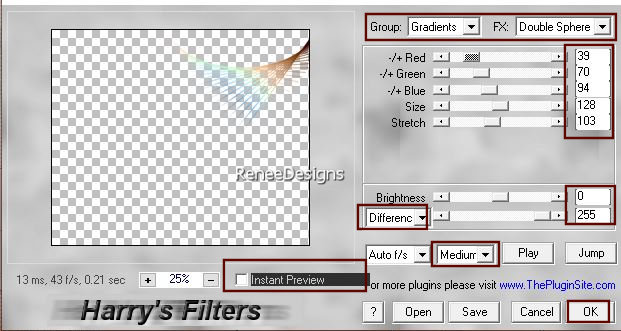
42. Effects – Plugins– The plugin Harry’s Filters 3.0 use the settings below
43. Effects – Plugins– FM Tile Tools – Wrinkle Emboss use the settings below

44. Layers- New Raster Layer
45. Selections –load/save selection –load selection from disc and select my selection: ’’Pays-Imaginaire 4’’
46. Flood Fill Tool
- Fill the selection with the Background color=2
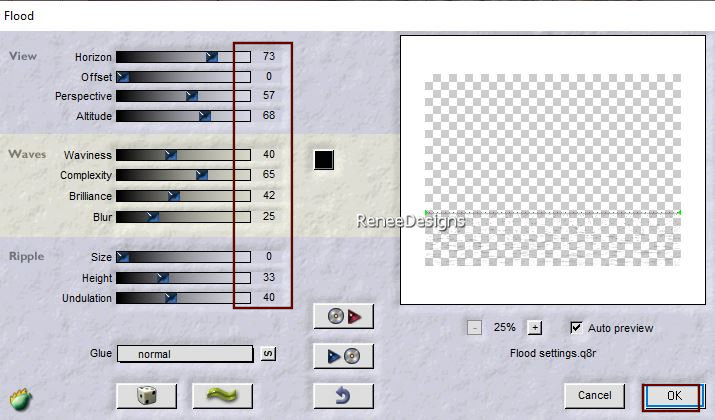
47. Effects – Plugins – Flaming pear – Flood :
Click on the red arrow>>select my file- Preset ‘’
Pays-Imaginaire-random settings’,-Can be used in any folder of your choice by clicking it. -3 Open it will be ok in your filter ’
48. Layers- Duplicate
49. Layers- Merge- Merge Down
50. Layers- Duplicate
51. Layers- Merge- Merge Down
52. Effects – Plugins – FM Tile Tools – Wrinkle Emboss with the same settings
53. Pick Tool: (K) on your keyboard -Enter these parameters on the toolbar
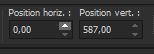 0/587 0/587
Press ( M ) to close the Pick Tool
54. Effects- User Defined Filter - Emboss 3 using the default settings
55. Open the Tube ‘’Renee-TUBES- Pays
imaginaire -Image 1’’ -Edit - Copy- Activate your work -Edit - Paste as a new layer
- Place at the bottom left ( see finished image)
- Material Properties: Set your Foreground color to color #c14633=3- Set your Background color to color # 000000=1
- Prepare a Foreground/Background radial gradient configured like this

56. Layers- New Raster Layer
57. Selections –load/save selection –load selection from disc and select my selection: ’’Pays-Imaginaire 5’’
58. Actvate Flood Fill Tool
–
Fill the selection with the gradient
59. Effects – Plugins– Backgroundmaniac- Medieval Impression use the settings below

Keep selected!
60. Effects –Plugins-
Unlimited 2.0 - Greg's Factory Output Vol. II- Pool
Shadow using the default settings
61. Effects - Plugins- Alien Skin EyeCandy 5 - Impact -Extrudes –Tab-Settings- User Settings and select my file-
Preset : Pays-Imaginaire-extrude
62. Selections -
Modify – Select -Selection Borders use the settings below

63.Activate Flood Fill Tool –
Fill the selection with the Background color=1
64. Image – Free Rotate 90° Left
65. Pick Tool: (K) on your keyboard -Enter these parameters on the toolbar
 653/609 653/609
-Press ( M ) to close the Pick Tool
66. Open the Tube ‘’Renee-TUBES- Pays imaginaire
-Image 2’’ -Edit - Copy- Activate your work -Edit - Paste as a new layer
- Move the Tube in the right place
Renée has a folder of spare tubes. So you can use those to change the scenery
For the used tubes in this lesson Renée has used this shadow (see screen) -Not mandatory -So -Shadow of your choice

67. Image - Add borders-Symmetric checked: 1 Pixel Color Black
Image - Add borders-Symmetric checked: 20 Pixels Color White
Image - Add borders-Symmetric checked: 1 Pixel Color #c14633= 3
Image - Add borders-Symmetric checked: 45 Pixels Color White
67. Image - Resize to 1005 Pixels Width
68. Open the Tube Text/Titre -Edit - Copy- Activate your work -Edit - Paste as a new layer/Or write your own title
Place the text of your choice or take a look at the example of Renée
- Paste the author's watermark on your work and your own watermark
- Layers- Merge- Merge All
Save as JPG
That's it - Thank you / I hope you enjoyed this lesson
Renée
This lesson was written by Renée 20/02/2022
Edited and Update
in 2022
*
* Do not forget to thank the people who work with us and for us
I have appointed the tubeurs and translators
Thanks
|

 Translations


