|
Let's start the lesson.
1. Open Imagefond ''fond_beaute_parfaite'' Promote Background layer=raster 1raster 1
2. Layers- Duplicate
3.Selections- Select All
4. Open the tube ''14bloem21042011''(Activate the second layer of the tube= Group raster 1) Edit - Copy - Edit - Paste into selection
5. Effects-Plugins
-Simple – Center Tile
6. Selections- Deselect All
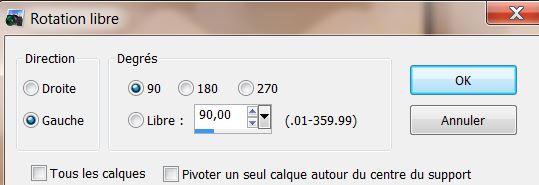
7. Effects-Plugins Factory M- Loom mettre / 0/ 255
8. Layers- Duplicate
9. Image Free Rotate /90° Left
10. Effects - 3D Effects - Drop shadow:10/10/50/5 Black/ Repeat Drop Shadow: -10/-10
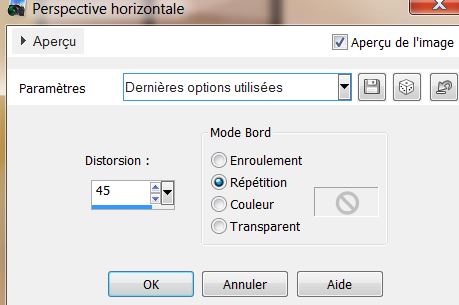
11. Effects- Geometric effects- - Perspective Horizontal
12. Layers- Duplicate
13. Effects- Geometric effects - Perspective Horizontal
14. Layers- Duplicate
15. Effects- Geometric effects - Perspective Horizontal
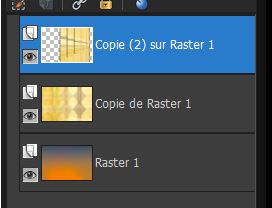
16. Layers- Merge- Merge Down and repeat (3 perspective is one layer)
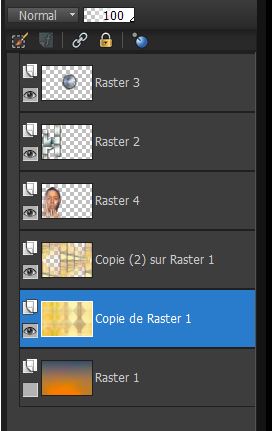
17. Your Layer Palette look like this now:
18. Effects - Image effects - Seamless tiling use settings below

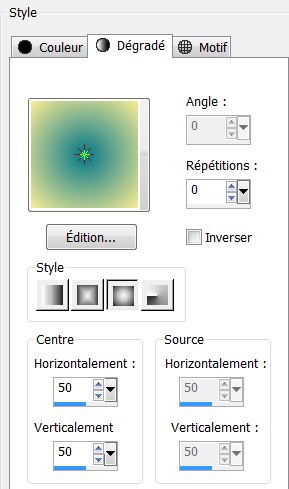
19. Effects- Edge effects-Enhance more
20. Material Properties: Foreground color : #03788a Backgroud color :
#fbed93
21.
Put your foreground on the foreground/background sunburst gradient with settings below
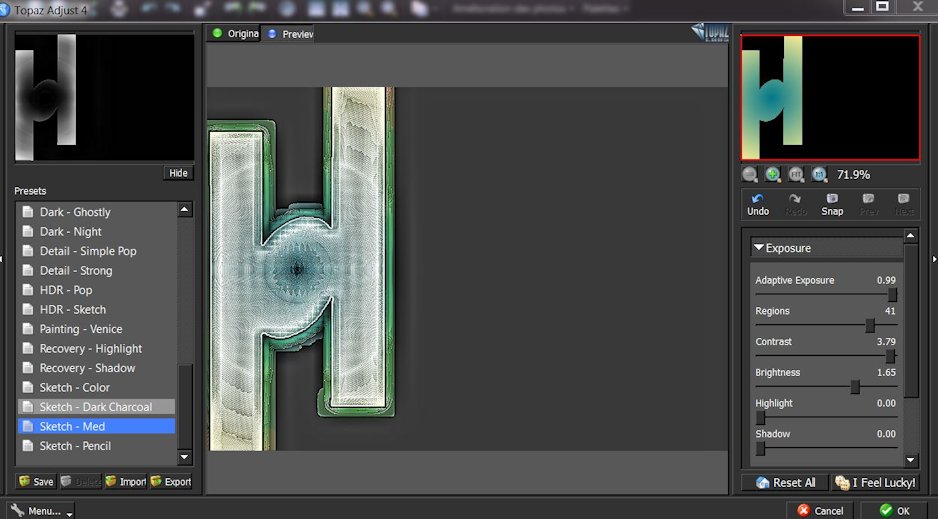
22. Layers-New raster layer
23. Selections - load/save selection - load selection from disk and choose ''renee_beaute_parfaite_1''
24.Flood Fill Tool: fill the layer with the gradient
25. Selections- Deselect All
26. Effects-Plugins
Topaz -Adjust4
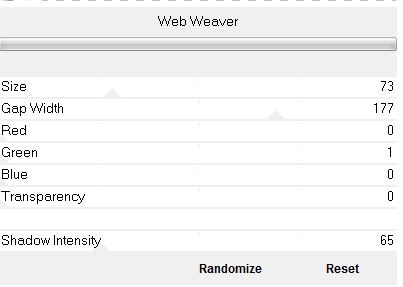
27. Effects-Plugins - VM1 - Web Weaver
28. Effects-Plugins - Eye Candy 5 - Impact - Perspective shadow -
Preset = Drop shadow blury
29. Set the layer opacity of this layer to : 46
30. Be placed at the top of the Layers palette
31.
Open the tube ''FEMME GINA 2385'' Edit - Copy - Edit - Paste as new layer
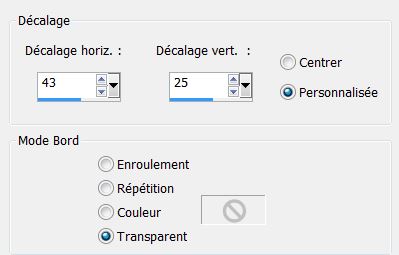
32. Layers- Arrange-Move down
33. Open the tube ''logane_7_formes
deco1_28novembre2012'' activate raster 4
of the tube
34.
Edit - Copy - Edit - Paste as new layer
35. Layer Palette :Double click on this Layer and set the Blend Mode to "Luminance Legacy "
36. Layers- Duplicate
37. Image
Resize 75% Resize all Layers not checked
38. Layers-Merge-Merge down
39. Effects-Image effects-Offset use settings below
40. Effects-Plugins
- Eye Candy5/Impact - Perpsective shadow -Tab Settings-User Settings-and choose my Preset ''renee_beaute_parfaite-persp''
-The result
41. Acivate the second layer from the bottom- (Copy raster 1)
42. Selections - load/save selection - load selection from disk and choose ''renee_beaute_parfaite_2''
43. Selections-Promote selection to layer
44. Effects
-Plugins Eye Candy 5/Impact - Glass in tab Settings/User Settings and choose my preset Preset''renee_beauté_parfaite_glass''
46 Selections- Deselect All
47. Layers-Arrange-Bring to top
48. Layers- Duplicate
49.Image
Free Rotate 90° Left
50. Layers- Merge-Merge down
51. Open the tube ''image1 '' Edit - Copy - Edit - Paste as new layer
Do not move it is in the right place
52. With your magic wand select inside the two rectangles
53. Activate the bottom of the layer palette=raster 1
54. Selections-Promote selection to layer
55. Layers-Arrange-Bring to top
Your work look like this now
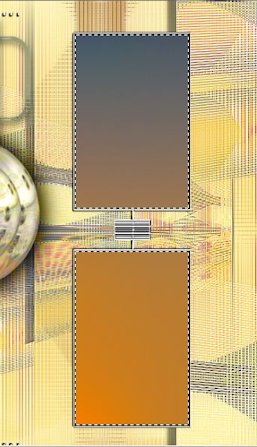
- Keep selected
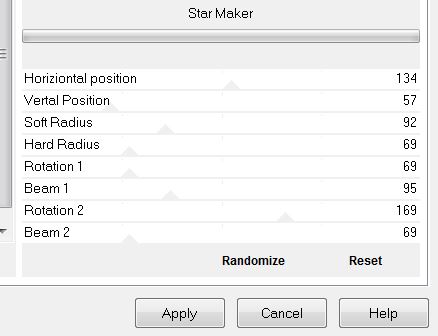
56. Effects-Plugins -Unlimited 2.0 - &<Sandflower SpecialV>Star Marker
57. Selections- Deselect All
58. With your magic wand select the bottom rectangle
59.
Effects-Plugins Land K's / Pia / 42
60.
Effet -EyeCandy 5-Impact - Glass in tab Settings/User Settings and choose my preset ''Drevers-Dreaming-Glass_1''
61.
On this layer (transformed selection ) Double click on this Layer and set the Blend Mode to "Multiply"
62.
Selections- Deselect All
63. Open the tube titre ''beaute parfaite'' Edit/copy-Edit paste as a new layer and move
64.
Open the tube papillon Edit/copy-Edit paste as a new layer and move
65. Image - add borders-Symmetric checked : 2 pixels Color black
66. Image - add borders-Symmetric checked : 50 pixels Color #fbed93
67. Image - add borders-Symmetric checked : 5 pixels Color black
68. Image - add borders-Symmetric checked : 10 pixels Color #fbed93
69. Image - add borders-Symmetric checked : 2 pixels Color black
70. With your magic wand select the border of 50 pixels
71.Effects-Plugins
Land K's / Pia / 7
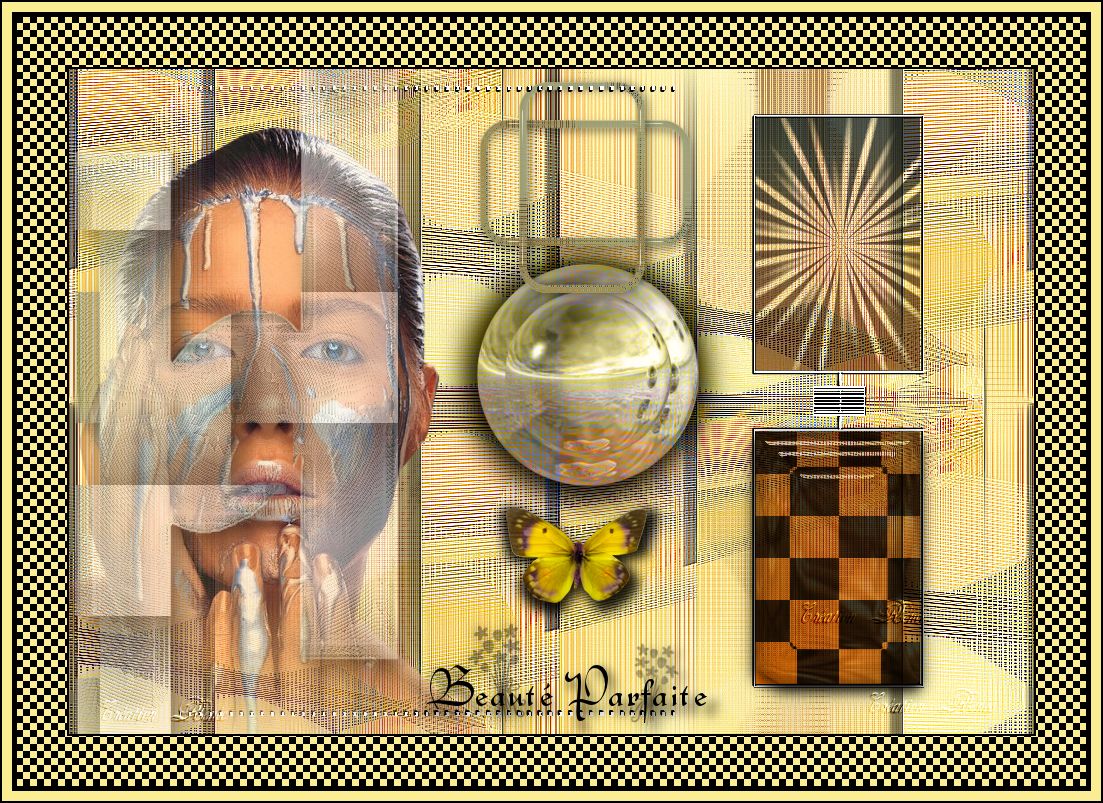
I hope you enjoyed this lesson
This lesson was written by Renée the 9/04/2013
*
 |


 Translations