|
Let's start the lesson
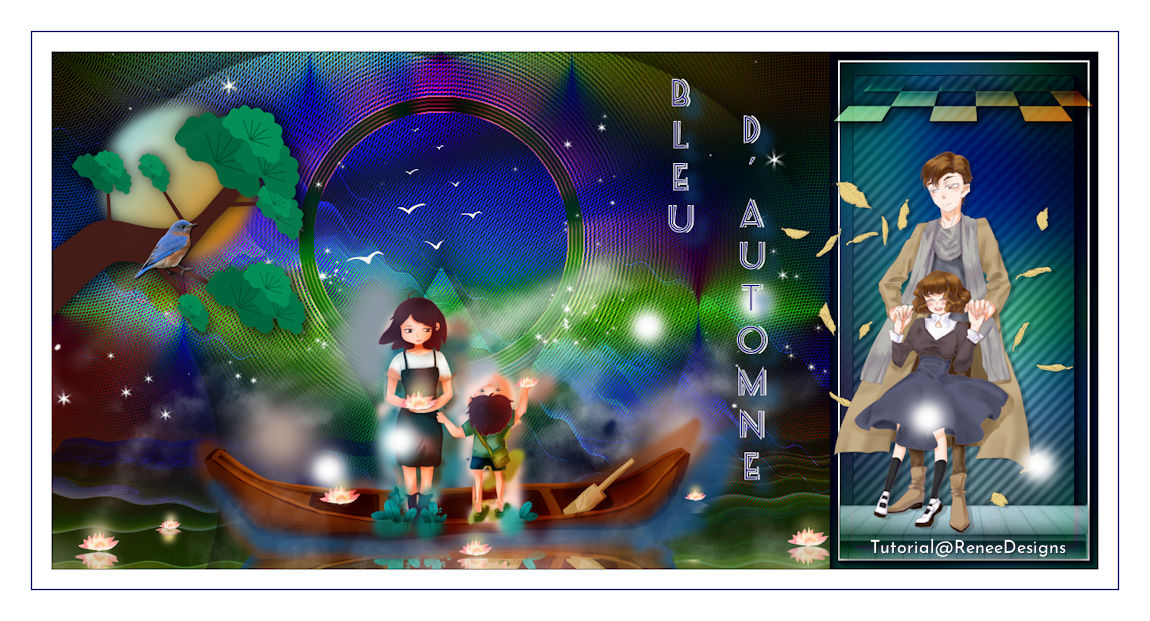
Bleu d’automne/Autumn Blue
- Preparation
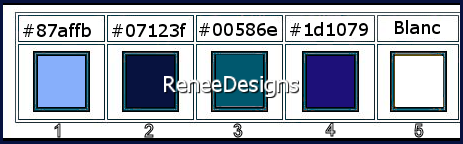
-Material Properties: Set your foreground color to color #87affb = 1 Set your background color to color #07123f=2
1. Open the Background image ’’Fond-Bleu-Automne’’-
Promote Background Layer =Raster 1
2. Effects-Plugins- Unlimited
2.0 - Sapphire Filters 04 -SapphirePlugin_0314... using the default settings
3. Effects – Plugins– FMTile Tools – Blend Emboss using the default settings
4. Layers- New Raster Layer
5. Selections –load/save selection –load selection from disc and select my selection: ‘’Bleu-Automne-1’’
6. Activate your Flood Fill Tool  -
Fill the selection with the foreground color = 1 -
Fill the selection with the foreground color = 1

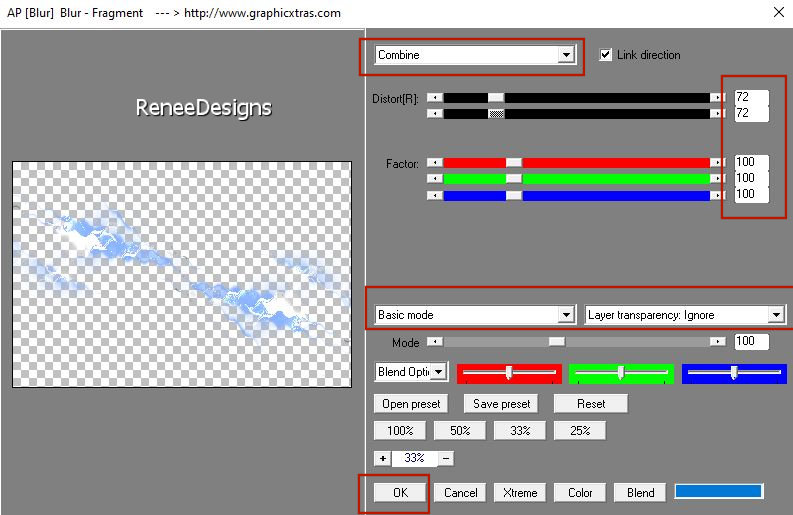
7. Effects – Plugins - AP[Blur] Blur – Fragment use the settings below
8. Layers-Properties-Change the Blend Mode to "Overlay "
9. Effects – Edge Effects– Enhance
10. Layers- Merge- Merge Down
11. Layers-Duplicate
12. Effects – Plugins – AAA Frame – Foto Frame using the default settings
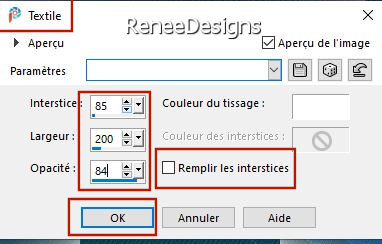
13. Effects – Texture Effects – Weave use the settings below -Color White
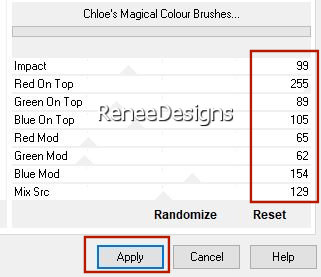
14. Effects –Plugins-
Unlimited 2.0 - Plugins AB 16 - Chloe's Magical Colour
Brushes..use the settings below.
15. Effects – Plugins – Transparency – Eliminate Black
16. Effects – Plugins -Alien Skin EyeCandy 5 Impact – Extrude –Tab-Settings-User Settings and select my file–
Preset :’’Bleu-Automne’’
17. Effects – Plugins– Flaming Pear – Flexify 2-Click the red arrow and select the file- Preset :’’Blue-Automne’’
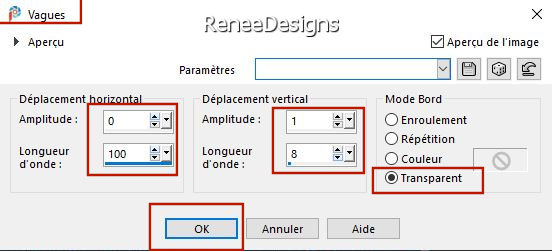
18. Effects – Distortion Effects– Wave use the settings below
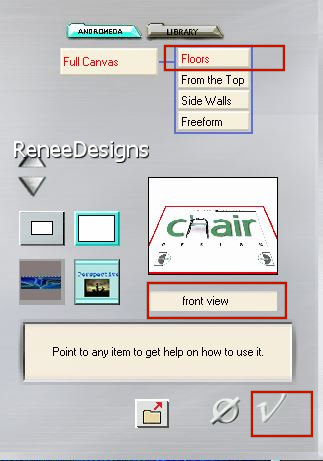
19. Effects – Plugins - Andromeda – Perspective - Floors- Front view
20. Objects - Align
– Bottom
21. Activate Pick Tool (K) – select my file -Preset : bleu aaautomne – Click ok to apply

22. Layers-Properties-Change the Blend Mode to "Overlay " - Lower the Opacity to 63%
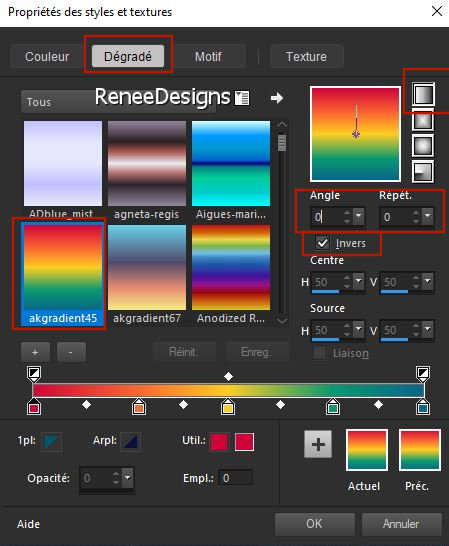
- Set your Foreground color to a Foreground Gradient and select ‘’ akgradient45’’- style Linear– configured like this
23. Layers-New Raster Layer
24. Activate your Flood Fill Tool
– Fill the layer with the gradient
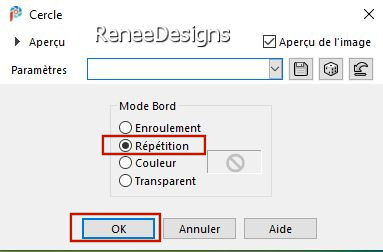
25. Effects – Geometric Effects - Circle
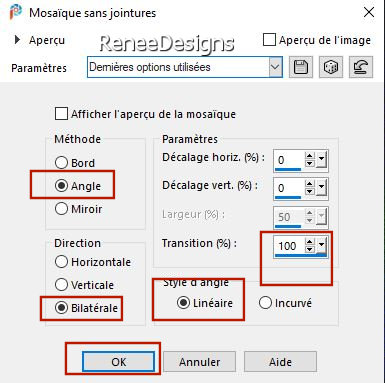
26. Effects – Image Effects – Seamless tiling use the settings below
27. Layers-Properties-Change the Blend Mode to "Overlay "
28. Layers-Duplicate
29. Layers-Properties-Change the Blend Mode to " Hard Light "
30. Layers- Merge- Merge Down
31. Layers- New Raster Layer
32. Selections –load/save selection –load selection from disc and select my selection: ‘’Bleu-Automne-2’’
33. Effects- 3D-Effects - Drop Shadow with these settings: 0/0/100/95 Color black

On the same layer - Do not add a new layer
34. Selections –load/save selection –load selection from disc and select my selection: ‘’Bleu-Automne-3’’
35. Effects- 3D-Effects - Drop Shadow with these settings: 0/0/100/95 Color black
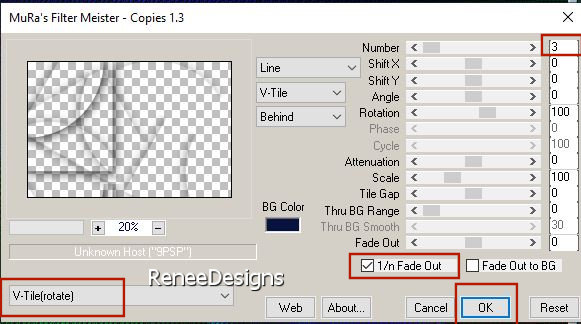
36. Effects – Plugins – Mura’s Meister – Copies use the settings below
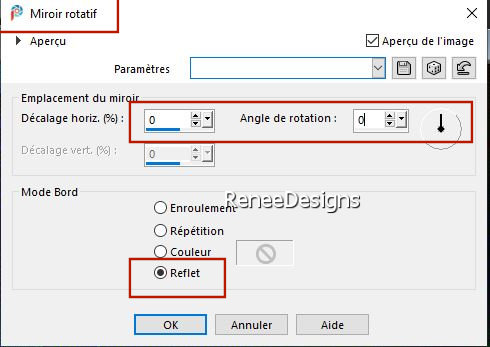
37. Effects- Reflection- Effects- Rotating Mirror-using the default settings
- Color-Palette-Set the Foreground color to color #00586e=3
38. Layers- New Raster Layer
39. Selections –load/save selection –load selection from disc and select my selection: ‘’Bleu-Automne-4’’
40. Activate your Flood Fill Tool
-
fill the selection with the foreground color = 3
41. Effects – Plugins – Alien Skin Eye Candy 5 -Impact –Blacklight –Tab-Settings-User Settings and select my file-Preset :
Bleu-Automne-blacklight
42. Layers - Arrange - Move down twice (Under Raster 2)
43. Selections –load/save selection –load selection from disc and select my selection: ‘’Bleu-Automne-5’
DELETE 3 or 4 times
- To replace the top of the layer-palette
44. Open the tube ‘’
Renee_TUBES-Bleu-Automne-nuages" -Edit - Copy- Activate your work -Edit - Paste as a new layer
45. Objects – Align
– Top
46. Open the tube ‘’
Renee_TUBES-Bleu-Automne-Etoiles’’ -Edit - Copy- Activate your work -Edit - Paste as a new layer
47. Objects – Align
- Top
48. Open the tube ‘’
Renee_TUBES-Bleu-Automne-Lune’’ -Edit - Copy- Activate your work -Edit - Paste as a new layer
-Place in the upper left corner (see preview image )
49. Open the tube ‘’ Renee_TUBES-Bleu-Automne-Arbre’’ -Edit - Copy- Activate your work -Edit - Paste as a new layer
- Place on image of the moon (see preview image )
50. Layers- New Raster Layer
51. Selections –load/save selection –load selection from disc and select my selection: ‘’Bleu-Automne-6’’
52. Set your foreground color to white #ffffff
Activate your Flood Fill Tool –
Fill the selection with the color white #ffffff.
53. Effects- 3D-Effects - Drop Shadow with these settings: 1/1/100 /2 Color black
54. Open the tube ‘’
Renee_TUBES-Bleu-Automne-personnage’’ -Edit - Copy- Activate your work -Edit - Paste as a new layer
55. Objects – Align– Bottom
56. Layers- Merge- Merge Visible
57. Edit-Copy !!!
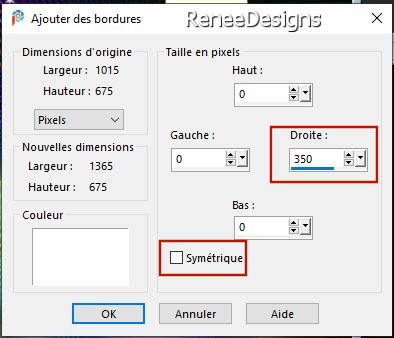
58. Image - Add Borders Asymmetrical Borders in White – configured like this
59. Activate the Magic Wand with these settings- Click in the white part

60. Layers- New Raster Layer
61. Activate your work -Edit - Paste into selection (the image is still in memory)
62. Adjust-Blur-Gaussian Blur-Radius 50%
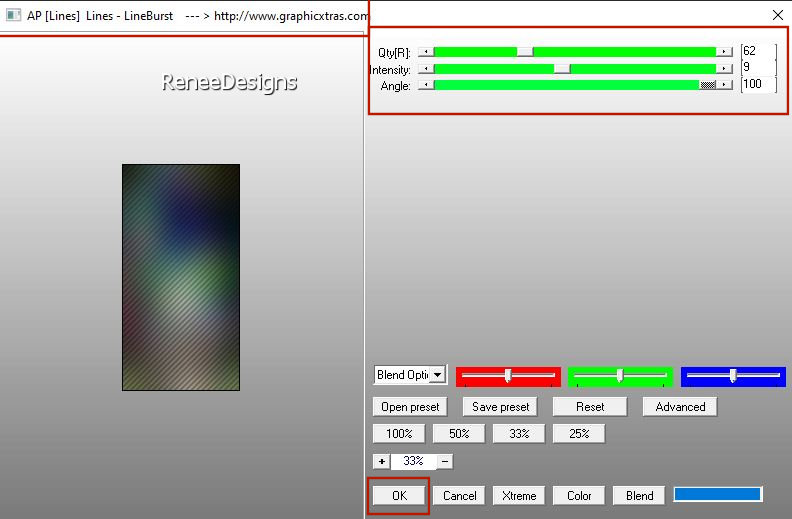
63. Effects – Plugins– AP [lines] Lines- LineBurst use the settings below
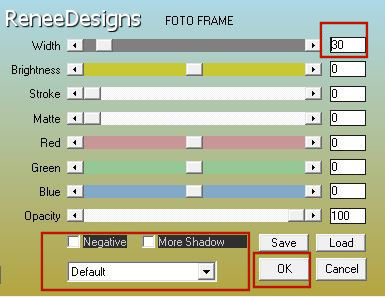
64. Effects – Plugins - AAA-Fame - FOTO FRAME use the settings below
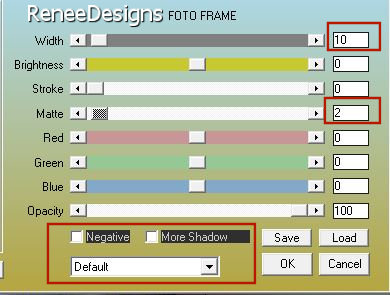
65. Effects – Plugins - AAA-Frame - FOTO FRAME use the settings below
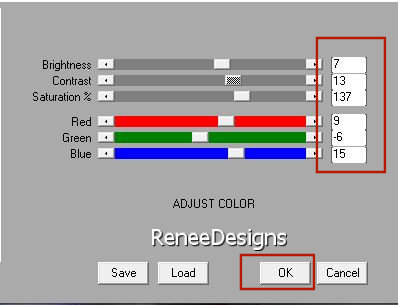
66. Effects -Plugins– AAAFilters- Adjust Color use the settings below
67. Open the tube ‘’ Renee_TUBES-Bleu-Automne-toit’’ -Edit - Copy- Activate your work -Edit - Paste as a new layer
(For Renée- Blend Mode "Hard Light")
-Place on top to (see completed)
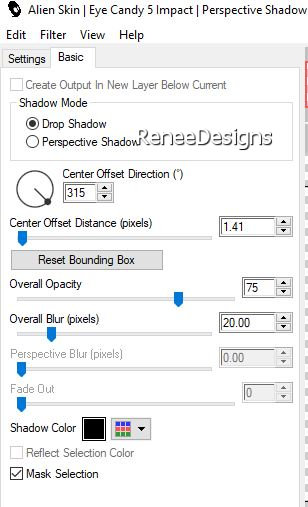
68. Effects – Plugins- Alien Skin Eye Candy 5 – Impact – Perspective
Shadow use the settings below
69. Open the tube ‘’
Renee_TUBES-Bleu-Automne-Plancher’’ -Edit - Copy- Activate your work -Edit - Paste as a new layer
- Place it in the right place (For Renée: Blend Mode Luminance H)
70. Effects – Plugins- Alien Skin Eye Candy 5 – Impact – Perspective Shadow with the same settings
71. Open the tube Renee_TUBES-Bleu-Automne-personnagest "( Woman and child ) or take your own tube
72. Layers- New Raster Layer
73. Selections –load/save selection –load selection from disc and select my selection: ‘’Bleu-Automne-7’’
74. Open the tube ‘’
Renee_TUBES-Bleu-Automne-floublanc’’ -Edit - Copy- Activate your work -Edit - Paste into selection
75. Image - Add borders-Symmetric checked: 1 Pixel Color #07123f=2
Image - Add borders-Symmetric checked: 25 Pixels Color white
Image - Add borders-Symmetric checked: 2 Pixels Color #1d1079= 4
Image - Add borders-Symmetric checked: 40 Pixels Color white
76. And now for the text-Write your own text,using a font of your choice or the provided font.
77. Layers- Merge- Merge Visible
78. Image - Resize to 1150 pixels width
-Save as JPG
That's it - Thank you / I hope you enjoyed this lesson
Renée
This lesson was written by Renée 17/08/2021
Edited and Update
2021
*
Any resemblance with an existing lesson is a coincidence
* Do not forget to thank the people who work with us and for us
-I have appointed the tubeurs and translators
Thanks
|
 Translations