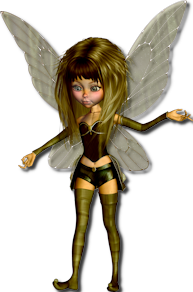
|
Let's start the lesson
Bonjour-Automne2022
- Preparation
-Material Properties: Set your foreground color to color #d9c759=color 1 – Set your background color to color #3d3b0d=2

1. Open the Background Image -
‘’Fond-Bonjour-Automne2022- Promote Background Layer =Raster 1
2. Effects- Plugins - Filters in Unlimited 2.0 - FunHouse – Tremors with these settings:
191/53 /80
3. Effects- Plugins - Filters in Unlimited 2.0 -Distortion Filters -
Scanline Shifter with these settings: 115/26
4. Adjust- Sharpness-Sharpen More
5. Layers - Duplicate
6. Effects- Plugins - VM Instant Art – Tripolis using the default settings
7. Effects- Plugins - Filters in Unlimited 2.0 - &<Bkg Kaleidoscope>
- 4 QFlip UpperL
8. Selections –load/save selection –load selection from disc and select my selection: ‘’Bonj-Autm-2022’’
9. Selection- Promote Selection to Layer

10. Effects – 3D-Effects –
Drop Shadow with these settings: 0/0/50/65 Color Black
11. Effects – Plugins – Flaming Pear - Flexify 2 use the settings below
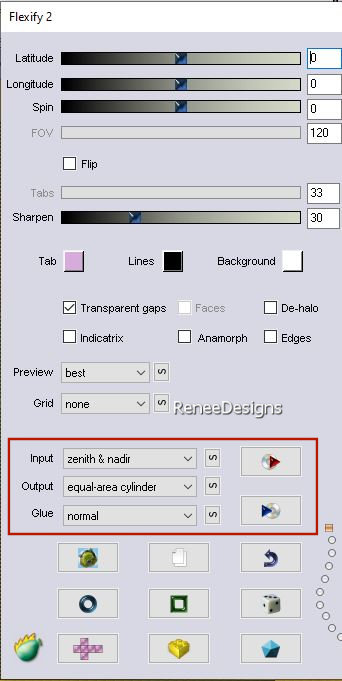
12. Layers– Duplicate
13. Image - Mirror - Mirror Horizontal (Image - Mirror in older versions of PSP)
14. Layers- Merge- Merge Down
15. Effects- Plugins - Filters in Unlimited 2.0 - &<Background
Designers IV> - @Night Shadow use the settings below
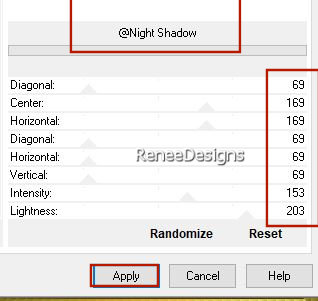
16. Effects- Plugins - Filters in Unlimited 2.0 – ColorRave -
Atmospherizer 1.1 use the settings below
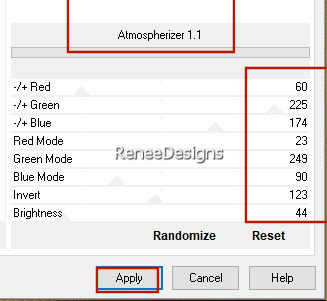
Activate Raster 1 in the Layers palette
17. Selections –load/save selection –load selection from disc and select my selection: ‘’Bonj-Autm-2022-1’’
18. Selection- Promote Selection to Layer
19. Layers- Arrange- Bring to Top
20. Effects- Plugins - Filters in Unlimited 2.0 - [AFS IMPORT]
–sqborder2 with these settings: 100/34/215
21. Effects – 3D-Effects – Drop Shadow with the same settings
22.Layers-Properties-Change the Blend Mode to " Hard Light"

23.Open the Tube ‘’ Bonjour-automne2022-
Image 1’’ -- Edit - Copy- Activate your work -Edit - Paste as a new layer
24. Pick Tool: (K) on your keyboard -Enter these parameters on the toolbar
 270/109 270/109
Press ( M ) to close the Pick Tool
25. Layers-Properties-Change the Blend Mode to "Overlay "
26. Effects – Edge Effects – Enhance More
27. Effects – 3D-Effects – Drop Shadow with the same settings
28.Open the Tube ‘’ Bonjour-automne2022-
Image 2’’--Edit - Copy- Activate your work -Edit - Paste as a new layer
Do not move, it is in the right place
- Material Properties: Foreground color remains at #d9c759=color 1 --Set your background color to color #550000=color 3
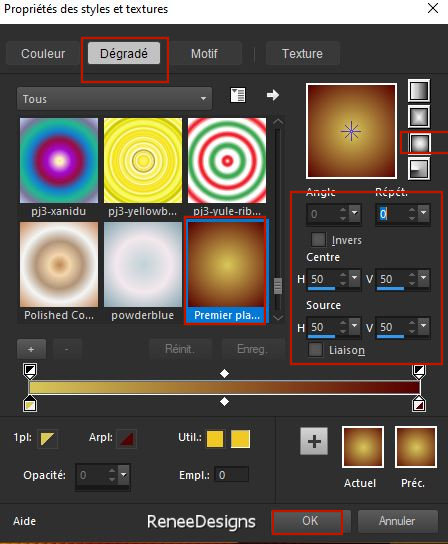
- Prepare a foreground/background sunburst gradient configured like this
29. Activate the Magic Wand – select the inside of this frame
30. Selections- Modify –Expand with 15 Pixels
31. Layers- New Raster Layer
32. Activate Flood Fill Tool
 –
Fill the selection with the gradient –
Fill the selection with the gradient
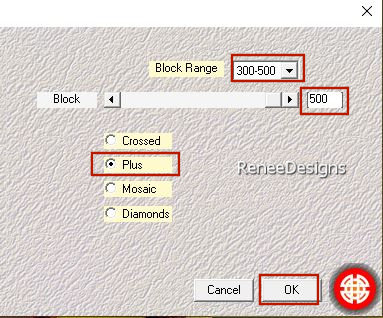
33. Effects – Plugins– Medhi – Sorting Tiles use the settings below
34. Effects- Edge Effects– Enhance (repeat a second time)

35. Layers- Arrange- Move Down
- To replace the top of the layer-palette
36. Effects- Edge Effects– Enhance
37. Layers- Merge- Merge Down
38. Open the Tube ‘’ Bonjour-automne2022-
Image 3’’ --Edit - Copy- Activate your work -Edit - Paste as a new layer
- Move it in the right place - see finished image
39. Layers-Properties-Reduce the Opacity of this layer to 83%
40. Layers- Duplicate
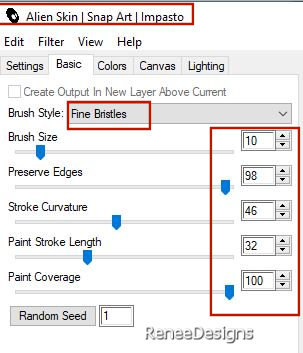
41. Effects – Plugins– Alien Skin Snap Art- Impasto -Tab- setting-User Settings and select my file -Preset : ‘’Automne-Renee-2022’’
42.Layers-Properties-Change the Blend Mode to " Hard Light"
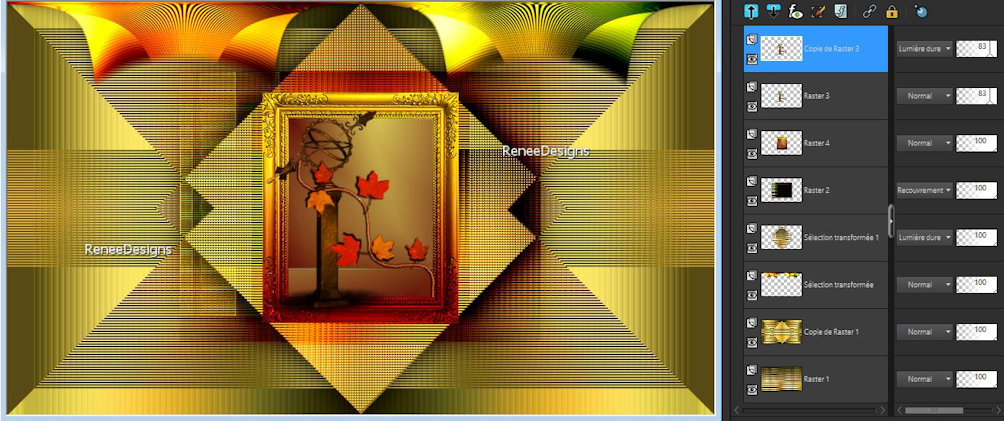
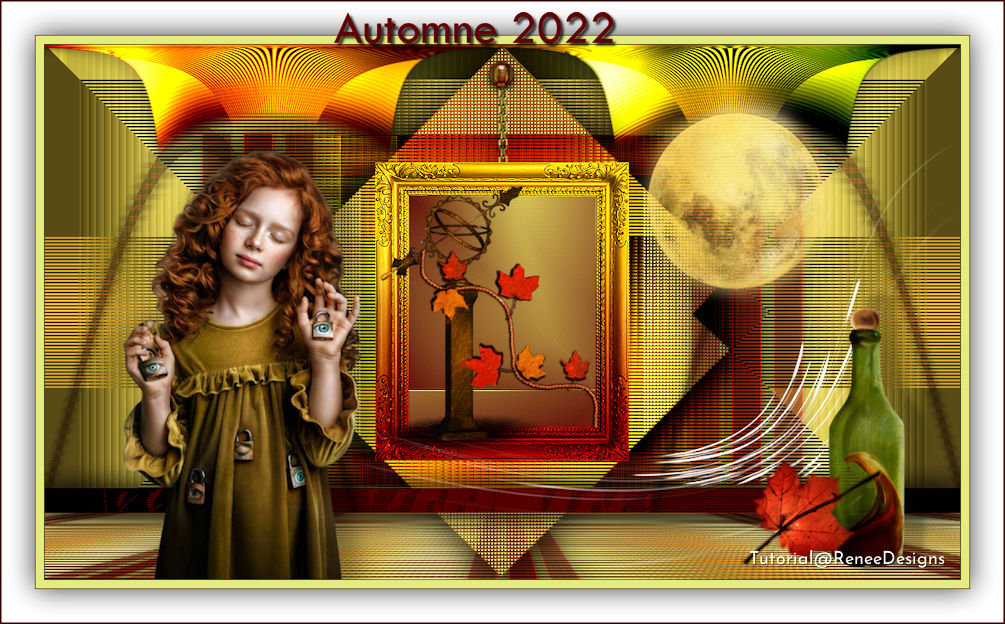
Your work and Layer Palette look like this now-You should have this result
43. Layers-New Raster Layer
44. Selections –load/save selection –load selection from disc and select my selection: ‘’Bonj-Autm-2022-2’’
45. Activate Flood Fill Tool
 –Fill the selection with the background color #550000=color 3 –Fill the selection with the background color #550000=color 3

46. Effects- Plugins – Toadies – What are you with these settings : 12/0
- Repeat this filter a second time
47. Effects – Edge Effects- Enhance More
48. Effects- 3D Effects- Drop Shadow with these settings: 0/0/50/18 Color Black
49. Layers – Duplicate
50. Image - Mirror - Mirror Horizontal (Image - Mirror in older versions of PSP)
51. Layers- Merge- Merge Down
52. Layers-Properties-Change the Blend Mode to " Hard Light "
53. Layers – Duplicate
Attention
please !!
54. Layers -Arrange –
Move Down-- Move above Raster 1 see screen below
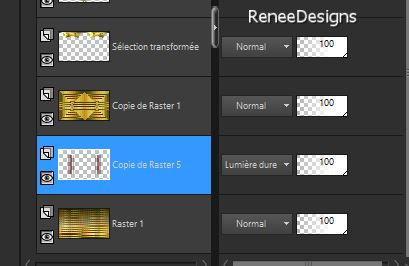
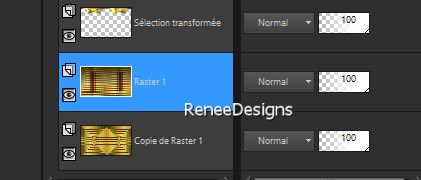
- Layers- Merge- Merge Down (Raster 1 and the Copy of Raster 5 are now merged) = Raster 1
-Layers-Arrange-Move Up – (Raster 1 is the second layer from the bottom)
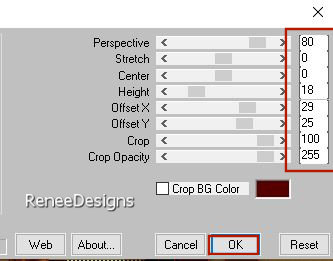
55. Effects – Plugins – Mura’s Meister – Perspective Tiling use the settings below
56. Selections –load/save selection –load selection from disc and select my selection: ‘’Bonj-Autm-2022-3’’
 6
times 6
times

Activate the top of the layer palette
57. Open the Tube ‘’ Bonjour-automne2022-
Image4.’’ -Edit - Copy- Activate your work -Edit - Paste as a new layer
58. Objects – Align- Top
(move slightly down/against the edge of the small frame) see finished image
59. Layers- New Raster Layer
60. Selections –load/save selection –load selection from disc and select my selection: ‘’Bonj-Autm-2022-4’’
61. Activate Flood Fill Tool
 –
Fill the selection with the gradient –
Fill the selection with the gradient
62. Effects – Texture Effects – Texture and select (Texture 14 )with these settings
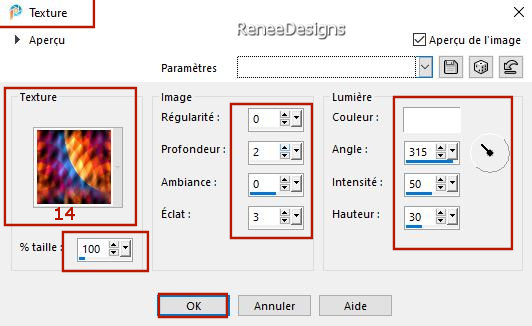

63. Effects- 3D Effects- Drop Shadow with these settings: 0/0/74/50 Color Black
64. Effects – Plugins – Vanderlee - Unplugged X- US Comic –use the settings below (Color #550000=3 )
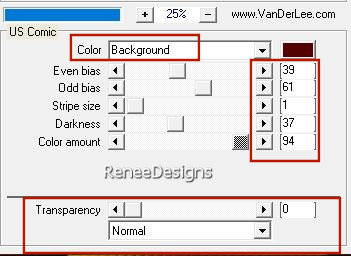
65. Layers-Duplicate
66. Effects– Distortion Effects– Wave use the settings below
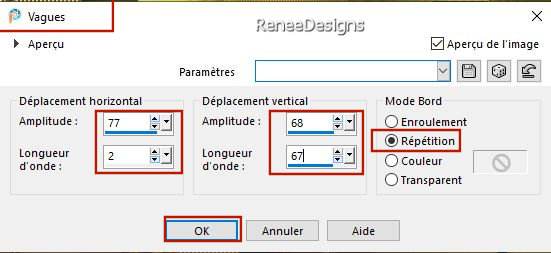
67.Layers-Properties-Change the Blend Mode to " Hard Light" - Reduce the opacity of this layer to 44%
68. Selections –load/save selection –load selection from disc and select my selection: ‘’Bonj-Autm-2022-5’’


69. Layers- New Raster Layer
70. Selections –load/save selection –load selection from disc and select my selection: ‘’Bonj-Autm-2022-6’’
71.Color Palette-Set your foreground color to color #ffffff= color 5
Activate Flood Fill Tool  –Fill the selection with the foreground color #ffffff=color 5
(click 3 to 4 times in the selection) –Fill the selection with the foreground color #ffffff=color 5
(click 3 to 4 times in the selection)

72. Open the Tube ‘’ Bonjour-automne2022-
Image5’’ --Edit - Copy- Activate your work -Edit - Paste as a new layer
Place to your taste
73. Open the Tube ‘’ Bonjour-automne2022-
Image6’’ --Edit - Copy- Activate your work -Edit - Paste as a new layer
74. Pick Tool: (K) on your keyboard -Enter these parameters on the toolbar
 839/292 839/292
Press ( M ) to close the Pick Tool
75. Open one of Renée's tubes (separate folder with autumn tubes) , or a tube of your own --Edit - Copy- Activate your work -Edit - Paste as a new layer and move it in the right place
-Resize if needed and drop shadow if desired
More Autumn Tube
Here
-Renée used this shadow for the tube:
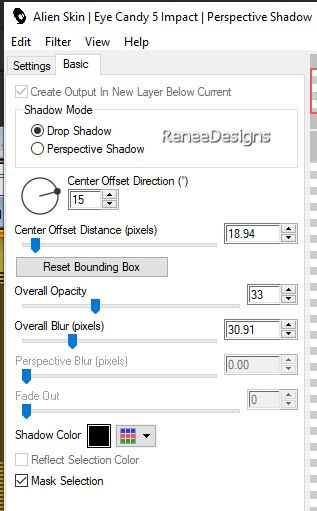
76. Image - Add borders-Symmetric checked: 1 Pixel- Color #3d3b0d= 2
- Image - Add borders-Symmetric checked: 10 Pixels- Color #e3eb81= 4
- Image - Add borders-Symmetric checked: 1 Pixel- Color #550000= 3
77. Selections -Select All
78. Image - Add borders-Symmetric checked: 40 Pixels -Color #ffffff=5
79. Effects- 3D Effects- Drop Shadow with these settings: 0/0/75/50 Color Black

80. Image - Add borders-Symmetric checked: 2 Pixels Color #550000= 3
81. Open the Tube " titre " -Edit - Copy- Activate your work -Edit - Paste as a new layer
Move it in the right place( see finished image )
Paste the author's watermark on your work and your own watermark.
Image- Resize to 1005 pixels width
- Layers- Merge- Merge All (flatten)
Save as JPG
I hope you enjoyed this lesson
Renée
This lesson was written by Renée 06/09/2022
Edited and Update
in 2022
*
*
Any resemblance with an existing lesson is a coincidence
*
Do not forget to thank the people who work with us and for us
-I have appointed the tubeurs and translators
Thanks
|
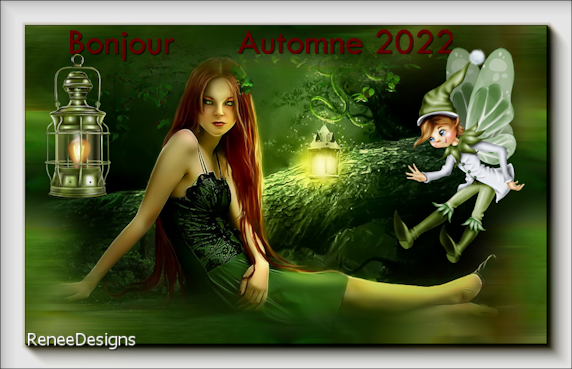
 Translations


