|
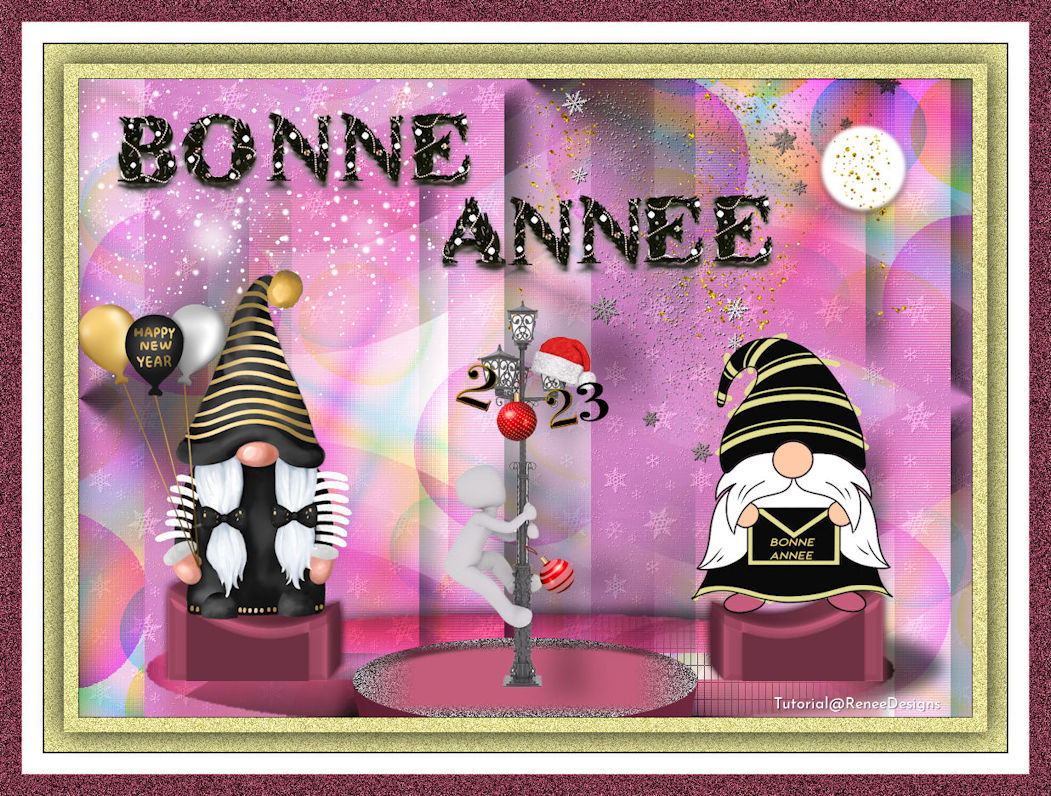
Let's start the lesson

-Preparation
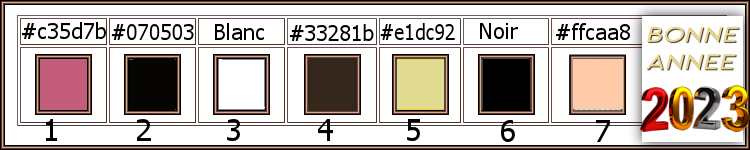
-Material Properties: Set your foreground color to color #c35d7b=color 1 – Set your background color to color #070503=color 2
1. File: Open a transparent image in this size : 1050
x 750 Pixels
2. Flood Fill Tool
 –
Fill the layer with the foreground color #c35d7b=color 1 –
Fill the layer with the foreground color #c35d7b=color 1
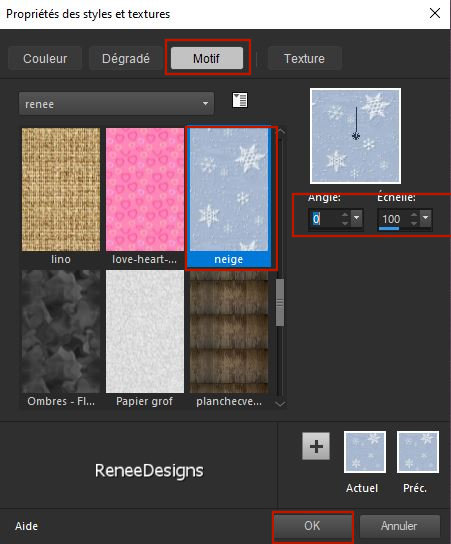
Color Palette- Open your pattern ''Neige'' in your PSP
Foreground Properties- Set the foreground color to pattern and select ‘’Neige’’ with these settings.
3. Layers- New Raster Layer
4. Flood Fill Tool
–Fill the layer with the pattern
5. Layers-Properties-Set the Blend Mode to " Overlay"
6. Effects – 3D-Effects – Drop Shadow with these settings: 1/1/50/2 Color Black
7. Layers- Merge- Merge Down
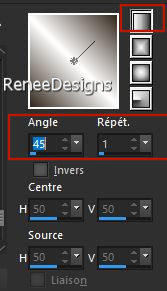
- Properties foreground- Reset foreground color to#c35d7b=color 1
- Change material of the foreground into a Foreground- Background radial gradient with these settings

8. Layers- New Raster Layer
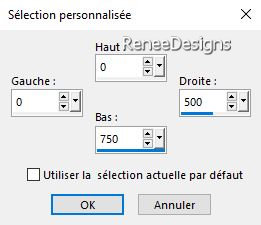
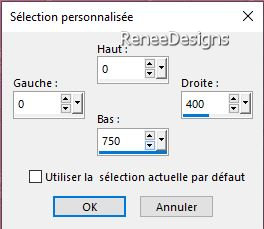
9. Activate Selection Tool -Custom Selection (S) with these settings

10. Flood Fill Tool
–
Opacity 70% –
Fill the selection with the gradient
11. Effects – Textureffects – Blinds use the settings below– Color #ffffff=3

12. Effects - Plugins - Alien Skin EyeCandy 5 - Impact Drop Shadow-Blury
using the default settings

13. Layers- New Raster Layer
14. Activate Selection Tool -Custom Selection (S) with these settings
15. Flood Fill Tool
–
Opacity 70% – Fill the selection with the gradient
16. Effects - Plugins - Alien Skin EyeCandy 5 - Impact Drop Shadow-Blury
using the default settings
17. Layers-Properties-Set the Blend Mode to " Multiply "
18. Layers- Merge- Merge Down
19. Effects- Image Effects- Seamless Tiling using the default settings
20. Layers-Properties-Set the Blend Mode to " Hard Light " - Reduce the Opacity of this layer to 81%
- Material Properties:
Set your foreground color to color #33281b=color 4 – Set your background color to color #ffffff=color 3
-Change material of the foreground into a Foreground- Background linear gradient with these settings
21. Layers- New Raster Layer
22. Flood Fill Tool
–
Opacity 100% –
Fill the layer with the gradient
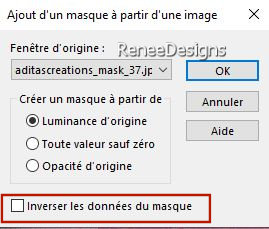
23. Layers- New Mask Layer -From Image and select Mask ‘’
aditascreations_mask_37.jpg’’
- Layers- Merge- Merge Group
24. Effects - Plugins– Xero – Fritillary use the settings below
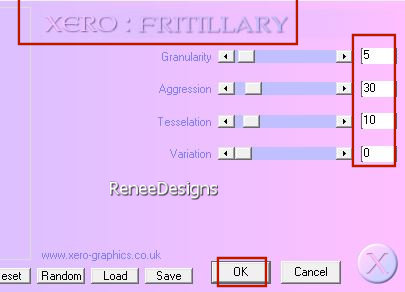
- Repeat this filter a second time
25. Effects – Plugins - FM Tile Tools – Blend Emboss using the default settings
26. Effects – 3D-Effects – Drop Shadow with these settings:4/ -5 /
72 /14 Color #c35d7b=color 1
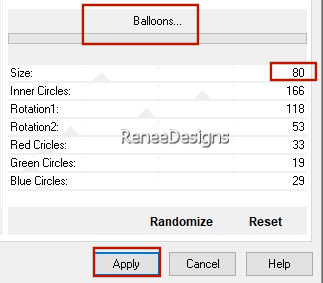
27. Effects - Plugins - Filters in Unlimited 2.0 - Two Moon - Balloons..use the settings below.
- Stay on the mask layer -Group - Raster 3
28. Selections –load/save selection –load selection from disc and select my selection: ‘’BA-2023’’
29. Selections- Promote selection to layer
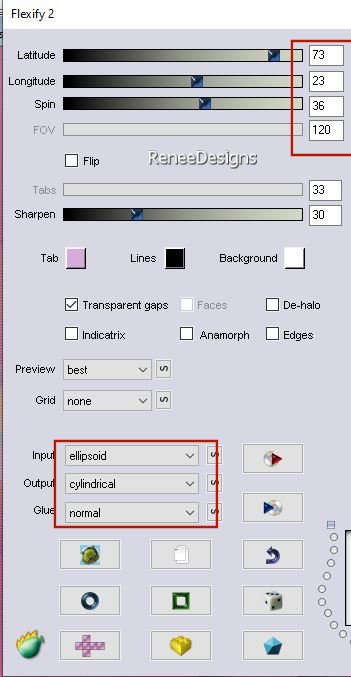
30. Effects – Plugins – Flaming Pear – Flexify 2 use the settings below
31. Effects – Edge Effects - Enhance
32. Effects - Plugins - Filters in Unlimited 2.0 - &<BKg Designer sf10
II> - Guidelines with these settings: 106/6/128
33. Effects – Edge Effects- Enhance
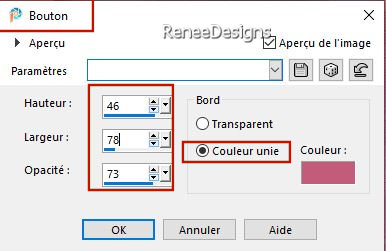
34. Effects –3D-Effects –
Buttonize with these settings- Color#c35d7b= 1
35. Layers-Properties-Set the Blend Mode to "Hard Light "

36. Effects – 3D-Effects – Drop Shadow with these settings: – 5/ 57/
50/25 Color Black
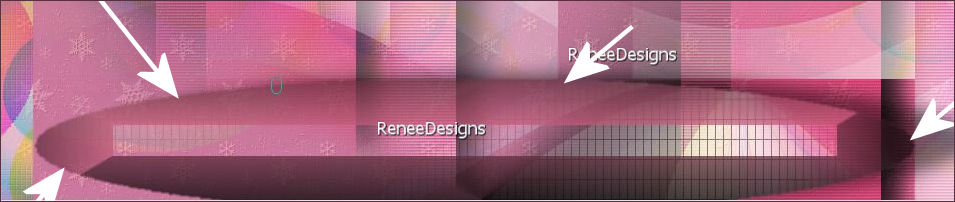
37. Activate Soften Brush use the settings below (
to soften the edge of the oval)

Move the brush along the frayed edge to smooth it out a bit
38. Layers- New Raster Layer
39. Selections –load/save selection –load selection from disc and select my selection: ‘’BA-2023-1’’
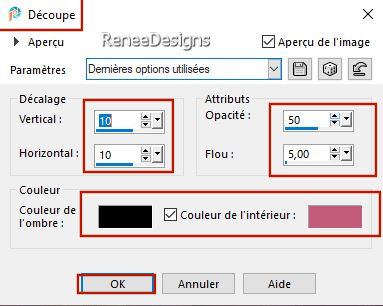
40. Effects – 3D-Effects –Cutout use the settings below-Color Black and #c35d7b=color 1
41. Effects - Plugins - Filters in Unlimited 2.0 - Italian Editors
Effect - Disturbo con dissolvenza sui Bordi : 255/94
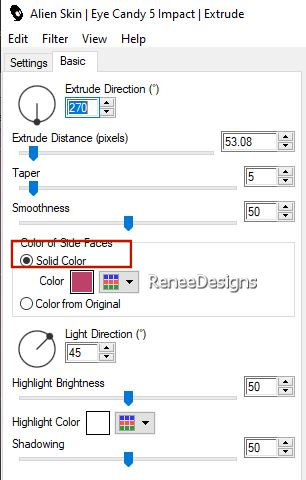
42. Effects - Plugins - Alien Skin EyeCandy 5 - Impact - Extrude
use the settings below-Color #c35d7b=1
43. Open the Tube ‘’Renee-TUBES-Bonne-Annee-2023- Plot’’ -Edit - Copy- Activate your work -Edit - Paste as a new layer
44. Pick Tool: (K) on your keyboard -Enter these parameters on the toolbar
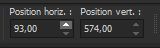 93/574
Press ( M ) to close the Pick Tool
45. Layers– Duplicate
46.Image - Mirror - Mirror Horizontal (Image - Mirror in older versions of PSP)
47. Layers- Merge- Merge Down
48. Effects – 3D-Effects – Drop Shadow with these settings: 57 / 0 / 50 /25 -Color #c35d7b=color 1
49. Layers- New Raster Layer
50. Selections –load/save selection –load selection from disc and select my selection: ‘’BA-2023-2’’
51. Flood Fill Tool
–Fill the selection with the background color #ffffff=color 3 ( 2 clicks)
52. Layers-Properties-Set the Blend Mode to " Screen "
53. Layers- New Raster Layer
54. Selections –load/save selection –load selection from disc and select my selection: ‘’BA-2023-3’’
55. Flood Fill Tool
-
Fill the selection with the gradient
56.Effects – 3D-Effects – Drop Shadow with these settings: 1/1/100/1 -Color Black
57. Open the Tube ‘’Renee-TUBES-Bonne-Annee-2023-lune’’ -Edit - Copy- Activate your work -Edit - Paste as a new layer
Place according to your taste
58. Open the Tube ‘’Renee-TUBES-Bonne-Annee-2023-lampadaire.pspimage’’
If you want to modify the tube the layers are not merged
– If you leave it as is – Layer- Merge- Merge Visible
- Edit - Copy- Activate your work -Edit - Paste as a new layer
- Move it in the right place( see finished image)
59. Effects - Plugins - Alien Skin EyeCandy 5 - Impact - Perspective
Shadow-Tab- Settings-User Settings -choose my- Preset : ‘’Renee-BA2023-Shadow’’
If you don't want to build your elves
- Open the Tube
‘’Renee-TUBES-Bonne-Annee-2023 – lutins’’
- Place the two elf figures in the right place and then go to point 92.
If you want to build it, go for it!
Put the image aside for now, we will need it later
60. File: Open a transparent image in this size : 600
x 600 Pixels
- Material Properties:
Set your foreground color to color #e1dc92=color 5 – Set your background color to color black = color 6
You will have several selections in order to let you choose the colors to create your character
61. Layers- New Raster Layer
62. Selections –load/save selection –load selection from disc and select my selection: ‘’BA-2023-4’’
63. Flood Fill Tool
–Fill the selection with color black =color 6
64. Layers- New Raster Layer
65. Selections –load/save selection –load selection from disc and select my selection: ‘’BA-2023-5’’
66.Flood Fill Tool
-Fill the selection with color black =color 6
67. Layers- New Raster Layer
68. Selections –load/save selection –load selection from disc and select my selection: ‘’BA-2023-6’’
69. Flood Fill Tool
- Fill the selection with color black =color 6
70. Layers- New Raster Layer
71. Selections –load/save selection –load selection from disc and select my selection: ‘’BA-2023-7’’
72. Flood Fill Tool
-
Fill the selection with #ffffff=color 3
73. Layers- New Raster Layer
74. Selections –load/save selection –load selection from disc and select my selection: ‘’BA-2023-8’’
75. Flood Fill Tool
- Fill the selection with color black =color 6
76. Layers- New Raster Layer
77. Selections –load/save selection –load selection from disc and select my selection: ‘’BA-2023-9’’
78. Flood Fill Tool
-
Fill the selection with #c35d7b=color 1
79. Layers- New Raster Layer
80. Selections –load/save selection –load selection from disc and select my selection: ‘’BA-2023-10’’
81. Flood Fill Tool -Fill the selection with #e1dc92=color 5
82. Layers- New Raster Layer
83. Selections –load/save selection –load selection from disc and select my selection: ‘’BA-2023-11’’
84. Flood Fill Tool
-Fill the selection with #e1dc92=color 5
85. Layers- New Raster Layer
86. Selections –load/save selection –load selection from disc and select my selection: ‘’BA-2023-12’’
87. Flood Fill Tool
-Fill the selection with #ffcaa8=color 7
88. Layers- New Raster Layer
89.
Selections –load/save selection –load selection from disc and select my selection: ‘’BA-2023-4’’
90. Flood Fill Tool
–Fill the selection with color black =color 6
91. Text tool - Font and Text of your choice - write your text on the cover of the homemade elf or activate my text
(the 2 texts are at the elf figures ''Renee-TUBES-Bonne-Annee-2023 - lutins'', layer 6 and 7 of the tube )
Everything is in place
92. Layer- Merge- Merge Visible
- Image - Resize to 57 %- Resize all layers
- Edit-Copy
- Activate your minimized image (the original).
93. Edit - Paste as a new layer – Move the tube in the right place
94. Renée has a separate folder with tubes you can use
95. Open the Tube ’’ Renee-Tubes-Texte’’ -Edit - Copy- Activate your work -Edit - Paste as a new layer
- Place to your liking
96. Layers- Merge- Merge Visible
97. Image - Add borders-Symmetric checked: 1 Pixel -Black
EDIT- COPY
98. Open the Tube ‘’ Cadre’’ in your Psp – Edit - Paste into Selection (Image is still in your PSP memory)
- Paste the author's watermark on your work and your own watermark.
- Layers- Merge- Merge All (flatten)
84. Image - Resize to 85% -Resize all layers
- Save as JPG
I hope you enjoyed this lesson
Renée
This lesson was written by Renée
22/11/2022
Edited and Update
in
*
Any resemblance with an existing lesson is a coincidence
* Do not forget to thank the people who work with us and for us
-I have appointed the tubeurs and translators
Thanks
|
 Translations