|
Let's start the lesson with a Happy New Year -2016
Material Properties:Set your foreground color to: #b8c7c2 - Set your background color to:#8b7b79
1.
Open the background image ‘’fond_2016’’- Window - Duplicate (or shift+D) - Close the original and proceed on the copy -Promote Background Layer =Raster 1
2.
Layers- Duplicate
3.
Effects- Plugins – L and K’s – Antonio
188/255
4.
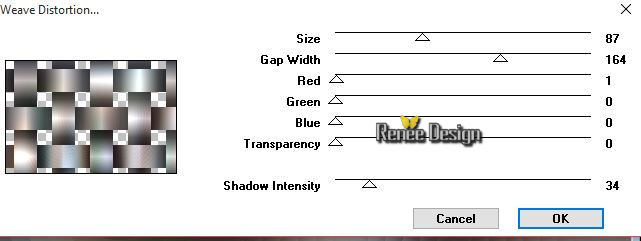
Effects- Plugins – VM Natural- Weave
Distorsion use settings shown below
5.
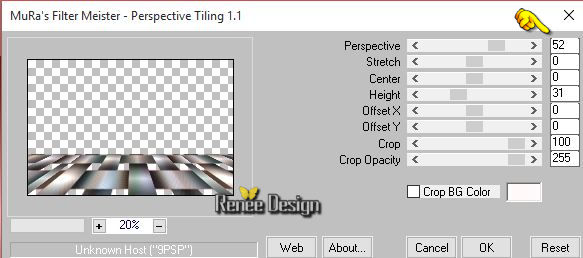
Effects-Plugins – Mura’s Meister – perspective
Tilling use settings shown below
6.
Repeat this filter- Mura’s Meister – perspective
Tilling / with the same settings
7.
Selections –load/save selection –load selection from disc and choose my selection: ‘’
selection_2016_1’’
8.
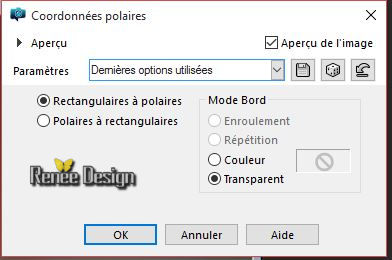
Effects- Distortions Effects-Polar Coordinates-Rectangular to Polar
9.
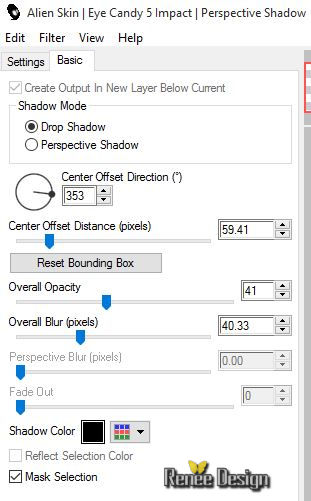
Effects- Plugins –EyeCandy 5 Impact – Perspective
shadow
–tab Settings/User settings choose my preset: » »2016_shadow »
Selections- Deselect All
10. Layers- New Raster Layer
11.Selections –load/save selection –load selection from disc and choose my selection:« selection_2016_2 »
12.
Properties Forground; Set your Foregroundcolor to foreground-/background linear gradient, with these settings
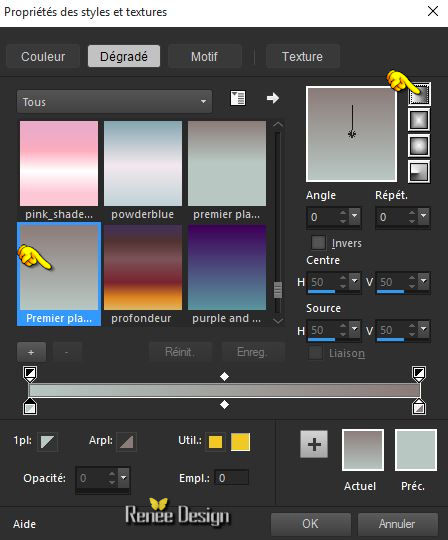
13.Activate Flood Fill Tool and fill the selection with the gradient
Selections- Deselect All
14.
Effects-Plugins – Toadies - What are
you 255/103
15. Effects- Edge Effects- Enhance More
16. Activate the tube ‘’ Renee_tube_escalier.pspimage’’
-Edit/ Copy-Edit - Paste as new layer on your working area (do not move it is in the right place)
17.Layers- Arrange- Move Down
18. Double click on this Layer and set the Blend Mode to "Screen" Set the layer opacity of this layer to 75%
- Activate top layer in the Layer palette= Raster2
19.
Selection Tool ( S ) Custom selection use settings below
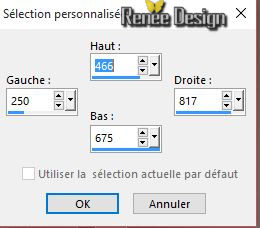
20. Edit-Cut !!Edit Paste as a new Layer
Selections- Deselect All
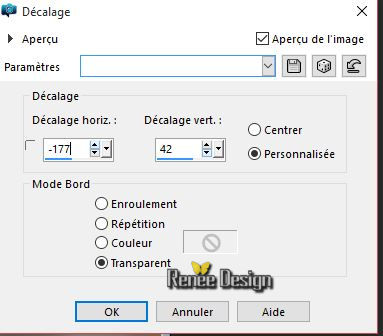
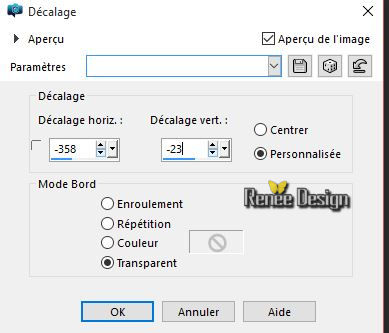
21. Effects- Image Effects- Offset with these settings
22. Effects- 3 D Effects- Drop Shadow with these settings :3/-3/65/8 black
23. Layers- Duplicate – Image Mirror
24. Layers- Merge-Merge Down
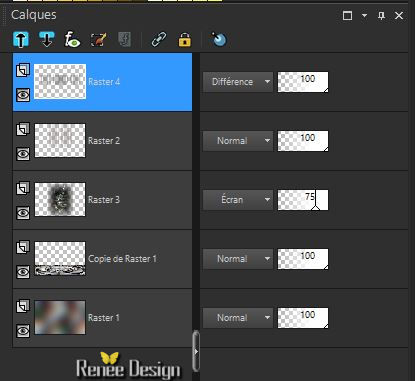
25. Double click on this Layer and set the Blend Mode to "Difference"
- Your Layer palette look like this now-You should have this result
26. Activate the tube ‘’ Renee_tube_2016_demi_oeuf’’
- Edit/ Copy-Edit - Paste as new layer on your working image
27. Effects- Image Effects- Offset with these settings

28.Layers- Duplicate
29.
Selections- Select All
-
Selections - Float
Selections – Defloat.
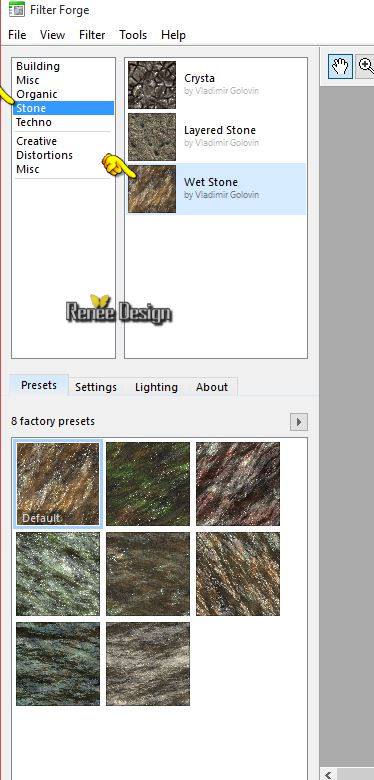
30. Effects- Plugins– Filtre Forge /Stone Web stone
It may be that this filter returns an error code, click OK and the filter will work
31.Effects- Edge Effects- Enhance More(repeat a second time)
Selections- Deselect All
32. Double click on this Layer and set the Blend Mode to "Screen"
33. Layers- Merge- Merge- Down
34. Double click on this Layer and set the Blend Mode to "Hard Light "
35. Activate the tube « Renee_tube_2016_terre_bulle.png »
- Edit/ Copy-Edit - Paste as new layer on your working image
36. Effects- Image Effects- Offset with these settings
37.
Effects –Plugins- Eyecandy 5 Impact – BlackLight /-tab Settings/User settings choose my preset:
« 2016_blacklight”
- Properties Foreground-
change the foreground color to #ffffff
38. Layers- New Raster Layer
39. Brush Tool and select my file:‘’agiBrush0260_xmas. in your psp
File- Export Custom Brush (Give it a name)
Activate Brush Tool and select my file in the list - ‘’agiBrush0260_xmas.PspBrush’’ use the settings below

-
Stamp as shown on the print screen below
by using your foreground color white
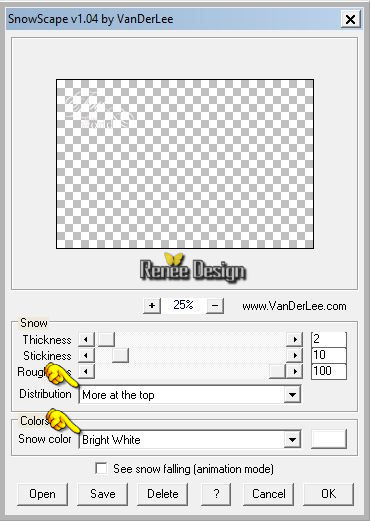
40. Effects-Plugins – Vanderlee - Snowscape use settings below
41. Layers- New Raster Layer
42.
Selections –load/save selection –load selection from disc and choose my selection:‘’
selection_2016_3’’
43. Activate Flood Fill Tool and fill the selection with the foreground color white
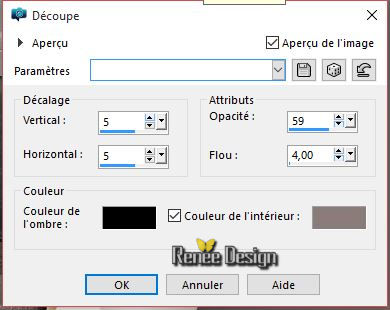
44. Effects
– 3 D Effects– Cutout use settings below / Colors Black and the BG-Color
Selections- Deselect All
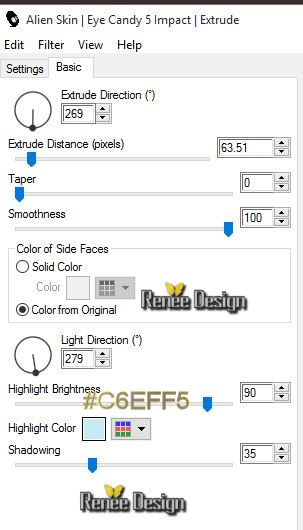
45. Effects- Plugins - EyeCandy 5 Impact - Extrude /-tab Settings/User settings choose my preset:
‘’’2016_extrude’’
46. Effects- 3 D Effects- Drop Shadow with these settings 3/4/100/8 white
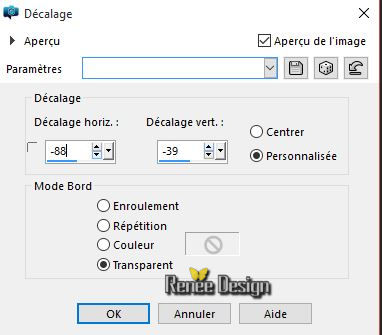
47. Effects- Image Effects- Offset with these settings
48. Activate the tube ‘’ Renee_tube_violon.pspimage’’
- Image
Resize to 65 %
- Edit/ Copy-Edit - Paste as new layer on your working image
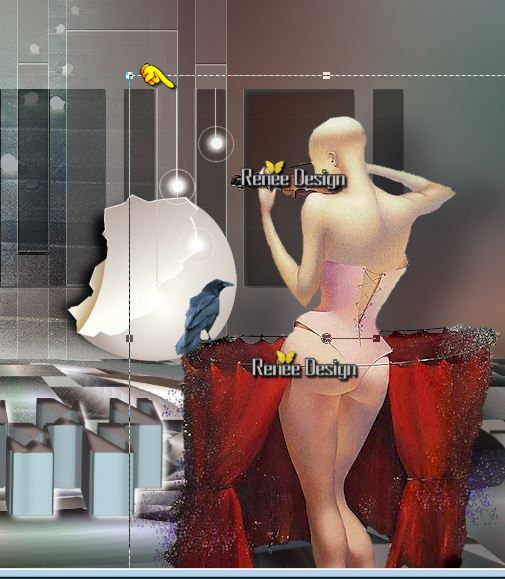
49. Activate Pick Tool (K) move it to the bottom right side as shown in the example below
50. Effects-Plugins - EyeCandy 5 Impact – Perspective
shadow use settings as shown below
51. Activate the tube ‘’ Renee_tube_2016_temps’’
-Edit/ Copy-Edit - Paste as new layer on your working image
-
Activate Move Tool (M) Place it in the upper right corner
- Put the image aside for now, we will need it later..
- Properties Foreground-
change the foreground color to black
52. Open a new tranparent Image 602 x 315 pixels -
53.
Selections –load/save selection –load selection from disc and choose my selection: »
selection_2016_4 »
54. Activate Flood Fill Tool and fill the selection with the FG-Color black (Rename this layer-
CONTOUR)
Selections- Deselect All
55.Activate Freehand Selection Tool-Lasso use settings below

-Select this little part (see example below)
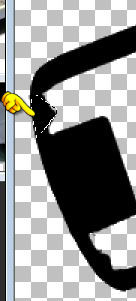
56.
Selections- Promote Selection to Layer
57.
Effects-Plugins – EyeCandy 5 Impact – Glass/-tab Settings/User settings choose my preset:
‘’2016_glass’’
Selections- Deselect All
58. Layers- Duplicate
- Activate Pick Tool (K) move it the right place as shown in the example below

59. Layers- Merge- Merge Down (Rename this layer: Taches _ fond)
60. Layers- New Raster Layer
61.
Selections –load/save selection –load selection from disc and choose my selection: ‘’
selection_2016_5’’
62. Open and activate the texture ‘’ 018_glass.pspimage’’ in your psp
- Edit/Copy-Edit Paste into selection
Selections- Deselect All
63.Effects- Edge Effects- Enhance
(Rename this layer: effet _interieur-bas)
64. Adjust-Blur-Gaussian Blur : Radius 20
65. Layers- New Raster Layer
66.
Selections –load/save selection –load selection from disc and choose my selection:/ ‘’
selection_2016_6’
-Texture ‘’ 018_glass.pspimage’’ Edit Paste into selection (Image is still in your PSP memory)
Selections- Deselect All
67.Effects- Edge Effects- Enhance
- Rename this layer: ''effet_interieur- haut"
68. Adjust-Blur-Gaussian Blur : Radius 20
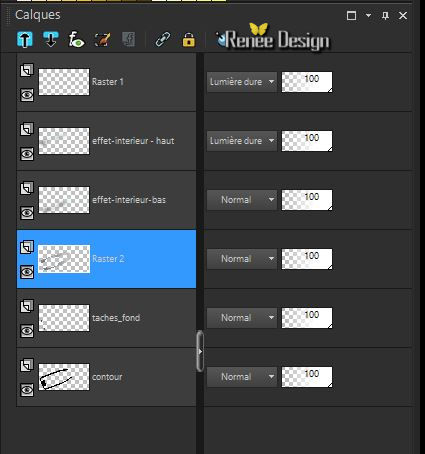
- On both layers-/Double click and set the Blend Mode to "Hard Light "!!!!(at the moment you can see nothing )
-Make layer ‘’taches _ fond ‘’ active
69. Activate the tube ‘’2016_bord_exterieur_bouteille’’
- Edit/ Copy-Edit - Paste as new layer on your working image
-
Activate Move Tool (M) move it the right place (see finished image)
- Your Layer palette look like this now-You should have this result
-
Activate the top of the layer palette
70. Activate the tube ‘’étiquette ‘’ Edit/ Copy-Edit - Paste as new layer on your working image
( -I have different logo, s
-but you can create others if you wish (see what is best for you ! )
-Activate your Pick Tool (K) and place it on the bottle
71. Layers- New Raster Layer
72.
Selections –load/save selection –load selection from disc and choose my selection: « selection_2016_7 »
73. Activate Flood Fill Tool and fill the selection with black
Selections- Deselect All
74. Activate the tube ‘’haut_bouteille ‘’
- Edit/ Copy-Edit - Paste as new layer on your working image
-Activate Move Tool (M) move it the right place (see screen )
You should have this result
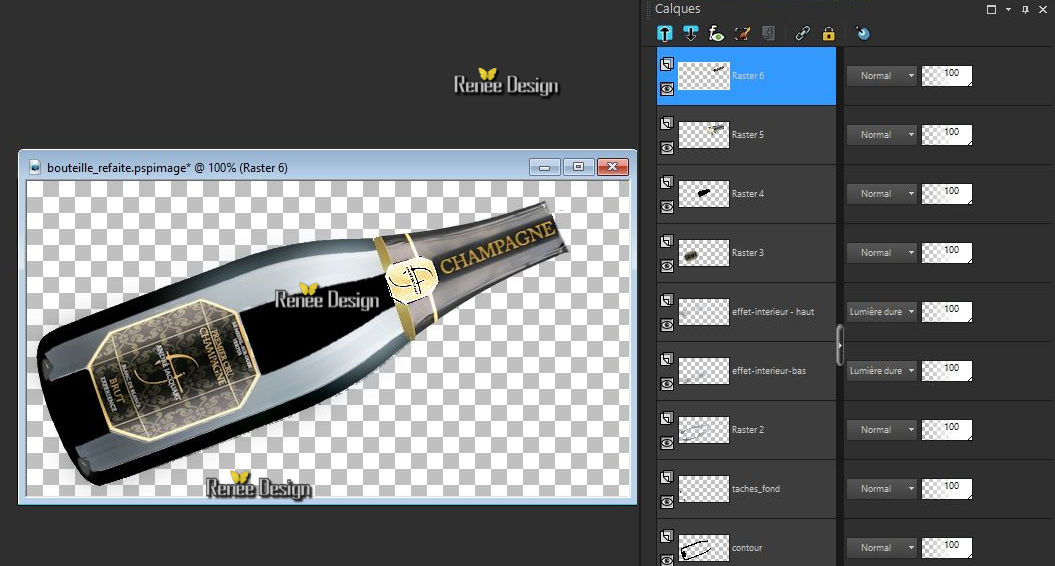
- Everything is in the right place?
75. Layers- Merge-Merge Visible
76. Click on your Text Tool – Font- Verdena
77. Properties Foreground: Change the foreground color into pattern and select motif: 704 or choose 2016. (see what is best for you)
-Write your text ‘’ CHAMPAGNE ‘’ Do you have problems with this? -Tube ‘’champagne’’ is into the zipfile
and paste as a new layer on your working area and move on the bottle
78. Layers- Merge- Merge Visible (the bottle)
79. Image
Resize to 70%
- Edit-Copy !!
- Activate your minimized image you created earlier on in the lesson
– Edit - Paste as new layer on your working image ( The bottle)
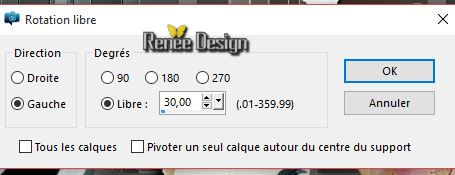
80. Image Free Rotate use settings shown below
81. Effects- Image Effects- Offset with these settings: H = - 106 and V = -70
82. Activate the tube ‘’ 2016_bouchon_eclat »
- Edit/ Copy-Edit - Paste as new layer on your working image
- Activate Move Tool (M) move it the right place (see finished image)
83. Double click on this Layer and set the Blend Mode to "Hard Light " -Set the layer opacity of this layer to 89%
84. Activate the tube ‘’2016_effet_brume’’
- Edit/ Copy-Edit - Paste as new layer on your working image
- With your move tool move to the bottom of your working image
85. Double click on this Layer and set the Blend Mode to "Soft Light "
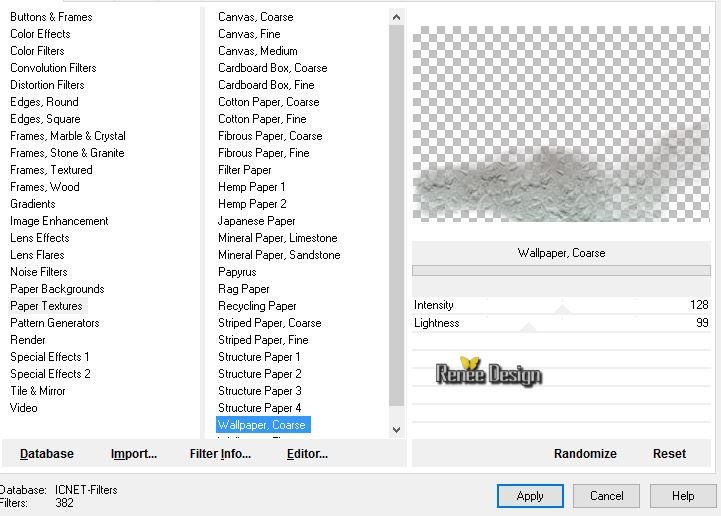
86.
Effects –Plugins-Unlimited - ICNER FITERS-Paper textures –Walpaper
Coarse
87. Effects- Edge Effects- Enhance
88. Activate the tube ‘’ Renee_tube_2016_verrechampagne’’
- Edit/ Copy-Edit - Paste as new layer on your working image
-With the Move Tool, move it in the right place
(see finished image)
-Everything is in the right place ??
89. Image - Add borders-Symmetric checked:1 pixel black
90. Image - Add borders-Symmetric checked:50 pixels white
91. Image - Add borders-Symmetric checked:1 pixel black
92. Image - Add borders-Symmetric checked:20 pixels white
93. Open my Pattern-texture ‘’motif 704 ‘’ in your psp
Change the foreground color into Pattern ''motif 704'' with these settings

94. Activate the Magic Wand and select the border of 20
pixels
95. Activate Flood Fill Tool and fill the selection with the pattern
Selections- Deselect All
96. Activate the Magic Wand and select the border of 50
pixels
97. Effects-Plugins – AAA Frame - Foto frame use settings below
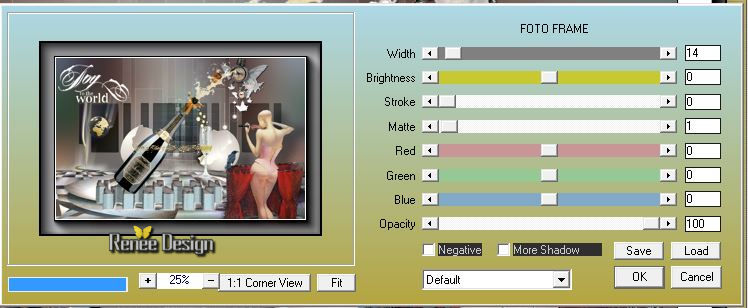
98. Repeat this Filter- Foto- Frame with the same settings
Selections- Deselect All
99. Image - Add borders-Symmetric checked:35 pixels white
100. Click on your Text Tool -Write your text -Or take the tube ‘’titre_renee_2016’’ -Paste as new layer on your working area
101.
Layers- Merge- Merge All
Image
Resize to 1015 pixels width
Save as JPG .
We do hope that you and your families have a
wonderful and great 2016!!!
All the best to you each
Take care
Hugs & Love Renée

I hope you enjoyed this lesson
Renée
This lesson was written by Renée 18/10/2015
Edited and Update
30 December 2015
*
Any resemblance with an existing lesson is merely a coincidence *
* Don't forget to thank the people who work for us and with us. I named the tubeurs - Testers and the translators.
Thanks Renée.
| 


 Translations


 When you see this logo the filter is imported in Unlimited
 I was surprised by your special creations and all your beautiful work in 2015
 All rights reserved