|
Let's start the lesson.


1. Open the background image ‘’Bonne_annee_2018_Fond ’’-
Window - Duplicate (or shift+D) - Close the original and proceed on the copy -Promote Background Layer = Raster 1
2. Effects – Plugins-Unlimited 2.0 - Filter Factory Gallery B -
Button Deluxe... using the default settings
3. Effects – Plugins- Unlimited 2.0 - Filter Factory Gallery G -
Noise Emboss : 35/14/41
4. Layers- New Raster Layer
5. Selections –load/save selection –load selection from disc and select my selection: ‘’
Bonne_annee_2019’’
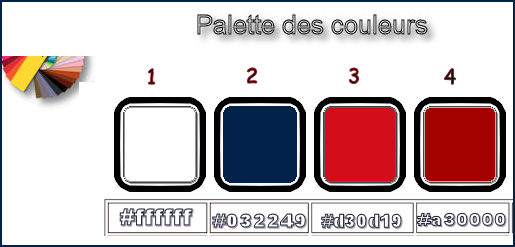
6. Activate the Flood Fill Tool – Flood Fill the selection with # d 30d19 = No 3 ( 2 clicks)
Selections- Deselect All
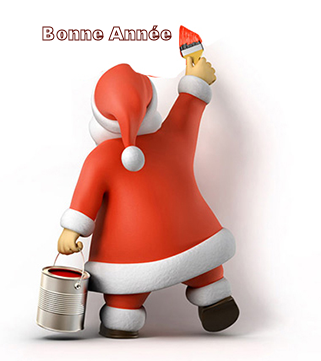
7. Open the tube ‘’Bonne_annee_2019_image 1’’
- Edit - Copy- Activate your work -Edit - Paste as a new layer
8. Effects- Image Effects- Offset with these settings: H = -200 and V = -
49
9. Open the tube ‘’ Bonne_annee_2019_image 2’’
- Edit - Copy- Activate your work -Edit - Paste as a new layer
- Do not move it is in the right place – Layers-Properties-Set the Blend Mode to " Multiply"
10. Layers- Duplicate
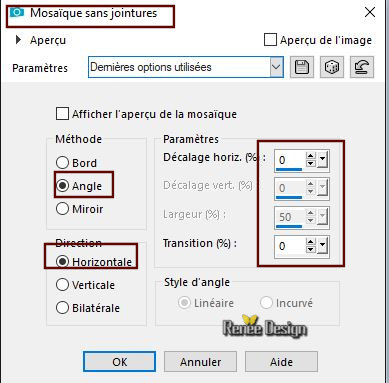
11.Effects – Image Effects-Seamless Tiling use the settings below
12. Open the tube ‘’ Bonne_annee_2019_image 3’’
- Edit - Copy- Activate your work -Edit - Paste as a new layer
13. Effects- Image Effects- Offset with these settings: H = 186 and V =
-96
14. Layers- New Raster Layer
15. Selections –load/save selection –load selection from disc and select my selection: ‘’
Bonne_annee_2019’_1’’
16. Activate the Flood Fill Tool – Flood Fill the selection with # a30000= No 4
Selections- Deselect All
17. Layers- Duplicate
18. Image Resize to 68 % All layers not checked
19. Effects –3 D Effects – Drop Shadow with these settings: 1/1/10/1 Color black
Place with your move tool as shown in screen below:
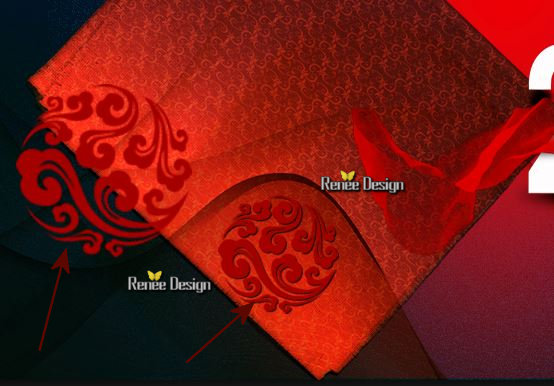
- In the Layer-Palette-activate the layer underneath
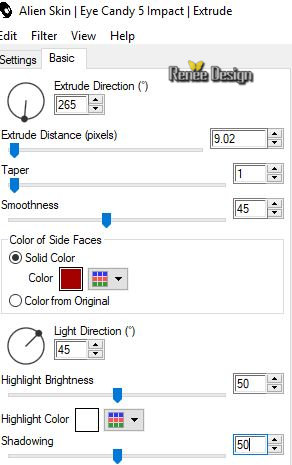
20. Effects –Plugins – Eyecandy 5 Impact –
Extrude use the settings below
21. Open the tube ‘’
Bonne_annee_2019_image 4.png’’
- Edit - Copy- Activate your work -Edit - Paste as a new layer
-Activate your Move Tool (M) place it in the top right corner
22. Layers- New Raster Layer
23. Selections –load/save selection –load selection from disc and select my selection: ‘’
Bonne_annee_2019’_2’’
24. Set your foreground color to color #ffffff .Activate the Flood Fill Tool – Flood Fill the selection with the foreground color #ffffff
Selections- Deselect All
25. Layers- New Raster Layer
26. Selections –load/save selection –load selection from disc and select my selection: ‘’
Bonne_annee_2019’_3’’
27. Activate the Flood Fill Tool – Flood Fill the selection with the foreground color #ffffff
28. Effects- Plugins – Eyecandy 5 Impact – Glass
–Tab Settings/User settings choose my – Preset ‘’BA_2019_Renee’’
(
If you work with other colors you can change the settings to choose the color that suits you)
Selections- Deselect All
29. Open the 4 tube ‘’ Bonne_annee_2019_image
5 / 6 / 7 / 8 ( or take Tube 33 ).png
-Edit - Copy- Activate your work -Edit - Paste as a new layer ( place to your choise )
30. Image - Add borders-Symmetric checked 2 Pixels Color # 032249 = No 2
31. Image - Add borders-Symmetric checked 20 Pixels Color #ffffff = No 1
32. Image - Add borders-Symmetric checked 1 Pixels Color #a30000 = No 4
33. Image - Add borders-Symmetric checked 50 Pixels Color #ffffff = No 1
34. Open the tube ‘’Bonne_annee_2019_image 9’’
-Edit - Copy- Activate your work -Edit - Paste as a new layer and move
Layers- Merge- Merge All (flatten)
- Write your own text


I hope you enjoyed this lesson
Renée
This lesson was written by Renée 28/10/ 2018
Edited and Update
2018
*
Any resemblance with an existing lesson is a coincidence
*
Do not forget to thank the people who work with us and for us I have appointed the tubeurs and translators
Thanks
*
|


 Translations


