|
New  Translations Translations
|
In [Dutch translated ] by Marion
Here

|
In [Englisch translated ] by Marion
Here

|
In [Italien translated ] by Graziella
Here

|
In [German translated ] by Marion
Here

|
Translations here
Juste
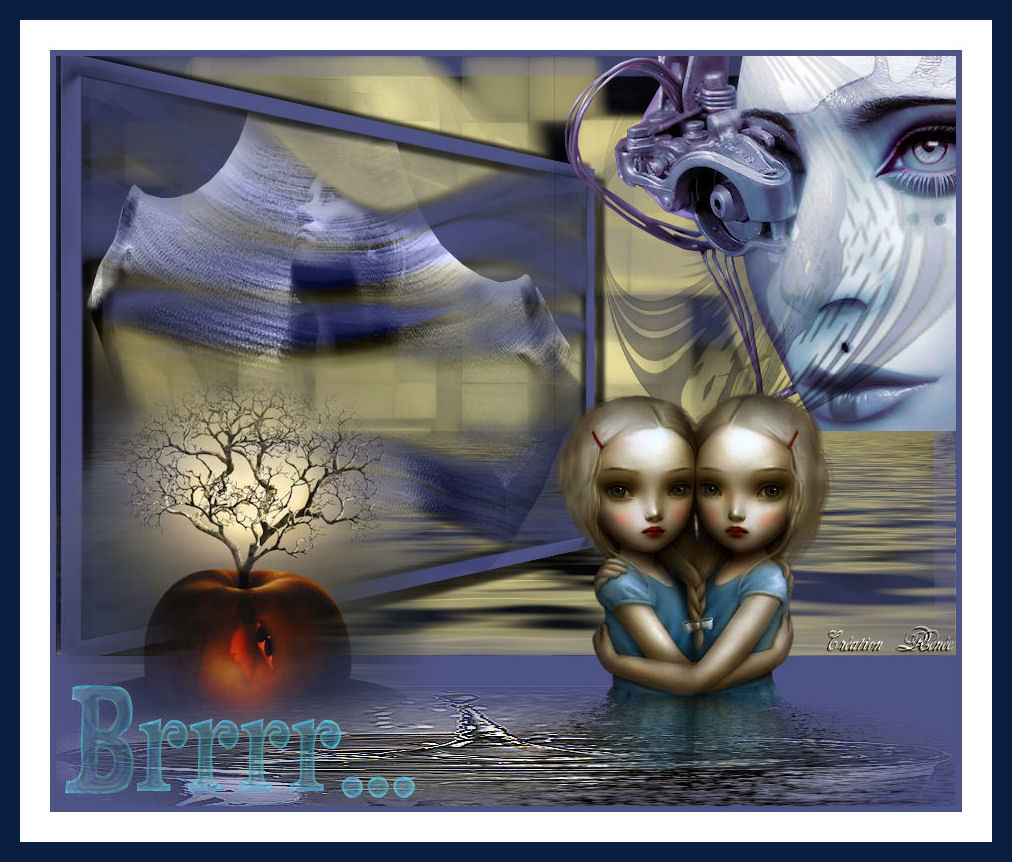
................BRR...........
 - -
|
These Plugins are used for this Tutorial
*
Picture Man Collection rubber
-Pinch ( included in the zip )
*
Alien Skin Eyecandy5- Motion
Trail
Flaming Pear -Flood
Andromeda -Perspective
Color Effex Pro.3-Graduated
Fog
You can find my filters 

Website
http://www.reneegraphisme.fr/ |
|
Tube are of
*
Silvina Vanessa Orsi-
JHanna and Mist
ATTENTION :
If it is your intention to share these tubes or these lessons in a group,club or forum please ask permission to the owner .
The tube may not be send without the lesson .
Please do not make changes to the tube, because this tube was made for this lesson only.
It is forbidden to share this tutorial without a link to the original lesson.
Thank you very much Renée
These tubes were received from tubeurs sharing groups
Or found by me searsching on the net.
I Am grateful to have been given permission these beautiful tubes so please use any copyright information as needed.
If one of these tubes is yours?
Contact me.
so I can make a link to your site or remove it.
Thank you very much Renée
|
|
Before starting *
* Open hardware Open / tubes and close duplicate originals
Minimizing Mask at the bottom of your PSP
Put filters into their appropriate folders
Brushes and other tools in their records - respective Psp
To import presets Eye Candy 5 / Double click on the file it will automatically move in the setting file Filter *
*
* For older versions of PSP
if you have an error message to open the tubes
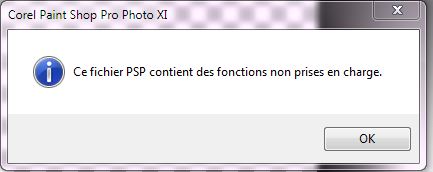
Click> OK and they will open
Thank you Renée
|
Let's start the lesson.
1. File: Open a new transparent image of 900 x 600 pixels
2. Color-palette:Set your foreground color to color #000000-Activate Flood Fill Tool and fill the layer with the foreground color #000000
3. Layers- New Raster Layer
4. Color Palette:Set your foreground to gradient and select
"GOLDGRAD "Linear -
( included in the zip )configured like this.
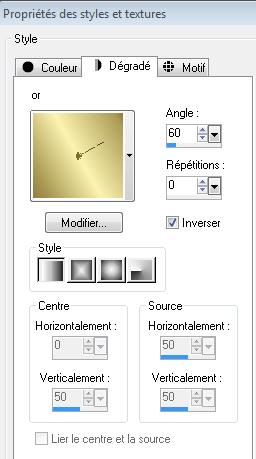
5. Activate Flood Fill Tool and fill the layer with the gradient
6. Layers- New Mask layer from Image and choose Mask:
-
"maskcameron F22"
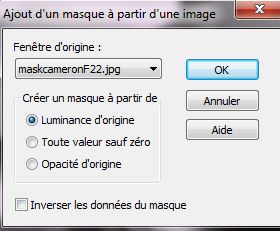
- Layer-Merge-Merge Group
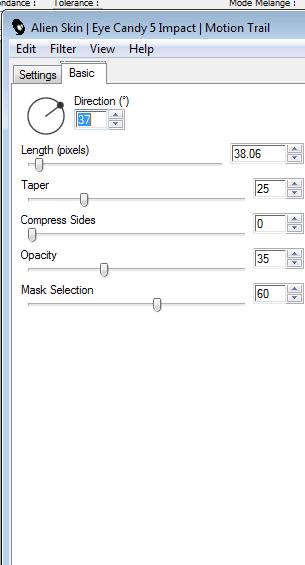
7. Effects- Plugins -EyeCandy5
Impact /Motion Trail /Settings-Basic use settings below
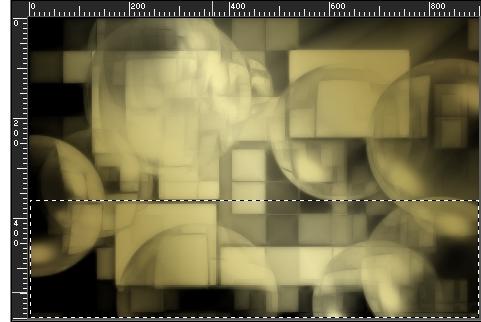
8. Activate Selection Tool-(S) Rectangle - Draw a selection like this
9. Effects- Plugins -Flaming pear /flood use settings below
10. Selections- Deselect All
11. Layers- New Raster Layer
Color-palette:Set your foreground color to color #4e5385-Activate Flood Fill Tool and fill the layer with the foreground color #4e5385
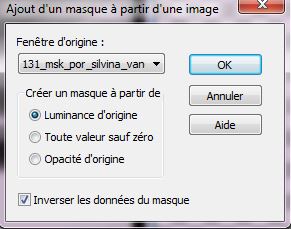
12. Layers- New Mask layer from Image and choose Mask:"131-mask-por silvina-vanessa
-orsi"
13.
Layer-Merge-Merge Group
14. Layers-Duplicate
- Layers- Arrange- Move Down (Group -Raster2)
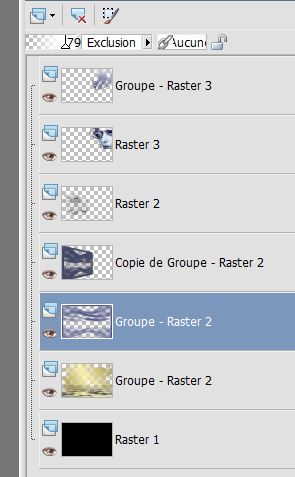
15. Layer Palette - Double click on this Layer and set the Blend Mode to "Exclusion " -Set the layer opacity of this layer to 79%
-Activate the top of the layer palette/"Copy of group Raster2 "

16. Effects- Plugins - Andromeda perspective -Side walls- It open
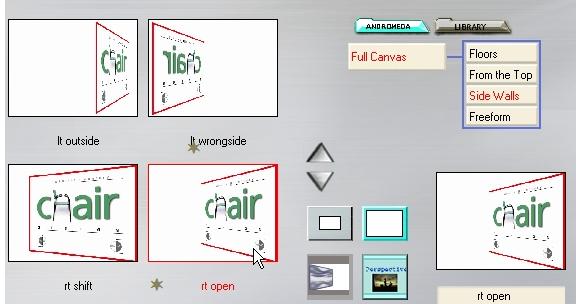
17.
Image Mirror
18. Effects- 3 D Effects-Drop Shadow with these settings: 10/10/50/5 black -Repeat Drop Shadow with these settings -5/-5/50/5 black
- Stay on this layer
19.Selections- Select All- Selections - Float
Selections – Defloat.
20. Selections-Modify-Contract with 20 pixels
21. Layers- New Raster Layer
22. Activate the tube
"218 -silvinaorsi-febrero-21-2009 "Edit/ Copy-Edit - Paste into selection
Selections- Deselect All
23. Layer Palette - Double click on this Layer and set the Blend Mode to "Luminance " -Set the layer opacity of this layer to 91%
24.
Layers- New Raster Layer /-Activate Flood Fill Tool and fill the layer with the foreground color #4e5385
25.Layers- New Mask layer from Image and choose Mask:
"191 msk-por-silvina-orsi"
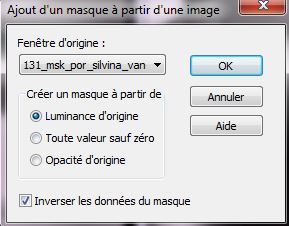
-
Layer-Merge-Merge Group
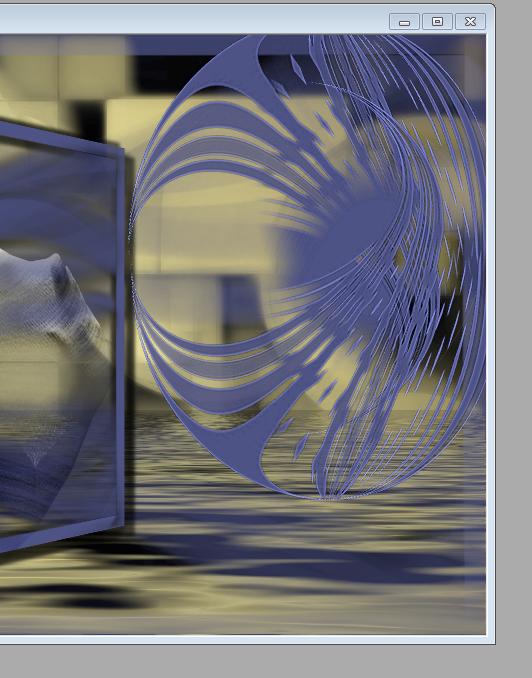
26. Effects- Geometric Effects
/Circle Transparent
27. Effects- Geometric Effects /Perspective Vertical with these setting : -24/ Transparent
28. Image- Resize to 70%
all layers not checked
29. Adjust-Sharpness-Sharpen More and move to the top right corner
30. Layers- Duplicate- Image Flip and move as shown in the example below
31.
Layers- Merge- Merge Down
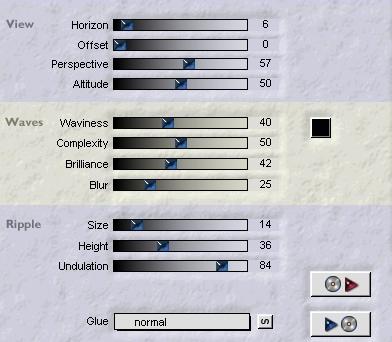
32. Effects- Plugins - Color efex Pro3.0 /Graduated Fog-Fog
method4 use settings below
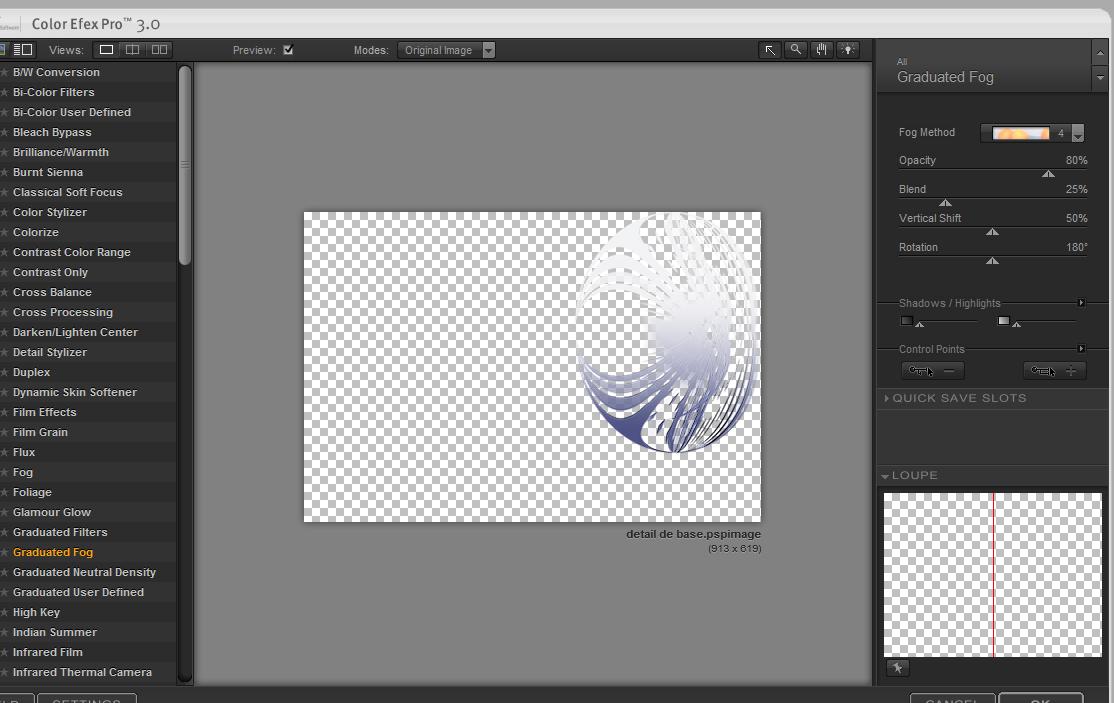
33.
Effects- Edge Effects -Erode
34. Image Resize 90 % all layers not checked and move
35. Activate the tube "147 silvina-vanesa-orsi- -febrero -5-2009"
Edit/ Copy-Edit - Paste as new layer on your working image
(Move to the top right corner and against the edge)
36. Layers- Arrange Move Down
37. Activate the top of the layer palette (Groupe Raster -3)- In the Layer- Palette- Double click and set the Blend Mode to "Multiply " -Set the layer opacity of this layer to 53%
-Your work and Layer Palette look like this now:
38.
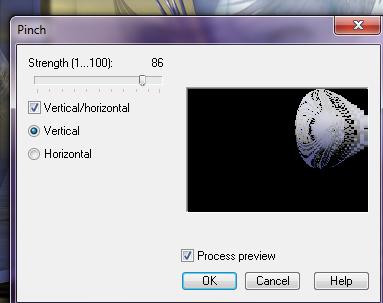
Effects- Plugins - Picture man -collection rubber
/pinch with these settings
**( included in the zip )
39.
Layers- Merge- Merge Visible
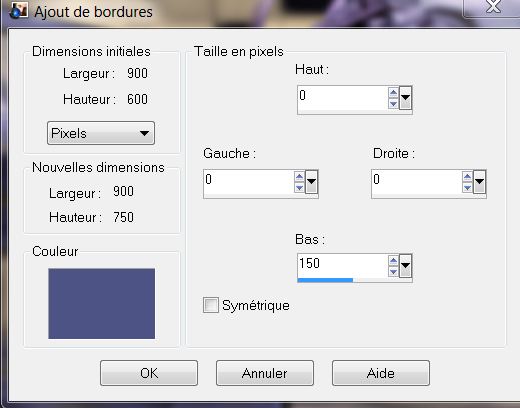
40. Image - Add borders-Asymmetric checked with the foreground color #4e5385
41.
Activate Selection Tool-(S) Rectangle - select that part of the border of 150 pixels
42. Layers- New Raster Layer -
43. Activate the
tube "flaque " - Edit/ Copy-Edit - Paste into selection
- Effects- Edge Effects- Enhance More
- Selections- Deselect All
44. Activer le tube "Miss apple
tree -dragon blu 0808" /Image Resize to 70%
- Edit/ Copy-Edit - Paste as new layer on your working and move to the left
45. Activate the tube "Jhanna 436" /Image- Resize to 70%
-Edit/ Copy-Edit - Paste as new layer on your working and move to the right
46 .Effects- Plugins - flaming pear /flood with these settings -attention GLUE
>>>>MULTIPLY (The filter settings "Horizon "depends where the tube is placed)

47.
Open the tube" texte brr "Edit/ Copy-Edit - Paste as new layer on your working and move to the left
48. Image - Add borders-Symmetric checked: 3 pixels #4e5385
49. Image - Add borders-Symmetric checked: 30 pixels #ffffff
50 Image - Add borders-Symmetric checked: 30 pixels #0a1e41
Save as JPEG
I hope you enjoyed this lesson
Renée
This lesson was written by Renée
Edited and Update
2009
Any resemblance with an existing lesson is a coincidence
* Do not forget to thank the people who work with us and for us
I have appointed the tubeurs and translators
Thanks Renée
2009
I am part of the Tutorial Writers Inc.
My tutorials are registered regularly
ReneeGraphisme_All rights reserved


|
Your Gallerie click here

|
|