|
Let's start the lesson.
C’est le cœur/This is the heart
- Preparation
- Material Properties: Set your foreground color to color #398b83= 1 – Set your background color to color #cc8789=2

1. Open the BG-Image ‘’
Fond-Le-cœur’’-Promote Background Layer = Raster 1
2. Effects- Image Effects- Seamless Tiling using the default settings
3. Adjust- Blur- Gaussian Blur-Radius 30
4. Layers- Duplicate
5. Effects- Plugins –
Unlimited 2.0 - &<Bkg Designer sf10 I> Circus Maximus:
170
6. Effects- Edge Effects- Enhance More
7. Effects-
Distortion Effects - Spikey Halo use the settings below
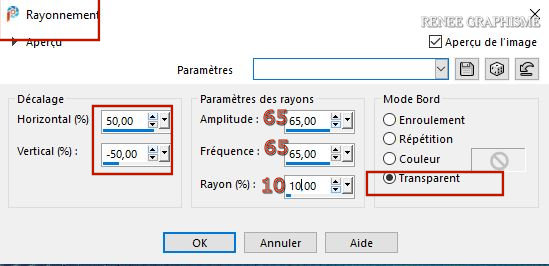
8. Layers-Properties-Change the Blend Mode to " Color "(Legacy)
9. Effects- Edge Effects- Enhance More
10. Layers- Merge- Merge Down
11. Effects –Plugins-
Unlimited 2.0 - [AFS IMPORT] - sqborder2 use the settings below
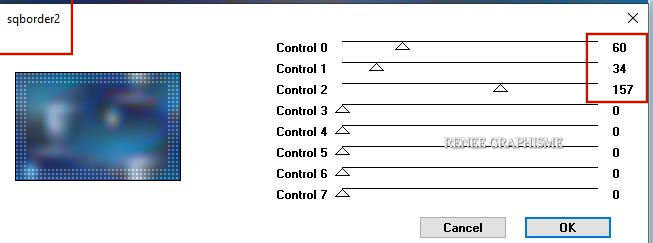
12. Effects- Image Effects- Seamless Tiling using the default settings
13. Layers- New Raster Layer
14. Effects -
Plugins – Medhi – Wavy Lab 1.1 use the settings below
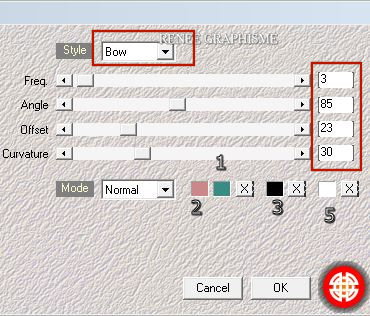
15. Effects –Plugins-
Unlimited 2.0 - &<Bkg Designer sf10 III> - Splash!..with these settings:
227/125/100/22/26
16. Effects –Plugins-
Unlimited 2.0 – Simple - Horizontal Grain
17. Layers-Properties-Change the Blend Mode to "Exclusion"
18. Layers- Merge- Merge Down
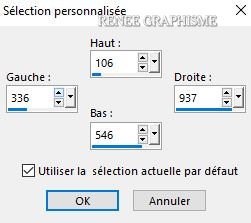
19. Activate Selection Tool -Custom Selection (S) -Rectangle with these settings
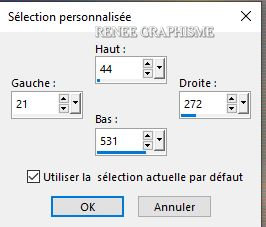
20. Selections-Promote selection to layer
Selections- Deselect All
21. Layers-Properties-Change the Blend Mode to "Exclusion"
22. Layers- Duplicate
- Layers- Merge- Merge Down
23.
Pick Tool: (K) on your keyboard -Enter these parameters for the X:87 and Y: 104 positions on the Toolbar
 87 / 104
- Press ( M ) to close the Pick Tool
25. Layers- Duplicate
26.
Image - Mirror - Mirror Horizontal (Image - Mirror in older versions of PSP)
27. Layers- New Raster Layer
28. Selections –load/save selection –load selection from disc and select my selection: "le cœur 1"
29.Flood Fill Tool
 -
Fill the selection with the Foreground color = 1 -
Fill the selection with the Foreground color = 1
30. Effects – Plugins - AP[Lines] Lines -
Silverlining use the settings below
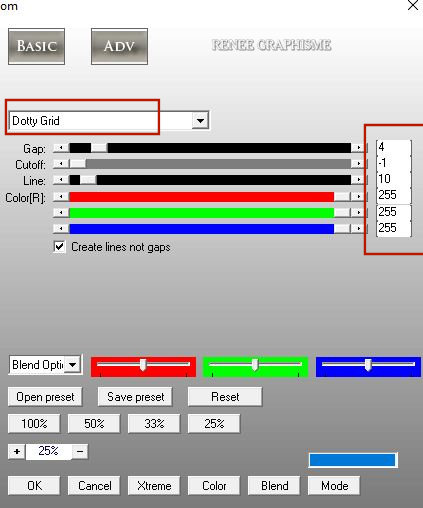
31. Effects–3 D Effects- Drop Shadow with these settings:
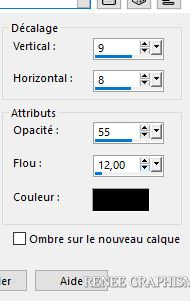
Selections- Deselect All
32. Layers-Properties-Lower the Opacity to 38%
33. Layers- New Raster Layer
34. Selections –load/save selection –load selection from disc and select my selection: "le cœur 2"
35. Flood Fill Tool
 -
Fill the selection with the Background color = 2 -
Fill the selection with the Background color = 2
36. Effects – Plugins - AP[Lines] Lines -
Silverlining use the settings below

37. Effects–3 D Effects- Drop Shadow with these settings:

Selections- Deselect All
38.Layers-Properties- Lower the Opacity to 38%
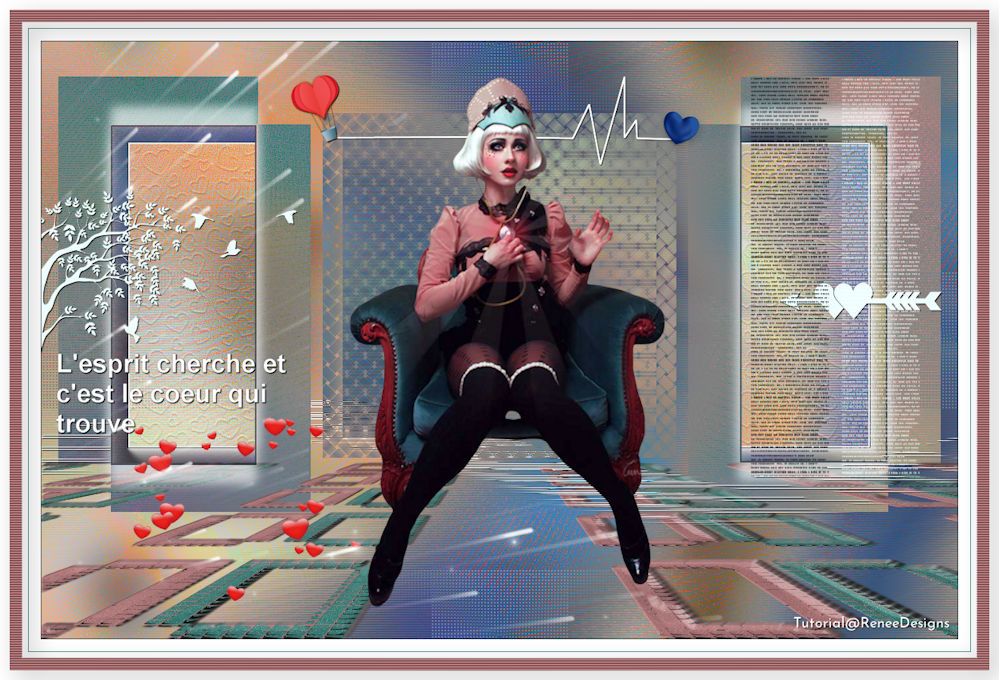
Your work and Layer Palette look like this now-You should have this result
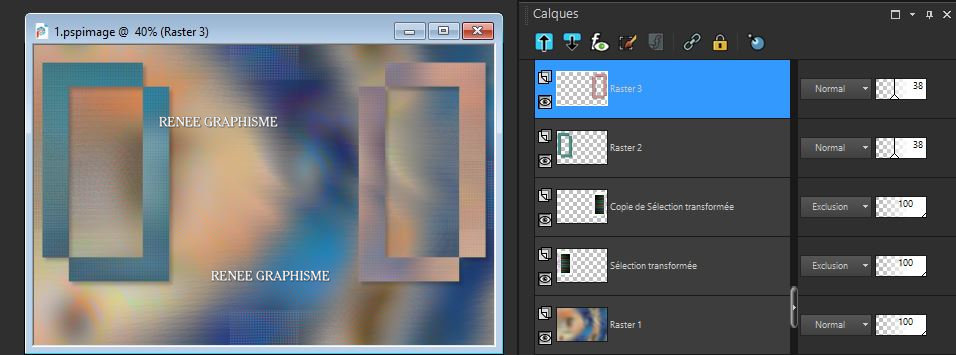
39. Layers- Merge- Merge Down (Attention !!!If the colors are not visible, duplicate this layer and continue with step 40)
40. Effects –Plugins- Unlimited 2.0 - It@lian Editors Effect -
Vetro - Vetro - www.italianeditors.com: 17/18/255
41. Effects –Plugins - Mura’s Meister –
Perspective Tiling using the default settings
42. Layers- Duplicate
43. Layers- Merge- Merge- Down
44. Activate the Pick Tool (K) – and select my file ‘’le cœur’’
OK

45. Effects- Plugins- Alien skin Eyecandy 5
Impact – Extrude–Tab-Settings-User Settings and select my file –Preset : ‘’le-cœur-extrude’’
Or manual settings as shown in the example below
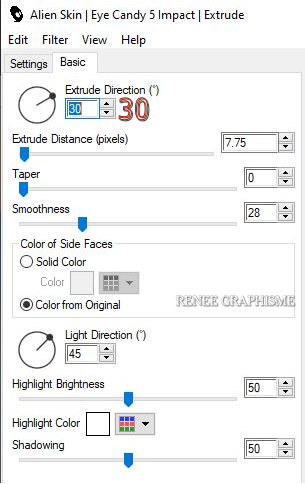 . .
- Activate the bottom layer in the layer palette = Raster 1
46. Selections –load/save selection –load selection from disc and select my selection: "le cœur 3"
47. Selections- Promote Selection to Layer
48. Layers- Arrange- Bring to Top
49. Effects - Texture Effects- Choose Texture
‘’Corel_08_021’’ (Cœur 05 included into the zipfile)
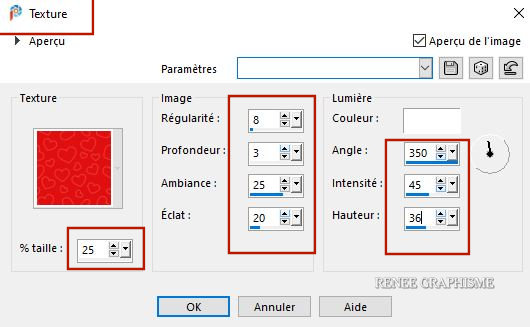
50. Adjust-Sharpness -Sharpen More
51. Effects – Plugins- AAA Frame – Foto Frame use the settings below
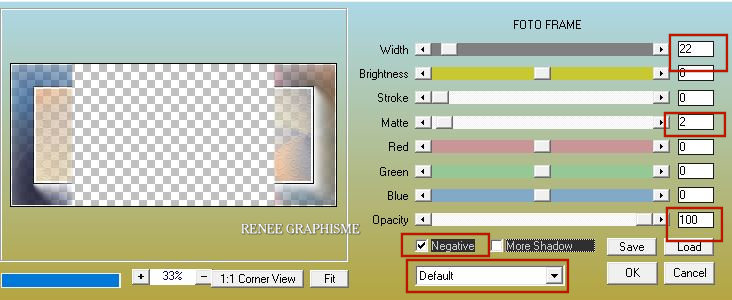
52. Layers- New Raster Layer
53. Set your Foreground color to color # 283c48=3
Flood Fill Tool
 –
Fill the selection with the Foreground color =3 –
Fill the selection with the Foreground color =3
54. Selections – Modify – Contract with 2 Pixels
DELETE
Selections- Deselect All
55. Layers- Merge- Merge Down
56. Effects– 3 D Effects- Drop Shadow with these settings: – 22/ 1 /62 /19
Color White
57. Layers-Properties-Change the Blend Mode to Hard Light – Lower the Opacity to
79%
58. Effects– 3 D Effects- Drop Shadow with these settings: 22/ - 1 /62 /19
Blanc
Stay on this layer
59. Activate Selection Tool -Custom Selection (S) -Rectangle with these settings
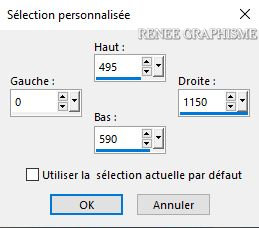
60. Effects –Distortion Effects– Weave with these settings
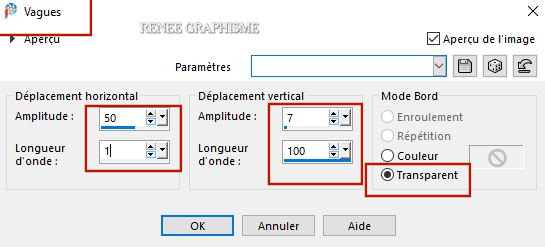
61. Selections- Promote Selection to Layer
62.Flood Fill Tool
 –Fill the selection with the Foreground color =3
Selections- Deselect All
63. Effects– 3 D Effects- Drop Shadow with these settings: 1/1/85/1 Color Black
64. Selections –load/save selection –load selection from disc and select my selection: "le cœur 4"
DELETE
Selections- Deselect All
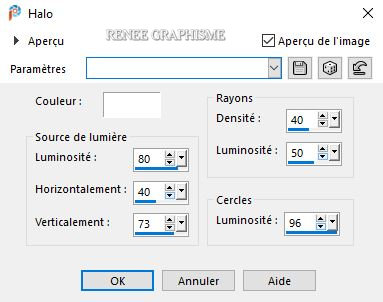
65. Effects – Illumination Effects-Sunburst use the settings below
66. Layers-Properties-Change the Blend Mode to " Hard Light " - Lower the Opacity to 75%
67. Effects- Edge Effects- Enhance More
68. Layers- New Raster Layer
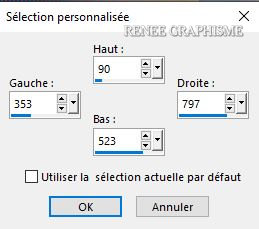
69. Activate Selection Tool -Custom Selection (S) -Rectangle with these settings
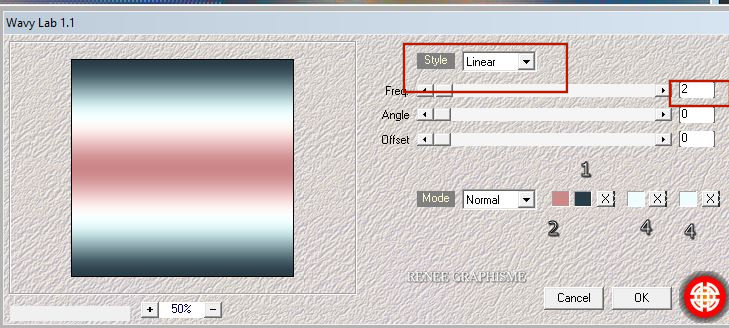
70. Effects - Plugins – Medhi – Wavy Lab 1.1 use the settings below
71. Effects –Plugins- Unlimited 2.0 - &<Bkg Designer sf10 I> -
Crosstitch using the default settings
72. Selections - Modify - Contract with 25 Pixels
73. Effects –Plugins- Unlimited 2.0 - &<Bkg Designer sf10 I> -
Cruncher 148/20
74. Effects– 3 D Effects- Drop Shadow with these settings: 10/ -7 /85 /35
Color Black
Selections- Deselect All
75. Effects– 3 D Effects- Drop Shadow with the same settings
76. Layers-Properties-Change the Blend Mode to "Exclusion" – Lower the Opacity to 87%
- Set your Foreground color to color #eefdfd= 4
77. Layers- New Raster Layer
78. Selections –load/save selection –load selection from disc and select my selection: "le cœur 5"
79.Flood Fill Tool
 Fill the selection with the Foreground color=4
Selections- Deselect All
80. Effects– 3 D Effects- Drop Shadow with these settings: 1 /1/ 85 /1 Color Black
81. Open the tube ‘’le coeur-image 1.pspimage’’ -Edit - Copy- Activate your work -Edit - Paste as a new layer
82. Pick Tool: (K) on your keyboard -Enter these parameters for the X:18 and Y: 391 positions on the Toolbar
 18
/ 391 18
/ 391
- Press ( M ) to close the Pick Tool
- Material Properties: Set your Foreground color to color Black – Set your Background color to color White
83. Layers- New Raster Layer
84.
Activate your Brush Tool and select the brush ‘’ texte-cœur ’’ - Size 500
- Stamp the Brush with the FG color Black to the top right
Layers-New Raster Layer !!! (then you can move it around) -Go a little to the right
Stamp the Brush with the Background color White (see finished image)
85. Layers- New Raster Layer
86.Flood Fill Tool
 -
Fill the Layer with the Background color White -
Fill the Layer with the Background color White
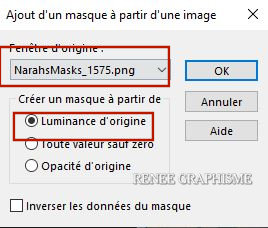
87. Layers- New Mask Layer - From Image and select Mask ‘’NarahsMasks_1575’’
- Layers- Merge- Merge Group
88. Activate Selection Tool -Custom Selection (S) -Rectangle with these settings
DELETE

Selections- Deselect All
89. Open the tube ‘’
Renee_TUBES_Cestlecoeur’’
- Image Resize with 80%
- Edit - Copy- Activate your work -Edit - Paste as a new layer
- Activate your Move Tool (M) move it in the right place (see finished image )
90. Open the tube ‘’le coeur-image2.pspimage’’
- Activate Image 1 and Image 2 of the tube -Edit - Copy- Activate your work -Edit - Paste as a new layer
Activate your Move Tool (M) move it in the right place (see finished image )
91. Image - Add borders-Symmetric checked 1 Pixel Color #283c48 =3
92. Edit- Copy !!!!
- Open the tube "Cadre /Frame " in your PSP
93. Edit - Paste as a new layer
94. Layers- Merge- Merge All
95. Image - Resize- Width 999 Pixels
Save as JPG
I hope you enjoyed this lesson
Renée
This lesson was written by Renée
17-07-2020
*
Any resemblance with an existing lesson is a coincidence
*
Do not forget to thank the people who work with us and for us I have appointed the tubeurs and translators
Thanks
*
|

 Translations


