|
Let's start the lesson
Carnaval 2022

Tubes for your own creations
Here
- Preparation
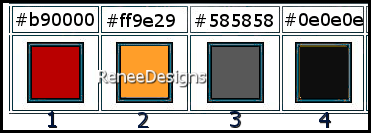
-Material Properties: Set your foreground color to color #b90000 = 1 Set your background color to color #ff9e29 = 2

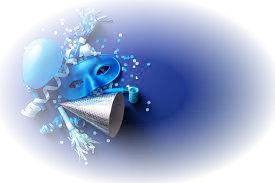
1. Open the Background Image ‘’Fond-Carnaval-2022 ‘’- Promote Background Layer =Raster 1
2. Effects –Plugins-
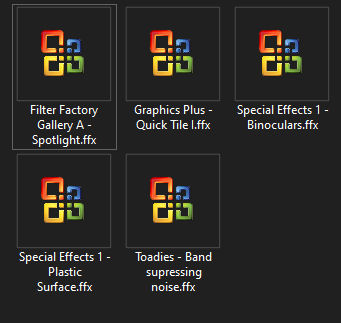
Unlimited 2.0 - Graphics Plus- Quick Tile I using the default settings
3. Layers- Duplicate
4. Adjust- Blur- Gaussian Blur: Radius 20
5. Effects –Plugins-
Unlimited 2.0 – Toadies - Band supressing noise with these settings: 214
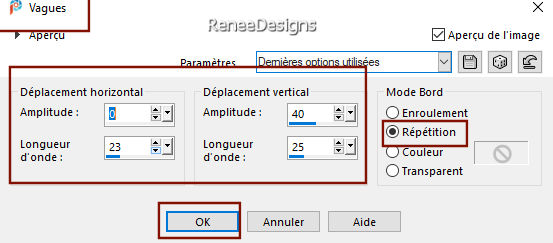
6. Effects- Distortion Effects - Wave use the settings below

7. Layers-Properties-Set the Blend Mode to " Luminance "-Lower the Opacity to 85%
- Activate the bottom of the layer palette =Raster 1
8.
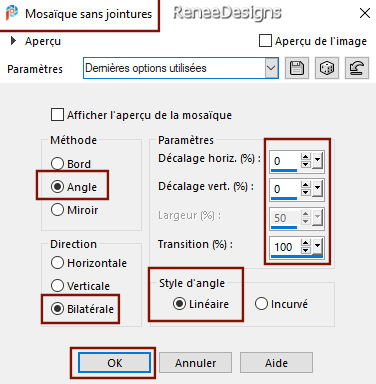
Effects- Image Effects- Seamless Tiling - Preset Side by Side
9. Layers- Duplicate
10.
Layers- Arrange- Bring to top
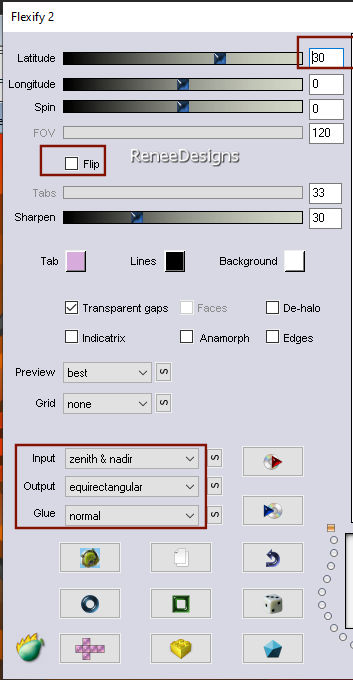
11. Effects – Plugins – Flaming Pear – Flexify 2 use the settings below

12. Objects - Align
– Bottom
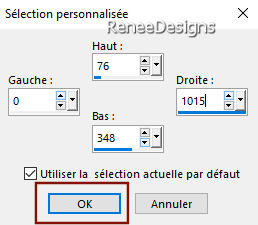
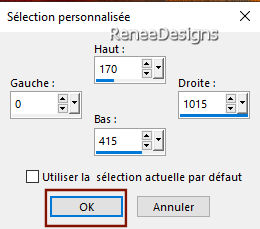
13. Activate Selection Tool -Custom Selection (S) -Rectangle with the same settings 

14. Edit- Cut !!!– Edit- Paste as a new layer

15. Image - Mirror - Mirror vertical ( Image - Flip in older versions of PSP)
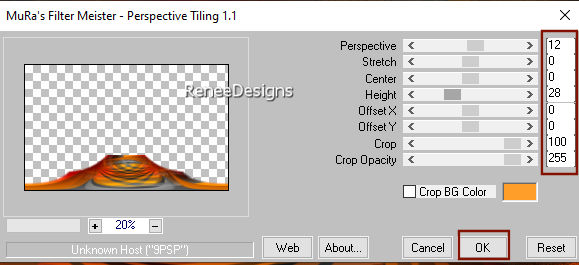
16. Effects – Plugins – Mura's Meister - Perspective Tiling use the settings below

17. Layers- Merge- Merge Down
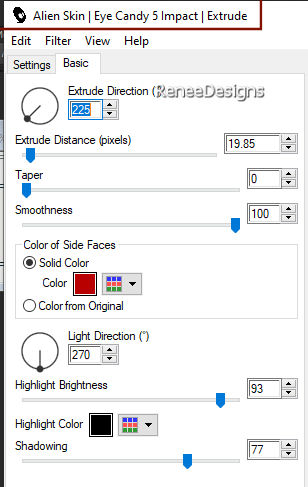
18. Effects - Plugins - Alien Skin EyeCandy 5 - Impact / Extrude use the settings below

19. Effects- 3 D-Effects- Drop Shadow with these settings: 0/0/100/20 Color black
-Materials: Change foreground color into #ffffff
20. Layers- New Raster Layer
21. Selections –load/save selection –load selection from disc and select my selection: ‘’Carnaval-2022-1’’
22. Flood Fill Tool  – fill the selection with the foreground color #ffffff ( 2 clics in the selection )

- Activate Copy of Raster 1 in the layer palette (Copy of Raster 1 is the second layer from the bottom in the layer palette)
23. Activate Selection Tool -Custom Selection (S) -Rectangle with the same settings

24. Selections- Promote selection to layer
25. Adjust- Blur -Gaussian Blur-Radius 10
26. Effects –Plugins-
Unlimited- ICNET-Filters -Special Effects 1-Binoculars with these settings:
56/55

27. Effects-3 D Effects-Drop Shadow with the same settings
28. Effects- Image Effects- Seamless Tiling use the settings below

29. Effects – Plugins – Xero – Clarity using the default settings
30. Effects –Plugins- Unlimited- ICNET-Filters -Special Effects
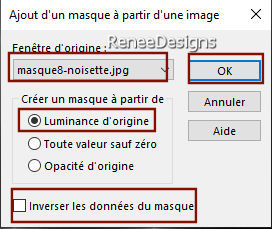
1-
Plastic Surface using the default settings
31. Layers-Properties-Set the Blend Mode to " Hard Light "-Lower the Opacity to 63%
- To replace the top of the layer-palette
32.Open the Tube ‘’ Carnaval-Renee-2022-Image1’’ - Edit - Copy- Activate your work -Edit - Paste as a new layer
33. Pick Tool: (K) on your keyboard -Enter these parameters on the toolbar
 82/78
82/78
Press ( M ) to close the Pick Tool
34. Activate the Magic Wand- Tolerance and Feather 0 – Click inside the small rectangle
-Material Properties: Set your foreground color to color #b90000 = 1 Set your background color to color #ff9e29 = 2
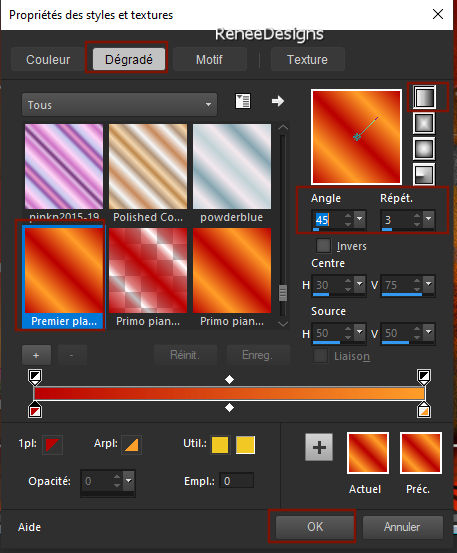
- Prepare a foreground/background linear gradient configured like this

35. Layers- New Raster Layer
36. Flood Fill Tool
 –
Fill the layer with the gradient –
Fill the layer with the gradient
37. Effects – Artistic Effects – Hot Wax Coating
38. Layers- New Raster Layer
39. Open the Tube ‘’
Renee-TUBES-Carnaval-55.’’ -
Edit - Copy- Activate your work -Edit - Paste into selection
40. Effects- 3 D-Effects- Drop Shadow with these settings: 0/0/100/20 Color black

41. Layers- Merge- Merge Down ( twice)
42. Effects- 3 D-Effects- Drop Shadow with these settings: 0/0/100/20 Color black
43. Open the Tube ‘’
Renee-TUBES-Carnaval-29.pspimage’’ -
Edit - Copy- Activate your work -Edit - Paste as a new layer
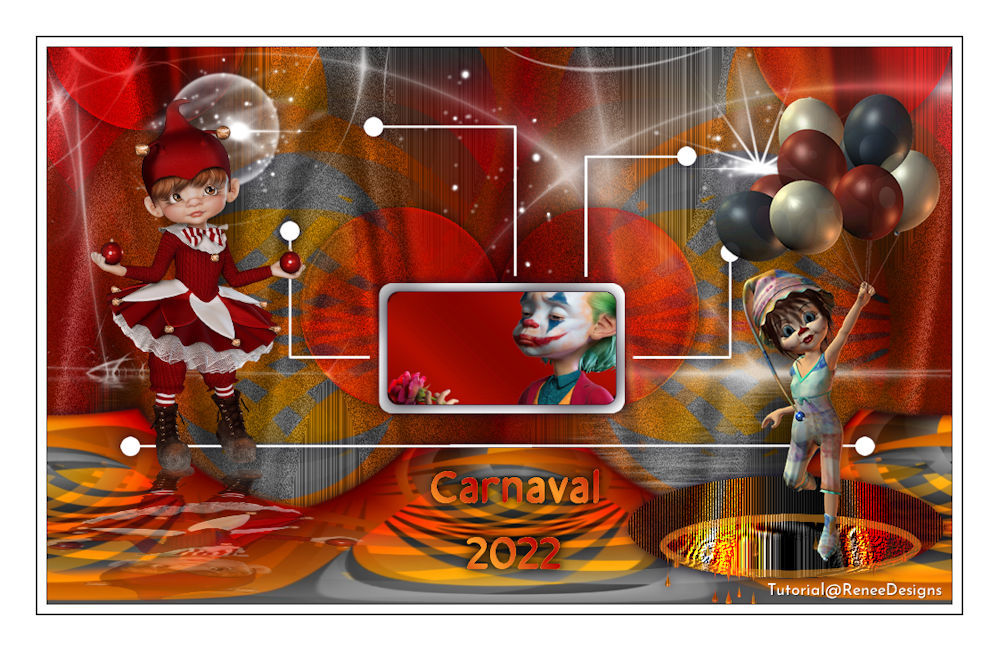
- Move it in the right place ( see finished image)
44. Effects –Plugins – Alien Skin EyeCandy 5 Impact- Perspective
shadow-Tab-Settings-User Settings and select my file- Preset : Carnaval-2022-Shadow’’
- Activate Copy of Raster 1 in the layer palette
(Copy of Raster 1 is the second layer from the bottom in the layer palette).
45. Layers- New Raster Layer
46. Materials: Change foreground color into #ffffff
Flood Fill Tool  -
Opacity at 50%
– Fill the layer with #ffffff -
Opacity at 50%
– Fill the layer with #ffffff
47. Layers- New Mask Layer- From Image and select Mask ’’masque8-noisette’’

- Layers- Duplicate
- Layers- Merge -Merge Group
48.Layers-Properties-Set the Blend Mode to " Overlay "
- Activate
Copy of Raster 1 in the layer palette (Copy of Raster 1 is the second layer from the bottom in the layer palette).
49. Selections –load/save selection –load selection from disc and select my selection: – ‘’Carnaval-2022-2’’
50. Selections- Promote Selection to Layer
51. Layers- Arrange- Bring to Top
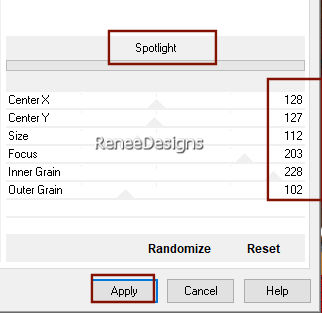
52. Effects -Plugins-
Unlimited 2.0 - Filter Factory Gallery A- Spotlight use the settings below

53. Layers- New Raster Layer
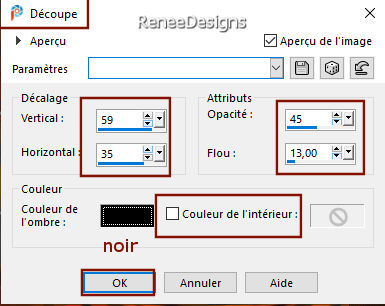
54. Effects-
3D-Effects– Cutout use the settings below/ Color black

55. Layers-Properties-Set the Blend Mode to " Darken "
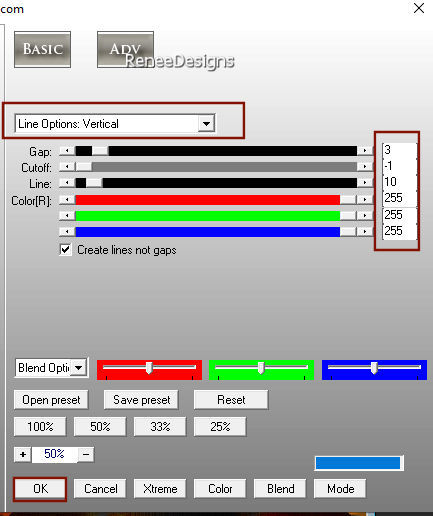
56. Effects – Plugins - AP[Lines] Lines – Silverlining use the settings below

57. Layers- Merge- Merge Down
Do not add a new layer
58. Selections –load/save selection –load selection from disc and select my selection:’’’Carnaval-2022-3’’
59.
Effects –Plugins- Unlimited- ICNET-Filters
-Special Effects 1-
Plastic Surface with these settings: 255/61/144/55
60. Effects-User Defined Filter – Emboss 6
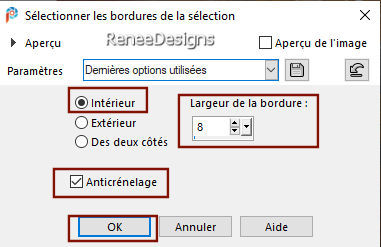
61. Selections- Modify-Select Selection Borders use the settings below

62.Flood Fill Tool
–
Opacity at 50%-
Fill the selection with the background color #ff9e29= 2(
reset the opacity of the paint pot to 100 %)
63.
Effects - Plugins - Alien Skin
EyeCandy 5- Nature – Drip –Tab-Settings-User Settings and select my file- Preset : ‘’Carnaval-2022-
Drip’’

64. Effects- 3 D-Effects- Drop Shadow with these settings: 0/0 /100 /20 Color black
65. Open the Tube ‘’
Renee-TUBES-Carnaval-14.’’
- Image -Resize to 70%.
- Edit - Copy- Activate your work -Edit - Paste as a new layer- Move it in the right place( see finished image)
66. Open the Tube " titre
" -Edit - Copy- Activate your work -Edit - Paste as a new layer-
Or write your own title - Place to your liking ( Font Renée used is included in the material )
67. Layers- Merge- Merge Visible
68. -Image - Add borders-Symmetric checked:1 Pixel Color 0e0e0e=4
- -Image - Add borders-Symmetric checked:10 Pixels Color White
- -Image - Add borders-Symmetric checked:2 Pixels Color #585858=3
- -Image - Add borders-Symmetric checked:40 Pixels Color White
- Paste the author's watermark on your work and your own watermark
69. Layers- Merge- Merge All (flatten)
70. Image- Resize 999 Pixels width
Save as JPG

That's it - Thank you / I hope you enjoyed this lesson
Renée
This lesson was written by Renée 04/01 2022
Edited and Update
2022
*
*
Any resemblance with an existing lesson is a coincidence
* Do not forget to thank the people who work with us and for us -I have appointed the tubeurs and translators
Thanks
|

 Translations


