|
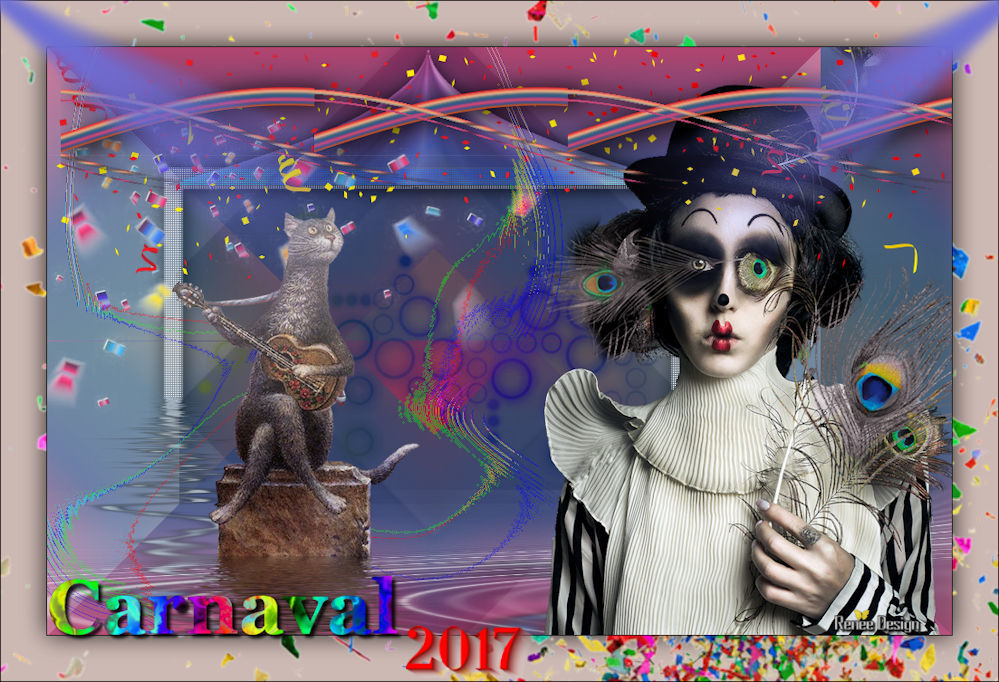
Let's start the lesson

-
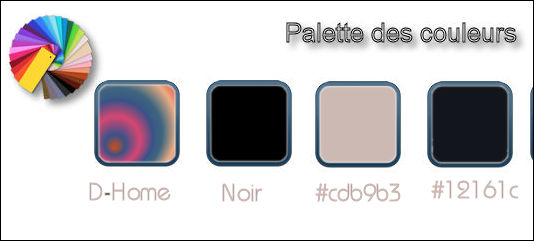
For this tutorial , we will need te following colors :
-
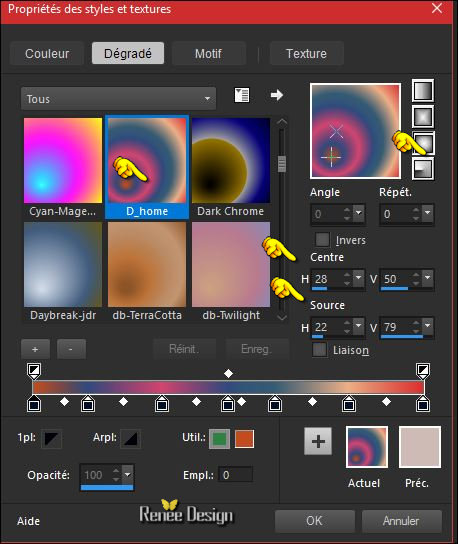
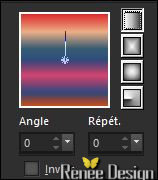
Color Palette: Set your Foregroundcolor to gradient and select : ‘D_home’’– Prepare a sunburst gradient configured like this.
Set your backgroundcolor to #000000
1.
File: Open a new transparent image 999 x 649 Pixels
2.
Activate Flood Fill Tool and fill the layer with the gradient 
3.
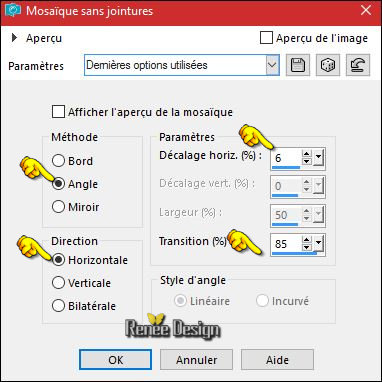
Effects- Image Effects- Seamless Tiling use settings below
4.
Effects -Plugins-Unlimited –ICNET FILTERS - Tile & Mirror-XY Offset
50% (positive)
5. Effects
–Plugins –Simple – Pizza Slice Mirror
6.
Selections –load/save selection –load selection from disc and select my selection: ‘’Carnaval_1’’
7.
Selections-Promote selection to Layer
8. Effects
–Plugins – KPT5 – KPT5 Noise/ Soft RGB - Noise
Mutation

Selections-Deselect All
9.
Layers-Properties-Set the Blend Mode to " Luminance Legacy "
10. Effects
–Plugins-Unlimited - It@lian Editors Effect- Effetto Fantasma
94/58
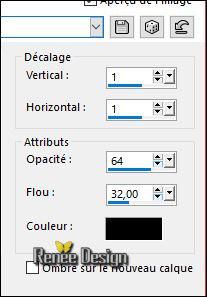
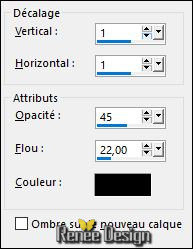
11. Effects – 3D Effects – Drop Shadow with these settings
- Activate the bottom layer in the layer palette = Raster 1
12.
Effects –Plugins- Unlimited - Toadies - *Sucking Toad* Bevel
II.2... 115/94/133
13.
Layers-Merge- Merge Visible
14. Effects
– Plugins ( or Unlimited )- Visual Manipulation- X-
Mirror 109/255
15.
Selections –load/save selection –load selection from disc and select my selection: ‘’Carnaval_2’’
16.
Selections-Promote selection to Layer
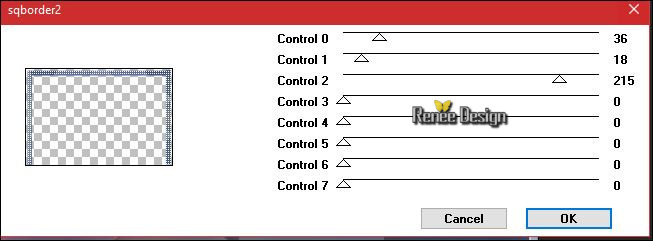
17. Effects-
Plugins – AFS[Import]-sqborder2 use settings below
Selections-Deselect All
18. Effects – 3D Effects – Drop Shadow with the same settings
19.
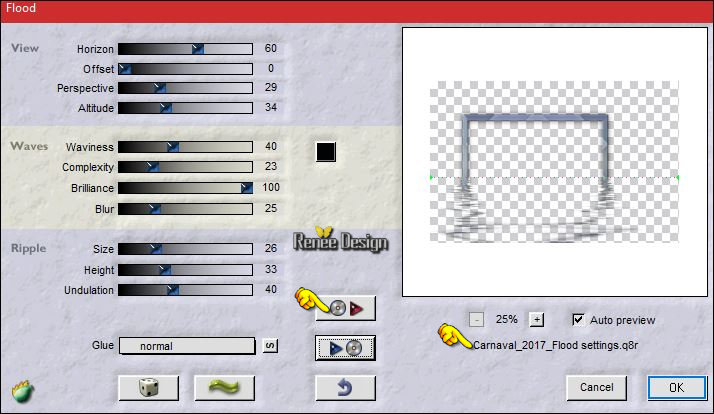
Effects –Plugins - Flaming Pear – Flood /Preset ‘’
Carnaval_2017_Flood settings.q8r’’
click on the red arrow select my file preset select my file preset 
can be used in any folder of your choice by clicking it. -3 Open it will be ok in your filter
Or manual settings below
20. Activate the tube ‘’Carnaval_2017_Image1’’-
- Edit - Copy- Activate your work -Edit - Paste as a new layer calque
-
Activate Move Tool (M) place against the bottom edge of your image
- Open the mask ‘’MASK-MD-04’’ in your PSP
21. Layers-New Raster Layer
22. Activate Flood Fill Tool and fill the layer with the background color black
23. Layers-New Mask layer-From image and select mask
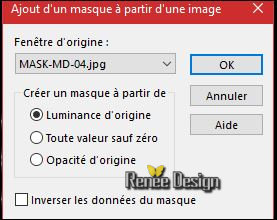
- Layers- Merge- Merge Group
24. Image- Negative Image
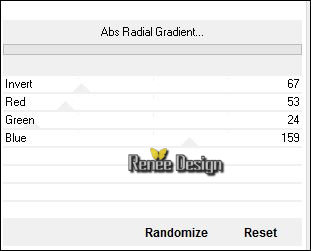
25.
Effects –Plugins - Unlimited - Alf's Power Grads-Abs Radial
Gradient...
26.Layers-New Raster Layer
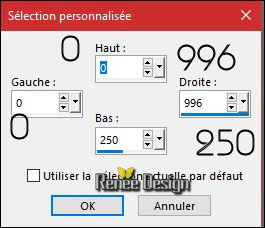
27.
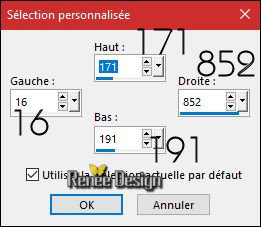
Activate Selection Tool -Custom Selection (S) -Rectangle with the same settings
28. Activate Flood Fill Tool and fill the selection with the gradient
Selections-Deselect All
29. Effects -Geometric Effects – Pentagon
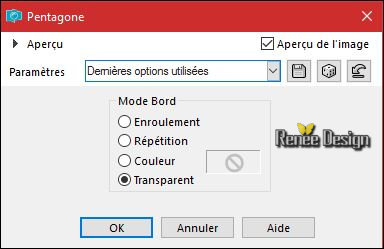
30. Repeat-Effects -Geometric Effects Pentagon
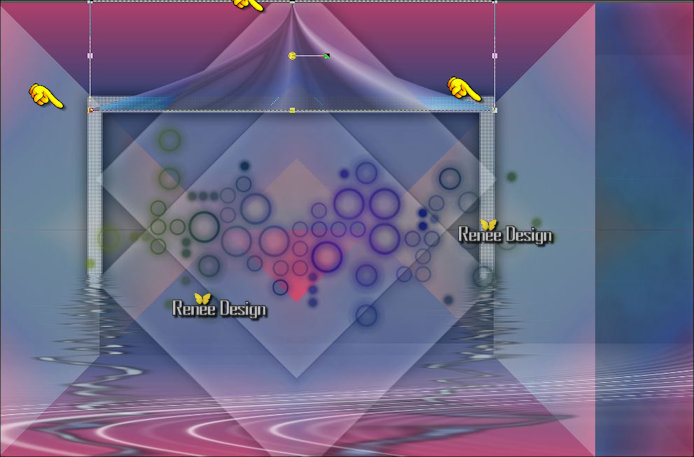
31.
Activate your Pick Tool (K) stretch on the both sides and upwards that it fits
– Position the tube like this:
(Hit the M key of your Keyboard to deselect the tool)
32.
Layers-Properties-Set the Blend Mode to " Luminance " -Set the Opacity of this layer to
87%
33. Effects – 3D Effects – Drop Shadow with these settings
34. Activate the tube ‘’ Renee_tube_-Juliette.pspimage’’
- Image
Resize to 75%
-
Edit - Copy- Activate your work -Edit - Paste as a new layer
- Move tool: place the tube to the bottom right side
35. Activate the tube ‘’ Carnaval_2017_Image2.pspimage’’
-
Edit - Copy- Activate your work -Edit - Paste as a new layer
- Activate Move Tool (M) place against the top edge of your image
36.
Open the tube ‘’
Renee_tube_46_gianlucamattia.pspimage”
- Edit - Copy- Activate your work -Edit - Paste as a new layer (do not move, it is in the right place)
37.
Adjust- Blur- Gaussian Blur: Radius 50
38. Image -
Mirror (CTRL+B)
39. Effects
-Plugins- (Or Unlimited )– Penta Com-
Bio 138
40. Effcts- Image Effects- Offset with these settings: H = - 187 and V = 0
-Set the Opacity of this layer to 40%
41. Layers- Merge- Merge Visible
-Color-Palette :Change your sunburst gradient into a linear gradient with these settings
42. Layers- New Raster Layer
43.
Activate Selection Tool -Custom Selection (S) -Rectangle with the same settings
44. Activate Flood Fill Tool and fill the selection with the gradient
Selections-Deselect All
45. Effects
– Distortion Effects – Wind -100 Right
46. Effects
– Distortion Effects -Weave with these settings
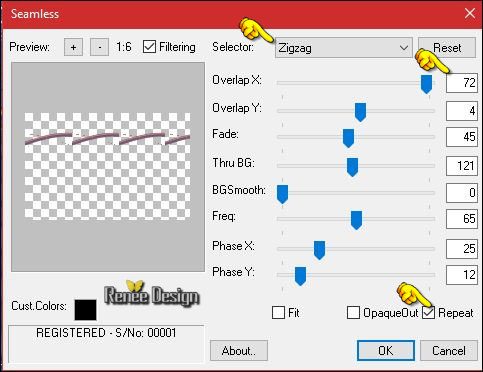
47. Effects
–Plugins –Mura Pro- Seamless use settings below
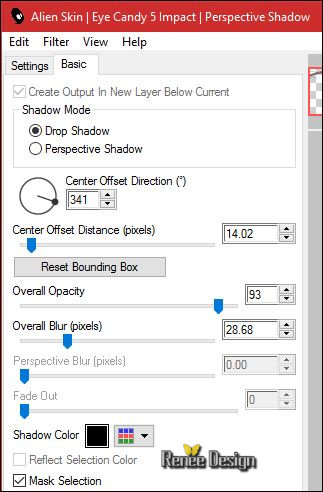
48. Effects
– Plugins – EyeCandy 5 –Perspective Shadow use settings below
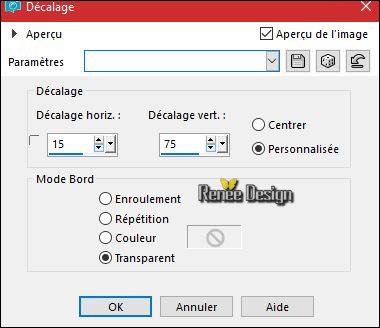
49.Effects- Image Effects- Offset with these settings:
50. Open the tube ‘’sérènade de chat-image de alicet merci.pspimage’’ de
Odette
- Activate the layer "raster 3" of the tube ( I have resized that tube )
-
Edit - Copy- Activate your work -Edit - Paste as a new layer
-
Move it in the right place
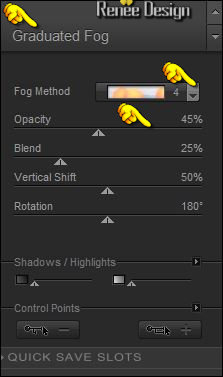
51.
Effects –Plugins – Nick Color effexPro 3.- Graduated
Fog
52. Image - Add borders-Symmetric checked: 1 pixel black
53.
Selections – Select All
54. Image - Add borders-Symmetric checked: 50 pixels #cdb9b3
55. Effects – 3D Effects – Drop Shadow with these settings: 0/0/80/42 black
56.
Selections - Invert
57. Layers- New Raster Layer
58. Open the tube ‘’confetti_pour_cadre ‘’
- Edit - Copy- Activate your work -Edit - Paste into selection
Selections-Deselect All
59. Activate the tube "text "-
Edit - Copy- Activate your work -Edit - Paste as a new layer
Or take your Text tool - font "carnival Mf rimmed" and write ‘’Carnaval 2017’’
60. Image - Add borders-Symmetric checked: 1 pixel #12161c
61. Image
Resize to 999 Pixels Width
62. Open the tube ''Carnaval_2017_Image2_lumiere''
-
Edit - Copy- Activate your work -Edit - Paste as a new layer
-
Activate Move Tool (M) place against the top edge of your image
63. Layers- Merge -Merge All ( flatten)
Save as JPG
I hope you enjoyed this lesson
Renée
This lesson was written by Renée 10/01/2017
Edited and Update
2017
*
Any resemblance with an existing lesson is a coincidence
* Do not forget to thank the people who work with us and for us I have appointed the tubeurs and translators
Thanks Renée *
*
| 
 Translations


 If a plugin supplied appears with this icon it must necessarily be imported into Unlimited *

 All rights reserved